


About
Tutorial: easy peasy tote (with pics)
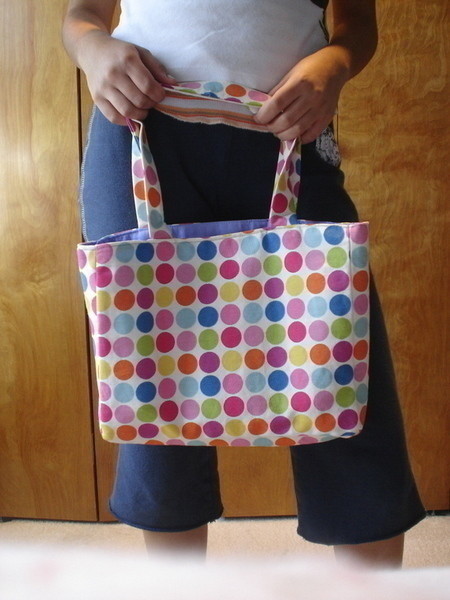
this is my first non-knitted bag.
i guess it's okay for a first!
I've never made a tutorial before so... sorry in advance!!
front & back = 13X10
sides = 4X10
bottom = 13X4
handles= 24 or 26X2.5
-
 Sveta favorited Easy Peasy Tote
17 May 09:53
Sveta favorited Easy Peasy Tote
17 May 09:53
-
 Caron K. favorited Easy Peasy Tote
23 Dec 08:34
Caron K. favorited Easy Peasy Tote
23 Dec 08:34
-
Caron K. added Easy Peasy Tote to Bags & Purses
23 Dec 08:33
-
Linda B. added Easy Peasy Tote to Bags
09 May 14:09
-
 marilyn.steckly favorited Easy Peasy Tote
20 Apr 22:46
marilyn.steckly favorited Easy Peasy Tote
20 Apr 22:46
-
 claraangelica.souza favorited Easy Peasy Tote
03 Mar 23:09
claraangelica.souza favorited Easy Peasy Tote
03 Mar 23:09
-
Ky H. favorited Easy Peasy Tote
28 Dec 07:20
-
 Jess I. added Easy Peasy Tote to christmas
16 Dec 19:20
Jess I. added Easy Peasy Tote to christmas
16 Dec 19:20
-
 Goodgollymissholly favorited Easy Peasy Tote
05 Dec 15:14
Goodgollymissholly favorited Easy Peasy Tote
05 Dec 15:14
-
 Munnazah C. added Easy Peasy Tote to Sew, sew, sew!
26 Oct 15:46
Munnazah C. added Easy Peasy Tote to Sew, sew, sew!
26 Oct 15:46
You Will Need
-
 Step 1
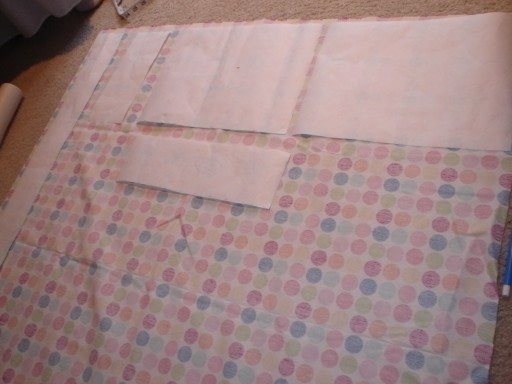
cut out the pattern out of paper (i used freezer paper and it works great!) after you have cut your sections (includes one front, one side, one bottom, and one strip for the handles) pin them to the outter fabric chosen.
like this:(i ended up using only one of the front pieces so i could be really accurate and even.)
-
Step 2
cut out the sections and make sure you end up with an identical front & back ---- two identical sides ---- one bottom ----- and two long handles.
-
Step 3
pin the outter fabric sections to a lightweight interfacing to make it stronger and then iron the interfacing on the outter fabric. ** make sure you iron the interfacing to the wrong side of the fabric.. just a little advice.
-
Step 4
do the same thing using the pattern already used for the outter fabric except using your lining fabric and iron interfacing on all sections sooo you will have a front & back ------ two identical sides ------ one bottom (BUT NO HANDLES) out of your lining fabric.
-
Step 5
pin sides to the front/back of outter fabric and .5 seam allowances to each side and do the same for the bottom like this:
** make sure on the corners you pin all three fabric sections so there are no holes.
-
Step 6
pin front/back to the 4 connected sections and .5 seam allowances on the sides and bottom.
-
Step 7
** this is the part where you add pockets or pen holders to the lining fabric before you start sewing the lining sections together ** if you decide to add pockets make sure you add interfacing to the back of them to make them strong.
-
Step 8
After you are done with pockets/pen holders, pin the sides to the front/back of the lining fabric just like in Steps 4 & 5.
-
 Step 9
trim seam allowances so there is only .25 of an inch there and turn outter fabric inside in and lining fabric inside out also trim corners.
-
Step 10
iron interfacing on both handles and sew with .5 seam allowances. turn the handles over inside in. (this process takes a while)
-
Step 11
fter getting handles ready pin right side edges of the top lining and top outter fabric and sew all around until you have one side open ** make sure you added the handles on front and back and measure where you want them to go (you may want to backstich on handles so they stay put)** after allowing .5 seam allowance on top turn fabric over and pin together the side that was left open and sew around the top of the bag being really close to top.
^ wow that was a looooooong step. i hope it was clear ...!!
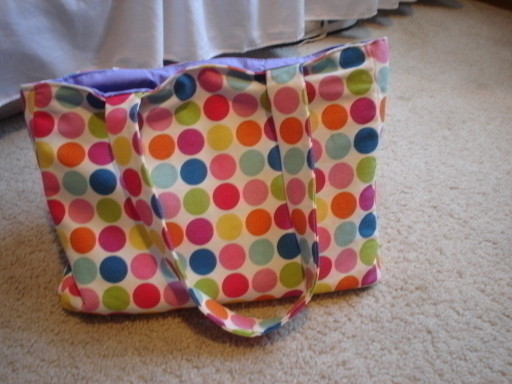
VOILA! you have a pretty tote.


Very cool project. I'm trying to make one, but I'm stuck at Step 6...
Very cool project. I'm trying to make one, but I'm stuck at Step 6...