

About
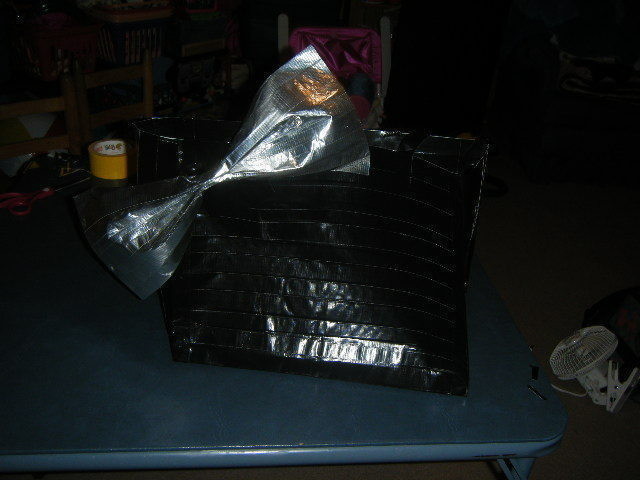
A cute duct tape purse with a giant bow on it!
I needed a purse to go with my duct tape skirt for VBS, and this is what I came up with. Obviously, you can change the colors, size, etc. to fit your personal style. Believe me when I say you need three rolls of the main color- I screwed up once and had to redo some. Be careful not to let duct tape fold over on itself- it kind of sucks when that happens.
-
 Deb E. favorited Duct Tape Purse With A Bow
07 Dec 19:00
Deb E. favorited Duct Tape Purse With A Bow
07 Dec 19:00
-
 artpanda18 favorited Duct Tape Purse With A Bow
06 Mar 01:59
artpanda18 favorited Duct Tape Purse With A Bow
06 Mar 01:59
-
 elarablair added Duct Tape Purse With A Bow to Need To Learn ASAP
23 Feb 18:38
elarablair added Duct Tape Purse With A Bow to Need To Learn ASAP
23 Feb 18:38
-
elarablair favorited Duct Tape Purse With A Bow
23 Feb 18:38
-
 Claire M. favorited Duct Tape Purse With A Bow
02 Feb 17:12
Claire M. favorited Duct Tape Purse With A Bow
02 Feb 17:12
-
 kellie.holub favorited Duct Tape Purse With A Bow
06 Aug 13:44
kellie.holub favorited Duct Tape Purse With A Bow
06 Aug 13:44
-
 Step 1
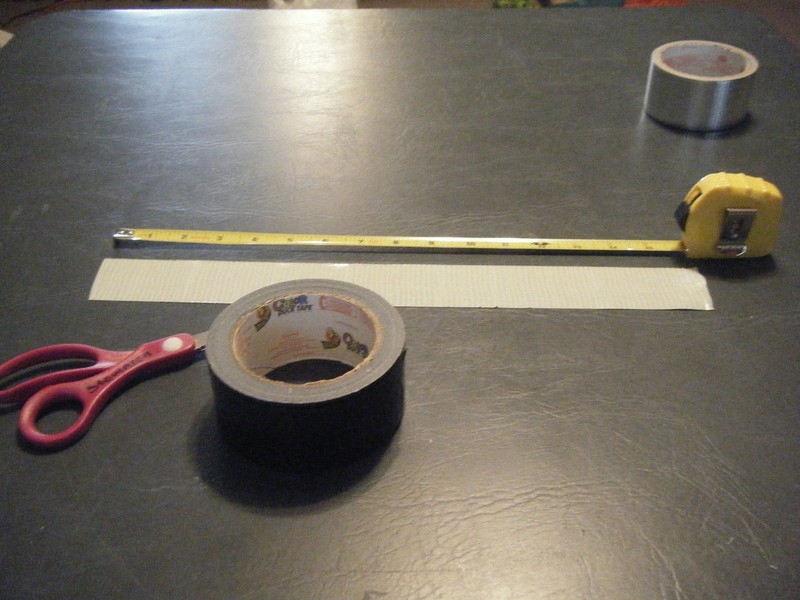
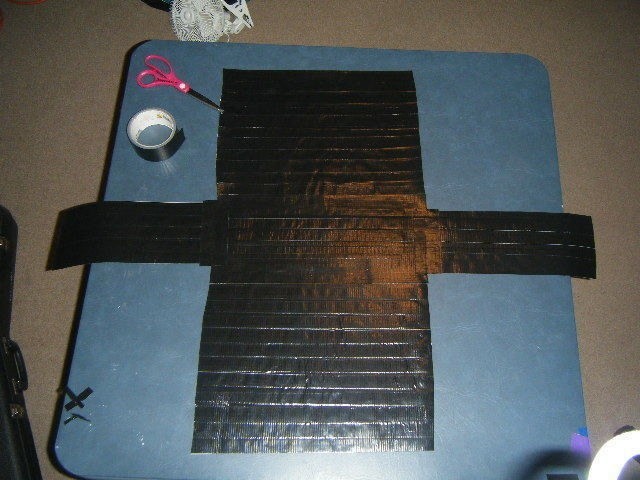
Choose the width and height of your bag. My bag is 15" width, 12" height, and 5" depth. Cut a piece of black duct tape as long as your width (15"), and lay it sticky side up on the table.
-
 Step 2
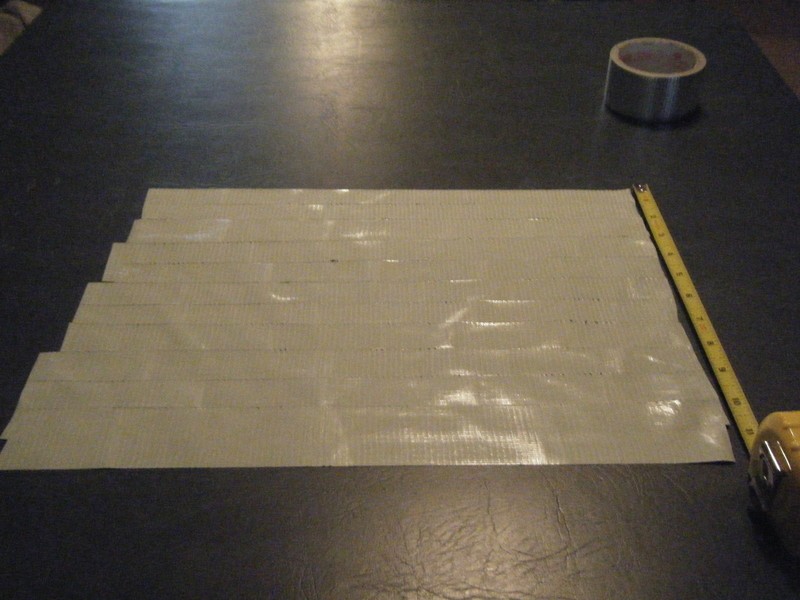
Cut another strip of black duct tape a little bit longer than the first (believe me- it's easier to have too much than too little), and lay it sticky side up on top of the first strip, about an inch down from the top of the previous strip. Continue to do this until you have the desired height (12").
-
 Step 3
Cut a strip of black duct tape the same length as the previous strips, and place it sticky side DOWN on the bottom strip of the duct tape you have laid out. Make sure to line the bottom and top up as nicely as possible, but the sides just need to be long enough. continue until you have what looks like a duct tape placemat.
-
 Step 4
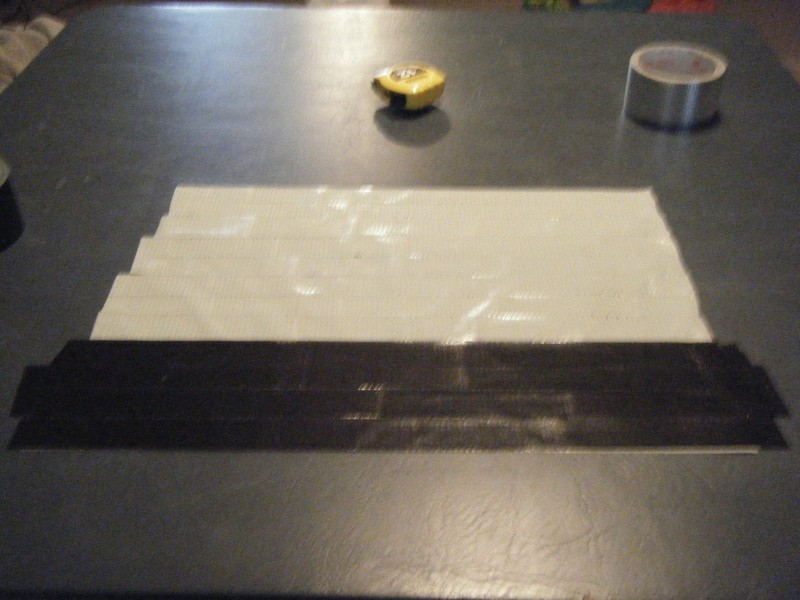
Using scissors, cut off rough edges at the sides smoothly.
-
 Step 5
Here's what you should have now! The front is done! Repeat the process for the back (It's a good idea to make it a little wider- you can always cut it down.)
-
 Step 6
The same duct tape layering technique is used to create the 2 sides. As you can see from the lower right picture panel, the duct tape is verticle on the sides. The sides must have the same height as the front/back. The depth is up to you.
-
 Step 7
Again, use the same method for the bottom. It should be as wide as the width for the front/back, and as "tall" as the depth for the sides.
-
 Step 8
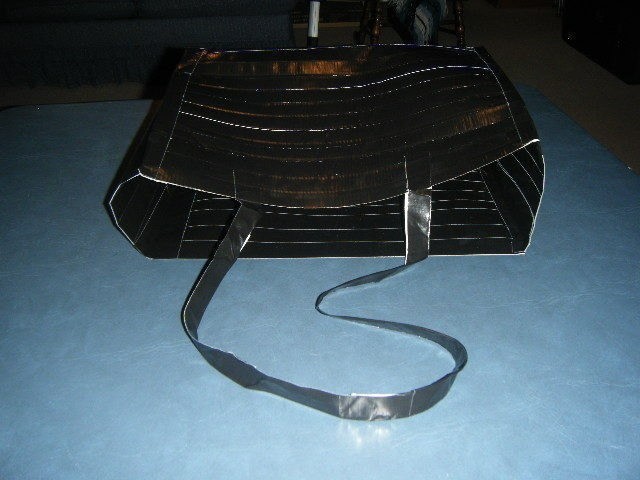
Now for the fun part- sticking them all together! Lay out the pieces as shown and tape them together along the detached edges. Flip it over and tape in the same places on the other side.
-
 Step 9
This step is one of the hardest, and as such, I couldn't take pictures of myself. Hopefully if you enlarge the picture, you'll be able to see what I mean. What you do is cut two strips of black duct tape ahead of time as long as the bag is tall. Put one on the outside of the edge, and one on the inside. For the last two edges, it's a good idea to cut all four strips of duct tape ahead of time, but be careful where you put them, because mine got stuck to each other when I accidentally dropped the bag and I had to recut them. The picture is what it should look like when you tape up all the edges.
-
 Step 10
Now for the handles. I cut an 18" strip of black duct tape. This is half the length of the handle. For a cool contrast, you could also use the bow color.
-
 Step 11
Cut a slit about 2 or 3 inches long in the middle of one end of the duct tape. Mine's too long in this picture.
-
 Step 12
Tape one half of the slitted end on the inside of the purse, the other on the outside. Fold the duct tape in half to make the strap. My folding kinda sucks- This was my first attempt doing this, mind you.
-
 Step 13
Repeat for the other half of one handle, but before folding in half all the way, insert a couple of inches of the previously made half of the strap. It'll turn out like this!
-
 Step 14
Make the second strap in the same manner. Your bag is now done, except for decorations!!
-
 Step 15
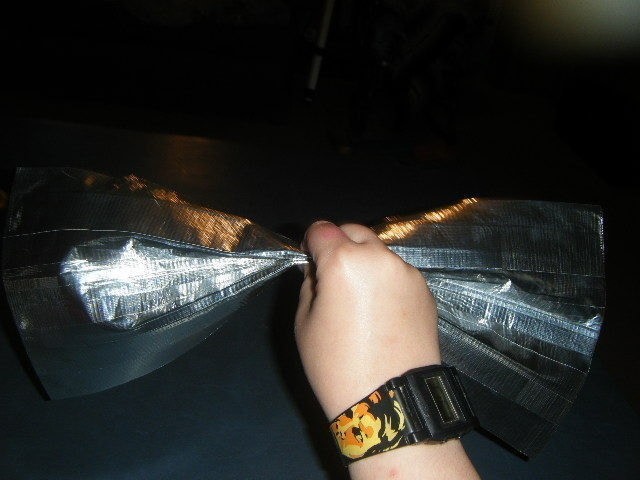
Now for the Big Bow. This method can be used for making duct tape bows of any size. Lay out strips of metallic silver duct tape sticky side up the same way you did for the purse pieces. Make them as long as you want your bow wide. Keep layering until the height is the same as you want the outside of your bow's to be.
-
 Step 16
Lay duct tape sticky side down over it, and cut off the excess as before. As you can see, I didn't check to make sure I had enough silver duct tape ahead of time, and had to use black on the back of the bow to save for the "knot" and to attach it to the purse.
-
 Step 17
To get the pinch in the middle of the bow, fold it in half, and then fold each end down to the middle again, so it's folded in fourths in a 'M' pattern. You'll have to hold this in place when you tape it. For the record, the watch you can see me wearing is held together with duct tape on the back!
-
 Step 18
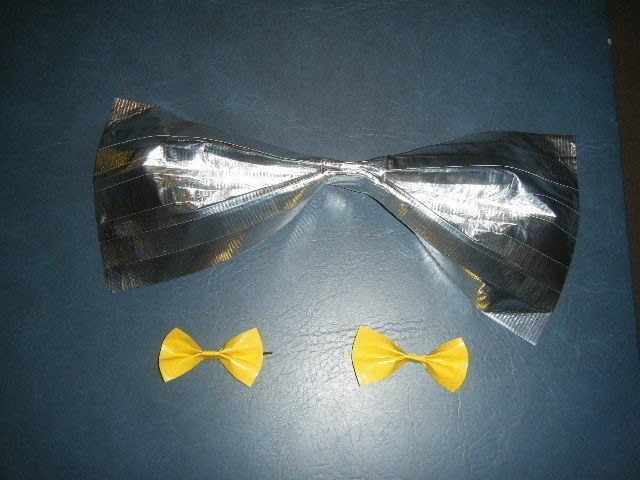
Take a strip of metallic silver duct tape and wrap it around the pinch in the middle of the bow to emulate a knot. The bow itself is finished now. It's pictured here with two smaller bows attached to bobby pins, hairbows for my VBS outfit. For their knot, I used a fourth of a strip of tape, width-wise, and it's wrapped around the bobby pin to attach it.
-
 Step 19
Now, take another strip of metallic duct tape and use it to attach to the bag as shown (or not, if you want it somewhere else). Hide the ends of this strip with black duct tape, and you're good to go! Please let me know if anything is unclear in this How To, and post a version so I can see it!


@PartyGirl-Thanks! It does hold my things well. I made another duct tape purse at one point that repeatedly broke at the handle, but this one has stayed intact and can take a lot of weight.