

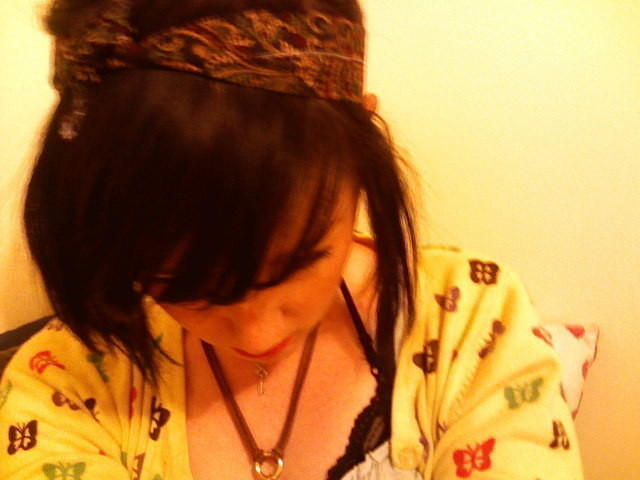


About
fabulously fashionable headwear from leftover fabric
i don't have many pictures of the process, but its super simple to explain how to make these sweet headbands!
-
 Key West Witch favorited Cute And Easy Scrappy Headbands!
05 May 03:41
Key West Witch favorited Cute And Easy Scrappy Headbands!
05 May 03:41
-
 Johnna C. added Cute And Easy Scrappy Headbands! to DIY I Need to Try!
09 Apr 04:01
Johnna C. added Cute And Easy Scrappy Headbands! to DIY I Need to Try!
09 Apr 04:01
-
Johnna C. favorited Cute And Easy Scrappy Headbands!
09 Apr 04:01
-
 Valerie L. favorited Cute And Easy Scrappy Headbands!
17 Oct 21:33
Valerie L. favorited Cute And Easy Scrappy Headbands!
17 Oct 21:33
-
Step 1
STEP ONE (for both methods): measure your head around where you'd be tying your headband, then add at least six inches. on the dark paisley headband, i added six inches so theres not a lot of poking out bits. if you like the look of the longer ends, though, add more! i've got nearly 9 extra inches on the pink headband.
-
Step 2
STEP TWO (also for both methods): decide how wide you want your headband to be, then multiply that by two. after that you'll want to add about half an inch of width, you're gonna overlap it a bit when you sew it.
-
Step 3
STEP THREE (one more "both methods" step!): fold the long edges of your fabric in on itself so it overlaps a bit in the middle. pin or just iron your headband so it stays folded like this.
-
 Step 4
MACHINE SEWING METHOD: Sew right along the center of your headband, where the fabric overlaps. Once thats done, cut the ends into points. it'll sort of look like an 80's skinny necktie at this point. then just sew along the edges of the pointed ends and you're done!
-
Step 5
HAND SEWING METHOD: Sew down the center of your headband so the overlapping fabric is sewn together
OR
if you don't like the look of naked stitches or are in a hell of a hurry, you can just sort of tack it together by using a couple of stitches every few inches.once you've got things held together, cut the ends of your headband into points, so it sort of looks like a skinny neck tie. then just stitch around the edges so things don't fray and you've got yourself an adorable, mildly Lucille Ball-esque headband.

Versions


Comments


 1
Watercolor Art »
Watercolor Paints Made From Make Up
1
Watercolor Art »
Watercolor Paints Made From Make Up

