


About
A Super Cute Rosette Pillow From a Pair of Pants!
I made this pretty pillow for my sister as a housewarming gift for her new house. I was in camp when she had her housewarming party though so I wasn't able to give it to her until Christmas. It was a lot of fun to sew and kept me busy when I was staying with Aren while he was on a job in Grande Cache. It took me a while since I didn't take it to camp with me. Now that I have a portable machine though (thanks Pris!) I will be able to take stuff with me while I'm out. Awesome!
Tags
-
 Key West Witch favorited Cute Rosette Pillow
15 May 17:13
Key West Witch favorited Cute Rosette Pillow
15 May 17:13
-
 Markee R. added Cute Rosette Pillow to Holly Golightly's Apartment Party
15 Jul 15:39
Markee R. added Cute Rosette Pillow to Holly Golightly's Apartment Party
15 Jul 15:39
-
 kylie.hannan favorited Cute Rosette Pillow
22 Dec 20:30
kylie.hannan favorited Cute Rosette Pillow
22 Dec 20:30
-
 leslie.n.hebert favorited Cute Rosette Pillow
14 Jun 13:10
leslie.n.hebert favorited Cute Rosette Pillow
14 Jun 13:10
-
 Alex Poser added Cute Rosette Pillow to Home Decor
11 Jan 19:01
Alex Poser added Cute Rosette Pillow to Home Decor
11 Jan 19:01
-
 cristinakilljoyway favorited Cute Rosette Pillow
03 Jan 16:27
cristinakilljoyway favorited Cute Rosette Pillow
03 Jan 16:27
You Will Need
-
 Step 1
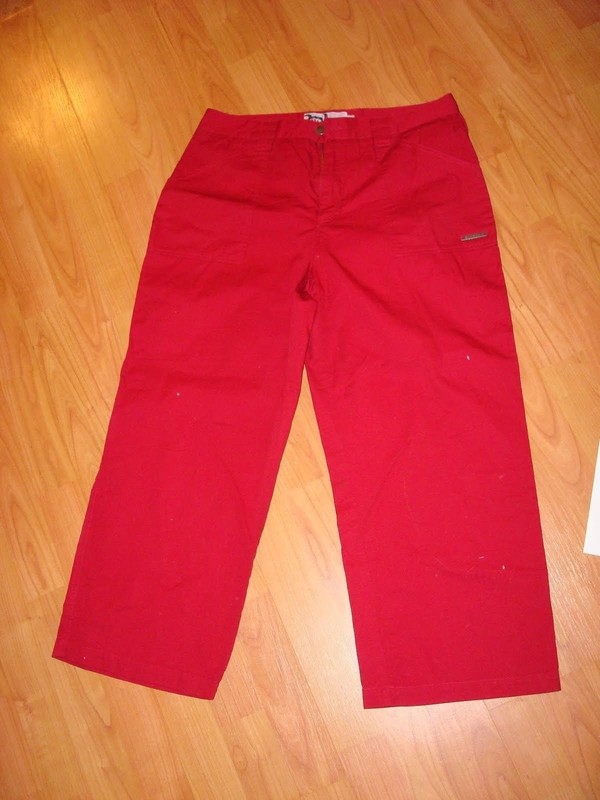
I started with these pants that my sister gave me while I was visiting her.
-
 Step 2
These were my two ideas for the rosette pillow. I decided to go with the rectangular pillow as the square one seemed too busy.
-
 Step 3
I made some piping (some people will call this cording) for around the edges to give it a sleeker look.
-
 Step 4
This is the finished piping before it was sewn onto the cushion itself.
-
 Step 5
One side of the cushion with the piping sewn down. You can see the seam at the bottom wear the edges of the piping meet. This will be enclosed in the pillow seam once it is all sewn up.
-
 Step 6
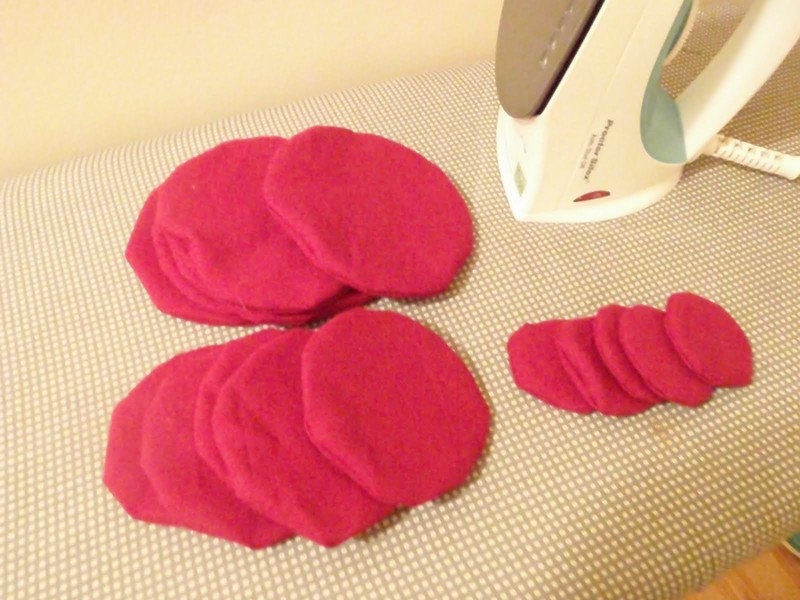
I used an existing pattern that I had made for the rosettes. Basically three circles of varying size.
-
 Step 7
Each rosette consists of six pieces. You sew two of each size together, cut a small hole in the middle and turn it inside out, then iron them flat. Sorry some of these photos are no good. I don't know what setting the camera was on and I can't really go back and take new photos now. :)
-
 Step 8
Then you gather each of the pieces into a rosette shape.
-
 Step 9
After the center piece has been gathered you gather the next piece around that one being sure to hide the hole you cut in between each layer.
-
 Step 10
From left to right we have single rosette centers (three), then a center sewn to a 2nd piece and finally a finished rosette.
-
 Step 11
The two sides of the pillow were sewn together and it was stuffed before the rosettes were sewn on. Using very small stitches s as to keep them completely invisible the rosettes were sewn down securely in a line across the front.
-
 Step 12
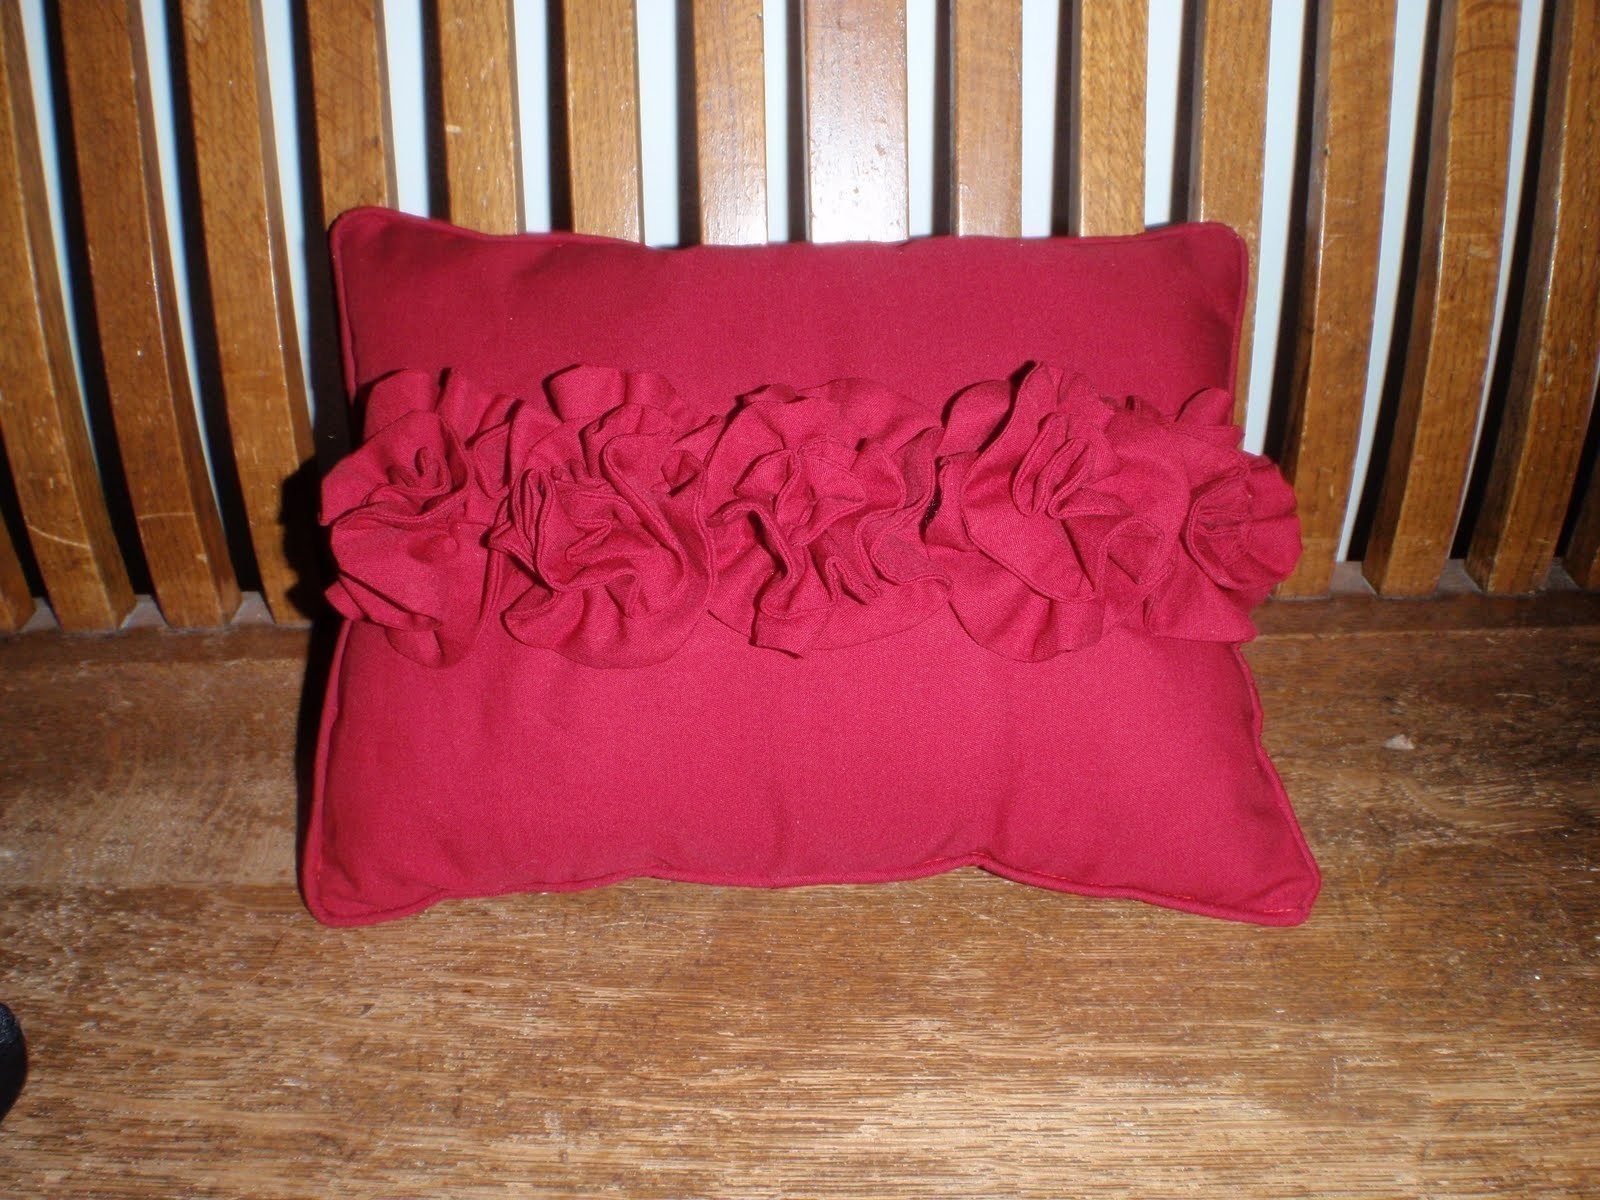
The Finished Cushion
-
 Step 13
As I said, this was a fun project and my sister really likes it which makes it well worth the effort! I am pretty excited about the machine I got for Christmas too as I have been unable to do much as far as crafting goes while I am out in camp. I am thinking that I will finish my Strip Quilt while I am out there.


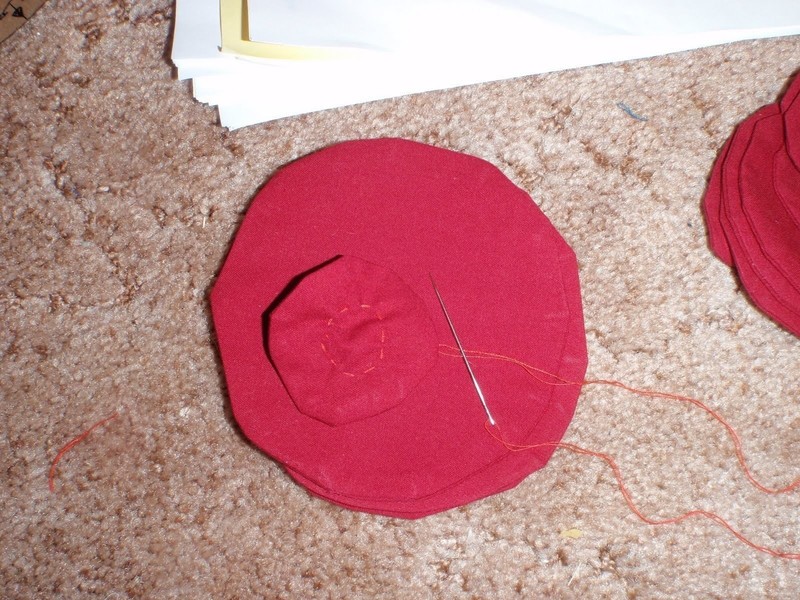
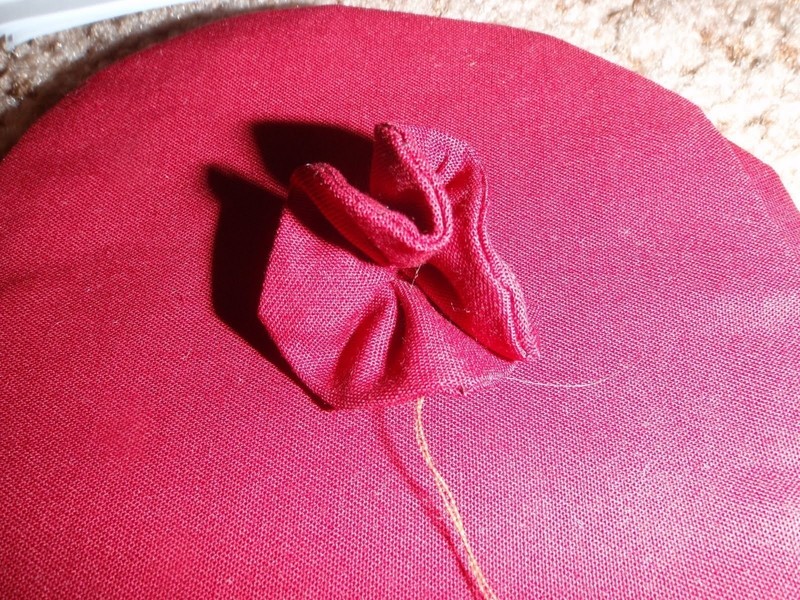


With each of the fabric circles you need to hand sew a circle of large loose stitches in the centre. These are then pulled together to gather the fabric into a "rose" type shape.Then you know it to keep it from undoing. You will end up with a kind of "tail" piece sticking out of the bottom of the rosette. The smaller piece tucks into the larger with this "tail" and then the larger into the largest. As you tuck the tails in you need to be sewing the smaller piece to the larger one to keep it from coming apart. Once all three pieces are sewn together you sew it to the pillow.
Please let me know if this helped you!