About
Customize that top hat to coordinate with your costume!
Having made a coachman-style cape for my vampire character, Dr. Miracle, I wanted to cover his top hat in the same material.
This was my first time covering a hat and, while it'll be okay for the stage, it's not perfect enough, in my opinion, for up-close inspection :) This is largely because of the seam around the top of the hat, which I sewed badly, couldn't press properly and generally mucked up.
Tags
-
 Key West Witch added Cover A Top Hat to Top Hats, Witch Hats, Hats & Fascinater’s
30 Jun 13:36
Key West Witch added Cover A Top Hat to Top Hats, Witch Hats, Hats & Fascinater’s
30 Jun 13:36
-
 Alma added Cover A Top Hat to Hats & Headwear
14 Jun 14:02
Alma added Cover A Top Hat to Hats & Headwear
14 Jun 14:02
-
 Hayley S. favorited Cover A Top Hat
03 Nov 15:06
Hayley S. favorited Cover A Top Hat
03 Nov 15:06
-
 Lydia D. favorited Cover A Top Hat
28 Sep 23:00
Lydia D. favorited Cover A Top Hat
28 Sep 23:00
-
 Juli T. added Cover A Top Hat to Willy Wonka
19 Sep 23:02
Juli T. added Cover A Top Hat to Willy Wonka
19 Sep 23:02
-
Juli T. added Cover A Top Hat to Willy Wonka
19 Sep 22:04
-
 AnitaBrassiere.Burlesque favorited Cover A Top Hat
18 Mar 22:55
AnitaBrassiere.Burlesque favorited Cover A Top Hat
18 Mar 22:55
-
 Deven S. favorited Cover A Top Hat
05 Aug 19:16
Deven S. favorited Cover A Top Hat
05 Aug 19:16
-
Tara L. favorited Cover A Top Hat
24 Feb 06:42
-
 Sam A. added Cover A Top Hat to Accessories
03 Jan 03:43
Sam A. added Cover A Top Hat to Accessories
03 Jan 03:43
You Will Need
-
 Step 1
Get your hat. Here's the white buckram top hat I picked up in Toronto for about $16. It's nice and tall.
-
 Step 2
There are four pieces of fabric you'll need to cover the hat. The first is for the very top. Put your fabric, wrong side up, on top of the hat, and trace right around the edge with your pencil or pen, leaving a clear line. Cut this out, adding a seam allowance.
-
 Step 3
Now you need to cut out the piece of fabric that will cover the sides of the top hat. Wrap your fabric around, wrong side out, and trim so that you have a seam allowance at the top and pin up a seam at the back so it fits snugly. I used a piece with the selvedge along the bottom, so that at least one edge would be stable.
Sew up the back seam. You'll have a tube.
-
 Step 4
You'll need two pieces for the brim. Put a piece of fabric on the top of the top hat again (wrong side up), and trace the top oval. Cut it out.
Slide the piece of fabric down onto the brim, wrong side up. Use your pencil to mark the edge of the brim on the fabric. Trim around this, leaving a seam allowance.
-
 Step 5
Take the top brim off the hat. Put it on top of another piece of fabric, right sides together, matching the grain. Cut out a second oval.
At the sewing machine, sew the two pieces of the brim covering together at the pencil line. Trim and notch the curved edges. Turn right side out. Mark the front of the brim with a pin.
-
 Step 6
Cut a few slots in the underside of the brim, where the head will go, and wrestle the brim onto the hat, keeping the front of the brim covering at the front of the hat. (This took some doing :))
Once the brim covering is on, slit the inside of the covering in as many places as you need to to make the brim covering fit into the hat. You'll hot glue these pieces into place when you're done. If the inside of the hat will be seen, you'll also want to make a lining. I didn't bother.
-
 Step 7
Now sew the tube from step 3 onto the hat top from step 2. I found out that this step is crucial to the appearance of your hat, because it's the only seam you can't easily cover up with something.
If I were doing it again, I'd likely do it by hand.
If you're machine sewing, make sure that the pencil line you're following (the one on the top piece) is very clear.
You'll need to clip and press this seam carefully. I didn't have a tailor's ham or a pressing mitt, so I used the backside of a stuffed dog :) Warning! When you're pressing a curved seam against the backside of a fluffy stuffed dog, don't steam yourself with the iron by mistake!
-
 Step 8
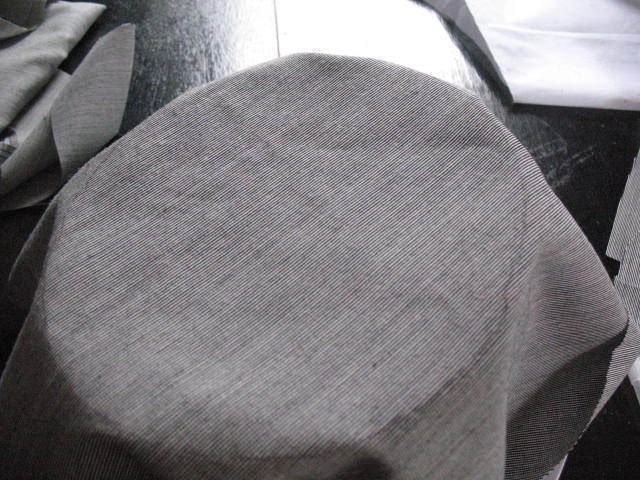
Turn the top covering right side out. Put on hat form, putting the back seam at the back.
See how lumpy my top seam is? I know you can do a better job :)
-
 Step 9
Sew the brim top to the lower edge of the top covering by hand.
-
 Step 10
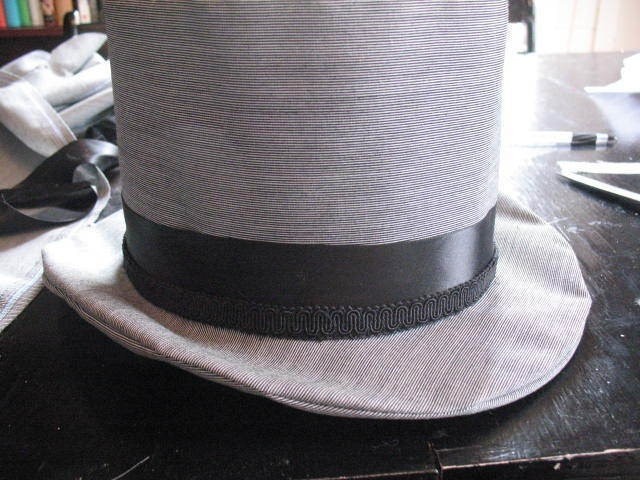
Put your trim along the bottom of the hat to cover the join between the brim and the top.
-
 Step 11
I snugged up the back seam, stitching by hand, because I hadn't made it precise enough in the first place. Keep the fabric very taut makes the hat look much better.
I also added another row of more flexible gimp braid at the bottom of the hat band to further cover up my hand sewing.
At this point you could hot glue the lower brim to the inside of the hat.
-
 Step 12
And here's the hat! If you wanted to, you could sew seam binding around the edge of the brim, either of the same material or a contrasting material.
You can also go to town trimming it, although this one will stay pretty plain.
Thanks for reading!


Comments