


About
Gorey make up for halloween
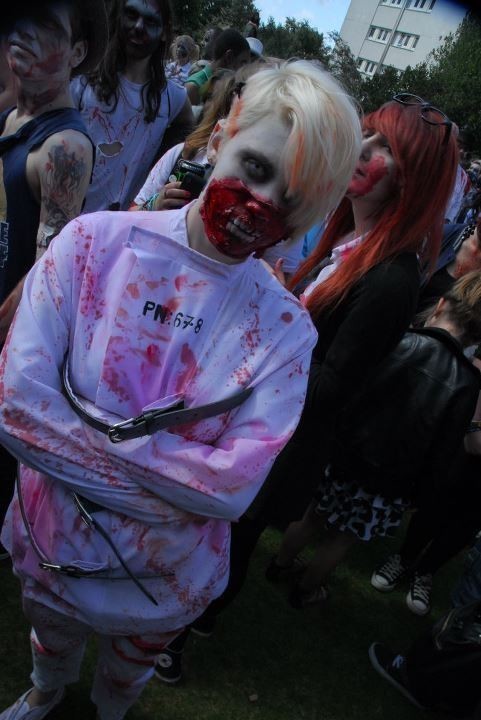
Okay i'm going to apologise to start for the lack of pictures for this tutorial, i was rushed on the day and only got the one and the finished project.
I completed this look for the Birmingham zombie walk, i was inspired by http://lyzius.deviantart.com/ and http://www.youtube.com/user/petrilude.
*Warning* I had trouble eating with this makeup on, so be warned.
Tags
-
 Emma H. favorited Zombie Half Face
31 Oct 22:46
Emma H. favorited Zombie Half Face
31 Oct 22:46
-
 Angela favorited Zombie Half Face
27 Jul 01:41
Angela favorited Zombie Half Face
27 Jul 01:41
-
 OH! Its the Domo :3 favorited Zombie Half Face
19 Jun 04:25
OH! Its the Domo :3 favorited Zombie Half Face
19 Jun 04:25
-
 Sissi favorited Zombie Half Face
31 May 20:42
Sissi favorited Zombie Half Face
31 May 20:42
-
 ShoujoMadness favorited Zombie Half Face
11 Jan 21:59
ShoujoMadness favorited Zombie Half Face
11 Jan 21:59
-
 Phoebe O. favorited Zombie Half Face
20 Oct 16:29
Phoebe O. favorited Zombie Half Face
20 Oct 16:29
-
 Nico Jones favorited Zombie Half Face
02 Oct 11:17
Nico Jones favorited Zombie Half Face
02 Oct 11:17
-
 orenintre favorited Zombie Half Face
20 Aug 12:19
orenintre favorited Zombie Half Face
20 Aug 12:19
-
 Bec M. entered her project Zombie Half Face to Lime Crime
01 Aug 12:25
Bec M. entered her project Zombie Half Face to Lime Crime
01 Aug 12:25
-
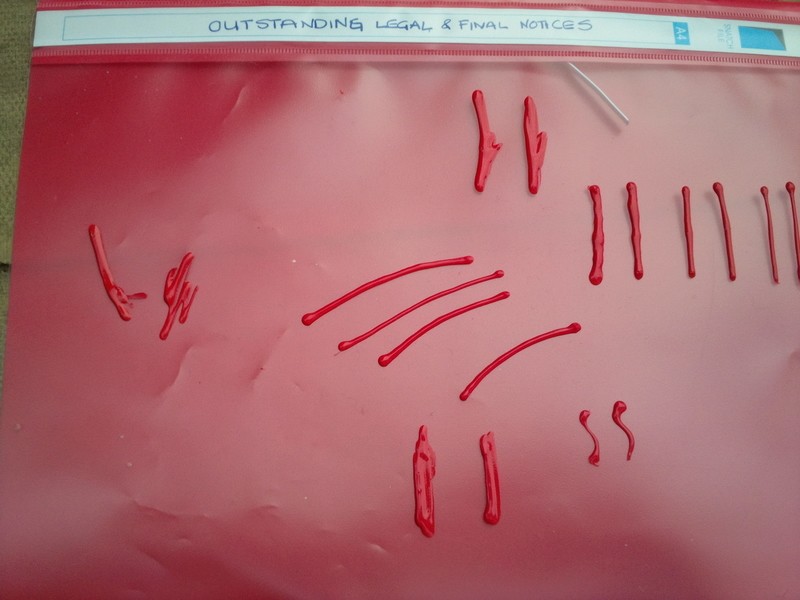
 Step 1
You'll need to do two things the day before.
One- Using the puff paint (3d fabric paint) and some plastic (I used an old plastic folder) start making some muscles, they can be all shapes, I made some thin and thick ones, the thick ones where the best. Leave these to dry over night
Two - the other step I did the day before because of time restraints. Using the fake nails to make the teeth.
I made 12 overall, using a nail clipper I cut the fake nails down to the size of my real teeth, I then filed them to make them more realistic. -
Step 2
To start prime your face as you would when applying normal make up.
If you’re going to wear contact lenses, put them in first.Now you’re ready to start. To begin outline where you want the skin to peel back with lip liner, this will help when applying the latex.
-
 Step 3
In a glass bowl or container pour the liquid latex.
Now using an old paint brush or a paint brush you won't miss start painting it on to the lines. Then apply the toilet paper on top.Just like with paper mache, you'll need to do multiple layers, i think i did three in the end. Wait till the previous is dry then apply more liquid latex and more toilet paper.
(Quick tip, apply some glue stick before the latex to stop it pulling your skin to much)
-
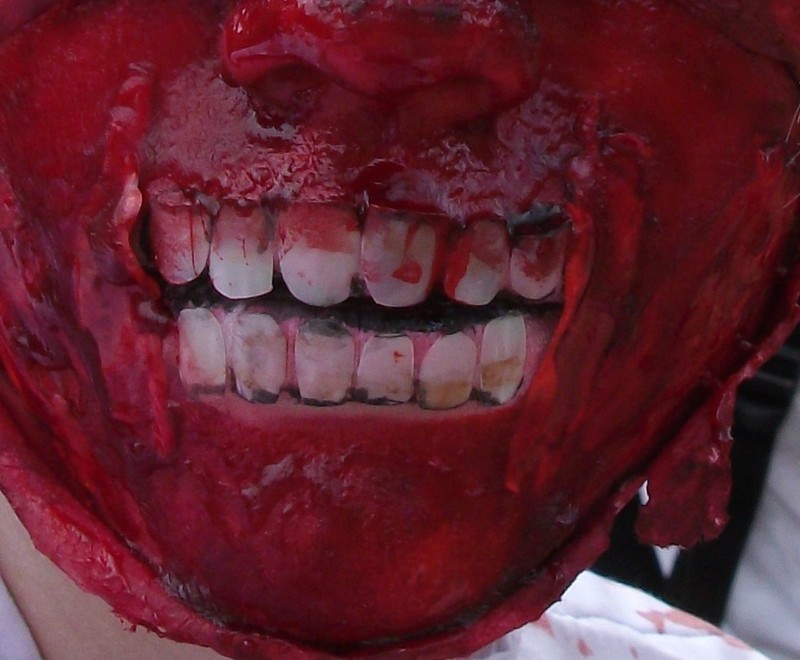
 Step 4
While waiting for the latex to fully dry, i started the teeth. Outline the area where the teeth will sit with the lip liner, fill it in with a mix of the red and white face paint.
Next to attach the teeth, using the eyelash glue, glue the fake teeth over your real teeth.
Once there firmly in place, using the black face paint, paint the middle where they meet and around the base.
(If you want a more decay look paint some yellow and green face paint on to the teeth.)
-
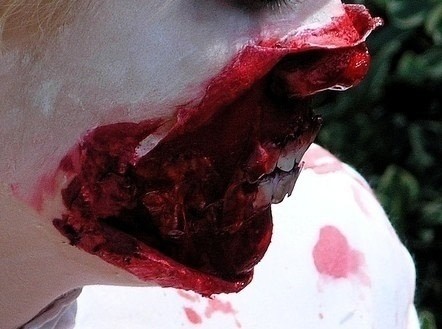
 Step 5
Its time to start peeling back the latex tissue. You can do this to you liking. I find it best to tear of access and to leave a bit hanging for effect.
-
Step 6
Now to fill in the ripped area. Using the cake blood or the red face paint. Fill in the area that's suppose to be exposed aswell as apint the ripped flesh that you feel should be bloody. This is a good base for the gore.
-
 Step 7
Now for the muscles, these are not necessary but i think they add to the depth of the makeup.
Using the eyelash glue, glue the muscles on both sides of the teeth, this will make it look like the rest of your teeth are beneath the muscle.
Using the face paint, paint over them to blend them in to the surrounding area.
-
Step 8
Now for more depth, using the eye shadows add shadows beneath the peeling areas, just dust the black or burgundy under the peeling latex to over emphasise the shadow.
-
Step 9
Before using the fake blood, you'll need to do the rest of your face.
Start with a white base, depending on how dead you want to be is how white or grey you go. I used a cream base then dusted with a white face powder for a more mate finish.You'll also need to blend in the edges of the latex tissue here, you can either blend it to white or paint it red so it looks raw and bloody
-
 Step 10
Now for the eyes. Using the black eye shadow, dust around the eyes on the socket and underneath the lash line, creating the hallowed out look. Then using your burgundy apply to the brow bone, this creates even more depth then just black helping for a more natural hallowed look.
(As an extra, if you want to be a bit decaying, dust some mate green and yellow eye shadow on the corners of you hair line )
-
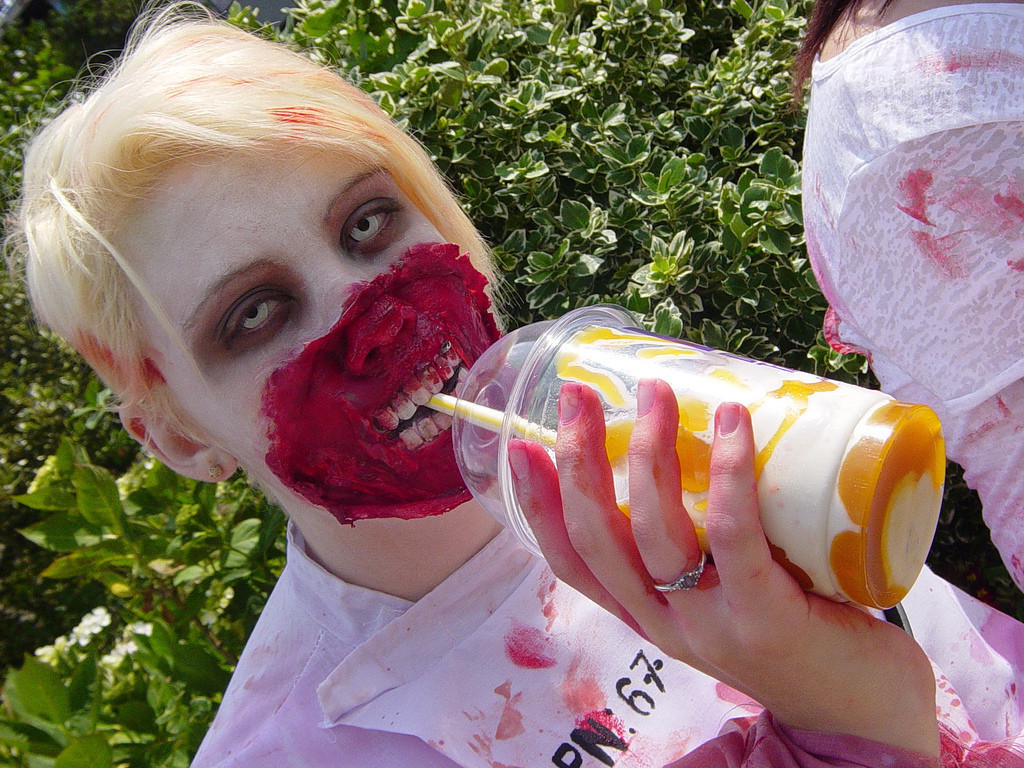
Step 11
So you’re nearly done, just got to add the fake blood.
The coagulated blood (available widely online and fancy dress shops) is a sticky syrupy blood that is ideal for this makeup. Apply liberally on top of the red face paint, add a touch to the teeth and leave parts dripping.The fake blood was used in my hair, you don't have to do this, but if you've been eating people all day you’re going to be a bit messy.
-
 Step 12
Team this with some torn clothes and be a zombie and have fun.