

About
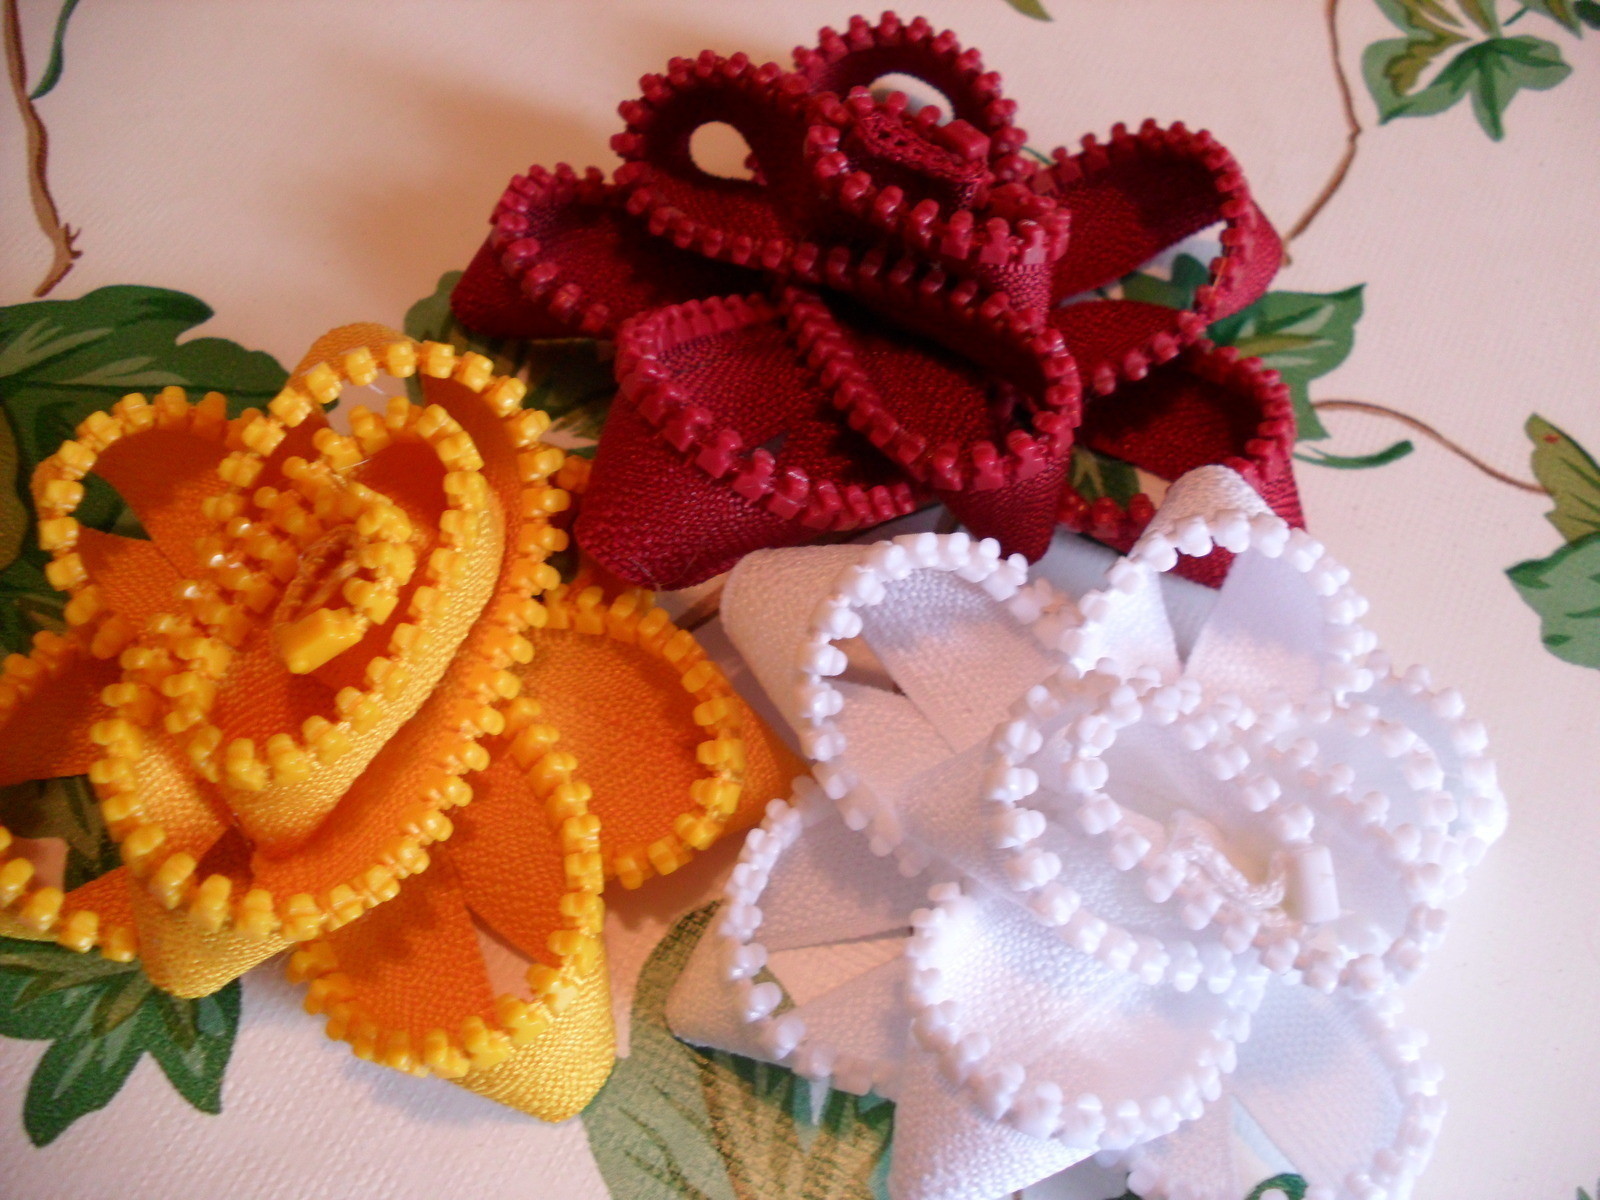
The Industrial Edge of a Zipper Mixed with the Organic Shape of a Flower
I originally saw this project on Martha Stewart online. I tweaked it a little bit and I added pictures and more description to the project. This is my first how-to project on here, so I hope you find it helpful. I realize that I put a lot of steps that most people will think are "no brainers," but I did not want to assume that people would know what to do. Once you have made a few flowers, you'll automatically do the steps without thinking about it. If you have any questions, let me know.
-
 Brittney S. added Zipper Flowers to Misc Other
07 Jul 05:43
Brittney S. added Zipper Flowers to Misc Other
07 Jul 05:43
-
 Key West Witch favorited Zipper Flowers
12 Sep 08:00
Key West Witch favorited Zipper Flowers
12 Sep 08:00
-
 Sarah Sylvia S. favorited Zipper Flowers
25 Jul 00:32
Sarah Sylvia S. favorited Zipper Flowers
25 Jul 00:32
-
 irishoday favorited Zipper Flowers
16 May 15:56
irishoday favorited Zipper Flowers
16 May 15:56
-
 su l. favorited Zipper Flowers
05 Mar 13:27
su l. favorited Zipper Flowers
05 Mar 13:27
-
 Funmi T. favorited Zipper Flowers
16 Jul 20:59
Funmi T. favorited Zipper Flowers
16 Jul 20:59
-
 stef.roberts.37 favorited Zipper Flowers
10 Oct 15:53
stef.roberts.37 favorited Zipper Flowers
10 Oct 15:53
-
 prusakcornell favorited Zipper Flowers
02 Mar 19:09
prusakcornell favorited Zipper Flowers
02 Mar 19:09
-
 tyler s. favorited Zipper Flowers
27 Jan 18:08
tyler s. favorited Zipper Flowers
27 Jan 18:08
-
 everlasting27 added Zipper Flowers to project ideas
03 Sep 22:30
everlasting27 added Zipper Flowers to project ideas
03 Sep 22:30
-
 Step 1
Gather your materials:
1. hot-glue gun and hot-glue sticks
2. scissors
3. newspaper (so the hot-glue doesn't ruin your table)
3. zipper (ideally, you want a 36-inch zipper, but a 30-inch one will do the trick; make sure it is not much smaller or else you will run out of zipper)I bought my zippers from JoAnn Fabrics and I used competitor coupons. I called and asked the store if I could do this before I came in, and that came in handy when the cashier was not sure about what the competitor coupons could be used on. I recommend you call your JoAnn store before shopping there. I found a good website for zippers, too, but I haven't shopped there yet: http://www.zipperstop.com/
-
 Step 2
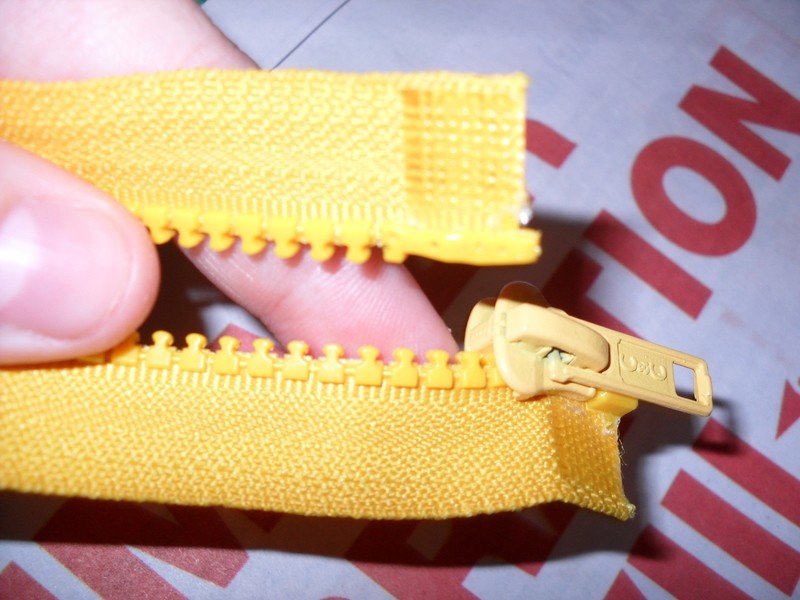
Take the price tag off. Unzip the zipper down towards the bottom. The zipper pull should become free from one side, but still remain attached to the other, as shown.
-
 Step 3
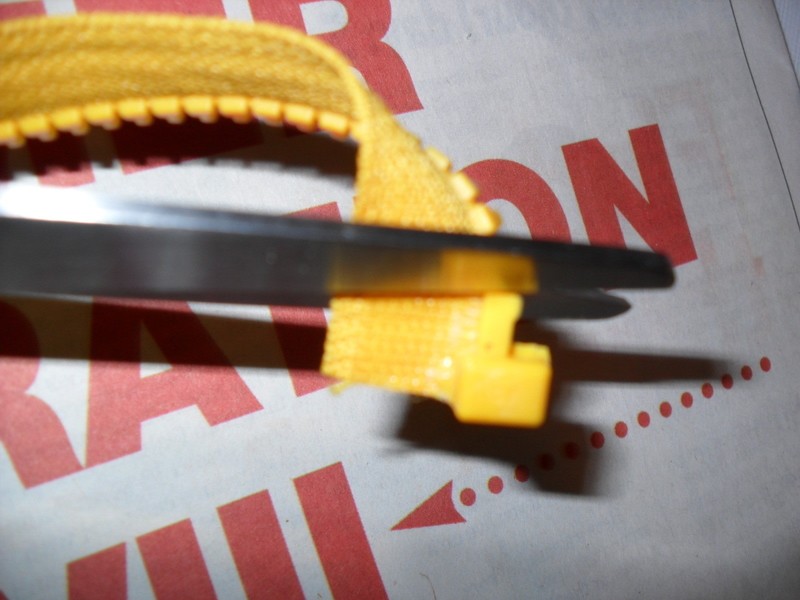
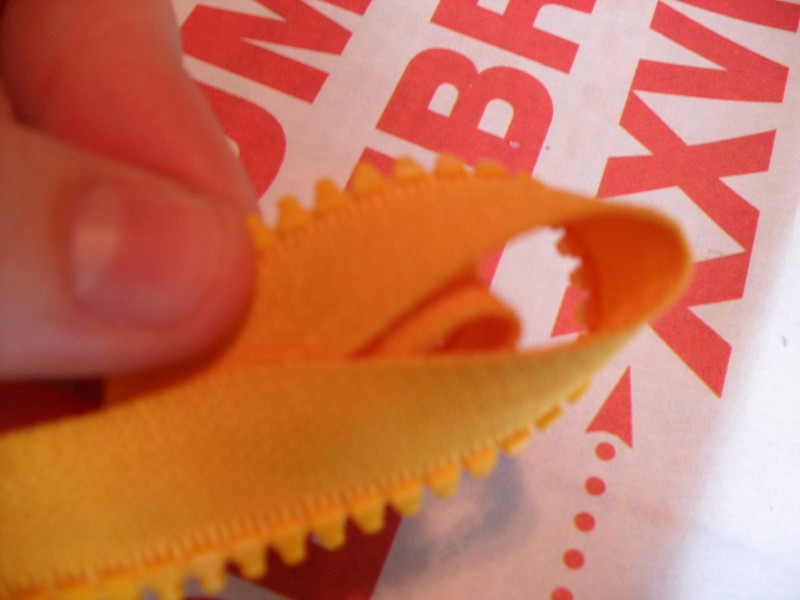
Cut off the plastic zipper stops from each end and slide the zipper pull off of the end it was attached.
-
 Step 4
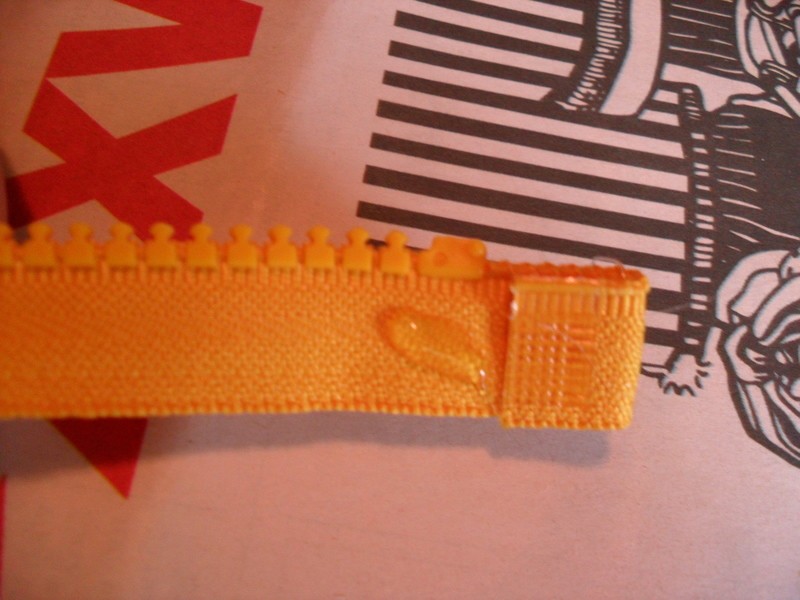
Once you've done that to both sides, this is what you should have.
-
 Step 5
The opposite end of the zipper (the end opposite of the one you just cut off) will have a longer piece of fabric. Dab some glue on this section.
-
 Step 6
Fold the end over onto the glue. Press it with your fingers, but be careful not to burn yourself.
-
 Step 7
Put some more glue next to this fold.
-
 Step 8
Roll the fabric over. This will be the center of the flower. Press down to secure the fabric in place. Be careful not to burn yourself from the hot-glue.
-
 Step 9
Place a dab of glue further away, about an inch or two. The center of your flower (shown on the right side of the picture) will need to be folded onto this dot of glue.
-
 Step 10
When you fold the center of the flower onto this dot of glue, a small loop will have been made. In this picture, you can see the small gap that the loop has made in between the center of the flower and the loop you made.
-
 Step 11
Do this step again so you have one loop on each side of the center part of the flower. It should start to look sort of like an oval.
-
 Step 12
Dab some more hot-glue an inch or two away from your oval-y loop.
-
 Step 13
Take your oval-y loop and twist it then stick it directly on top of the dab of glue. The zipper should be perpendicular to the oval-y loops you made.
-
 Step 14
This is what the bottom of your flower should look like now. You can see that now, instead of looking like a sushi roll, it has a flat back.
-
 Step 15
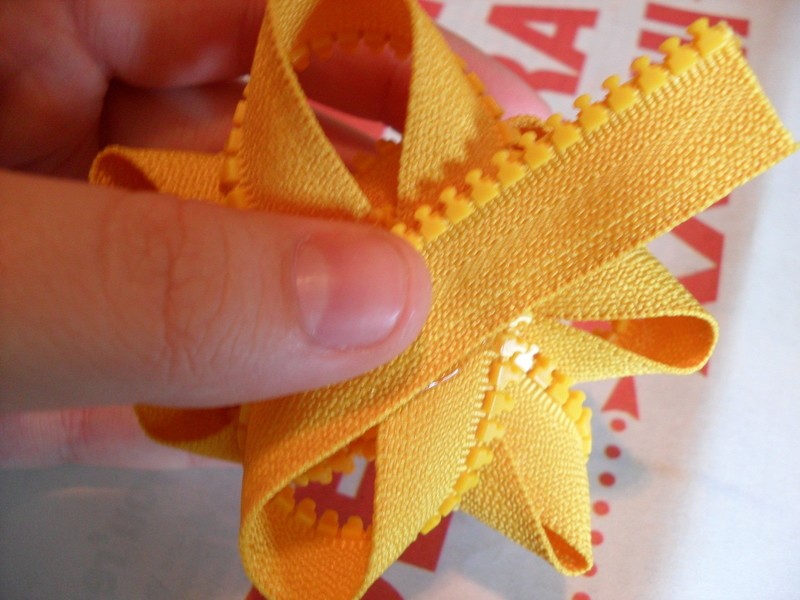
Keep dabbing glue and twisting the zipper to form loops around the center of the flower. These will be your petals.
-
 Step 16
Just before your last petal is made, this is what your flower should look like. The long tail will make up your last petal.
-
 Step 17
Turn your flower over and dab some hot-glue in the center.
-
 Step 18
Take the tail, twist it to make a petal, and secure it to the underside of the flower, where you put the glue. Press down to secure it, but make sure you don't burn your fingers.
-
 Step 19
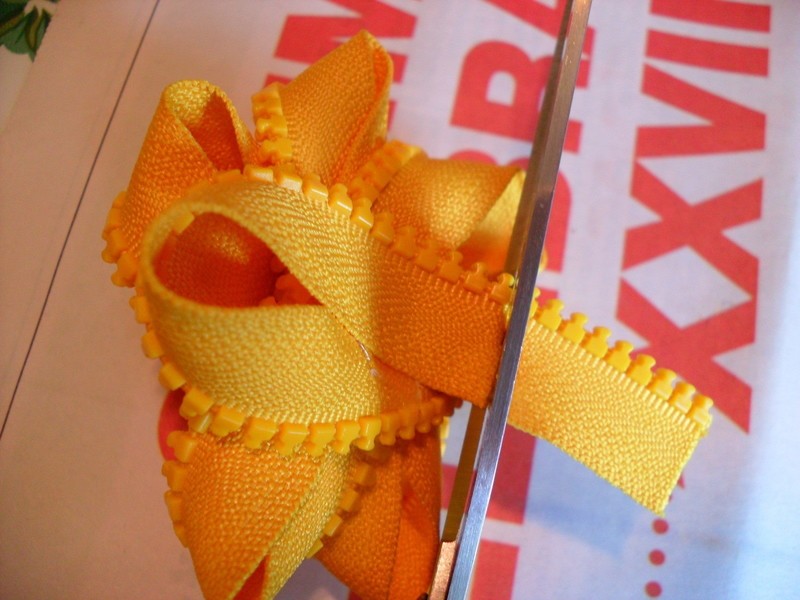
Cut of the extra leftover tail so you can't see it sticking out underneath the flower. If you want to, you can use Fray Check to stop the zipper fabric from fraying. Or you can carefully pass the end (frayed part) quickly back and forth through the flame of a lighter, but be careful.
-
 Step 20
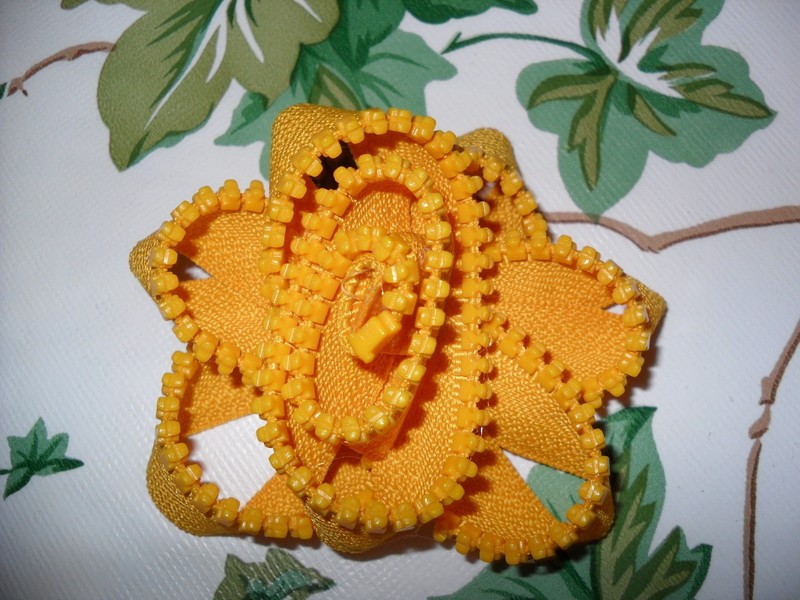
You're all done! If you want to attach your flower to something, you can add felt or fabric to the underside and then attach that to whatever you want (headband, pin, blouse, gift wrapping, etc.).
You can also use different kinds of zippers to create your own unique look. I picked zippers with plastic zipper teeth because they were less expensive, but you can pick zippers with metal teeth. That gives the flower a harder edge to it, which contrasts nicely with the organic shape of the flower.


Versions


Posted by
Keeley C.

Posted by
Whit J.


Posted by
Melissa Beth


and i tryed making one...but just couldnt figure it out....until now =p
i will try it...THANKS!!!!