


About
When you're feeling down, make a key. Said no one ever. Except for me!
When I'm sad, I have a compulsive urge to create something. This key is one of such projects, and I actually took step-by-step pictures this time.
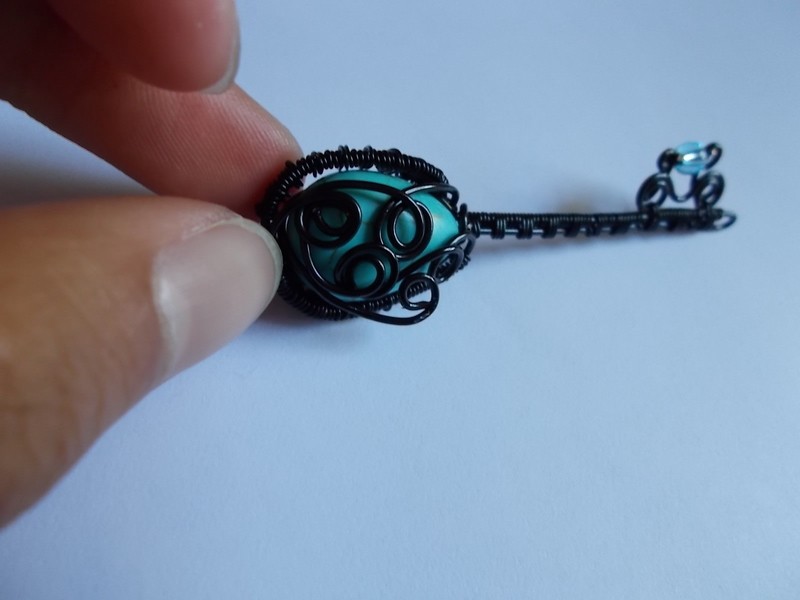
I got a bag of beads from a jewelry workshop that I went to at a public library, and in that bag were some turquoise beads, one of which I wrapped for the key. There was little preliminary considerations and planning for this; the head of the key was mostly free-handed. The bottom part was somewhat inspired by some online searches for a spark to set off my creative juices.
Anyway, I hope you enjoy this tutorial as much as I liked making this!
Tags
-
 Key West Witch favorited Wirework Key
05 Oct 16:24
Key West Witch favorited Wirework Key
05 Oct 16:24
-
Key West Witch added Wirework Key to Jewelry
30 Jun 01:59
-
 veronica f. favorited Wirework Key
10 Feb 18:16
veronica f. favorited Wirework Key
10 Feb 18:16
-
 Conn replied to a comment on her project Wirework Key
12 Sep 22:01
Conn replied to a comment on her project Wirework Key
12 Sep 22:01
-
Melanie-Anne T. favorited Wirework Key
11 Sep 17:18
-
 Michelle L. commented on Wirework Key
05 Sep 07:47
Michelle L. commented on Wirework Key
05 Sep 07:47
-
Michelle L. favorited Wirework Key
05 Sep 07:46
-
 Kelly J. favorited Wirework Key
03 Sep 04:59
Kelly J. favorited Wirework Key
03 Sep 04:59
-
 Josephine B. favorited Wirework Key
02 Sep 05:42
Josephine B. favorited Wirework Key
02 Sep 05:42
-
 jo favorited Wirework Key
30 Jun 21:28
jo favorited Wirework Key
30 Jun 21:28
-
 Step 1
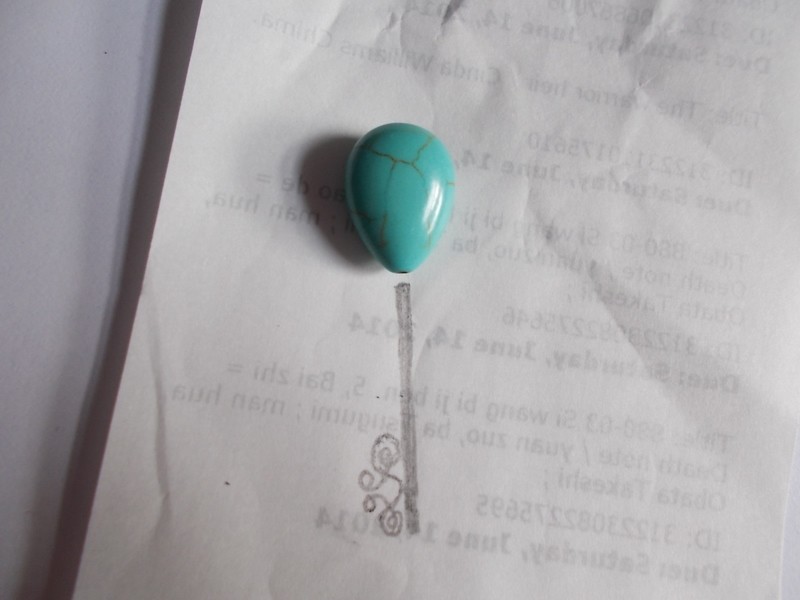
Gather your materials.
-
 Step 2
Grab some spare paper (receipt from the library, in my case) and sketch out a design like this for the bottom of the key. You'll use it for shaping .
-
 Step 3
You'll begin by creating the key's blade first.
Make a curve like so. -
 Step 4
Make a circle, using your sketch as a guide.
-
 Step 5
Form another circle inside the previous one.
-
 Step 6
Curl the cut end into a loop.
-
 Step 7
Repeat for the bottom to get this.
-
 Step 8
Use thinner wire to attach a small bead (preferably a color that matches the color of your central bead later) between two loops.
-
 Step 9
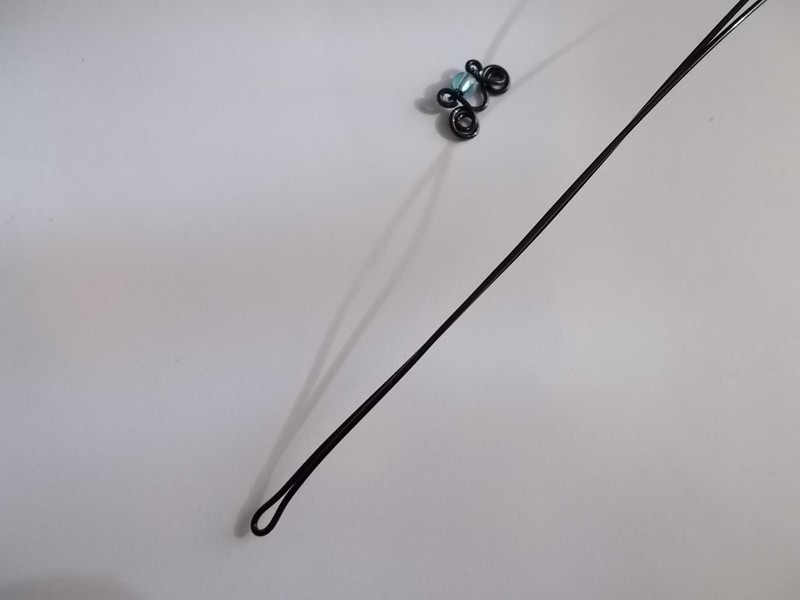
Weaving time!
Make a small teardrop loop about one foot away from the end of the wire. -
 Step 10
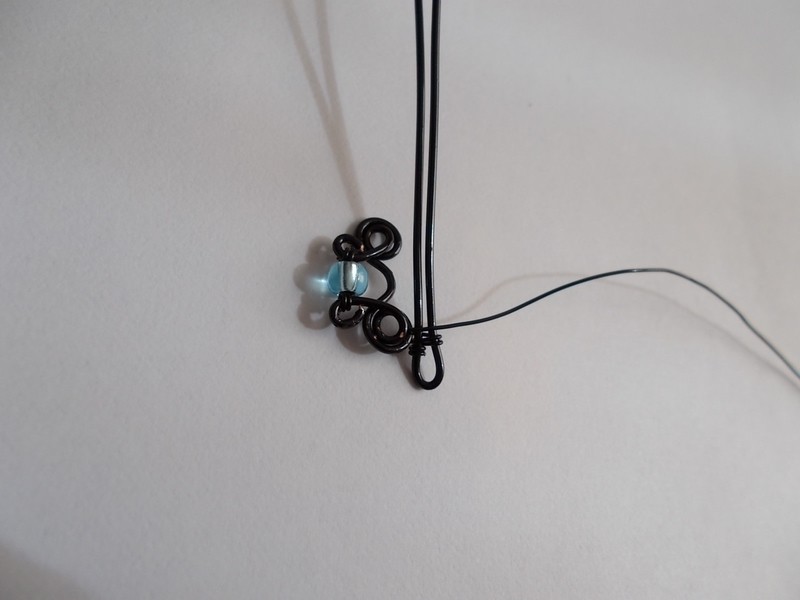
Then grab thinner wire attach one end right above the loop.
-
 Step 11
Wrap around both wires twice.
-
 Step 12
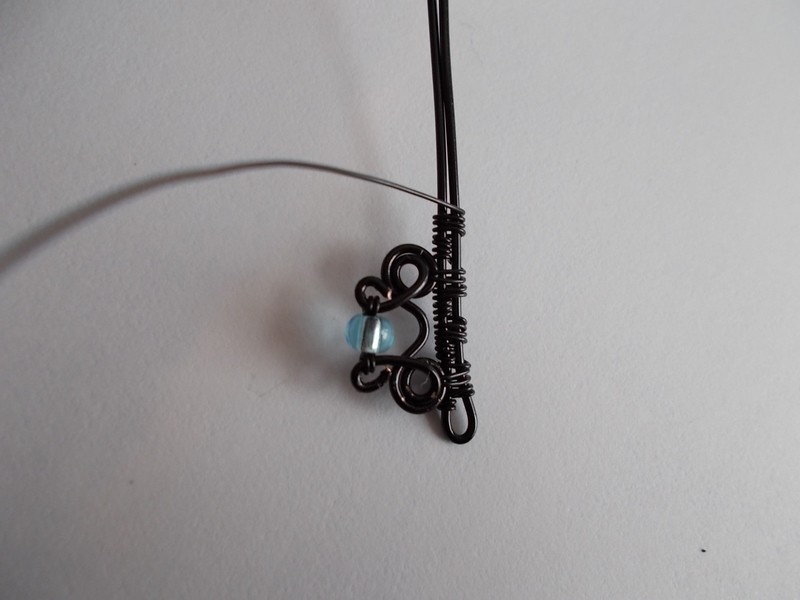
String the wire through the outer circle and then wrap it around the thick parallel wires again.
-
 Step 13
String the thin wire through the outer circle and then around the parallel wires again. Then wrap the wire around ONLY ONE of the wires THREE or FOUR TIMES. (I did four.)
-
 Step 14
Repeat the weaving pattern of three or four wraps around both, and then three or four wraps around one only.
-
 Step 15
Continue until you are satisfied with the length of the bottom half of the key. When you're content, cut the wire short and use pliers to clamp the end down.
-
 Step 16
Curve one of the wire pieces so that it fits around the bead. The other piece remains straight for stringing the bead onto it.
-
 Step 17
After putting on the bead, make a loop on top of the bead with the wire coming out of its hole.
-
 Step 18
Then curve both wires down the front of the bead.
-
 Step 19
Grab your thin wire again and wrap one end around both pieces of wire. Begin weaving down, making sure your wire is still curving (not straight) in front of the bead. Weave by wrapping around both wires twice, then only one twice, then around both twice, then around one twice, then around both twice, then around one THREE times, then around both twice, then around both THREE times, then around both twice, then around one FOUR (notice the increases) times, and so on until you're all the way down. Do NOT cut the thin wire loose yet.
-
 Step 20
Bring the wire to the left side of the bead.
-
 Step 21
One of the wire pieces will follow the wire on the left side of the bead.
The other wire will curve its way to the back and further secure the bead. -
 Step 22
Using the same thin wire, weave together the wires on the left side of the bead.
Wrap thin wire around both twice, then around only one three times, then around both twice, then around one three times, and so on until you've reached the top loop of the key. -
 Step 23
For the wire on the back of the key, make a few circles like so until the wire hits the loop at the top of the bead.
-
 Step 24
Take the wire from the back of the key and connect it to one of the wires from the weave along the left side of the bead.
-
 Step 25
This weave uses the wire from the back of the key and one of the wires from the weave on the left side of the bead. Again, wrap thin wire around both twice, then around only one three times, then around both twice, then around one three times, and so on.
-
 Step 26
Continue the weave until you're all the way back to the top of the key's bottom half.
-
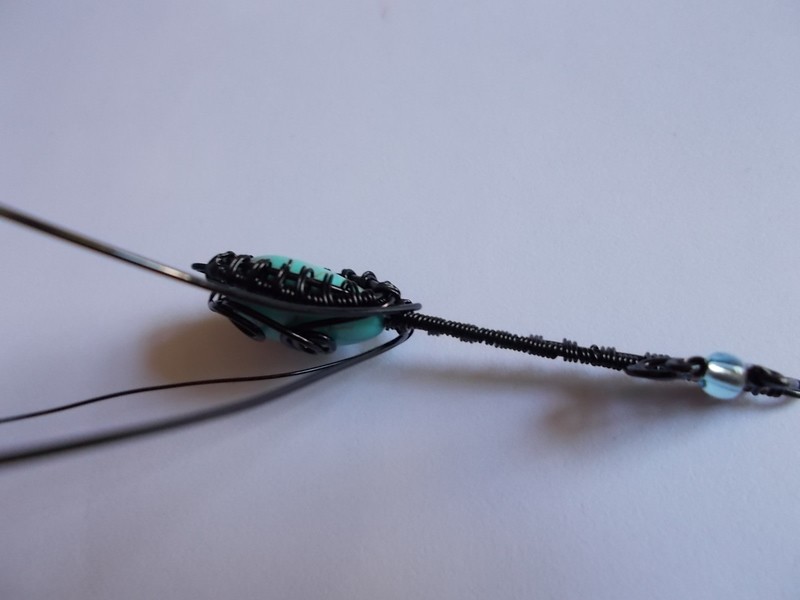
 Step 27
One wire goes in front of the bottom half of the key.
The other wire goes behind. -
 Step 28
Take the wire that was in front of the key's bottom half and poke it through some of the weaving done here at the bottom base of the bead.
-
 Step 29
Poke wire through. After that, pull the wire as tightly as possible. Bring the wire up and across the front of the bead.
-
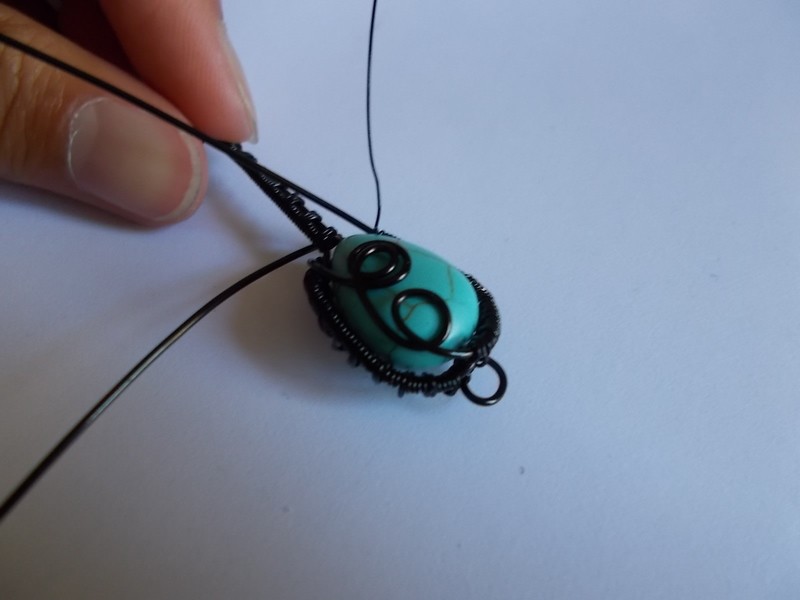
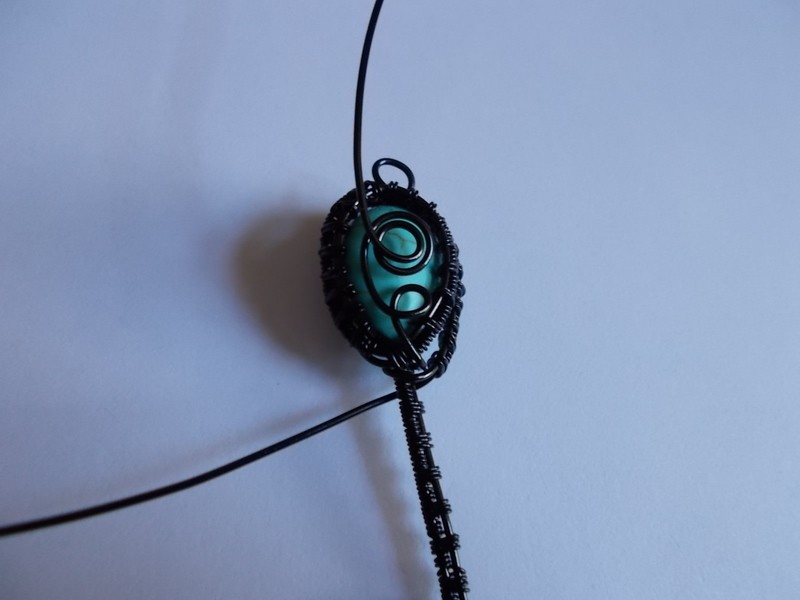
 Step 30
Form the swirls like so.
-
 Step 31
Insert the end of the wire into the gap between the weaving and the top of the bead before tugging the wire tightly so that all of the wire is through to the back of the key.
-
 Step 32
With the other piece of wire remaining, form even more swirls to cover the back of the key.
-
 Step 33
Then insert the end into a gap formed between the bead and the first set of swirls that you made on the back.
-
 Step 34
Notice that the wire does NOT go under any weaving.
-
 Step 35
Cut the wire short and curl the end into a loop. Tuck that loop under any swirl on the back of the key (any, but make sure it looks good!).
-
 Step 36
Determine a place on the back of the key where a curl would look nice. Then, cut the last (and thankfully final) piece of wire shorter.
-
 Step 37
Curl the end into a loop...
-
 Step 38
.. and tuck that loop into the place that you found!
-
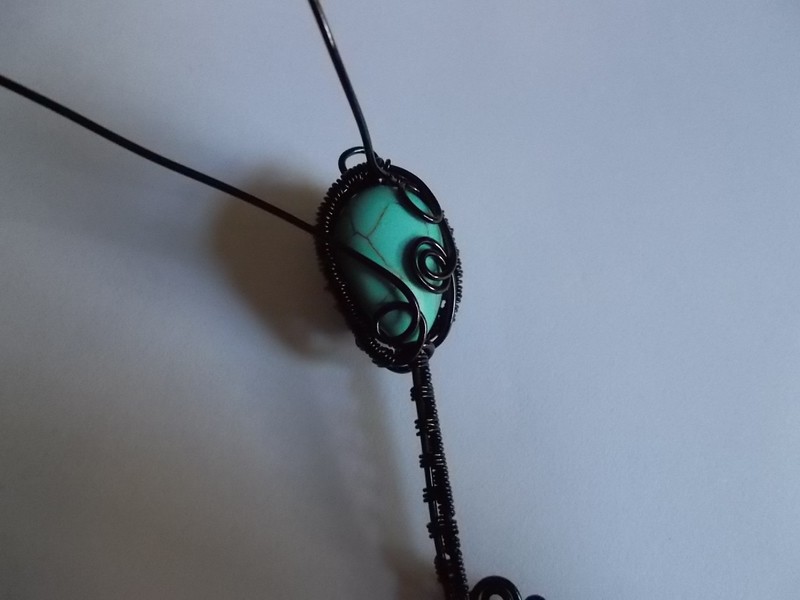
 Step 39
Now you can take a jump ring, string it through the loop at the top, and wear it on a necklace. Or you could string it to the collection of keys on your key ring. Either way, I'm sure it'll look gorgeous.
I hope you, my dear reader, enjoyed this tutorial, and perhaps will attempt to replicate this. Feel free to comment if anything is unclear to you, and I sincerely wish you a wondrous day!


Good luck!
I hope that helps!