


About
Wet Felted 3D Resist Bag Tutorial
This wet-felted wool bag is made by working over a 3d foam resist. We'll be creating this form ourselves from a simple foam chair pad that you can get from most sewing and craft stores. I used 3 colors of wool roving, but you can use as little or as few colors as you would like.
-
 archana l. favorited Wet Felted 3 D Resist Bag
03 Feb 07:44
archana l. favorited Wet Felted 3 D Resist Bag
03 Feb 07:44
-
 clarisse.cramer favorited Wet Felted 3 D Resist Bag
27 Sep 17:07
clarisse.cramer favorited Wet Felted 3 D Resist Bag
27 Sep 17:07
-
 yuliatko added Wet Felted 3 D Resist Bag to Wet Felting
11 Apr 07:32
yuliatko added Wet Felted 3 D Resist Bag to Wet Felting
11 Apr 07:32
-
yuliatko favorited Wet Felted 3 D Resist Bag
11 Apr 07:32
You Will Need
-
 Step 1
To create my pattern, I folded a scrap piece of paper in half and cut off the top corners, creating a pleasing shape. Keep in mind that your final product will be approximately 35 to 40 percent smaller due to fibers shrinking into place.
Place pattern on top of a 1 inch thick foam chair cushion and cut around edges with sharp craft scissors.
-
 Step 2
Cutting along the edges of the bottom corners of the foam resist, shape softer edges along the bottom. I like to round my sharp corners off first, then go back and shave a little off the middle as well. Thinner slices of foam will end up with a smoother result.
-
 Step 3
Foam is squishy, which is perfect for what we're using it for in this application. However, it's also porous, and that means that felted wool tends to try and attach itself to foam. For this reason, we'll be wrapping our resist in plastic.
Cut the handles and bottom off a plastic bag. Slice the tube you're left with so that you have one long rectangle of plastic. Begin wrapping your foam, neatly and taut, but leaving just a little room to manipulate the foam inside the bag.
Tape up the edges of the bag. The tape usually ends up coming off by the end of the project, so remember to check inside your bag for wet tape at the end. For the beginning shaping, however, it's necessary to hold the shape of the wrapped bag.
-
 Step 4
I like to do my bags multi-layered. This gives me a few opportunities for beautiful and unique blends in color, and also stretches my supply of colored roving much, much further.
When I can, I pick up a large bag (usually 8 oz) of merino in natural white or grey. I really like the fact that there's less processing of the fibers since there's no color, which tends to make these purchases quite a bit less expensive than for colored merino. I start my base with these natural tones, choosing a color that works well with my overall scheme.
Today I chose natural white in the hopes that as the fibers felted, a little of the white would show through. Also, this would create a pretty contrasting internal color as well. It would also show up nicely on the inside of the handles.
When laying down roving, spread the fibers thin and evenly. Lay fibers down horizontally first, overlapping edge fibers by a few inches. Lay down your next layer of white vertically, paying attention to wrapping your ends around the edges.
-
 Step 5
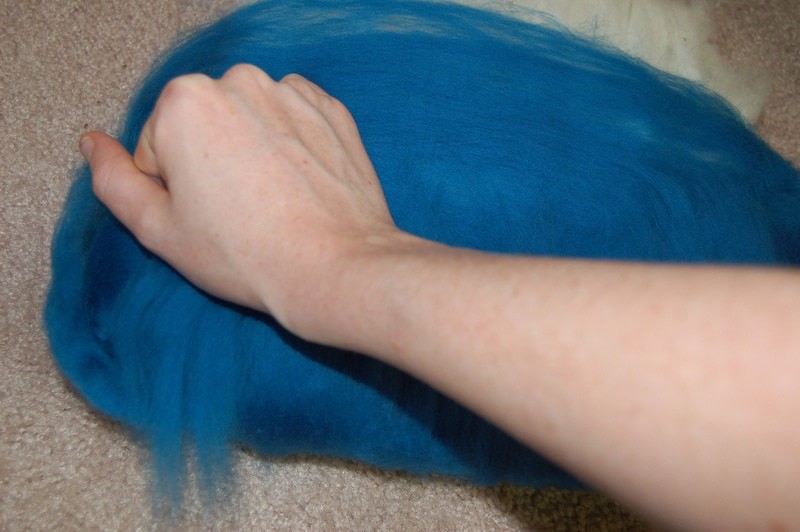
Place your main bag color horizontally over the middle and bottom portions of the bag. Lay fibers evenly, but spread the edges out gradually to minimize the result of heavy lines in the final bag.
-
 Step 6
Once both sides of the bag have the main color across the center, it's time to work in the edges. Pulling short sections from the roving, lay each handful smoothly across the edges, perpendicular to each place as you go around. Smooth the ends of the fiber along either side of the bag.
-
 Step 7
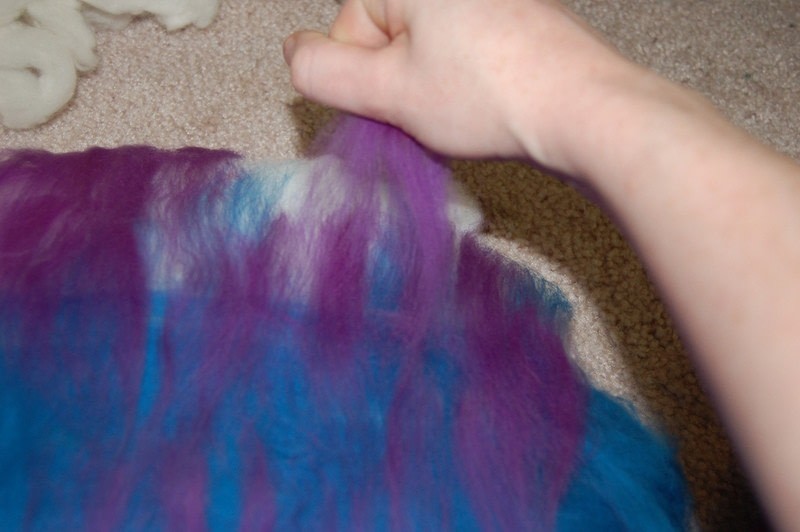
Pulling small amounts of fiber from your accent roving color, spread small amounts of wool along the top edges of the bag. Alternate with your main color and your direction occasionally, making the blend more soft and gradual.
-
 Step 8
Lots of people have different ways of setting up for wet felting. Outside is great because you don't have to worry about getting everything wet. I know of people who felt in the bath tub, especially for larger projects. I personally like to set up on a stack of 4 or so towels with an old broken desktop laying across them. This gives me a flat surface with some cushion below, gives me a water barrier, and makes it so I can sit on the floor, where I do a good deal of my crafting. I do a lot of the preliminary work in the big green bucket until I start rolling in the mat.
-
 Step 9
GENTLY lift your bag into the bucket. Using a soapy wet sponge and a rolling motion, moisten the wool fibers, being careful not to pull up layers or agitate the fibers too much at this phase. Carefully turn and repeat on the other side, then on the edges.
-
 Step 10
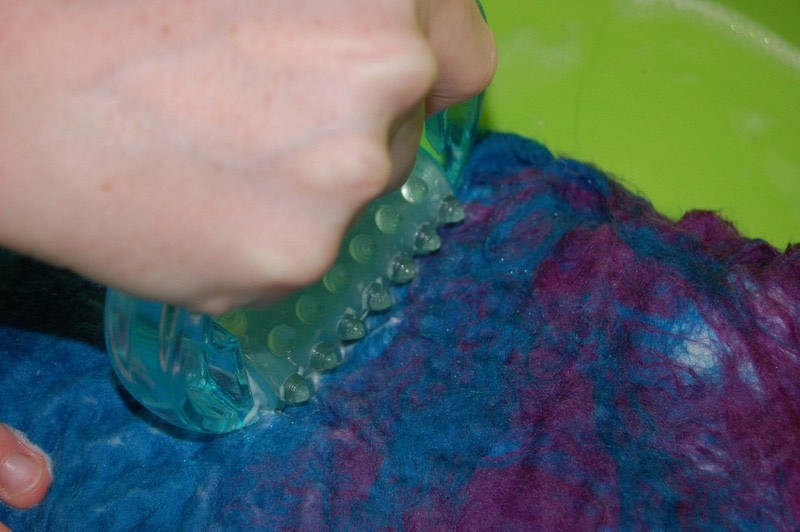
The beginning of this process is done rather slowly with little pressure. You don't want the fibers to separate and clump on themselves, so make sure you keep spreading everything out smooth every so often.
I use a hand-massager (It was something that came with a bottle of firming lotion and was designed to "break up celulite". Hah.) to do the majority of my agitation so my fingers aren't completely raw by the end of my day of felting, but you can also lightly massage the fibers with your fingers and palms and light pressure if you don't have something like this. A meat mallet tends to work pretty well, too.
Alternate sponging on hot and cold water, occasionally dumping waste water in the bucket so the project isn't flooded. Keep soapiness at a light amount, but make sure there are always suds.
-
 Step 11
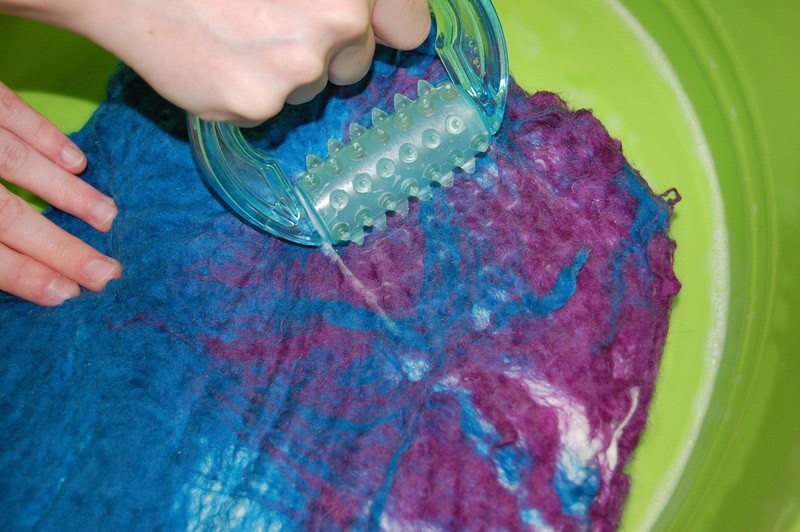
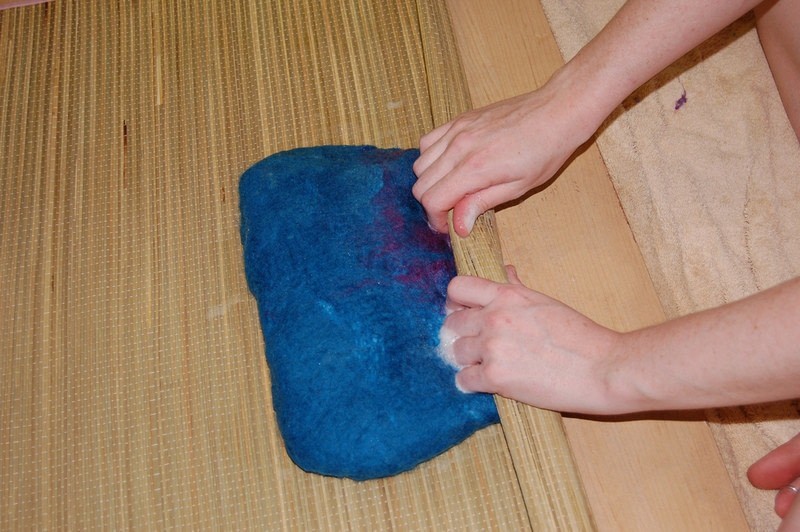
he fibers are beginning to interlock. The layers are merging. There's still individual definition of fibers, but they're starting to meld.
This means it's time for the next step. You don't want to over-felt at this stage or you don't end up with a smooth enough or even enough surface.
-
 Step 12
Begin by placing an edge of the bag near the end of the mat. Fold the end of the mat over the edge of the bag, and begin rolling tightly, as if you're making a big felt-and-bamboo cinnamon roll. Mmm, cinnamon rolls. Anyway, back to the bag...
-
 Step 13
Once you have the mat rolled up, press and roll the entire bag. Pressure is great in this stage, it's the friction that creates a smooth and even felting process. Continue to roll bag in mat, alternating hot and cold water applications. Occasionally you can mop up the soap suds and excess water with your sponge and squeeze it into the bucket.
Continue this process, flipping bag and turning all edges into end of roll. This means you'll be rolling from 8 different directions: front of bag up and back of bag up from both sides, and the top and bottom edges.
-
 Step 14
Your bag is nearing completion when the foam resist form inside is beginning to be crunched and distorted by the felt. Felt shrinks quite a bit, and it'll seem like your form is trying to curl up in the bag when you're ready to cut.
-
 Step 15
Cut the bag along the top seam with scissors. Remove the foam resist form and the plastic bag, remembering to check for any loose tape.
-
 Step 16
Here you can see the bag laying on top of the original form. See the size difference? The bag has become smaller and dense.
At this point, it's time to create your handles. From scratch paper, create a handle pattern that pleases your eye and works with the shape of the bag. Keep in mind that the handles will be stretched and rolled, so will appear longer and thinner than they are in the photo.
-
 Step 17
Fold handle pattern back in half, and fold one side of bag in half similarly. Cut along edges of pattern, then cut through the center to create the hole for the handles. Repeat on other side.
-
 Step 18
This is your final shaping opportunity for your bag. Pull and stretch the handles to elongate. Roll between your palms to curl inward on themselves.
Roll top edges of bag out to expose internal color. Form with your fingers and allow to dry that way.
Press a flat base into your bag so it can mostly stand on its own.Set bag aside to dry, which will take 1 to 2 days, depending on your climate. Decorate bag as desired, or use plain!


Comments


