


About
The Terrific Tri-Fold Wallet
This pretty and professional-looking wallet holds a little bit of everything. There’s room for your notes, coins, cards and receipts in a clever and compact three-fold design. And the good news (for all you zip phobics out there) is that there isn’t a zip in sight. Hurrah!
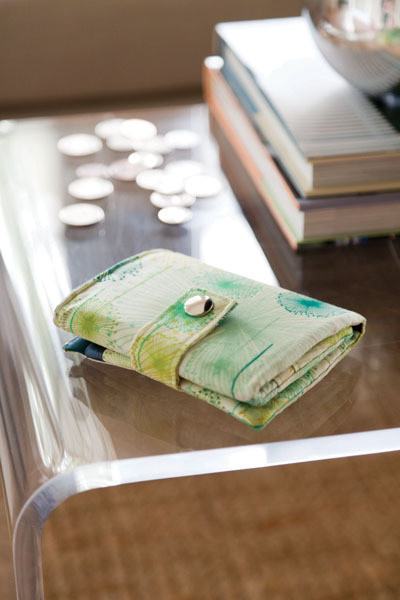
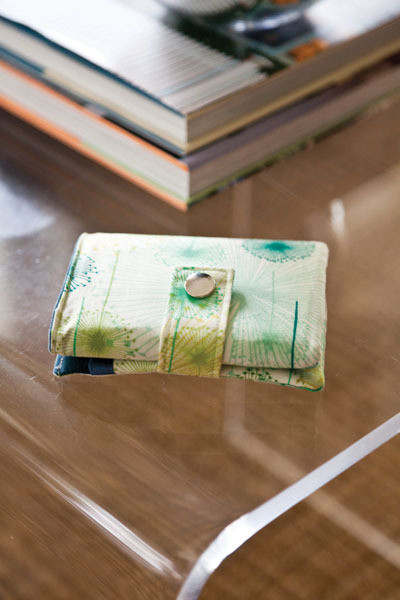
Closed view When closed the wallet is neat and compact and will fit comfortably into any handbag.
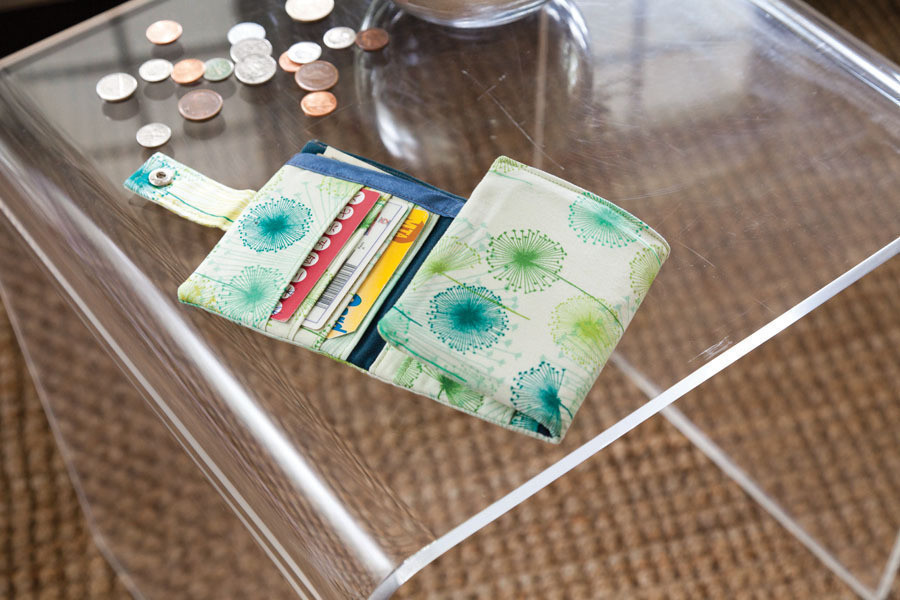
Semi-open view Inside the wallet you’ll find three card slots at either side…
Fully open view … an expanding coin pouch in the middle and a roomy notes slot at the back.
Features you’ll love
Finished size: closed 12 x 10cm (43/4 x 4in); open 30 x 10cm (117?8 x 4in)
Firm structure for good looks and durability
Keep everything tidy and organized within six card slots, one notes slot, one receipts slot and a separate pouch for coins
Tri-fold design and strong popper fastening for security
Need to know
• A walking foot will help you ease through the multiple layers in
this design
• ‘Clip together’ means use sewing clips instead of pins to hold pattern
pieces together before stitching. Pins are not suitable for this project.
• This wallet uses a specialist fusible interfacing (Decovil), which gives
fabric a leather-like quality and a high level of durability. If you are unable
to source this you can use any other type of extra-stiff fusible interfacing.
• Because of the extra-stiff interfacing, I recommend you stick to using
quilt-weight fabric for the exterior. Home dec fabrics will be too thick
to work with when combined with the interfacing.
• All seam allowances are 5mm (3?16in) unless stated otherwise.
• All topstitching is stitched with a 3mm (1?8in) seam.
• There are no patterns for the coin pouch or card slots as all you need are fabric rectangles. Measurements are given in the Preparation panel.
• The pattern pieces for the main body and coin pouch flap are given in
the pull-out section and include the seam allowance.
Preparation
Cut the fabric and interfacing pieces as follows
(see pull-out section for pattern pieces):
From the Terrific Tri-Fold Wallet (Main Body)
pattern piece
• 1 x exterior fabric
• 1 x lining fabric
• 1 x Decovil fusible interfacing
From the Terrific Tri-Fold Wallet (Coin Pouch Flap) pattern piece
• 1 x exterior fabric
• 1 x lining fabric
The Terrific Tri-Fold Wallet (Coin Pouch) is a 15 x 9.5cm (6 x 33/4in) landscape rectangle
• 2 x exterior fabric
• 1 x woven fusible interfacing
The Terrific Tri-Fold Wallet (Card Slots) is a 90 x 11cm (351/2 x 43?8in) portrait rectangle
• 1 x exterior fabric
• 1 x woven fusible interfacing
Transfer all pattern notches and markings to the fabric with a disappearing marker
Also cut:
• 1 piece of lining fabric, 31.8 x 11cm (121/2 x 43?8in), for the notes slot
• 1 piece of exterior fabric, 12 x 9cm (4¾ 31/2in), for the wallet tab
• 1 piece of woven fusible interfacing,
12 x 4.5cm (4¾ x 1¾in), for the wallet tab
-
 Luna D. favorited Tri Fold Wallet
25 Apr 05:40
Luna D. favorited Tri Fold Wallet
25 Apr 05:40
-
 Alma added Tri Fold Wallet to Bags, Wallets...
20 Jun 16:22
Alma added Tri Fold Wallet to Bags, Wallets...
20 Jun 16:22
-
Joana A. favorited Tri Fold Wallet
12 Jun 23:07
-
Robin M. favorited Tri Fold Wallet
18 Oct 17:11
-
 Petra M. favorited Tri Fold Wallet
17 Jun 19:00
Petra M. favorited Tri Fold Wallet
17 Jun 19:00
-
Donna S. commented on Tri Fold Wallet
26 Mar 01:02
-
Donna S. replied to a comment on Tri Fold Wallet
25 Mar 21:17
-
Donna S. commented on Tri Fold Wallet
25 Mar 21:16
-
Becky W. favorited Tri Fold Wallet
16 Aug 14:37
-
 LollypopLoz favorited Tri Fold Wallet
02 Jan 18:34
LollypopLoz favorited Tri Fold Wallet
02 Jan 18:34
You Will Need
-
Step 1
The interfacing
Interface the exterior main body – trim off 1.5cm (5?8in) all around the Decovil interfacing piece. Iron the Decovil to the WS centre of the exterior pattern piece. -
Step 2
Interface the card slots – trim off 3cm (11?8in) from one of the long edges of the woven fusible interfacing. Iron the interfacing down the WS
centre of the exterior pattern piece. -
Step 3
Interface the coin pouch – trim off 1.5cm (5?8in) from one of the long edges of the woven fusible interfacing. Match one of the long edges of the
interfacing with one of the WS long edges of the exterior pattern pieces and iron in place. -
Step 4
Interface the wallet tab – lay the strip of woven fusible interfacing down the WS width centre of the tab fabric and iron in place.
-
Step 5
The inside of the wallet
Transfer the card slot pattern markings – place the main body paper pattern onto the notes slot fabric. Transfer all the card slot pattern markings onto the notes slot fabric. These pattern markings will help you position each of the card slots ready for stitching in Step 11.
-
 Step 6
Make the coin pouch flap – bring the flap fabric pieces RST. Pin and stitch together along the side and curved bottom edges. Clip the curved
edge, iron the seam open and turn RSO. Iron the flap and topstitch along the bottom and side edge. Stitch the flap (solid colour facing up) to the top
edge RS centre of the notes slot fabric piece. Match the raw edges of the flap and the notes slot clip and stitch together. See Fig a.Fig a With the solid colour facing up, clip and stitch the coin
pouch flap to the centre RS top edge of the notes slot fabric. -
Step 7
Stitch the coin pouch – the pouch exterior is the interfaced fabric piece and the long edge (on the interfaced piece) where the interfacing
falls short (in other words, the long edge that is free of interfacing) will be the bottom edge of the pouch. Bring the coin pouch fabric pieces RST.
Clip and stitch together along the top and side edges. Clip off the top corners, iron the seams open and turn RSO.Keep it trim …
Clever trimming of the interfacing layers at the start of this project will greatly reduce b ulka ts eams‘T. hisw illp roducea smootherlo okingw alleta ndw ilml aket he construction process a lot easier’. -
 Step 8
Insert pleats in the coin pouch – from both side top edges of the pouch, measure and mark 3cm (11?8in) and 4.5cm (13/4in). Fold concertina pleats (from top to bottom of the pocket) and topstitch the uppermost fold. See Fig b. Topstitch the fold 3mm (1?8in) from the fold, and ensure you are topstitching though both layers.
Fig b View of the finished wallet (looking down into the coin pouch). Fold the concertina pleat as shown. Topstitching the fold will give the pleat definition and durability.
-
Step 9
Cut the card slots – take the card slot fabric and divide it as follows: two pieces 12 x 11cm (43/4 x 43?8in) and six pieces 10 x 11cm (4 x 43?8in). This should leave you with a total of eight card slots. The two longer pieces are the outer card slots and the six shorter pieces are the inner card slots.
-
 Step 10
Make the card slots – take one of the card slot pieces and fold it in half by bringing the long edges WST. Iron and topstitch the fold, 3mm (1?8in) from the edge. Use a zigzag stitch to stitch the long raw edges together (don’t worry, this zigzagged edge will not show on the finished
wallet). Repeat for the other seven card slot pieces.
Set aside. See Fig c.Fig c Fold, topstitch and zigzag stitch each slot as shown.
-
 Step 11
Clip the card slots onto the notes slot – begin by positioning the left-hand side card slots. Take one of the short card slots and place it
onto the innermost slot marking (the marking furthest to the right). Use sewing clips to clip the card slot in place. Stitch the card slot to the notes
slot fabric along the zigzagged edge of the card slot with a 5mm (3?16in) seam allowance. Position another two short card slots to the left of the first
card slot, in the same way (layering them as you go). See Fig d. Finally, position and clip one of the long card slots onto the left-most slot marking.
The top, bottom and side edges of the card slot and the notes slot fabric should match.Fig d Position and clip the card slots at the pattern markings, layering the slots on top of each other.
-
Step 12
Stitch the card slots onto the notes slot – stitch all four card slots in place along the top, bottom and side edges of the left-hand side of the
notes slot fabric with a 3mm (1?8in) seam allowance. Repeat with the other four card slots and the righthand side of the notes slot. At this point if the top and bottom edges are looking a bit scruffy, give them a trim to get nice straight edges (this will help make Step 18 much easier). -
Step 13
Bind the top edge of the notes slot fabric – binding the top edge of the notes slot fabric will neatly conceal the top edges of the card slots and coin pouch flap on the finished wallet. Take the binding, fold it in half lengthways RST and iron the fold. Place the folded bias over the top edge of the notes slot fabric and stitch in place to bind the edge. Stitch 2mm (1?16in) from the edge of the bias.
-
 Step 14
Stitch the notes slot fabric to the lining – lay the notes slot (with slots, pouch and flap facing up) onto the lining RS. Clip and stitch together with a 3mm (1?8in) seam allowance. Stitch a division in the centre between the right-hand side card slots and the coin pouch. Stitch through both
layers and stitch from the notes slot binding top edge down to the bottom edge. Now that the wallet lining has been stitched to the notes slot, I’ll refer to both as the wallet lining. See Fig e.Fig e View of the finished wallet. This stitched line will create two slots, one for your paper money and another for your receipts.
Take the strain … To reinforce the high-stress area at the
binding top edge, be sure to sew a few stitches in forward and reverse. -
 Step 15
The outside of the wallet
Make the wallet tab – take the wallet tab fabric WSO. Fold it in half by bringing the short edges together, iron the centre crease and open out. Fold both the short edges to the crease you have just made and then fold in one of the short edges by 1cm (3?8in). See Fig f. Now fold up the
whole strap along the centre crease and topstitch all around the folded edges of the strap 2mm (1?16in) from the edge.Fig f Fold in the long and short edges of the wallet tab.
-
 Step 16
Insert one half of the popper snap on the wallet tab – take the strap and mark a small ‘X’ 13mm (1/2in) down from the short folded edge
in the centre. Follow the popper kit instructions and use the hole punch to insert the domed button (female) half of the popper snap into the ‘X’ mark
you have just made. See Fig g.Fig g Insert the female part of the popper snap into the
centre of the folded edge. -
Step 17
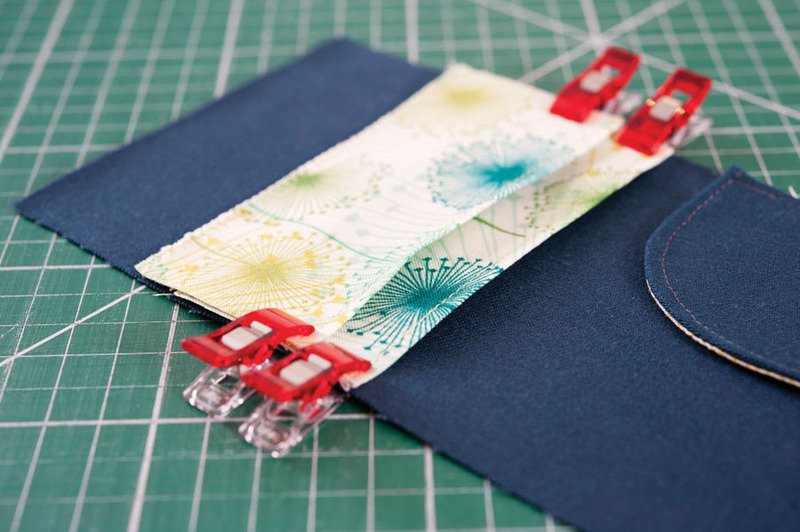
Stitch the wallet tab to the wallet exterior – with the exterior main body fabric RSO (and right way up), place the wallet tab onto the centre
left-hand side short raw edge of the main body exterior fabric piece. Clip and stitch in place with a 5mm (3?16in) seam allowance. -
Step 18
Stitch the wallet lining to the wallet exterior – bring the wallet lining and exterior fabric pieces RST. Carefully match all of the edges, clip together and stitch all around the edges leaving a 12.5cm (5in) gap in the centre top edge for turning out. Carefully clip off the corners and turn the
wallet RSO through the gap. Use a pressing cloth to iron out the bumps at the corners and seams. -
 Step 19
Make a mark for the male part of the popper on the wallet exterior – where you position the other half of the popper snap depends on
where the popper on the wallet tab falls onto your wallet exterior. Have a marker ready and fold up your wallet (as if you were closing it). Wrap the tab around to the exterior back of the wallet and mark a small ‘X’ where the tab popper falls onto the wallet back. See Fig h.Fig h Grab a marker and close up your wallet. With your free
hand, pull the wallet tab over to the back of the wallet. Then,
mark a small ‘X’ where the popper falls onto the wallet back. -
Step 20
Apply the other half of the popper snap onto the wallet exterior – reach into the top edge gap of the wallet and follow the popper kit
instructions to insert the dimpled (male) half of the popper snap into the ‘X’ mark you have just made using the hole punch. Be sure to apply the popper half through the exterior fabric only (that is, the Decovil interfacing and exterior fabric layer). -
 Step 21
Stitch the gap in the wallet shut – push the raw edges of the gap into the hole, carefully line up the folded edges with the top edge of the
wallet and iron the folds. See Fig i. Topstitch the entire top edge of the wallet with a 3mm (1?8in) seam allowance. All finished, now you can fill up your smart new wallet (with money you have saved from not having to buy a wallet from the shops!).Fig i Push the seams of the gap into the hole, fold them down and ensure the folded edges line up with the rest of the top edge of the wallet before ironing.
Punch drunk … Applying the popper half through a gap is awkward, as your view is somewhat obstructed. Take time to check your positioning before punching any holes
Make it mine … Size – for a more petite version of this wallet, how about
making it two-thirds of the original size? The smaller version could be a
bi-fold wallet – simply eliminate one side of the card slots.Closures – if you prefer you can swap the popper snap for a pretty button and elastic cord closure or how about a stylish wraparound look using leather lacing wrapped several times around the wallet?
Embellishment – personalize the wallet by stitching initials onto the wallet exterior, or stitching fabric flowers, buttons, beads or embroidery onto the front.Stash your cash in style with a wallet made from your favourite fabrics of the season. Why not make one for summer and another one for winter?


This, in my opinion is false advertising, there are only bits and pieces of pattern information, a few measurements and no pics labeled alphabetically. So sorry to have wasted my time on it?....
Please assist.
Ellen