
About
Protect your memories
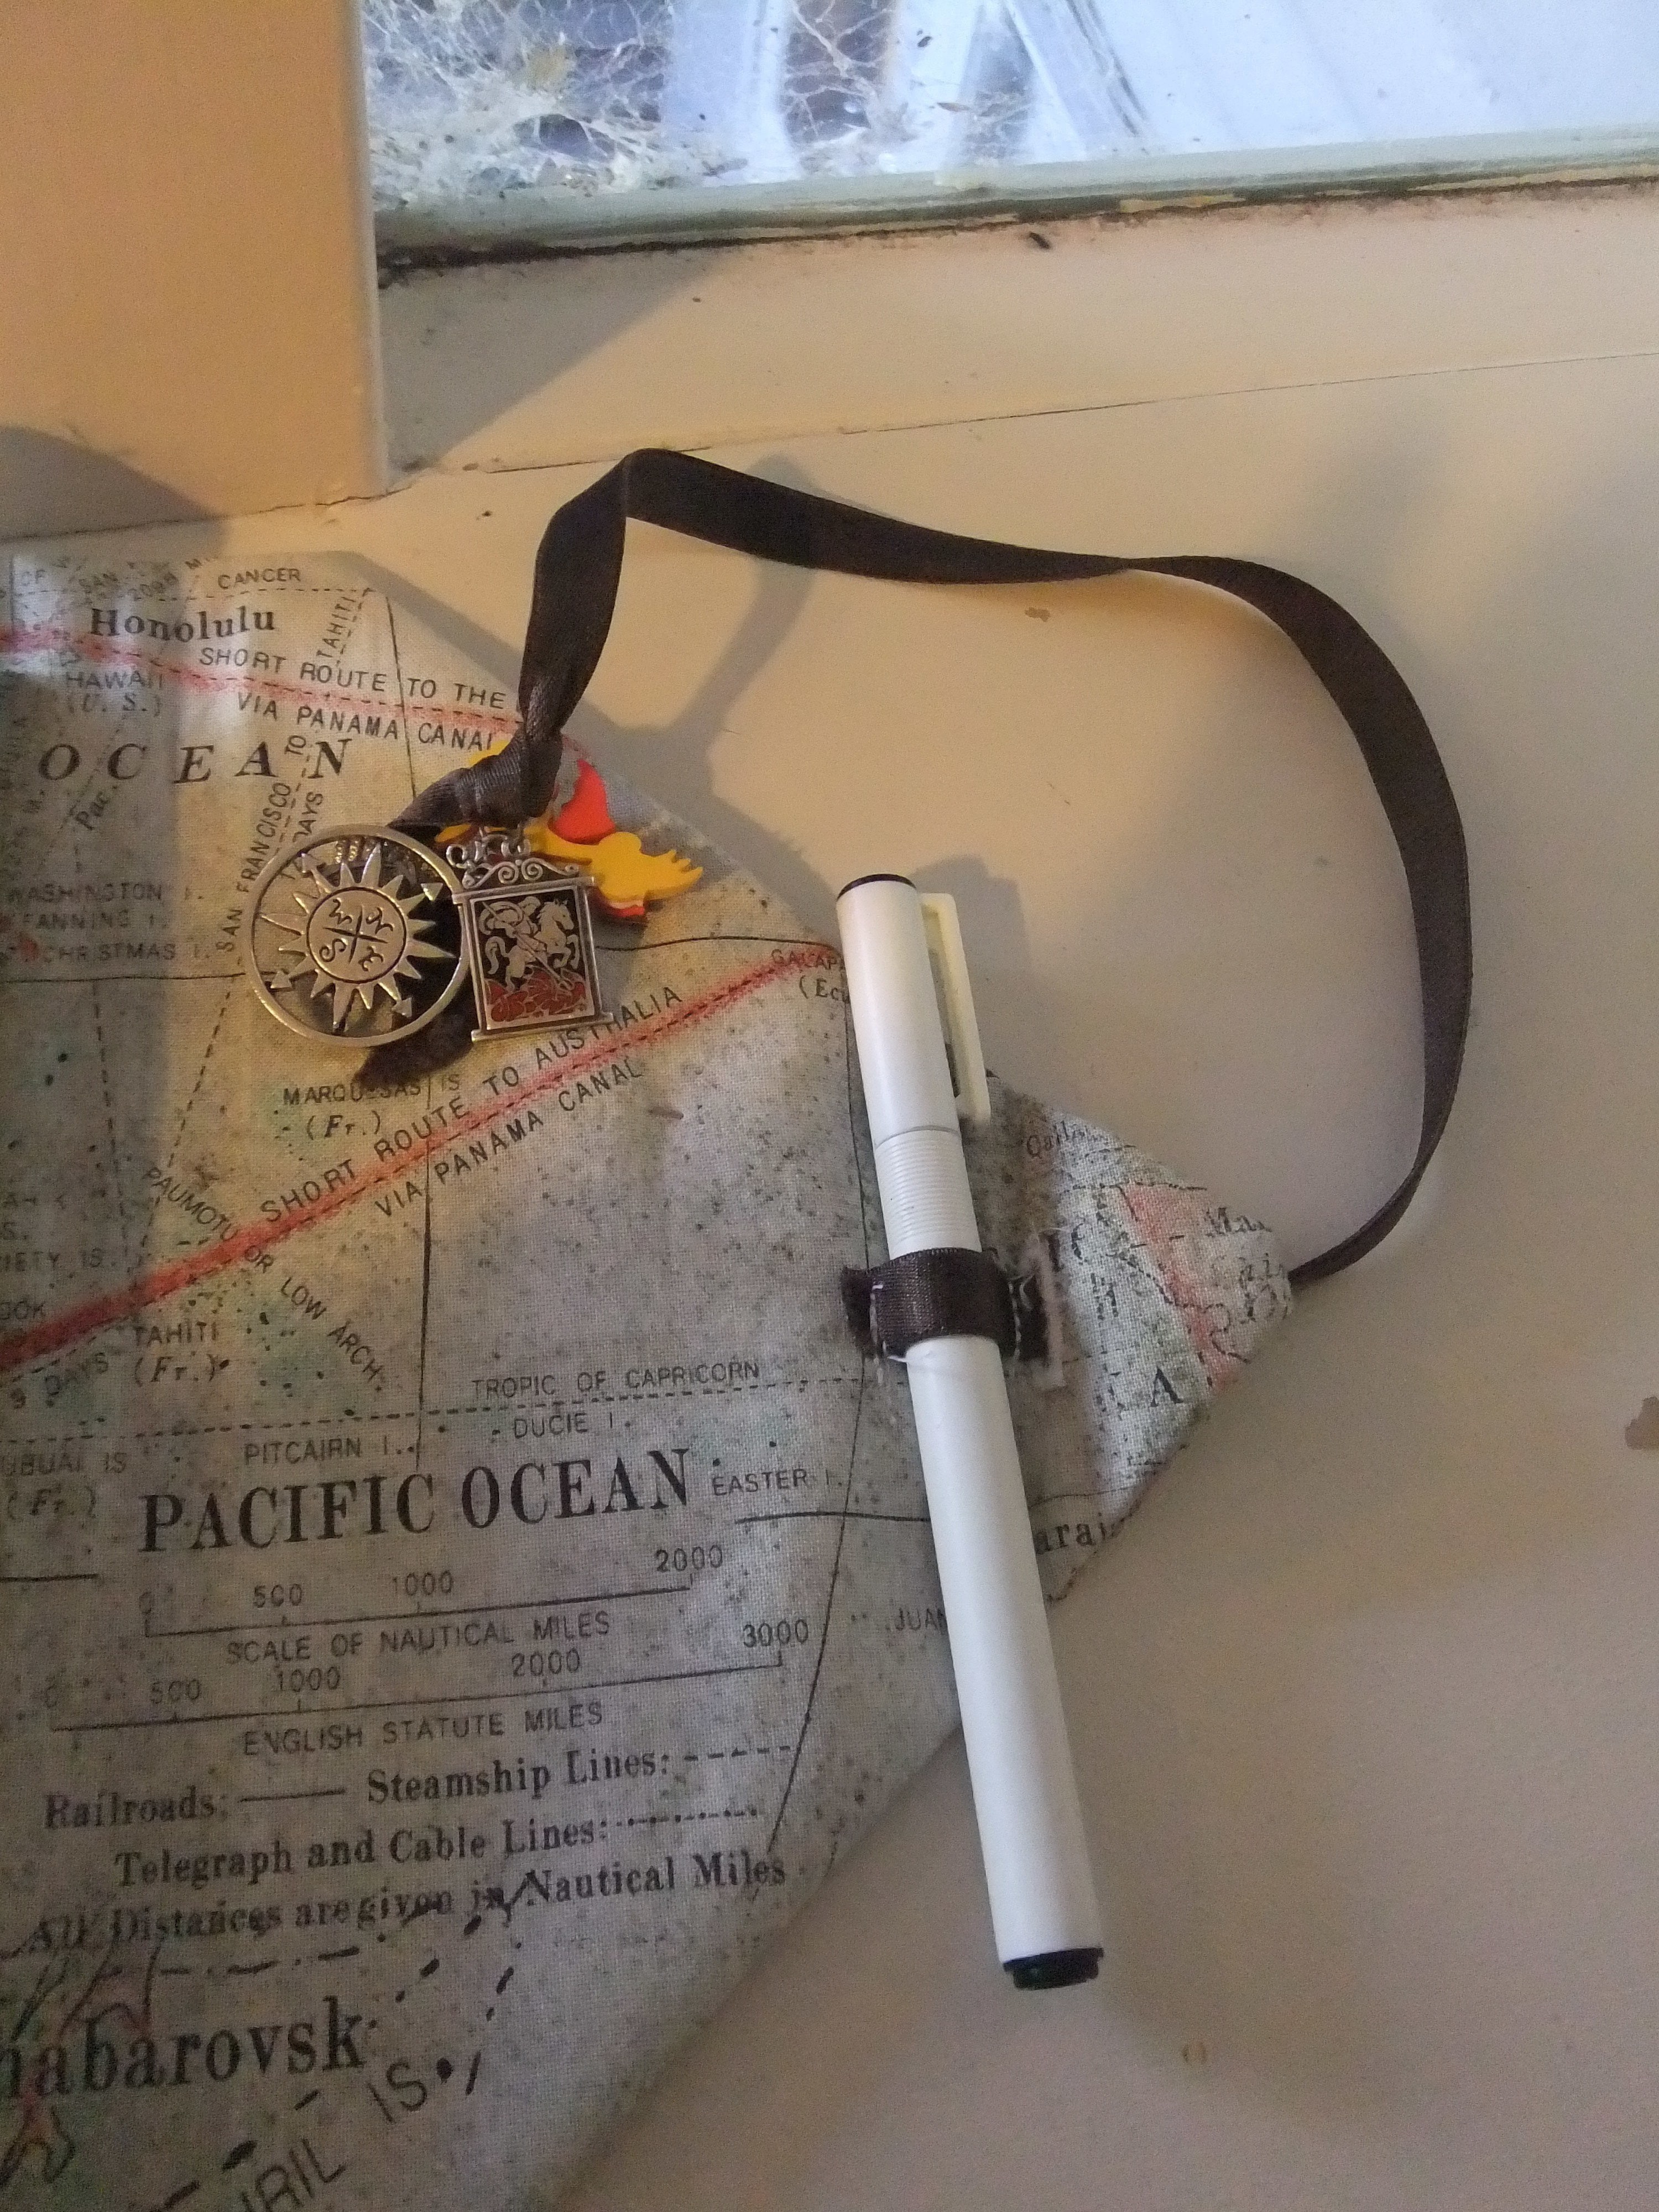
I plan to travel next year and I found this cool map print material.
So I made a book cover for my travel journal.
I wasn't 100% sure on the 'journal' (as I'm still looking for one that suits what I want inside it) but I knew the size was going to be A5.
In my search I came across a leather cover that looked expandable... I'm not a fan of real leather so I thought I could make it myself. I did :)
I used charms I found that were around in my craft stash. I am pretty stoked with the final result :D
-
 Kinhime Dragon favorited DIY Fabric Journal Book Cover
01 Aug 01:31
Kinhime Dragon favorited DIY Fabric Journal Book Cover
01 Aug 01:31
-
 Julie Phillips favorited DIY Fabric Journal Book Cover
18 Jul 05:06
Julie Phillips favorited DIY Fabric Journal Book Cover
18 Jul 05:06
-
 Sandra C. favorited DIY Fabric Journal Book Cover
12 Dec 20:50
Sandra C. favorited DIY Fabric Journal Book Cover
12 Dec 20:50
-
 ohsotif favorited DIY Fabric Journal Book Cover
31 Jul 15:03
ohsotif favorited DIY Fabric Journal Book Cover
31 Jul 15:03
-
Kinhime Dragon added DIY Fabric Journal Book Cover to alter
13 Feb 15:32
-
 Kaitlynn L. favorited DIY Fabric Journal Book Cover
25 Jan 01:34
Kaitlynn L. favorited DIY Fabric Journal Book Cover
25 Jan 01:34
-
 Tierra T. favorited DIY Fabric Journal Book Cover
14 Nov 21:19
Tierra T. favorited DIY Fabric Journal Book Cover
14 Nov 21:19
-
 Jess H. favorited DIY Fabric Journal Book Cover
13 Nov 02:01
Jess H. favorited DIY Fabric Journal Book Cover
13 Nov 02:01
-
 choco s. published her project DIY Fabric Journal Book Cover
12 Nov 14:02
choco s. published her project DIY Fabric Journal Book Cover
12 Nov 14:02
-
 Step 1
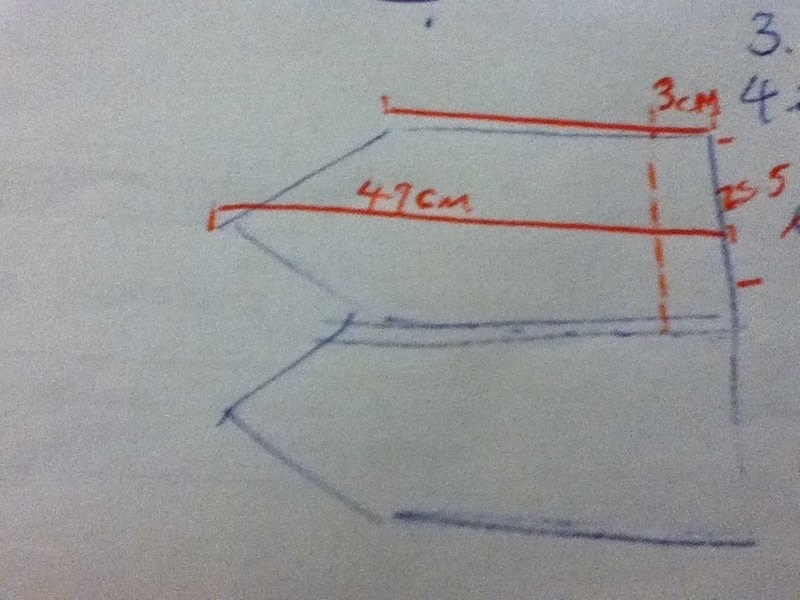
Measure the books height and width (both closed and open).
Draw an oblong on pattern/paper plus an even triangle (so the point is centred) on one side.(as seen in picture) You can use the book as a reference for how long/big a
a cover you would need. Add a few mm-cm if you want to use it for different books.. plus it is better if it is taller than your book for protection and ease of putting your book into it.
Make sure there is 3 to 3.5cm extra on the straight edge side (See step#5 )+tip you can include the seam allowance in the pattern just remember that it is included when it comes to sewing
(I was making for A5 sized book So it was 25.5cm tall, 49cm across from triangle point to straight edge)
-
 Step 2
You can fold the fabric in half (doubled over) and pin the pattern to it.
Then cut with 1cm seam allowance. This means both sides will be the same size.Repeat with interfacing. (I used sew on interfacing)
+tip
(if the fabric has a pattern/design OR you want to have a different fabric for the inside of your cover then just place the pattern on the side A fabric (single layer) <--- pointing one way. Then for side B flip the pattern so it is pointing the other way --->
(If you do not do this one of the sides patterns will be upside down!) -
 Step 3
Pin the two pieces together so that it is right sides together (inside out). The interfacing pinned to the outside.
Insert the elastic band near the triangle side in between the fabric and pin in place.
I used my book as a guide how centre/left to put it so it was not too far out. I had it about 3cm to the left of the book edge. You can place it where ever you feel like as long as, it is not going to just fall out because it wasn't to the left enough.** Tip- make the elastic a little taunt when you pin it. (I did not do this so it is loose on mine so if I did this again that would be the improvement I'd make)
-
 Step 4
Sew around the edge except the side with the straight edge. (follow the red line in image)
Do not forget about the seam allowance.Turned it right-side out.
(If you have different patterns- make sure you flip the elastic to the side you want as 'inside')
I Ironed it so the book cover edges looked crisp and tidy/ -
 Step 5
The side with the straight edge
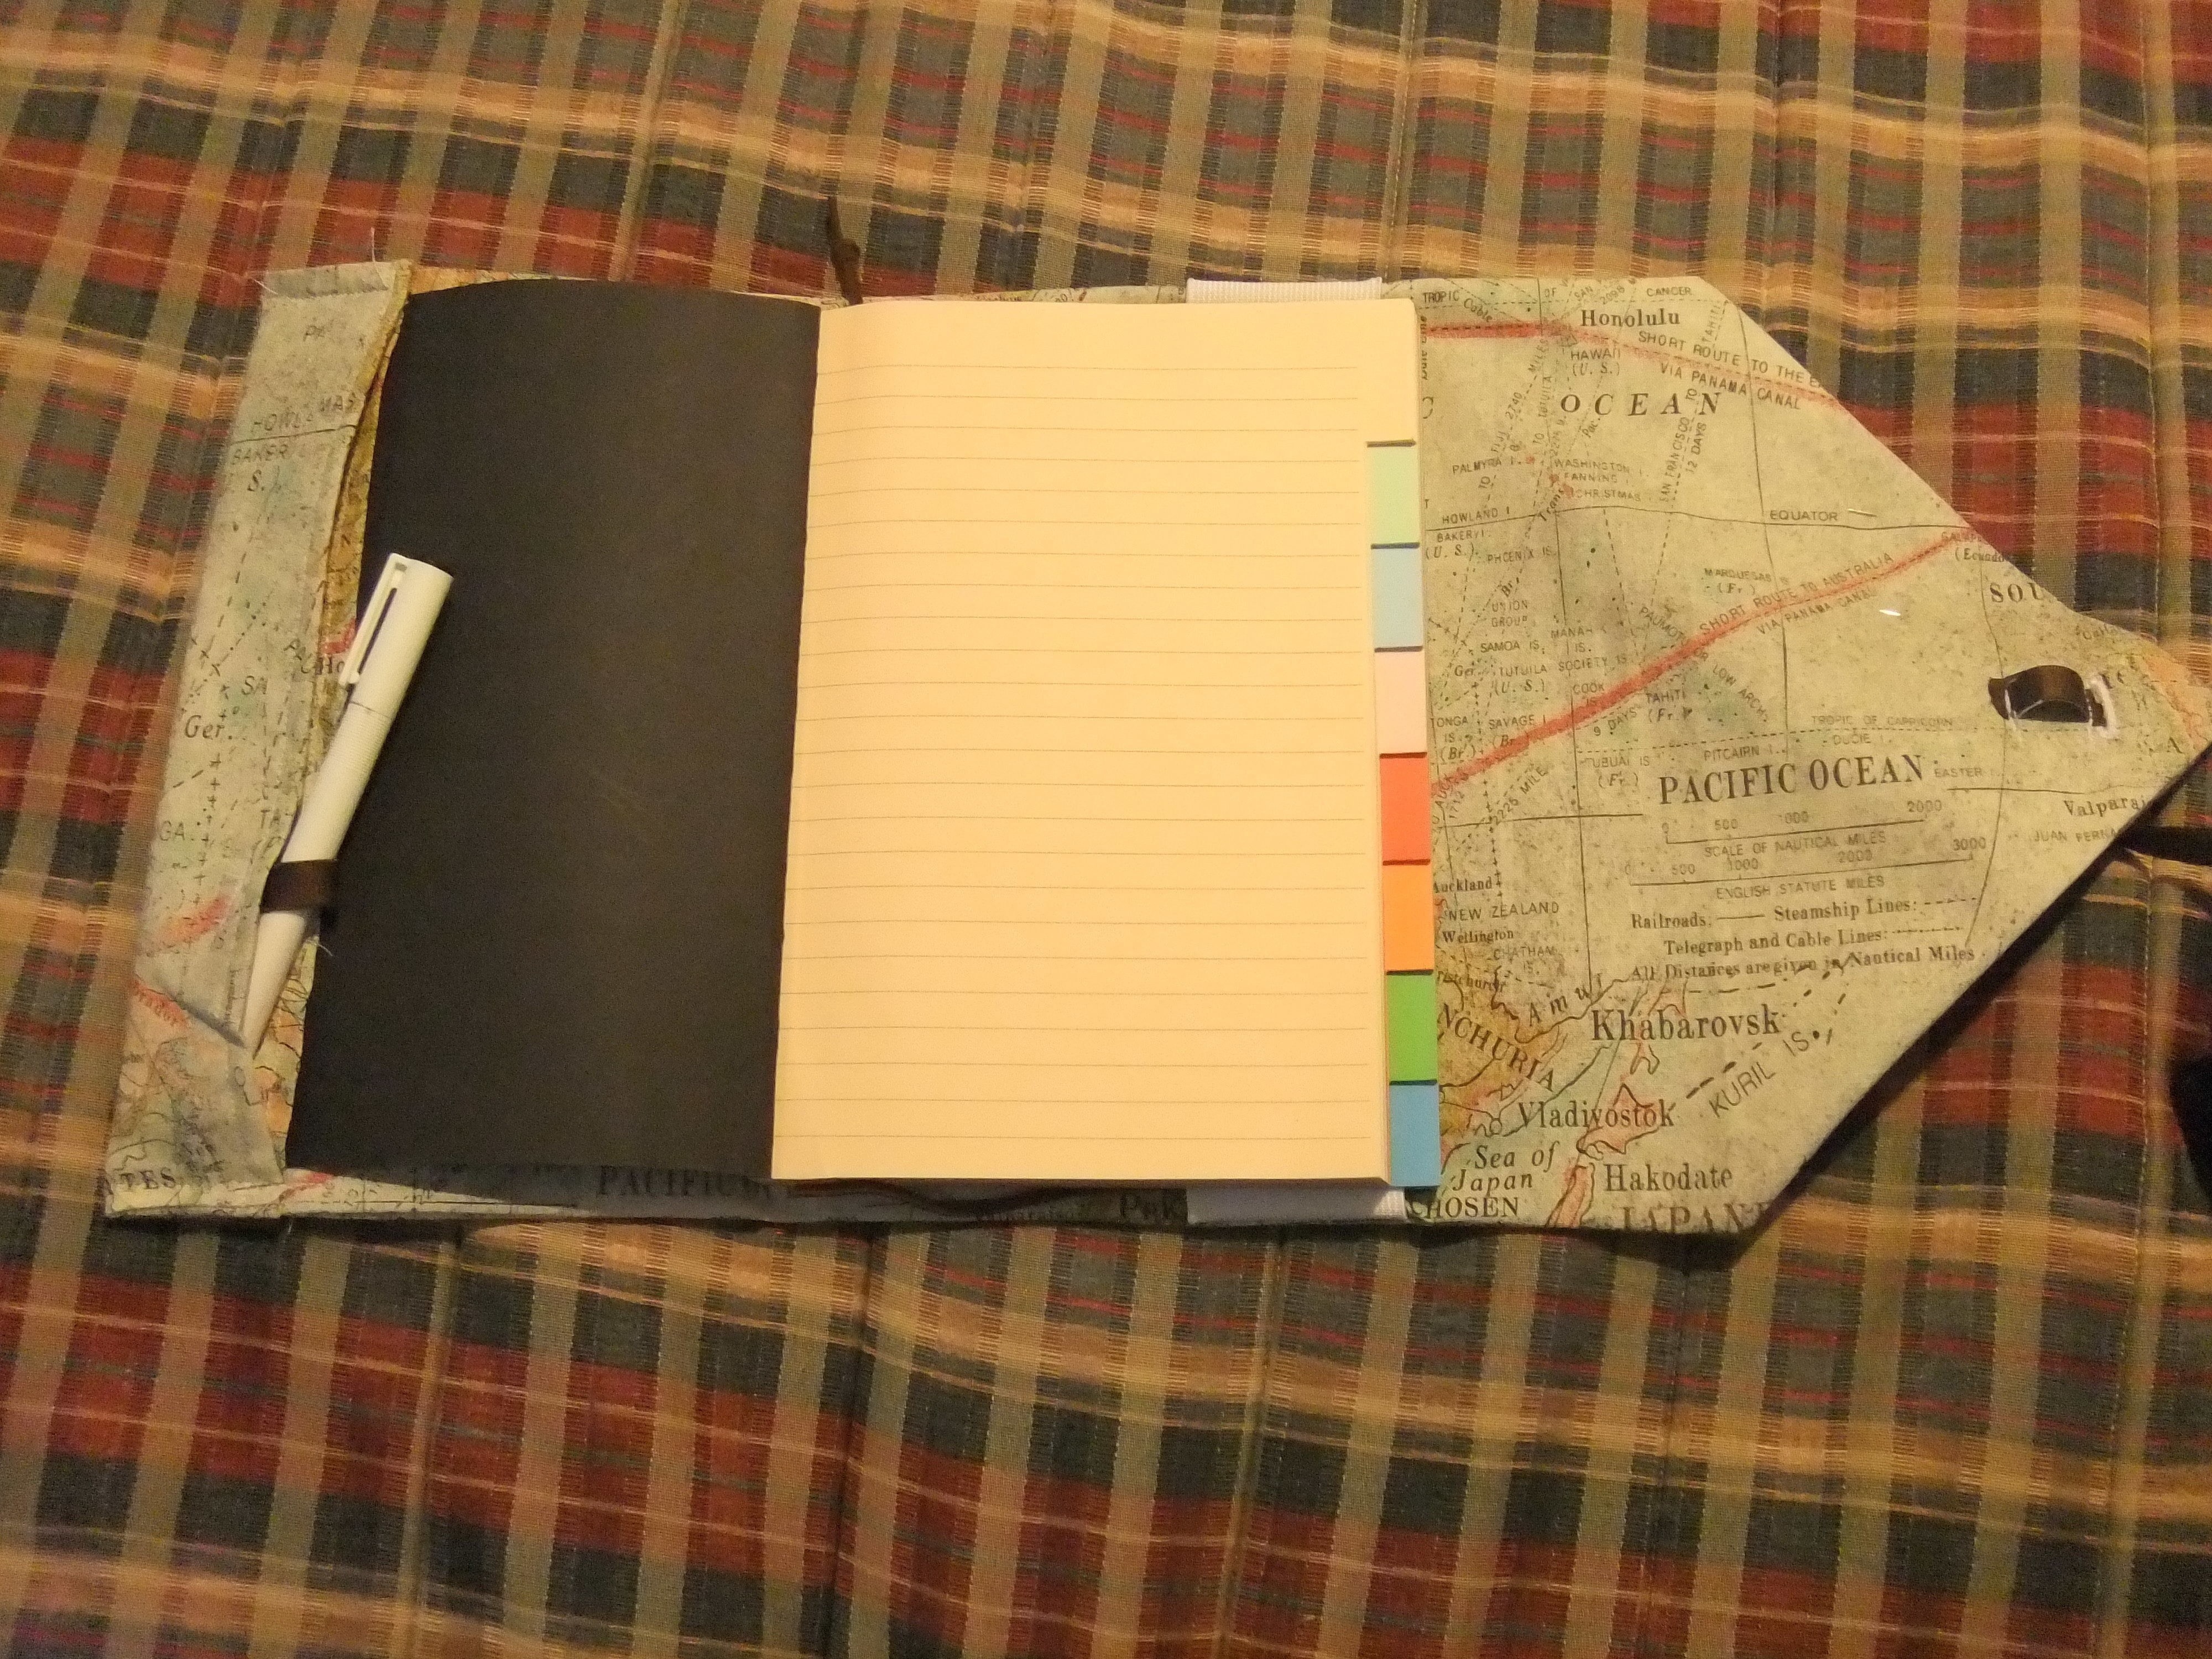
Fold the edge inwards (I ironed) then sewed like a hem. (I also sewed elastic between the upper and bottom edge and it is a secret pen compartment when the cover is closed)(you can also just fold and sew the straight edge together
fold it towards the centre about 3 to 3.5cm from the edge.)
.
Sew along the top and bottom. (if you want to be fancy and do topstitching you can do that too -another poiny to iron beforehand..) around the entire edge of the book cover. -
Step 6
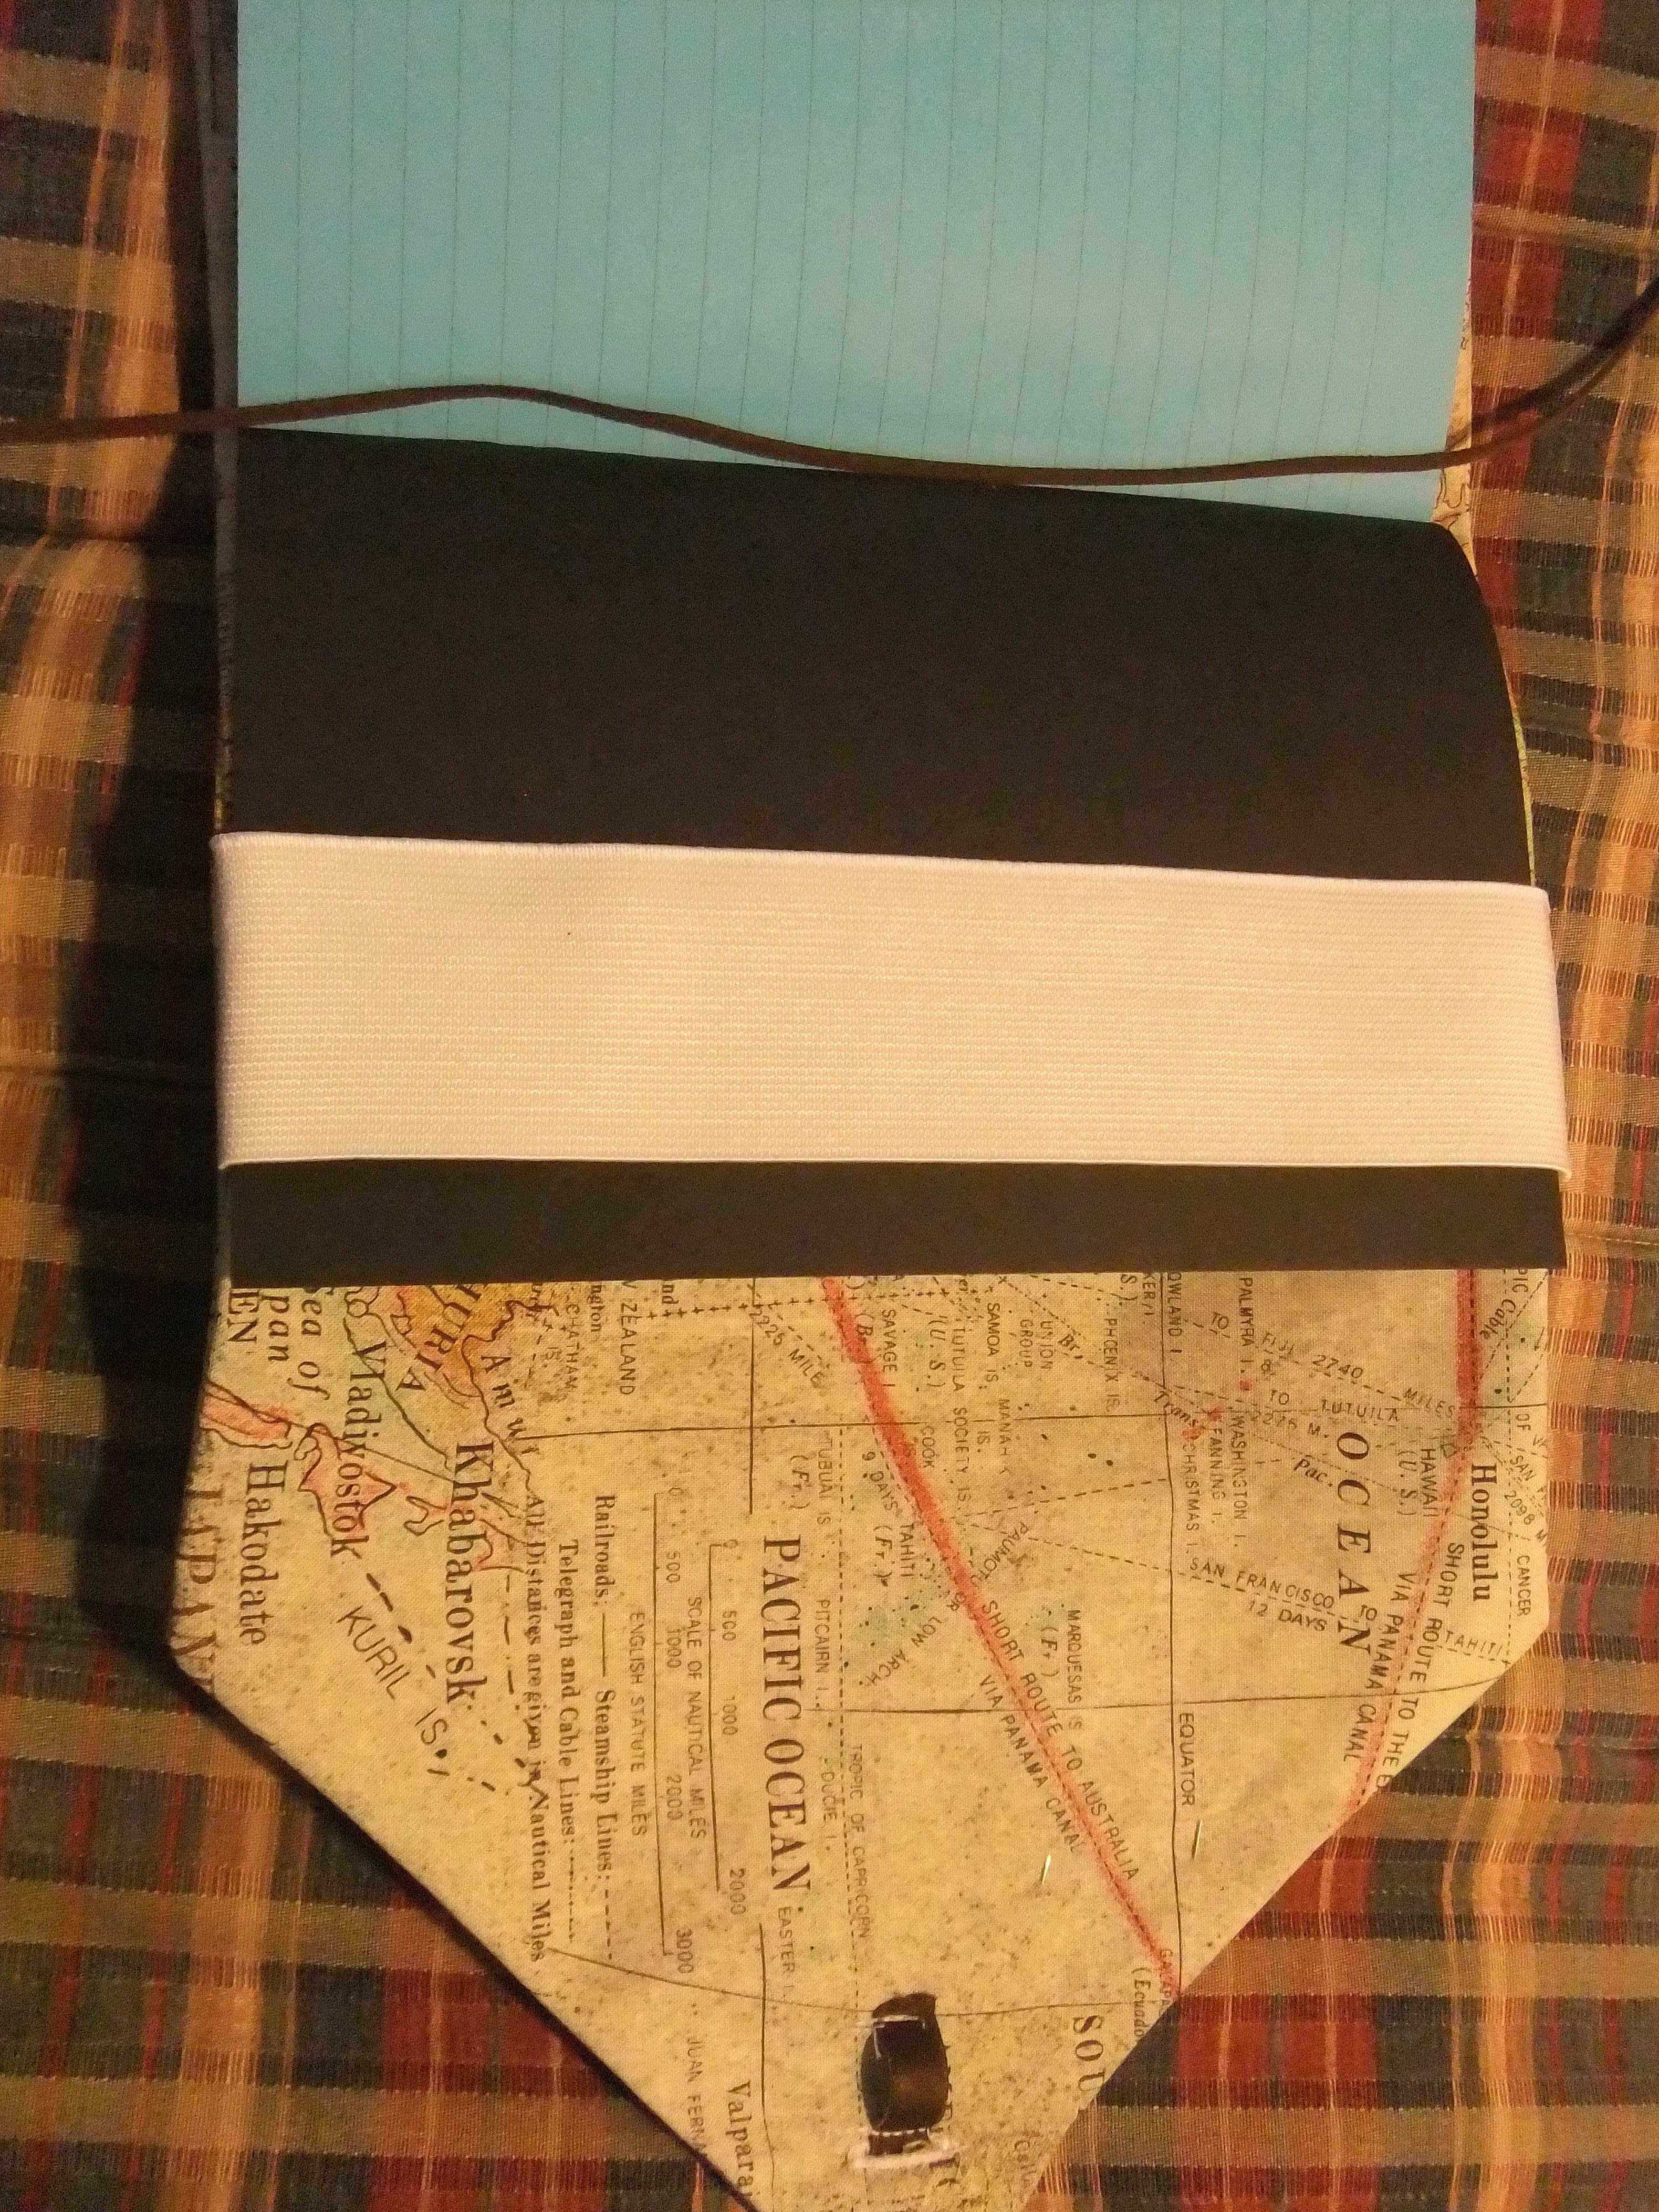
On the triangle edge I did a button stitch for the hole about 2.5cm from the triangle edge with sewing machine. But you can insert an eyelet or just cut a hole (but depends on whether your fabric may fray/tear).
Put the ribbon/elastic inside the hole. I sewed 1cm away from the hole on the inside of the cover with enough space to insert a pen (as you can see in reference photos)Wrap the elastic around the cover and cut to suitable length. Give yourself some excess incase.
I added some charms which hold the elastic in place when tucked back under the elastic
-
 Step 7
Done