


About
A faux metal piece made of recycled toilet paper rolls
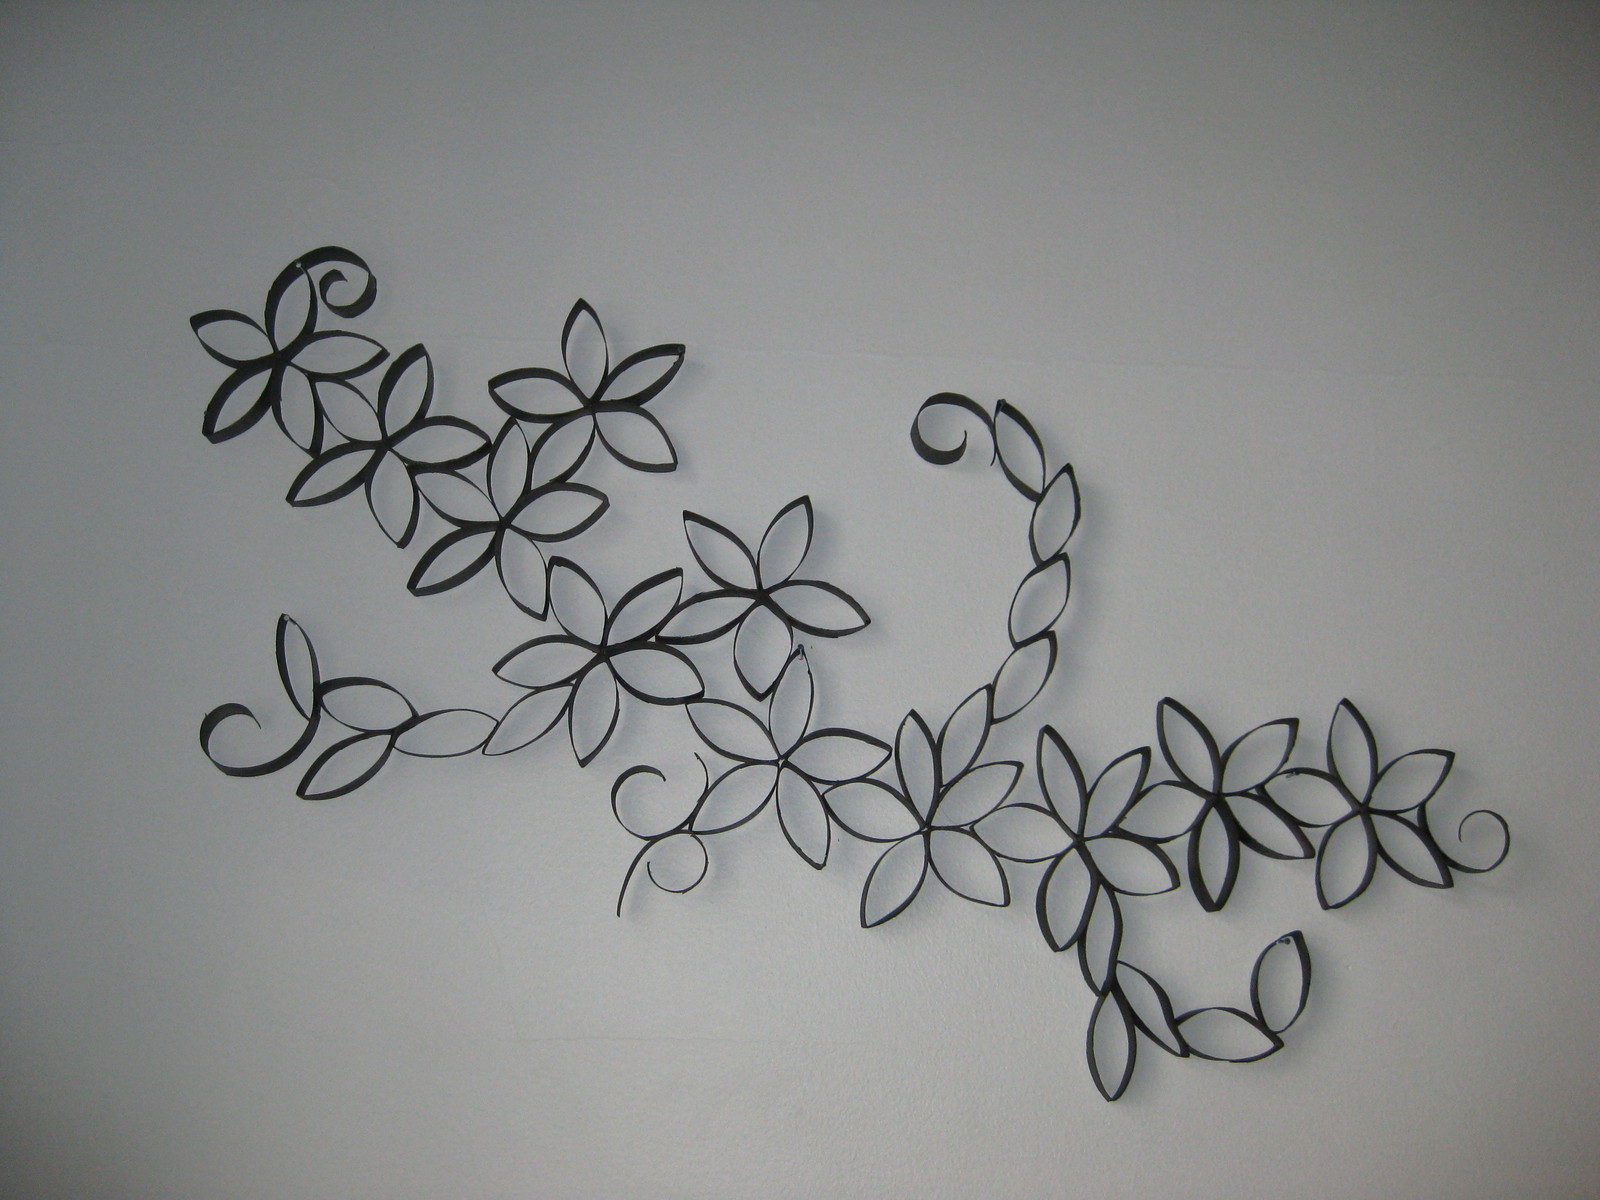
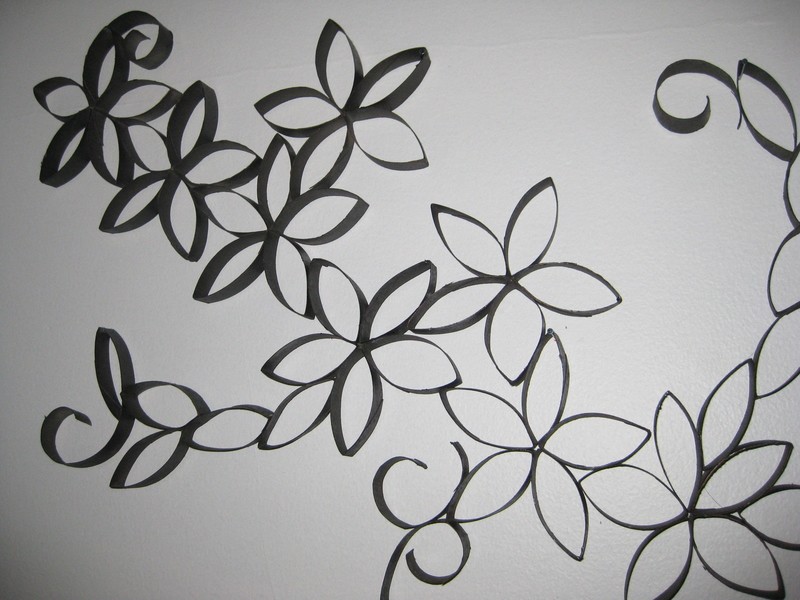
Well the walls in my room have been looking awfully bare recently, so I figured something needed to be done! Since my bank account is awfully bare as well, I decided to do something with what I had around the house. I've been saving toilet paper roles for a while with another project in mind, but this is what I settled on. Cheap, easy, and looks pretty good once it's finished! It has a nice faux metal/wrought iron-ish look to it, which makes it look way more impressive than it actually is :)
-
 Caden Kaslik favorited Toilet Paper Roll Wall Art
25 May 20:35
Caden Kaslik favorited Toilet Paper Roll Wall Art
25 May 20:35
-
 Galan T. favorited Toilet Paper Roll Wall Art
26 Sep 08:25
Galan T. favorited Toilet Paper Roll Wall Art
26 Sep 08:25
-
 Carrie Alice added Toilet Paper Roll Wall Art to Crafty
12 Aug 09:53
Carrie Alice added Toilet Paper Roll Wall Art to Crafty
12 Aug 09:53
-
 Carol S. favorited Toilet Paper Roll Wall Art
17 Jan 15:30
Carol S. favorited Toilet Paper Roll Wall Art
17 Jan 15:30
-
 Willa H. added Toilet Paper Roll Wall Art to To-Decor
14 Oct 16:47
Willa H. added Toilet Paper Roll Wall Art to To-Decor
14 Oct 16:47
-
 harleychick6815 added Toilet Paper Roll Wall Art to Favorites
06 Aug 14:13
harleychick6815 added Toilet Paper Roll Wall Art to Favorites
06 Aug 14:13
-
harleychick6815 favorited Toilet Paper Roll Wall Art
06 Aug 14:12
-
 Su Ann T. favorited Toilet Paper Roll Wall Art
20 Jun 04:55
Su Ann T. favorited Toilet Paper Roll Wall Art
20 Jun 04:55
-
 Deborah K. favorited Toilet Paper Roll Wall Art
02 Jun 00:55
Deborah K. favorited Toilet Paper Roll Wall Art
02 Jun 00:55
-
Karen W. added Toilet Paper Roll Wall Art to Crafts
29 May 07:21
You Will Need
-
 Step 1
Gather your supplies. For this project, I used plain old toilet paper roles, (the number you need depends on what design you decide on for your project, mine used around 13 I think...) glue, and a bushed metal appearance spray paint.
-
 Step 2
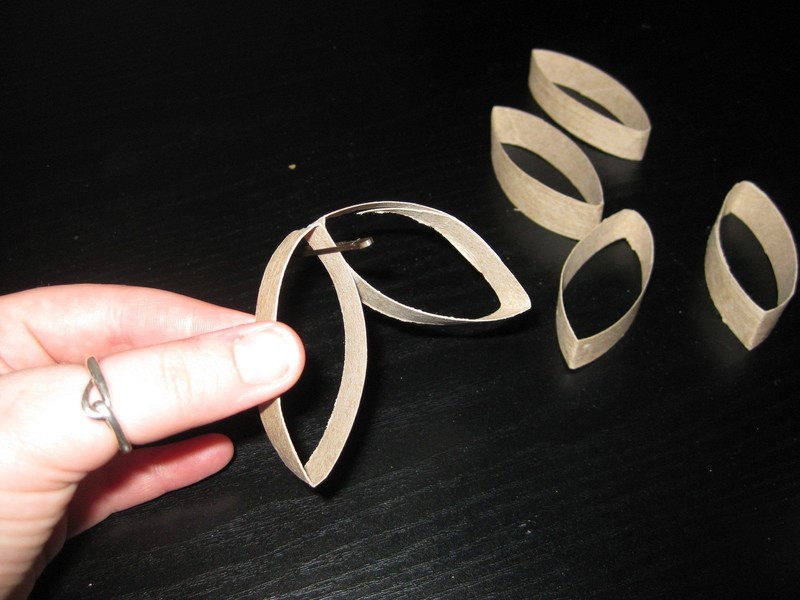
Crush your toilet paper roll in half, and cut it crossways. You could measure if you like, but I just guess-timated based on the look I was going for. For my project, each toilet paper role yielded 6 "petals".
-
 Step 3
Keep cutting until you've got tons of these, the basic unit for your piece.
<----------- -
 Step 4
Begin glueing the "petals" together. How you do that depends on what kind of pattern you're going for.
-
 Step 5
I found that using bobby pins (any type of clip would work too) to hold my pieces together was helpful. It gave the glue between each segment a chance to dry while I continued glueing...
-
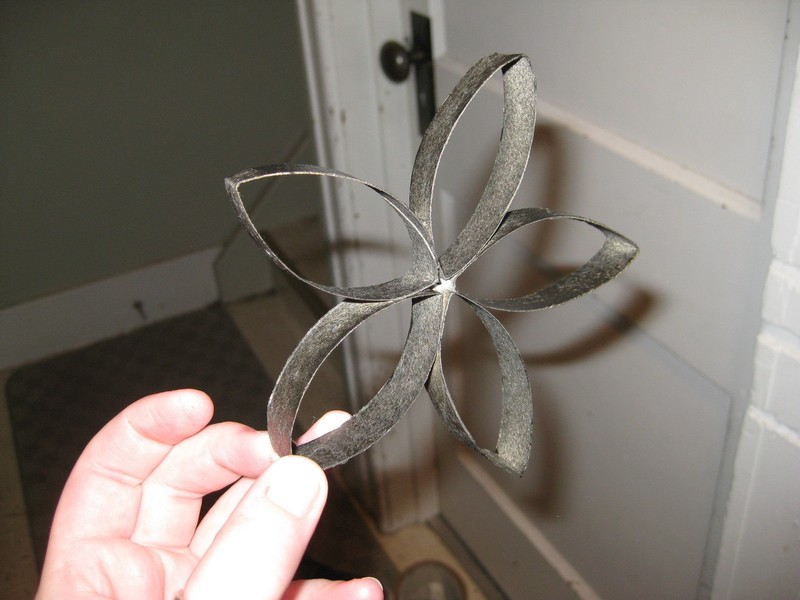
 Step 6
Since a 5 petal flower shape was the basis for my piece, this is what most of my base units ended up looking like. After I made a bunch, I glued them all together in a pattern I liked, and also added a few other viney/leafy looking segments here and there.
-
 Step 7
Once you're happy with how your piece looks, time for spray paint! (I used a metal finish paint, but any color will do!)
-
 Step 8
Wait until it dries, and you'll have something like this! (Please note I didn't spray paint every piece individually, this is just an example I did for the tutorial. When I actually made my wall art, I glued the entire thing together first, then painted it as a whole.)
-
 Step 9
You're done! Now hang your new wall art wherever your little heart pleases, stand back, and admire :)


CO + K User