
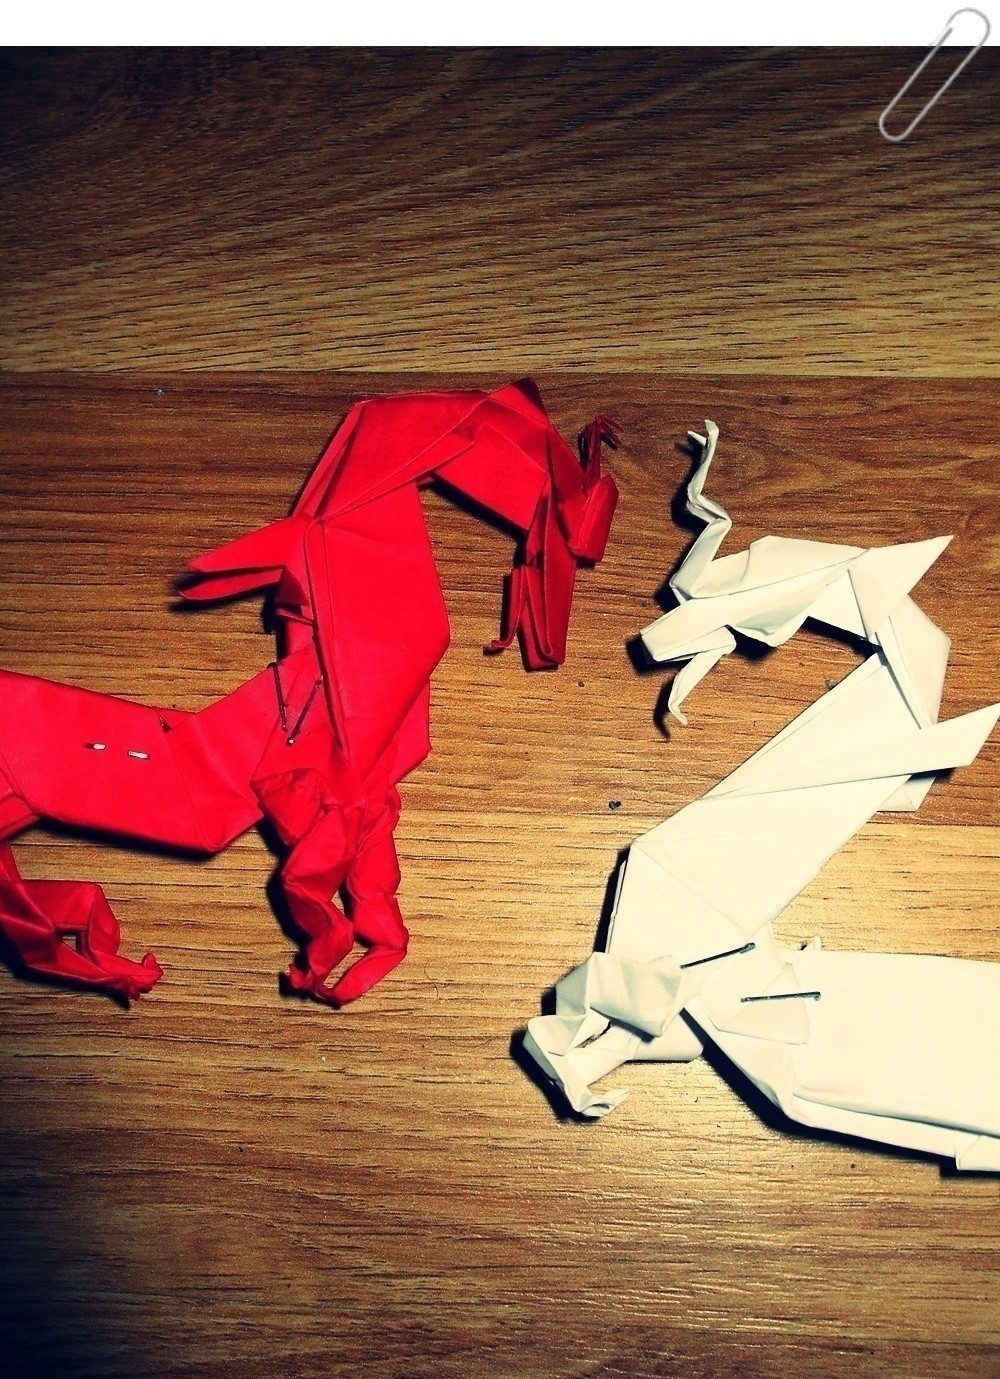


About
My favourite origami!
Yo might want to know that creating this dragon is very complicated and you have to be very careful to understand.
I was taught to make this dragon by my aunt and now I share it with you!
I hope you manage to get it well ...
Tags
-
 Kaiulani W. favorited The Red Dragon
27 Apr 09:29
Kaiulani W. favorited The Red Dragon
27 Apr 09:29
-
 Curie J. favorited The Red Dragon
27 Apr 03:26
Curie J. favorited The Red Dragon
27 Apr 03:26
-
 andreas.buzzing favorited The Red Dragon
26 Mar 20:55
andreas.buzzing favorited The Red Dragon
26 Mar 20:55
-
Alex Z. added The Red Dragon to Интересное
04 Oct 12:47
-
 Morgan favorited The Red Dragon
21 Jun 07:33
Morgan favorited The Red Dragon
21 Jun 07:33
-
Shrestha R. favorited The Red Dragon
18 Apr 11:28
-
 cynthia.rodriguez.3532507 favorited The Red Dragon
30 Mar 14:05
cynthia.rodriguez.3532507 favorited The Red Dragon
30 Mar 14:05
-
 selien s. favorited The Red Dragon
28 Mar 18:08
selien s. favorited The Red Dragon
28 Mar 18:08
-
 julie.sheridan.522 favorited The Red Dragon
07 Feb 21:54
julie.sheridan.522 favorited The Red Dragon
07 Feb 21:54
-
 pink favorited The Red Dragon
22 Nov 06:59
pink favorited The Red Dragon
22 Nov 06:59
You Will Need
-
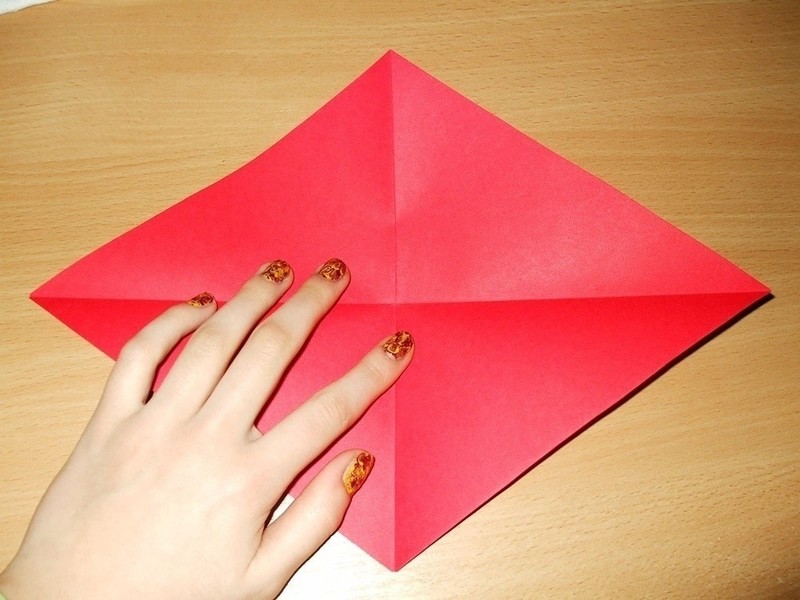
 Step 1
This is what you will need. You should really use origami paper because the model is very complicated and xerox paper won't do. I made my dragons with xerox paper but I made them a few times to get them right because the paper is to rough.
-
 Step 2
Fold your paper equally on the long side of the paper.
-
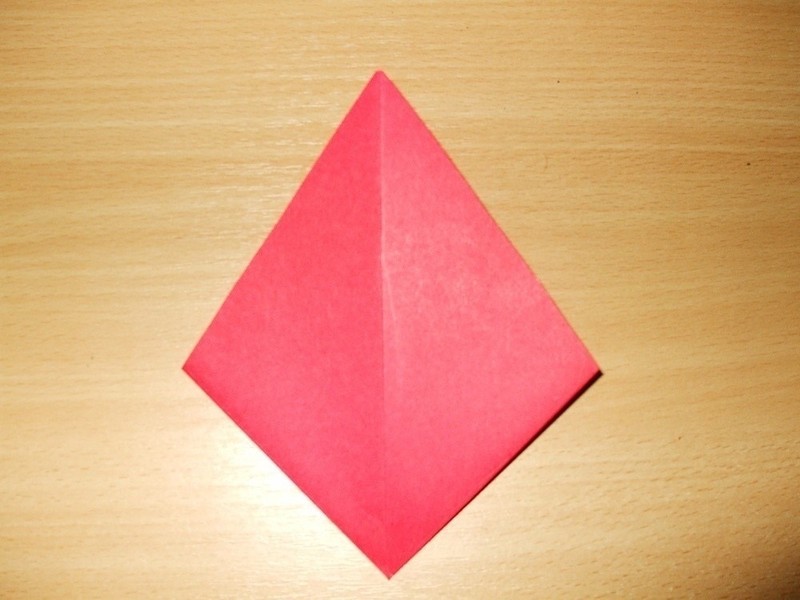
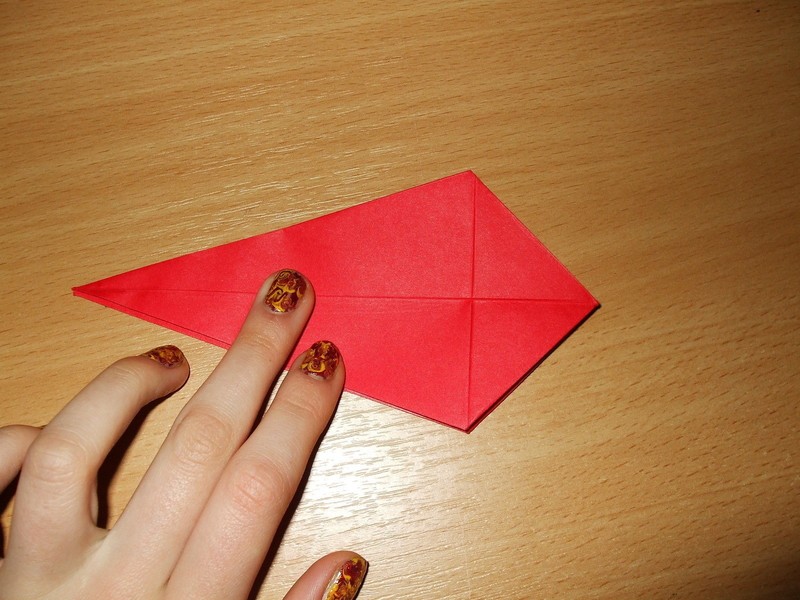
 Step 3
You get this.
Now you need to fold it again into half. -
 Step 4
You will get a rectangle which will be cut into half.
-
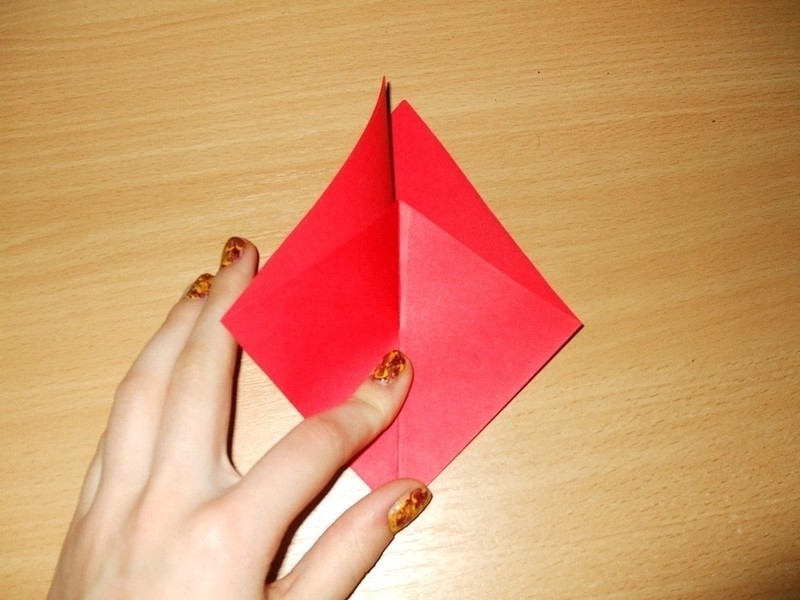
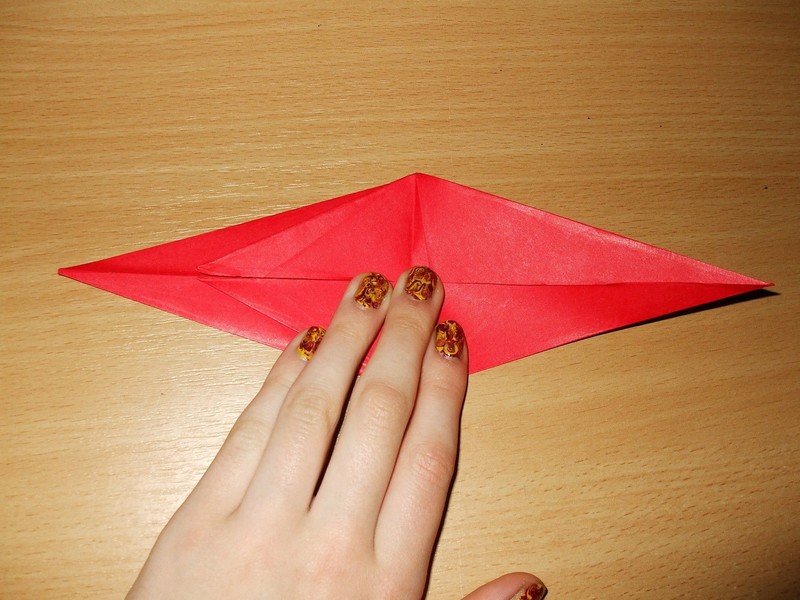
 Step 5
Now you have a triangle. It should look like this.
-
 Step 6
Open it.
-
 Step 7
You get a square folded across the diagonals.
-
 Step 8
Now you fold it into half exactly like in the picture.
-
 Step 9
You get this triangle.
Now you have to fold the corners inside the model, guiding yourself by the vertical center. -
 Step 10
You get this.
-
 Step 11
Turn over the sides on the front and on the back as well.
-
 Step 12
This is how your model should look like.
-
 Step 13
Now fold the sides according to the vertical center.
-
 Step 14
Like this.
-
 Step 15
Now fold the triangle that has been left according to the upper sides.
-
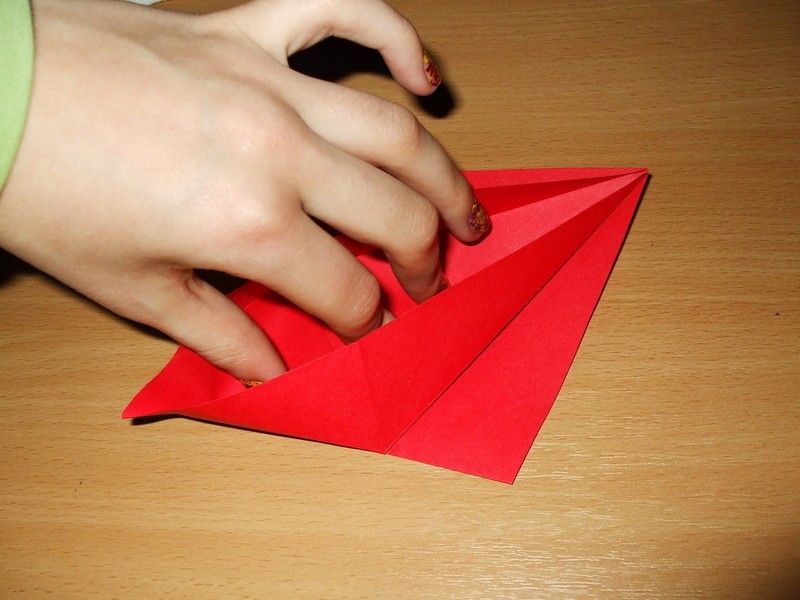
 Step 16
Open the 3 folded parts and get this.
-
 Step 17
Now you pull that thing down like in the picture.
-
 Step 18
Now your model looks like this.
-
 Step 19
Do the steps 13-18 for the back as well and get this.
-
 Step 20
Now fold the right side like this. Do this on both sides.
-
 Step 21
Now grab the upper side and fold it over according to the center.
Do this on both sides.
-
 Step 22
You get this.
-
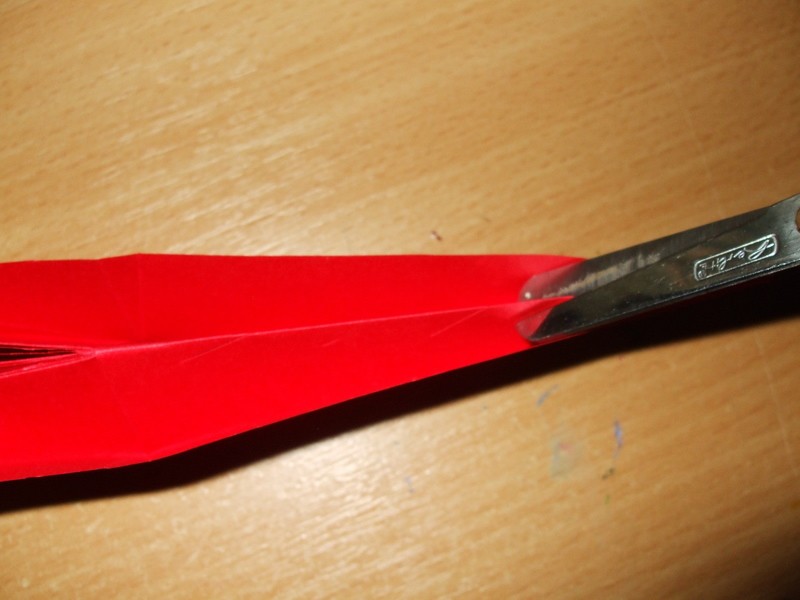
 Step 23
Now you cut down the right part like in the picture.
-
 Step 24
It should look like this.
-
 Step 25
Now grab the left side and pull it over. Do this on both sides.
-
 Step 26
This is how it should look.
-
 Step 27
Now you'll want to fold both parts according to the vertical center. Do this on both sides.
-
 Step 28
Now cut two little diagonal openings on both folded sides on this part.
-
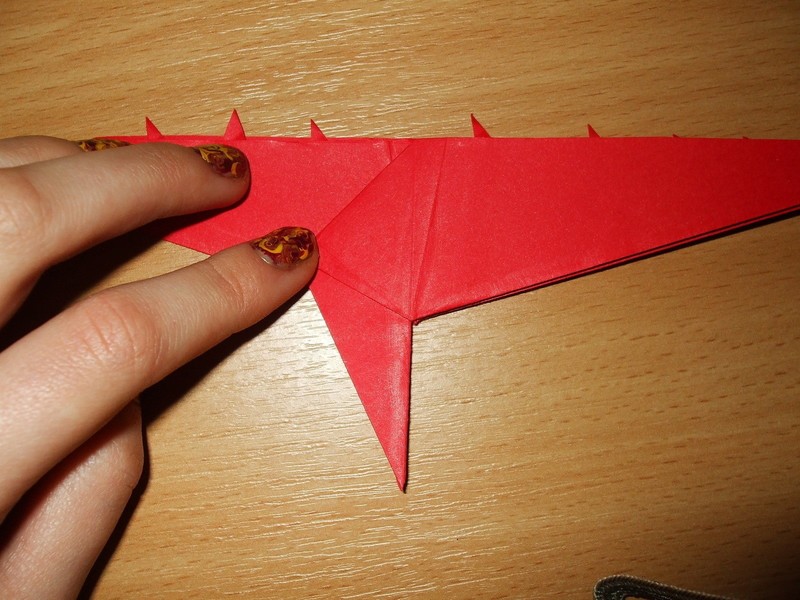
 Step 29
Here is a closer look to get it right.
-
 Step 30
Fold up the upper cuts than turn the model.
-
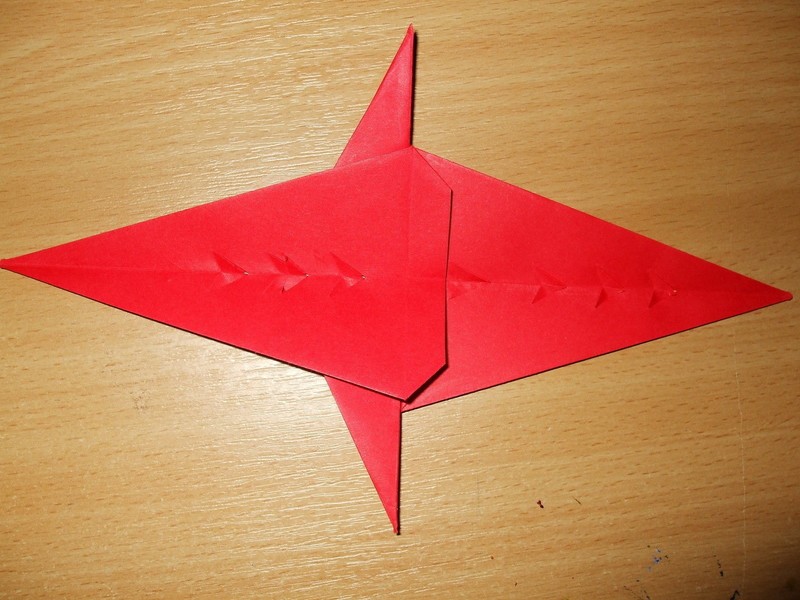
 Step 31
Make two little cuts on this side as well like in the picture than fold in half the entire model.
-
 Step 32
You should have this.
-
 Step 33
Back fold half of the model and you form the neck of the dragon.
-
 Step 34
Back fold again the part on top of the thorn.
-
 Step 35
Reverse fold in that area.
-
 Step 36
With a reverse fold you get the feet of the dragon.
Do this on both sides.
-
 Step 37
Fold the feet in half.
-
 Step 38
Back fold the feet and the beak.
-
 Step 39
Reverse fold the feet.
-
 Step 40
Back fold feet.
-
 Step 41
And finally, fold up the ends making the talon.
The feet are ready.
-
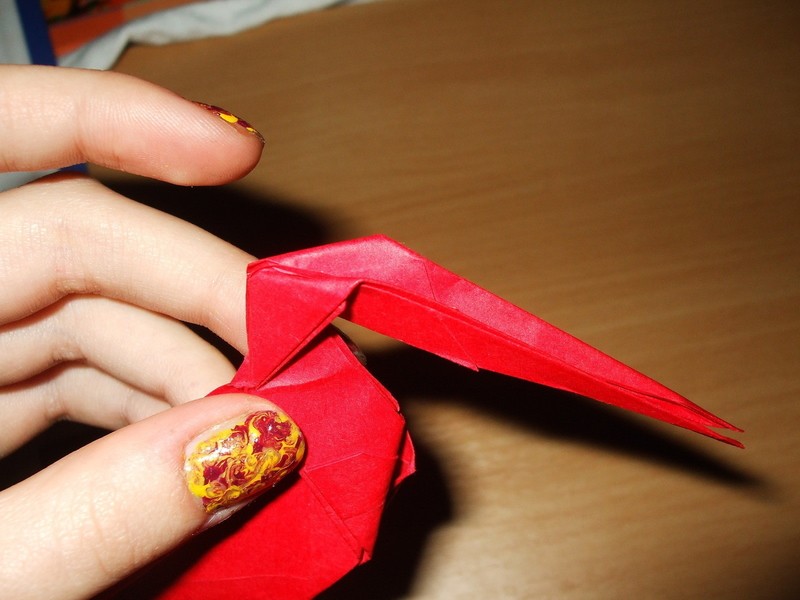
 Step 42
Your beak should look something like this. Find the cuts you previously made and try to pull them out.
These are smaller thorns.
-
 Step 43
After you found the thorns, you have to pull out the upper part of the beak just like in the picture.
-
 Step 44
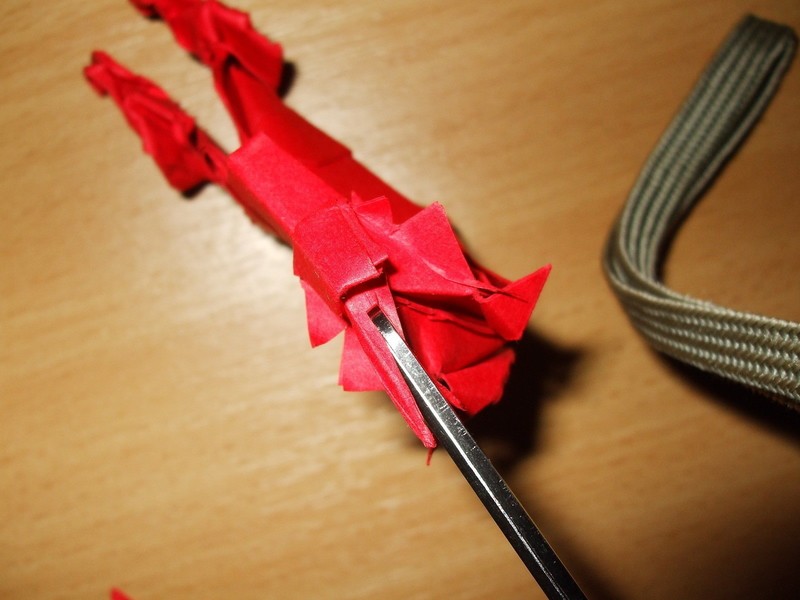
Cut it in making a thorn on both sides.
-
 Step 45
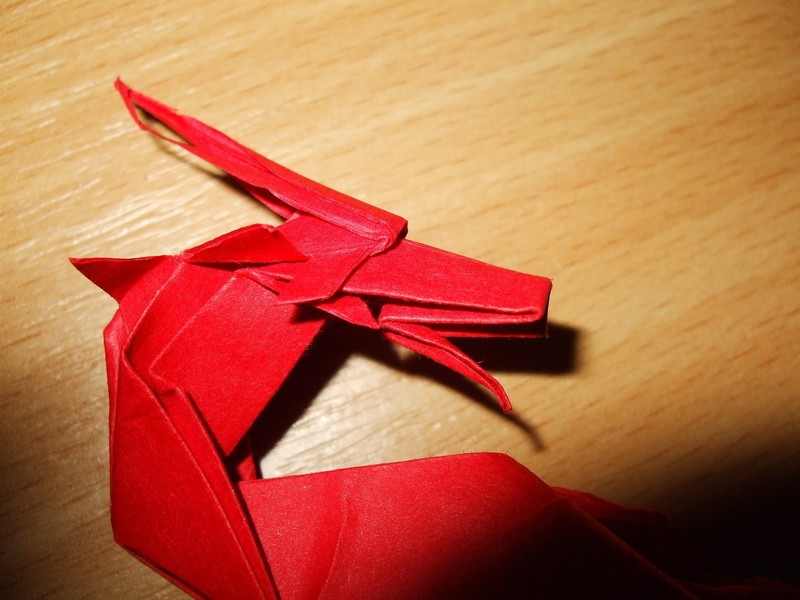
This is how the head should look at the moment.
-
 Step 46
Now grab the upper part of the beak and fold it back.
-
 Step 47
Back fold the beak.
-
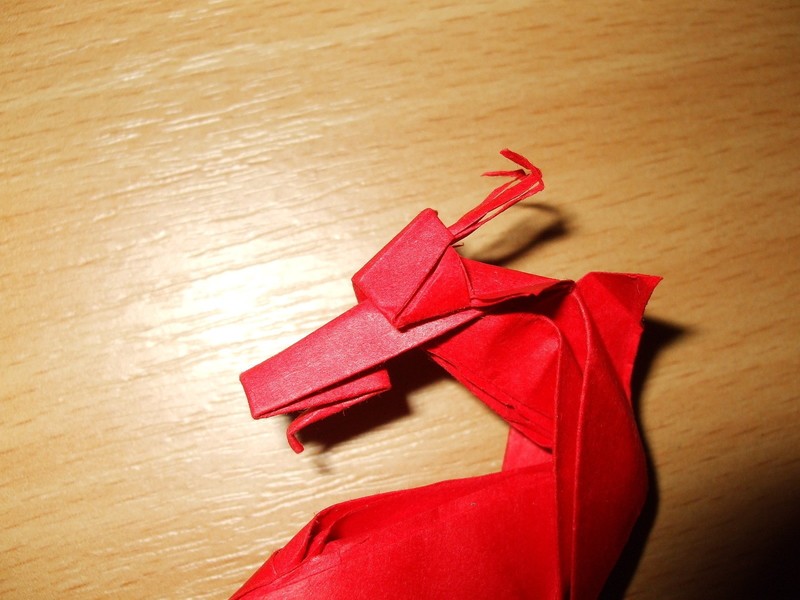
 Step 48
Revers fold the beak.
This is the mouth.
-
 Step 49
Finally, fold down the end of the beak.
This is the tongue.
-
 Step 50
Now, with a back fold and a reverse fold you make the ears.
-
 Step 51
Cut in between them and part them.
-
 Step 52
Now fold up the ends.
-
 Step 53
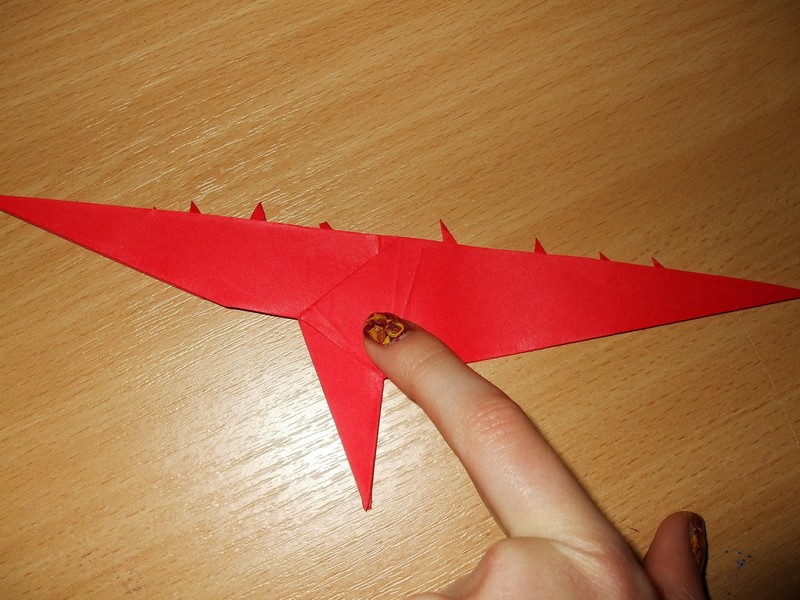
The first part of your dragon is ready!
-
 Step 54
Use the other A4 paper and repeat steps 2-26.
Take the right part and fold it over to the left.
-
 Step 55
It should look like this.
-
 Step 56
Now fold the entire model into half.
-
 Step 57
Hold the model like this.
-
 Step 58
Cut it in 4 spots.
-
 Step 59
Now fold them up making some little thorns.
-
 Step 60
Take the right part and turn it on the left side.
Repeat steps 57-59.
-
 Step 61
Form the right side like this and fold it into half.
-
 Step 62
It should look like this.
These are going to be the feet.
-
 Step 63
Now open the model.
-
 Step 64
Fold in the sides according to the feet.
-
 Step 65
Now fold the model into half.
-
 Step 66
Cut down the right end.
-
 Step 67
The the other end and cut it in on the sides. After that, pull them out.
-
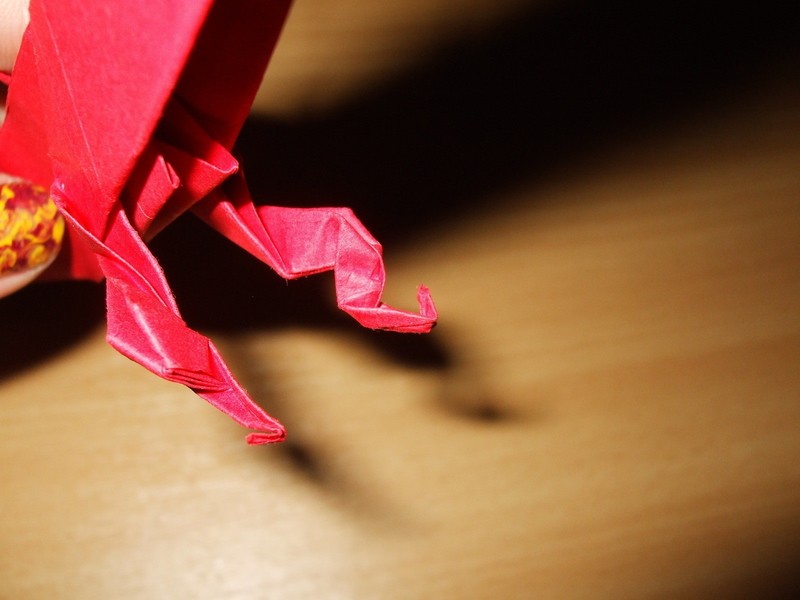
 Step 68
You have here the tale of your dragon ;)
-
 Step 69
open the feet and cut them like in the picture.
After that fold them over.
-
 Step 70
Reverse fold the feet.
-
 Step 71
Back fold.
-
 Step 72
Reverse fold.
-
 Step 73
And finally, fold up the ends for the talon.
-
 Step 74
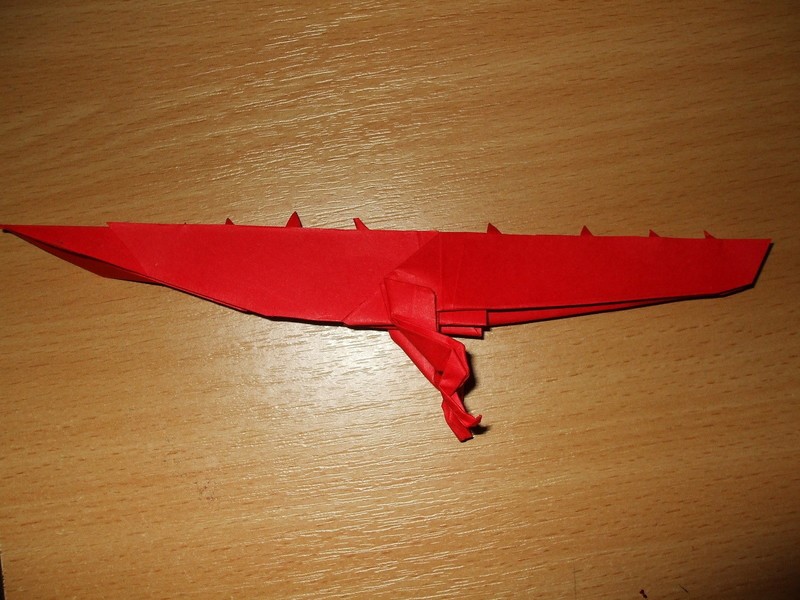
The second part of the dragon is ready!
-
 Step 75
Now put the two parts together.
-
 Step 76
Use the Stapling Machine to make them stay that way and model your dragon the way you like.
-
 Step 77
Ready!


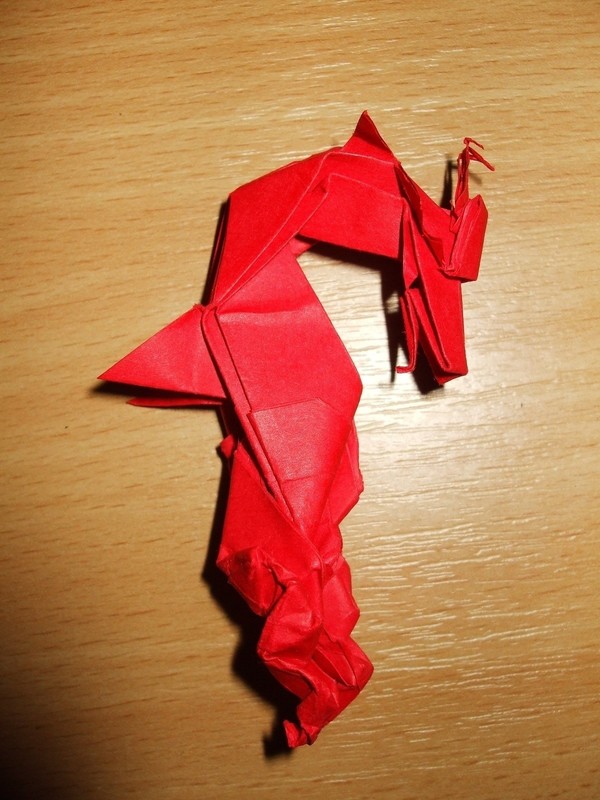


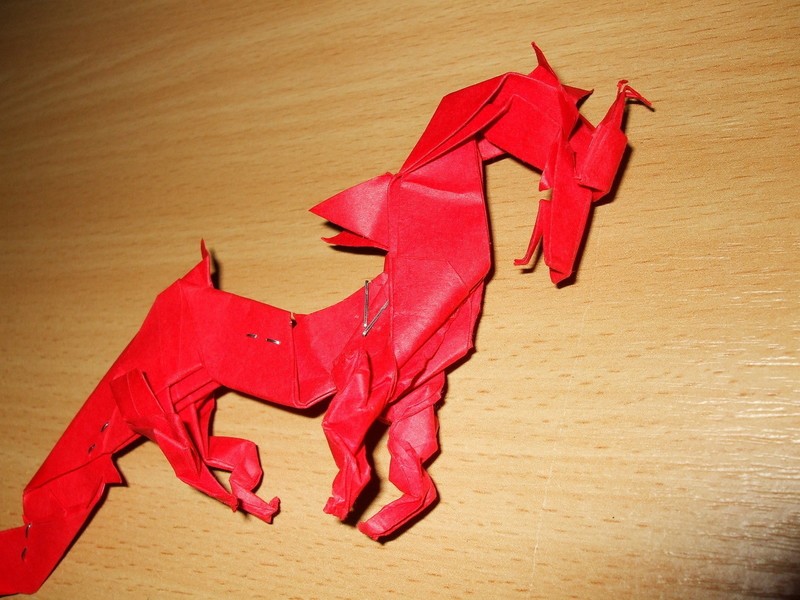

Good luck!
*are steps 2-4 just so you end up with a square? Could that be avoided by starting with a square peice of paper?
*@23, do you cut that off completely?
Thanks.
I wonder who sat down and came up with this first XD