The Alphabet
Extract from Mind-Blowing Modular Origami • By Byriah Loper • Published by Tuttle Publishing

About
Mind-Blowing Modular Origami
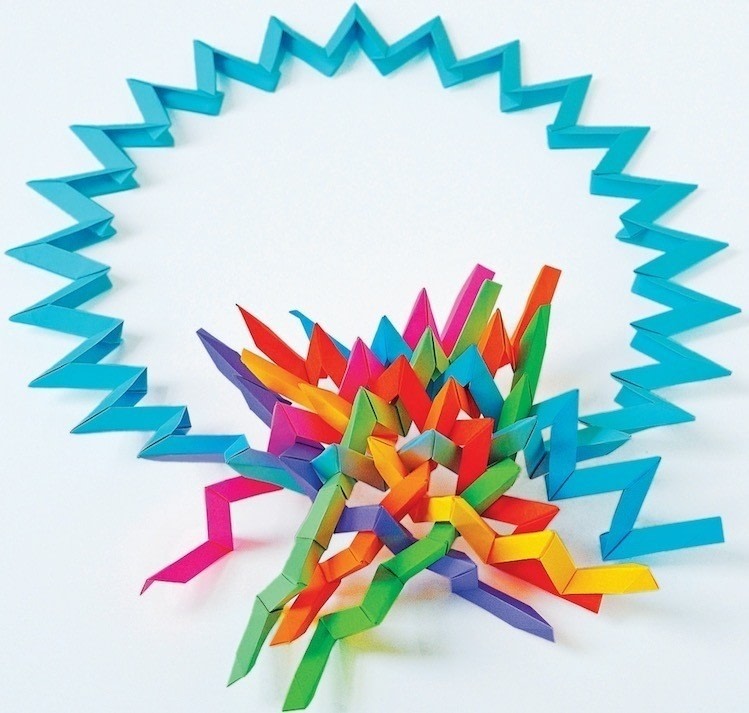
This is the single most time-consuming project in this book; when it was first constructed it was the largest Wire Frame modular ever made. Its polar dihedral symmetry distinguishes it from all other models in this book, as it is not based on a regular polyhedron. The name comes from its connection to planar modulars, where each plane is a assigned a letter of the alphabet. Here, the twenty-six frames represent each of the letters of the alphabet.
This model has only one paper proportion: 1:2.41. If using the template, start with relatively small squares. Rectangles ripped from 3.5" squares make a ~10" model.
-
 Crash Blackburn added The Alphabet to Paper insanity
09 Aug 21:34
Crash Blackburn added The Alphabet to Paper insanity
09 Aug 21:34
-
Mikayla B. favorited The Alphabet
08 Sep 02:40
-
 Gibran Isaacs favorited The Alphabet
16 Jun 06:13
Gibran Isaacs favorited The Alphabet
16 Jun 06:13
-
Gibran Isaacs favorited The Alphabet
16 Jun 06:13
-
 Kai' K. favorited The Alphabet
13 Jan 23:23
Kai' K. favorited The Alphabet
13 Jan 23:23
-
 jabbathemut added The Alphabet to paper
16 Dec 15:43
jabbathemut added The Alphabet to paper
16 Dec 15:43
-
Suzi T. favorited The Alphabet
11 Dec 20:54
-
 amalia.syamra favorited The Alphabet
01 Dec 08:04
amalia.syamra favorited The Alphabet
01 Dec 08:04
-
amalia.syamra commented on The Alphabet
01 Dec 08:03
-
Alissa B. favorited The Alphabet
23 Nov 18:33
You Will Need
-
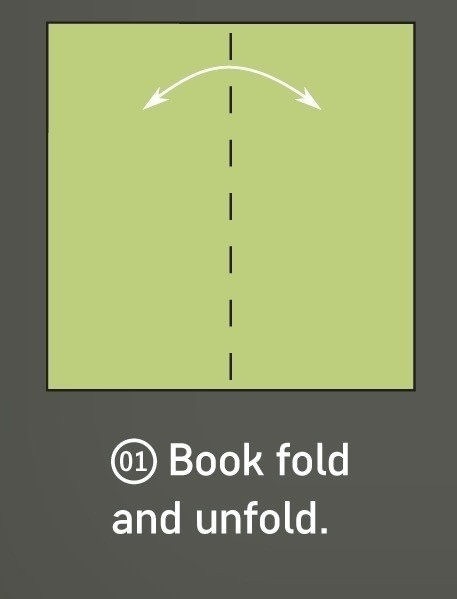
 Step 1
Making and Using the Template
Book fold and unfold. -
 Step 2
Fold in half diagonally where shown; unfold.
-
 Step 3
Fold in half between the circled areas where shown; unfold.
-
 Step 4
Fold the right edge to join the intersection of the two previous folds; unfold.
-
 Step 5
Fold the right edge to join the previous fold; unfold.
-
 Step 6
Fold the left edge to join the previous fold.
-
 Step 7
The completed template.
-
 Step 8
Slide a second square into the template, so that the circled lines are flush with each other.
-
 Step 9
Fold the square over along the edge of the template.
-
 Step 10
Pull the square sheet out and set the template aside.
-
 Step 11
Refold the crease.
-
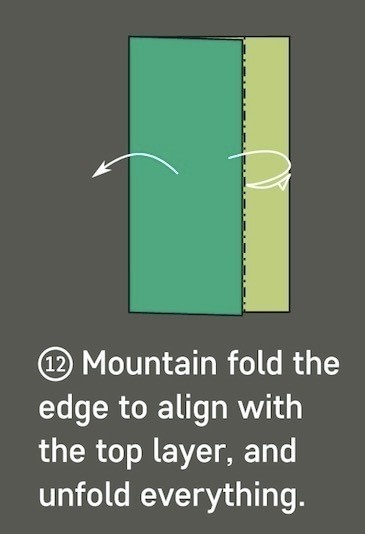
 Step 12
Mountain fold the edge to align with the top layer, and unfold everything.
-
 Step 13
Rip along both lines. Keep the two equal-sized rectangles; discard the small strip on the right. Set one rectangle aside and focus on the other.
-
 Step 14
Unit Preparation
The crimp formed using the given folding method makes a 75-degree interior angle. Such units are used to make stellated polygons. The actual angle for perfectly flat polygonal frames as used here should be roughly 74.4 degrees. Using the formula (360/n+a), where n is the number of sides on the given polygon and a is the interior angle of each vertex, you can find the necessary crimp angle for any star polygon. The 75-degree angle lets the units have a slightly wider dihedral angle than perfectly angled crimps would allow.
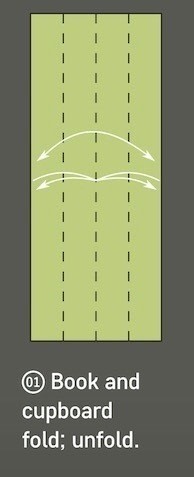
Book and cupboard fold; unfold. -
 Step 15
Pivoting along the center crease, join the circled areas, folding where shown.
-
 Step 16
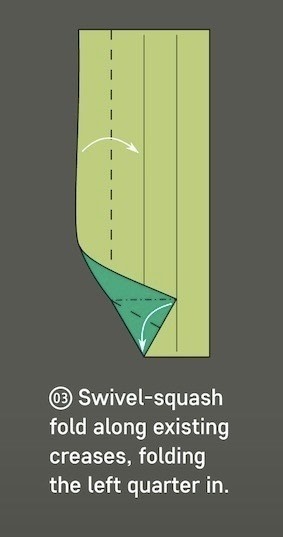
Swivel-squash fold along existing creases, folding the left quarter in.
-
 Step 17
The result. Rotate 180 degrees.
-
 Step 18
Repeat Steps 2–3 on the other side of the paper.
-
 Step 19
Tuck the locks under the top layer.
-
 Step 20
Join the circled edges, and unfold.
-
 Step 21
Fold the unit in half horizontally; unfold.
-
 Step 22
Join the circled edges and unfold.
-
 Step 23
Fold up where shown, along the bottom of the crease made in the previous step; unfold.
-
 Step 24
Fold an angle bisector of the previous two steps.
-
 Step 25
Pivoting along the horizontal center crease, join the left edge to the edge of the angle bisector on the right, folding where shown; unfold.
-
 Step 26
Fold between the circled areas; unfold.
-
 Step 27
Fold in half and unfold. Then flip over.
-
 Step 28
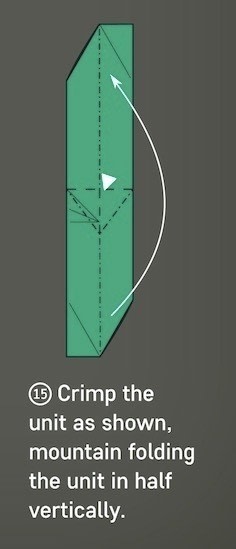
Crimp the unit as shown, mountain folding the unit in half vertically.
-
 Step 29
The completed unit. Side view.
Steps 9–11 are used to make a 75-degree crimp angle. If you feel comfortable doing so, you can omit these steps and approximate the fold made in Step 12 to save time. -
 Step 30
Assembly
Before assembling the units, flatten the dihedral angle around the vertices of the units you are assembling. Then slide the tabs around and into the pockets. Two units will join at every vertex. -
 Step 31
Finally, push in the sides of the units where shown, recreasing the center dihedral angle.
-
 Step 32
Two units joined. Join the others in the same fashion.
-
 Step 33
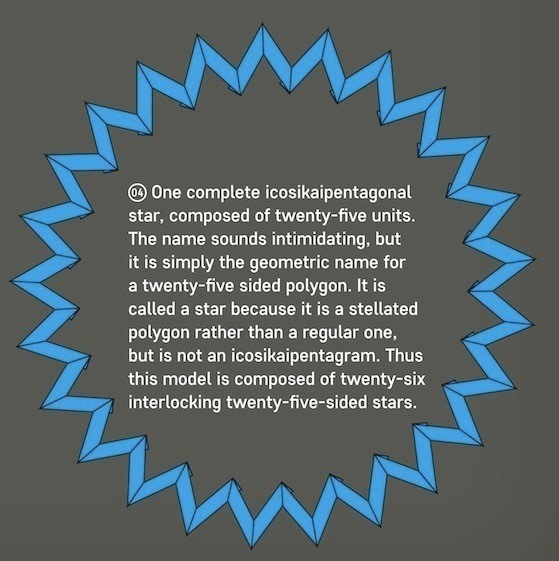
One complete icosikaipentagonal star, composed of twenty-five units. The name sounds intimidating, but it is simply the geometric name for a twenty-five sided polygon. It is called a star because it is a stellated polygon rather than a regular one, but is not an icosikaipentagram. Thus this model is composed of twenty-six interlocking twenty-five-sided stars.
-
 Step 34
Weaving Instructions
This model is very different from all others in this book. First, it is critical to recognize that it has polar dihedral symmetry; there will be a large “hole” on the top and bottom of the model. There is no regular polyhedron on which this compound is based; therefore the assembly will rely on axial weaving. -
 Step 35
Basically, there are twenty-five polygonal “bands” that weave around each other to form the large “holes” on either side of the model. The twenty-sixth frame wraps around the center of the model, and is the only frame that has no interaction with the poles. In the photos below, the twenty-sixth frame is the light-blue band that is fully completed, and the pieces of other frames are parts of the center.
-
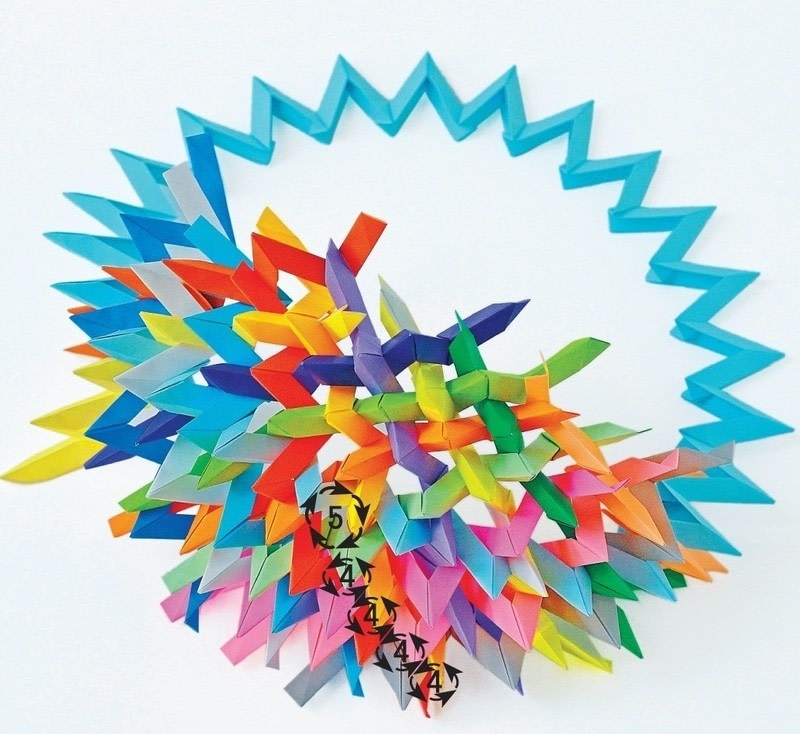
 Step 36
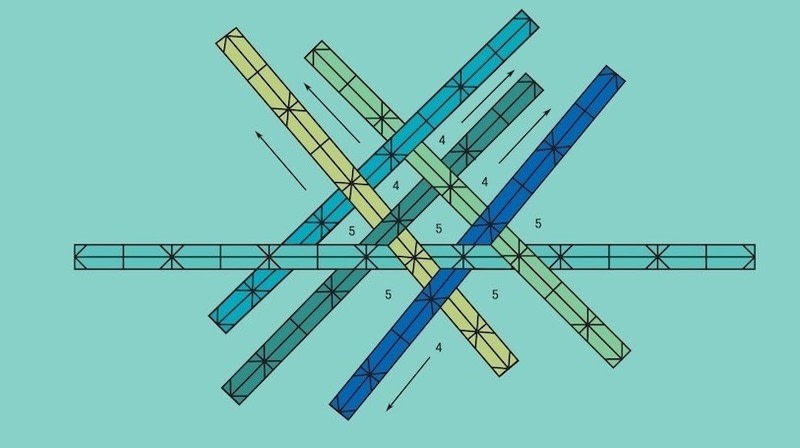
The weaving of this model is actually simpler than you might think, once the pattern is understood. The schematic above shows the center light-blue frame—represented by the light-blue segment—and its equatorial relationship with other frames. There will be ten four-fold axes along each “file” of the model.
-
 Step 37
The actual weaving between the frames should be obvious—each vertex where two units join should weave over the “valley” crimp of another unit.
-
 Step 38
Along each “file” of the model, starting at the center twenty-sixth frame, there will be one five-fold axis, followed by ten four-fold axes, followed by one three-fold axis near one of the poles, before the frame bends back down into the model as indicated by the arrow on the photo at the top left of the facing page.
-
 Step 39
This pattern is repeated along each “file” around the entire model. All frames, with the exception of the twenty-sixth center frame, are hyperboloidal.
-
 Step 40
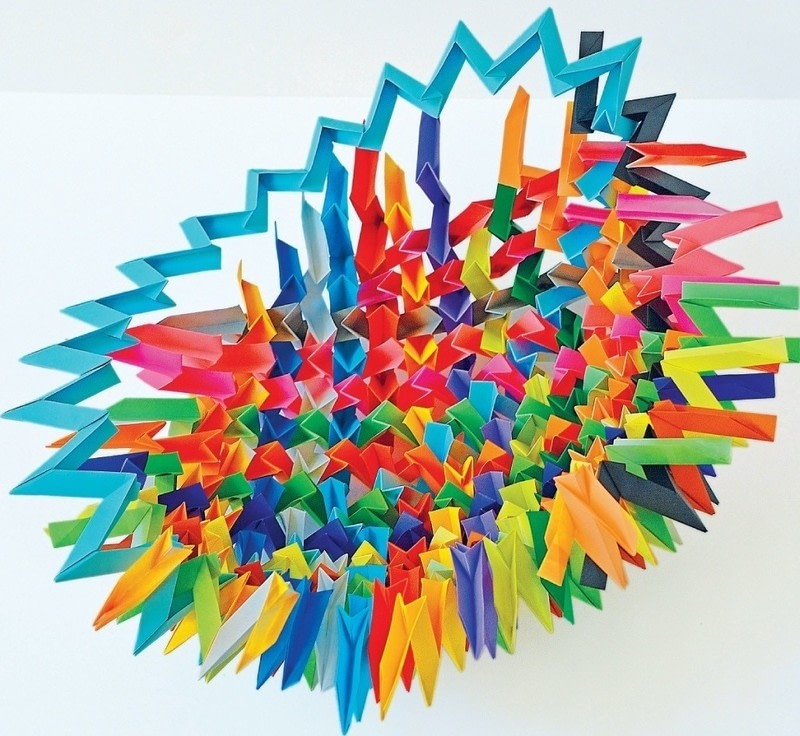
The number of assembled units in each picture is not specified since units can be added randomly, as needed. Also, the nature of the crimped units should make frameholders unnecessary, even in the earlier stages. The below right and top left facing page photos show the first complete pole forming.
-
 Step 41
As the model gets closer to completion, its weight and shape will necessitate that it be tipped onto one of its poles (the large open holes with twenty-five-fold axes on opposite sides of the model).
-
 Step 42
As the frames approach completion around the equatorial regions, the light-blue twenty-sixth frame might deform a little because the other frames still aren’t in their final positions.
-
 Step 43
Push down gently on the poles to help alleviate this problem. Additionally, note that along each “file,” the chirality of every axis is opposite to the ones on either side of it.
-
 Step 44
Further, this model has an in-and-out weaving relationship between any two frames, which is helpful if you need to double-check the weaving.
-
 Step 45
If you manage to complete it, congratulate yourself; this is the largest and most time-consuming model in this book, which is why I have left it for last.


Comments