


About
Yarr! Every pirate needs a parrot to complete the look >:D
My mum is going to a pirate themed halloween party this year so I decided to make her a parrot as part of her costume! He has safety pins on his feet so he can sit on a shoulder, hat or arm without falling off. I've never made any large felt designs before so I'm happy with how it came out :) I used this bird pattern http://www.spoolsewing.com/blog/wp-content/uploads/2008/06/birdpattern1-1.pdf by Michael Fulkerson to get the body shape right, then modified it and embellished a lot!
Tags
-
 Key West Witch favorited Stuffed Parrot
01 Jul 00:43
Key West Witch favorited Stuffed Parrot
01 Jul 00:43
-
 Ms Dorito added Stuffed Parrot to Plushie
12 Jun 17:21
Ms Dorito added Stuffed Parrot to Plushie
12 Jun 17:21
-
 michelle m. favorited Stuffed Parrot
19 Jan 18:31
michelle m. favorited Stuffed Parrot
19 Jan 18:31
-
Anne T. favorited Stuffed Parrot
18 Mar 08:05
-
 Sharon H. favorited Stuffed Parrot
23 Jan 18:08
Sharon H. favorited Stuffed Parrot
23 Jan 18:08
-
 Annie G. favorited Stuffed Parrot
09 Aug 15:32
Annie G. favorited Stuffed Parrot
09 Aug 15:32
-
Liza W. added Stuffed Parrot to Plushie Ideas
14 Dec 15:15
-
 Neko-San K. favorited Stuffed Parrot
31 May 20:31
Neko-San K. favorited Stuffed Parrot
31 May 20:31
-
 Britta J. entered their project Stuffed Parrot to Blueberry Cove Beads
16 Jun 18:16
Britta J. entered their project Stuffed Parrot to Blueberry Cove Beads
16 Jun 18:16
-
Britta J. entered their project Stuffed Parrot to Vegan Cuts
16 Jul 09:25
-
 Step 1
Print the bird pattern from the above link and trace onto paper. We need to modify the beak because the pattern is for a songbird at the moment. Enlarge it as shown to get a nice parrot beak shape. Follow the instructions on your printout to make the basic bird base. Leave the tail open for now.
-
 Step 2
Working on the bird's back, insert a long feather between the tail pieces of felt and a couple of small ones of the same colour. Now sew up the tail so that the feathers are held secure. position three or four more feathers of a new colour on top and sew them on, making sure they overlap the first row enough to hide the pointy ends. Do the same again so you have three lots of feathers.
-
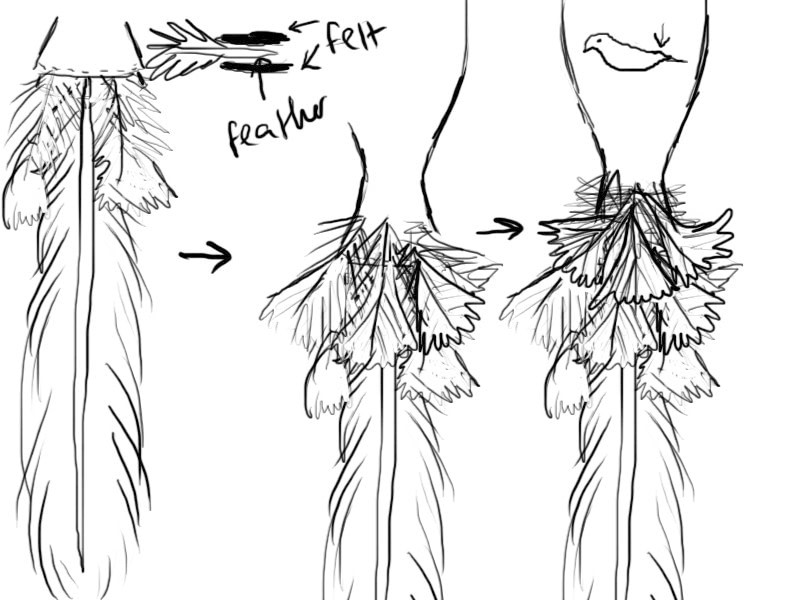
 Step 3
Now we need to hide this rough area where the feathers end. Go back to your paper pattern and trace the 'waist' area again. Redesign it as shown and trace onto felt. Cut out. Cut the top bit off as in the picture so you have two pieces of felt.
-
 Step 4
Embellish the big peice of felt with some embroidery to make it look like a feather. Backstitch a line down each outy bit and do a simple 'in the top, out the bottom' stitch around the outside to strengthen it against fraying. Pin into position on the back of your bird, covering the pointy ends of the feathers, and sew on.
-
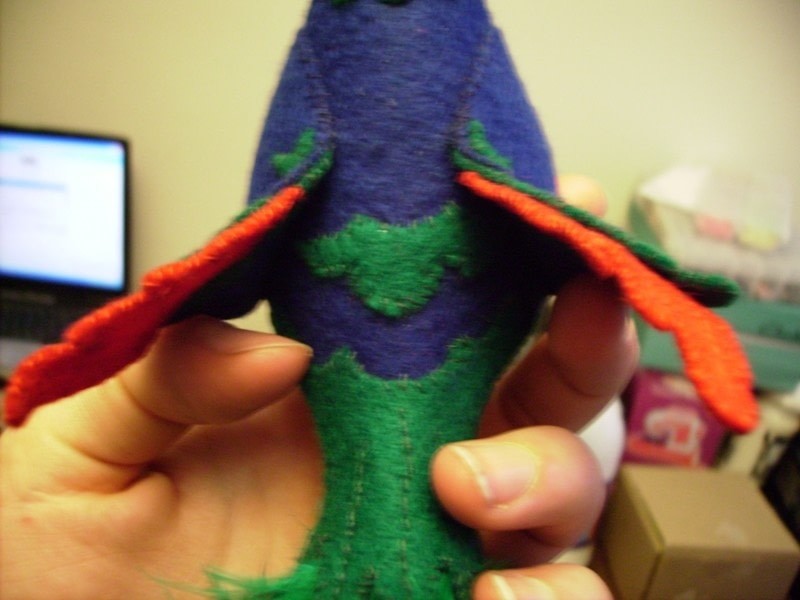
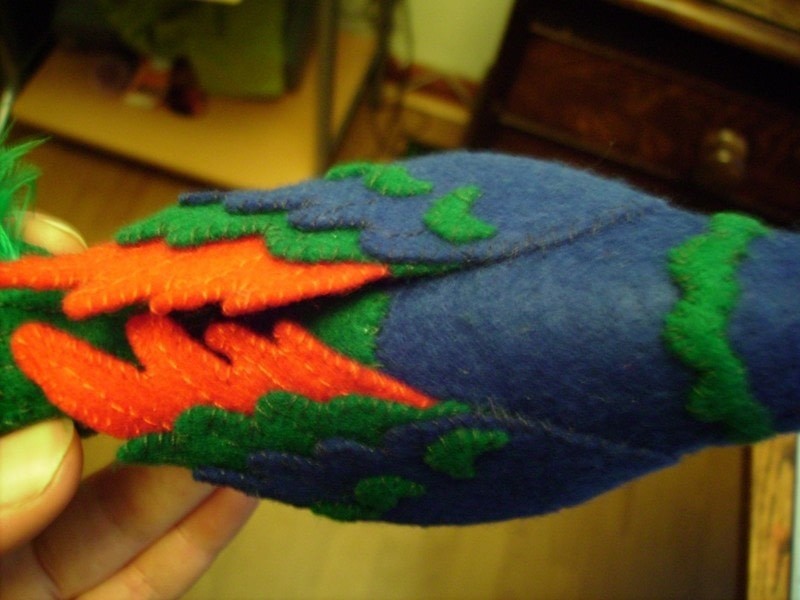
 Step 5
Here's a photo of that area showing the stitch detail and the overlap to cover the real feathers. (Ignore the red wings on the left, they don't exist yet!)
-
 Step 6
Here's another photo of that area, showing the extra little felt bit above the main bit. (Ignore the wings!)
-
 Step 7
Now flip your bird over and do the same again on his tummy as in step 2. This time I only added two more rows of feathers, but it's up to you.
-
 Step 8
Once again, this unsightly area must be covered! Go back to your original paper pattern and retrace the waist area. Redesign as shown and cut out in the tummy colour felt.
-
 Step 9
Again, embellish the felt with stitching and then sew into position to cover the pointy feather ends.
-
 Step 10
This photo shows the detail on the tummy felt piece which hides the ugly feather points.
-
 Step 11
Your parrot should now look something like this. However, notice he is looking sad? He would like a pair of wings please! Okeydokey, next step...
-
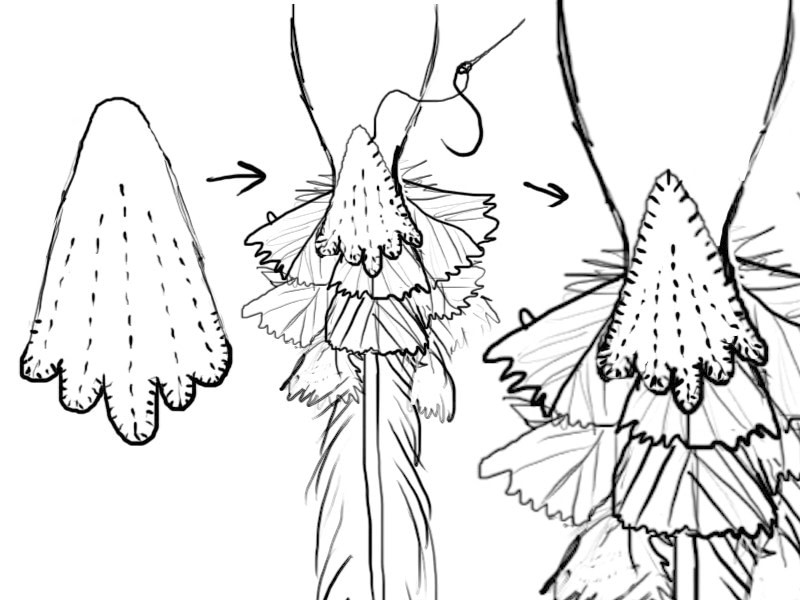
 Step 12
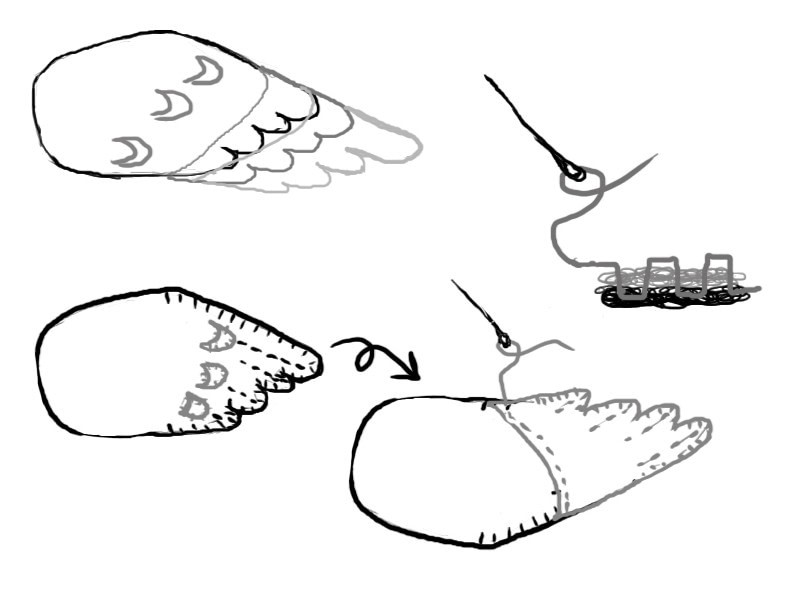
The best way to design wings for your bird is to draw it out on paper, cut it out, hold it up against him, cut off what needs to go, and basically do it by eye. Here is what I came up with. The wing shape is made up of three main felt pieces which will go on in layers so it can be multicoloured. This diagram shows where they overlap. Also I added three little crescents of the middle colour to put on the first, for more feathery detail.
-
 Step 13
Embellish each piece as before and then sew the pieces together. The beauty of felt is that it is a thick fabric, so you can just skim the lower piece with the needle and not go straight through, meaning you don't have the ruin the look of your wings with different coloured threads showing up on the surface! See the little diagram for what I mean.
-
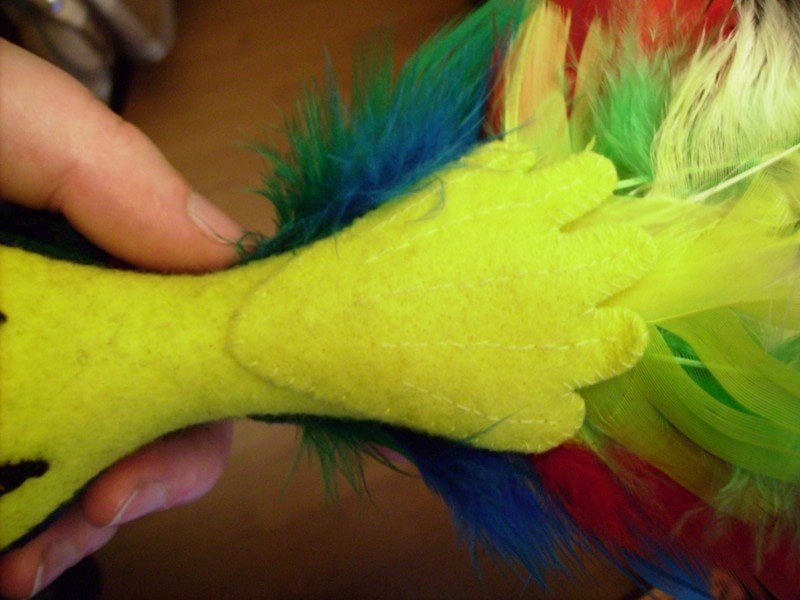
 Step 14
Now you should have two wings like these! Pin them to the body of your bird to see what looks best. It took me several attempts to get them symmetrical, and I evetually decided on having the wing tips overlapping one another slightly. When you sew them on, you only need to sew from point A around to point B; the rest will be supported enough to hang loose, and it gives a little more life-like moveability to your parrot.
-
 Step 15
Here is how I positioned the wings.
-
 Step 16
Now onto the beak; Go back to your original paper pattern and retrace the beak but with an allowance of about 2-3mm all around. Cut two of these out in black felt and sew together, leaving the end open. Turn inside out. Tada, you have made a 'beak sock'! Insert the beak of your parrot into this and sew into place.
-
 Step 17
To make the eyes, cut out a piece of paper like the shape shown. Hold it against your parrot, right up against the top of the beak, and adjust the size and shape until it looks right. Trace onto white felt and cut out. Make a couple of eyes from a small black bit of felt sewn onto a bigger yellow bit of felt, and sew these on to the white piece in the position shown. Use black thread to embellish this with lines like on a real parrot. At this stage I also added another feathery piece of felt to his neck, like a collar.
-
 Step 18
Get your two safety pins and sew them onto his stomach, where his feet should be. Make sure you sew them on the right way, so that they can still be opened and pierce things. Cut two foot shapes from black felt and use these to cover the stitching and also to reinforce it, as these will hold the weight of the bird while it is attached to things. Tada! You're finally done :) it took ages but it's worth it for the result!


So thank you.....