


About
a great (and creative) soft toy storage idea
I saw this project a while ago, and it's been sitting in the back of my mind. After tripping over one too many stuffed toy mounds, I finally got the incentive I needed to try it. It took three days to build and paint (mostly because of the time needed for paint and primer to dry) but all up, it was no more than 10 hours of solid work. less if you do a plainer paint scheme and have someone lending a hand for screwing it together.
the size can be adjusted as needed. this is an (almost) 2 metre cage, because we have a lot of soft toys. it can be made shorter and/or smaller, if you haven't had a recent invasion of soft toy aliens that seem to breed when you aren't watching them.
Tags
-
 Roughwaters44 favorited Soft Toy Cage
24 Feb 04:47
Roughwaters44 favorited Soft Toy Cage
24 Feb 04:47
-
 jodi r. favorited Soft Toy Cage
21 Feb 00:20
jodi r. favorited Soft Toy Cage
21 Feb 00:20
-
 cynthia.wimberly.12 added Soft Toy Cage to likes
12 Dec 03:20
cynthia.wimberly.12 added Soft Toy Cage to likes
12 Dec 03:20
-
 Becky H. favorited Soft Toy Cage
22 Oct 02:57
Becky H. favorited Soft Toy Cage
22 Oct 02:57
-
 MickeyDi added Soft Toy Cage to Inspiration
22 Jul 07:26
MickeyDi added Soft Toy Cage to Inspiration
22 Jul 07:26
-
MickeyDi favorited Soft Toy Cage
22 Jul 07:26
-
 tiffanybsparks favorited Soft Toy Cage
07 Jul 16:12
tiffanybsparks favorited Soft Toy Cage
07 Jul 16:12
-
 Maemi.Gojo added Soft Toy Cage to Kid Stuff
03 Jun 14:07
Maemi.Gojo added Soft Toy Cage to Kid Stuff
03 Jun 14:07
-
 Teagan D. replied to a comment on her project Soft Toy Cage
18 May 05:28
Teagan D. replied to a comment on her project Soft Toy Cage
18 May 05:28
-
 Mai commented on Soft Toy Cage
06 May 00:54
Mai commented on Soft Toy Cage
06 May 00:54
-
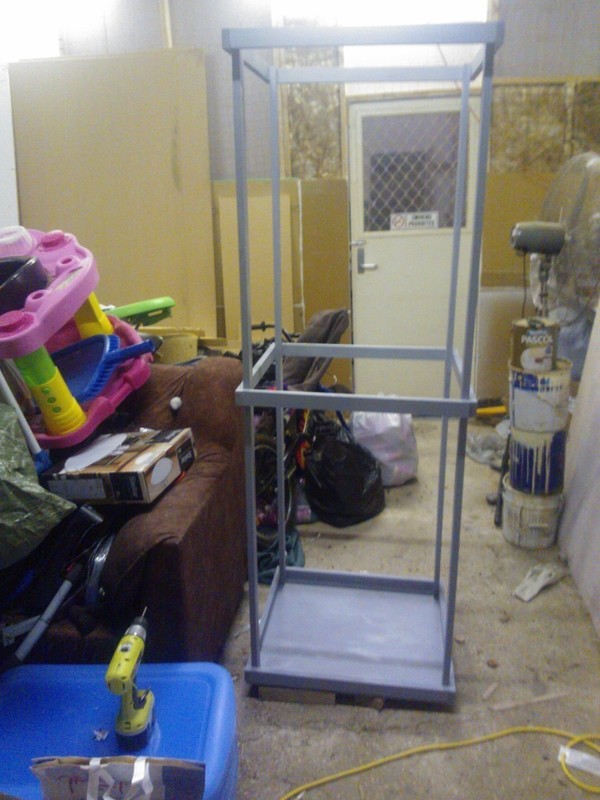
 Step 1
I didn't have a picture of the the original unpainted frame. but this is how I put it together.
- screw each of the three sets of longer planks (that should be cut into quarters) into square frames.
-attach the base to one of the square frames.
-attach the 4 poles securely to the inside of the square frames.
(if you're painting, then you need to prime the wood now. then let it dry) -
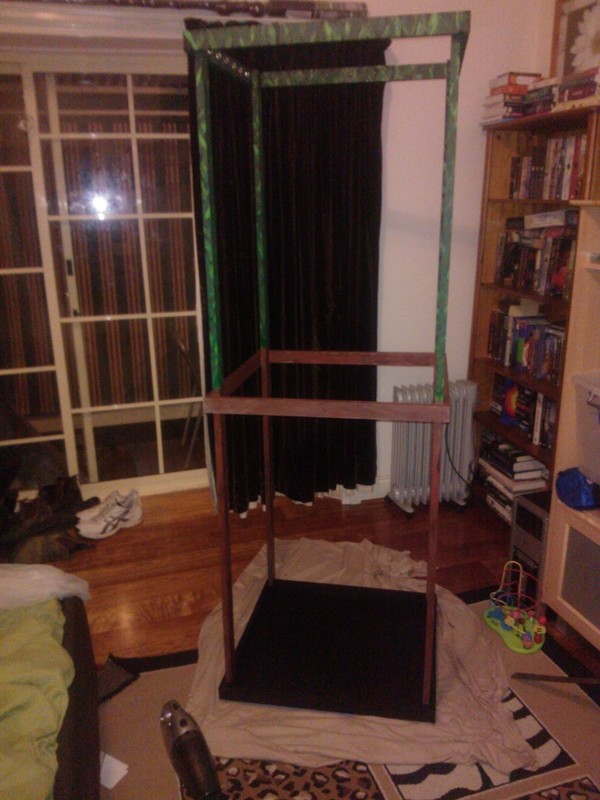
 Step 2
do all your painting on the wood frame (this was painted to match my daughters room) then let it dry completely. add a clear coat of varnish after you paint (or stain) to assist in durability.
-
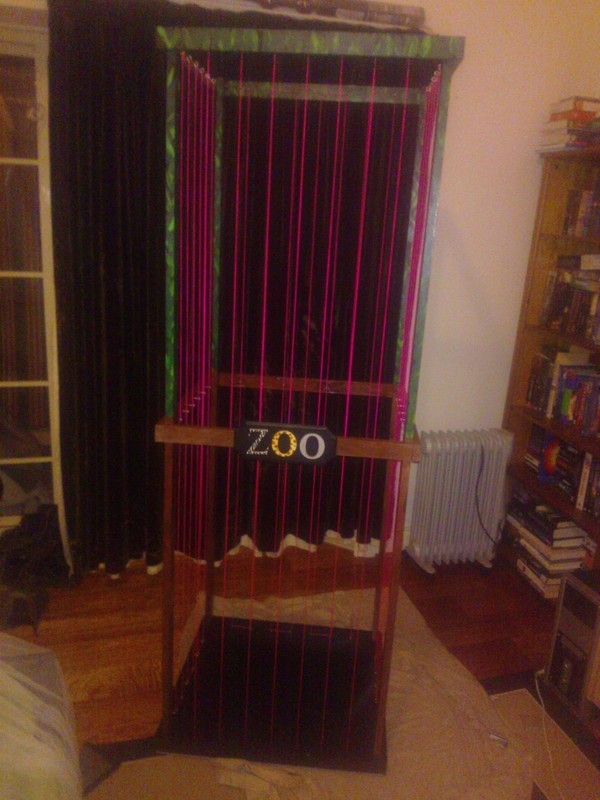
 Step 3
depending on what decoration you're using, you can skip this step. I got a wooden plaque and some wood letters from my local bunnings, painted it while waiting on the frame to finish drying. then attached the plaque to the frame with flat headed screws, before sticking the letters on with PVA glue over the screws to hide them.
-
 Step 4
measure the insides of the square frames and mark out holes for the eyelet screws (or hooks if that's what you want to use) we used roughly 70mm gaps between screws to allow for retrieval of toys through the strings while holding in some of the smaller toys. but you can adjust it to however wide you want the gaps to be. attach them to the insides of the square frames (the middle frame needs them for guidance, to hold the strings in shape) then lace the cage, making sure the string is tight, but still flexible enough to retrieve toys through it.
-
 Step 5
place it in a room of your choice, and start filling. (or do as my husband and I did, and use it as a basketball net to catch the soft toys lobbed into it from across the room) as you can see... we had a lot of soft toys to fill it with.


Comments

