
About
Pottery You Can Use
One of the great advantages of making plates by the slabbing method is that very little equipment is required, and what is used (apart from standard pottery tools) is either easy to make yourself or is something generally used for another purpose. Even plaster moulds are relatively easy to make.
Most simply, slab plates can be made by cutting ‘V’-shaped sections from the corners or edges of a slab cut to a chosen shape. When joined back together the walls pull up naturally to create a rim. The depth of the plate directly relates to the size of the sections cut away, thus giving great flexibility for adaptation.
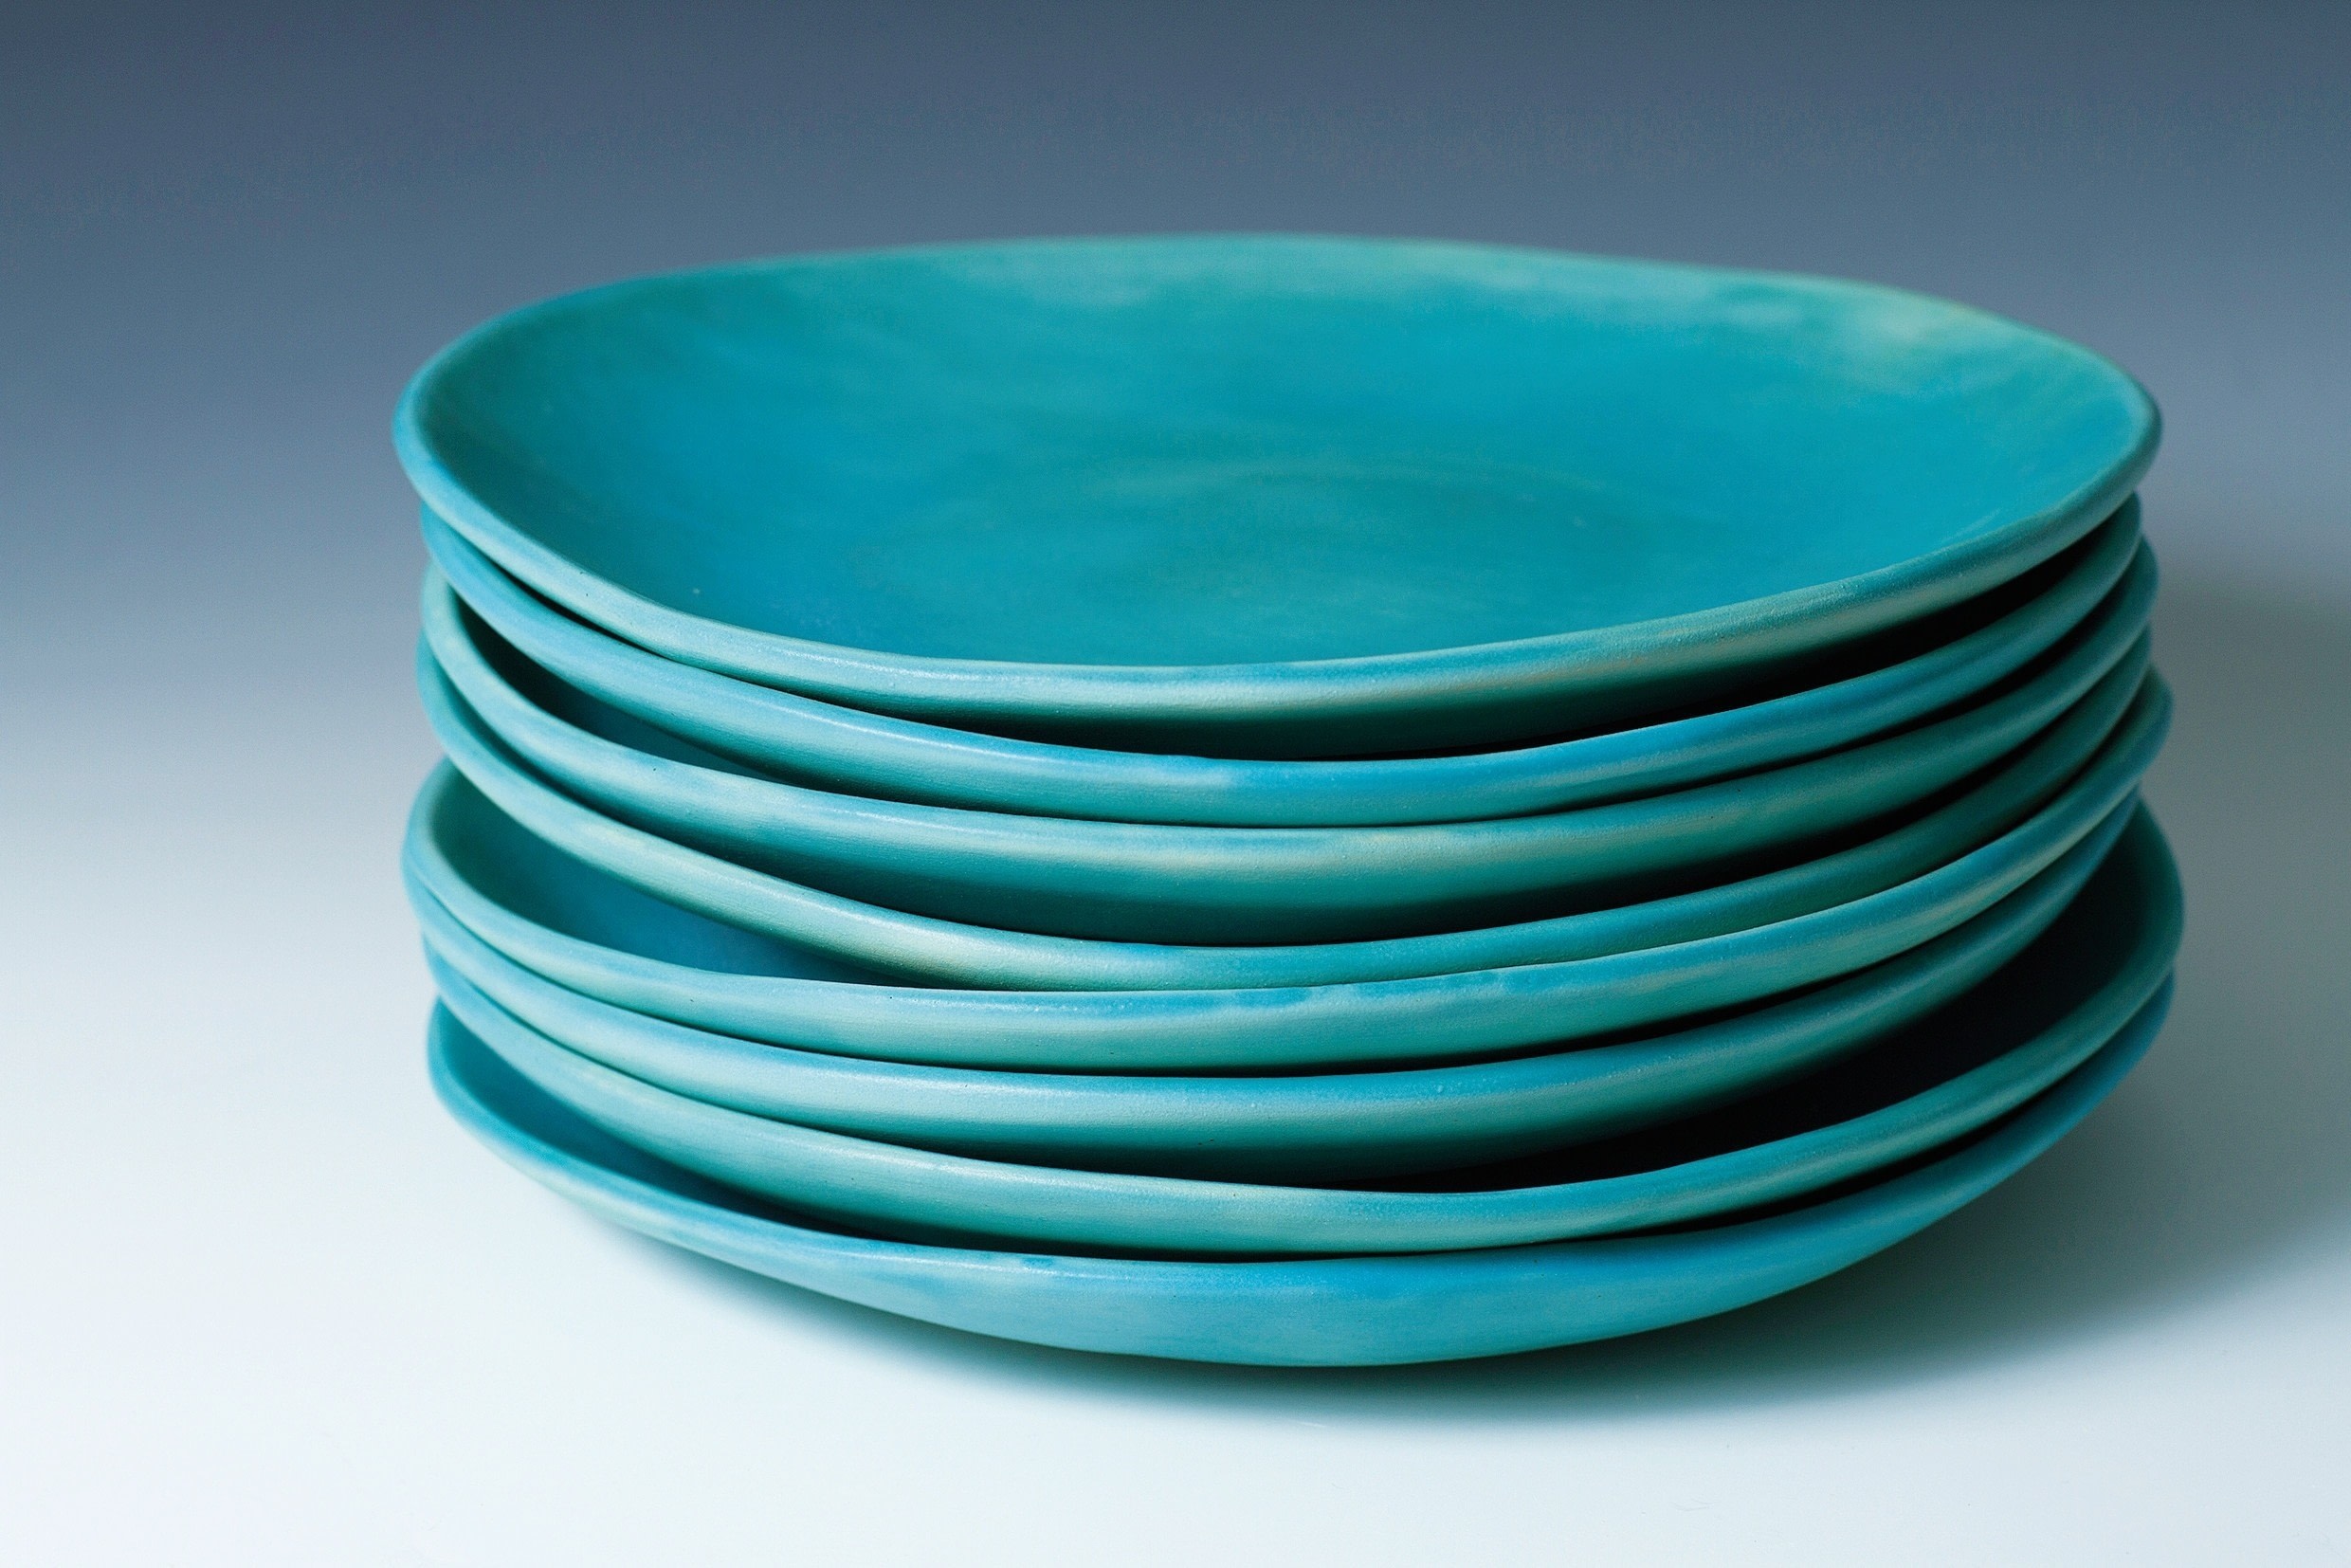
Slabbed plates by Crystal Van Wyk
Slab plates always have a liveliness about them: they distort a little in the process of making and firing, but therein lies their appeal, because this makes them unique. These high-fired, vitreous slabbed plates are simply coloured in a single turquoise glaze for maximum impact.
Moulds and formers for flatware
Listed here are some of the items you can use to make plates.
Plaster, hump or press moulds.
Wooden blocks, used as hump moulds. These can be mitred around the edges for added definition of shape. Cover blocks with a sheet of cotton fabric to prevent the clay sticking to the wood.
Round wooden boards, used as hump moulds for round plates.
Small wooden disks, used for making saucers.
Picture frames, preferably wooden, can be used as press or slump moulds.
Homemade frames, made from triangular-shaped sections of wood. A timber supplier will usually cut the sections to size for you but, if not, a simple mitre angle block will ensure you cut the correct angles for the shape you require. Glue and pin the wood at the corners and you will have the perfect press mould.
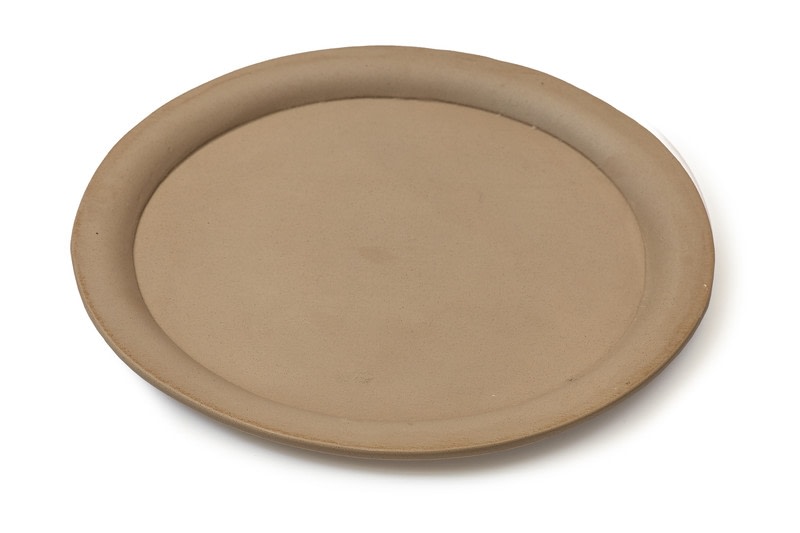
Biscuit-fired plates make great moulds.
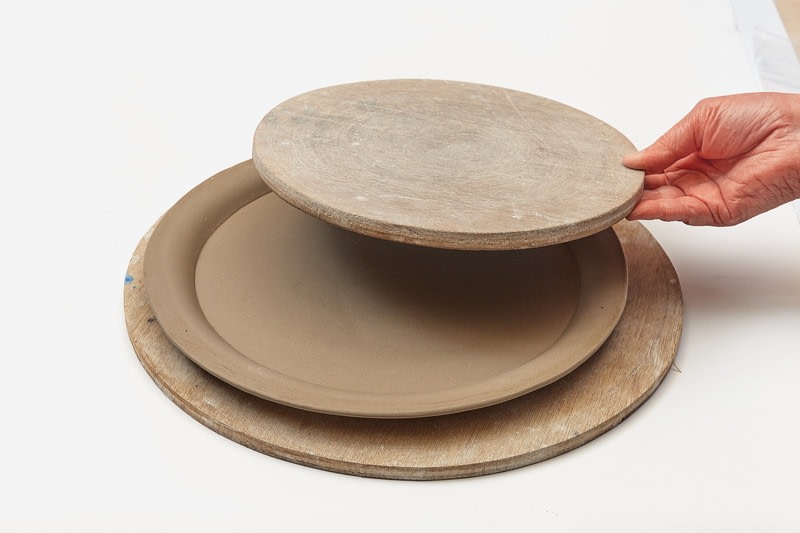
Soft slab plate formed over a round board
BEFORE YOU BEGIN
> You will need three wooden boards: two large and the other smaller to form the centre of the plate. The difference in size between the clay slab and the smaller board will dictate the width of the rim.
> Make a paper template of the plate with inner lines drawn to mark the central position for the smaller board, and also the position for feet if they are to be added later.
-
 Leonor R. favorited Slabbed Flatware
08 Oct 15:19
Leonor R. favorited Slabbed Flatware
08 Oct 15:19
-
 JadeSucksAtLife favorited Slabbed Flatware
25 Feb 13:19
JadeSucksAtLife favorited Slabbed Flatware
25 Feb 13:19
-
 Kimya J. favorited Slabbed Flatware
04 Nov 02:41
Kimya J. favorited Slabbed Flatware
04 Nov 02:41
-
 Search Press published her project Slabbed Flatware
13 Oct 09:00
Search Press published her project Slabbed Flatware
13 Oct 09:00
You Will Need
-
 Step 1
Roll out a large slab of clay and, using the paper template, carefully cut out a circle to the required size and mark the position for the smaller board using a wooden tool by redrawing the line through the paper.
-
 Step 2
With the clay still in position on the plastic sheet, transfer the circle to one of the larger boards, then place the smaller board on top to fit within the scored line.
-
 Step 3
Position the third board over the top of the second, then carefully turn everything over so that the plate is now upside down. Remove the board that is now on top and the plastic sheet from the circle.
-
 Step 4
Using a flexible rubber kidney, gently ease the clay into a smooth and even shape around the inner wooden board to form the rim. An alternative method for making the clay slump into place for the rim is to drop the board from a height, but this can be a tricky manoeuvre if you are inexperienced, so only try this if you feel confident. At this point, add the foot design of your choice.
-
Step 5
Allow the plate to dry to leather-hard. Place the first board over the base and again turn over so that the plate is the correct way up. Carefully remove the small board.
-
 Step 6
Make any small refinements to the clay using a rasp blade, then either sponge the rim gently or use a rubber kidney to soften and round the edge. If you choose to, you can alter the shape of the rim at this stage – scalloping, squaring, carving, cutting in or adding handles, etc.
-
 Step 7
The simple and quick method of making this type of plate provides a wonderful surface for decoration, either before or after biscuit firing.