About
Oils
In this project you will paint the sky in an indirect technique. That is, you will prepare a white surface with textures, leave it to dry, then use glazes and velaturas to create rich textural effects.
Colours needed
Phthalo Blue
Viridian Hue
Yellow Ochre
Burnt Sienna
Permanent Alizarin Crimson
Titanium White
-
 CraftyCat favorited Sky Painting
13 Aug 00:54
CraftyCat favorited Sky Painting
13 Aug 00:54
-
 RareJewel favorited Sky Painting
07 Aug 15:10
RareJewel favorited Sky Painting
07 Aug 15:10
-
 Crafterella featured Sky Painting
06 Aug 23:00
Crafterella featured Sky Painting
06 Aug 23:00
-
 GMC Group published her project Sky Painting
02 Aug 09:00
GMC Group published her project Sky Painting
02 Aug 09:00
You Will Need
-
Step 1
The sky is quite unlike any other subject we can paint. It is a constantly evolving abstract painting with new formations, colours and moods appearing every few minutes. Sit and look out of a window on a windy day and you will see exactly what I mean.
This painting features various kinds of clouds in different layers of the sky. Those closest to us, (the tiny blue-grey ones in the finished painting) move fastest, scuttling across the foreground. Spectacular cumulus clouds (those familiar cotton-wool balls) are lit by the noonday sun high above us. These goliaths move at a more lumbering pace – still too fast if you’re trying to draw them – but are constantly turning, edges breaking off, and making new cloud formations.
High in the sky, where the atmosphere is coldest, the delicate textures of cirrus and cirrocumulus stay still for longer. At this height, the freezing exhausts of jet planes create cloud formations in a category all by themselves: vapour trails.
-
 Step 2
Reference photo: A summer sky over Lytham St Annes, England.
Photography is an excellent tool for freezing the motion of the sky, allowing us to study the exact shapes of clouds. Even so, you will notice many differences between my reference photo and the finished painting. Aware of the fact that photography cannot capture the subtle, airy colours of clouds, I based my colours on previous studies done directly from the sky.
A subject such as this gives us great flexibility in how we apply the paint. We can invent shapes to suit our composition because clouds can be almost any shape anyway. Rather than trying to copy the exact shapes and textures of my painting, allow the paint to have a life of its own, echoing the natural movement of clouds.
So long as you bear in mind the following general effects, you will get away with adventurous paintwork:The tops of the clouds are the most brightly lit.
Shapes of clouds get flatter and thinner towards the horizon.
Blue sky gets lighter and more turquoise towards the horizon.
Cloud colours get warmer towards the horizon.A sliver of landscape at the base of the painting gives scale to the clouds and by its relative darkness can make the sky look lighter. I prefer to keep the details vague, so that it does not depict a specific location, but you may add any landscape you wish.
Tip
You can paint great cloud shapes using photos, but when it comes to mixing accurate sky colours, nothing beats looking at the sky itself. -
 Step 3
Stage 1
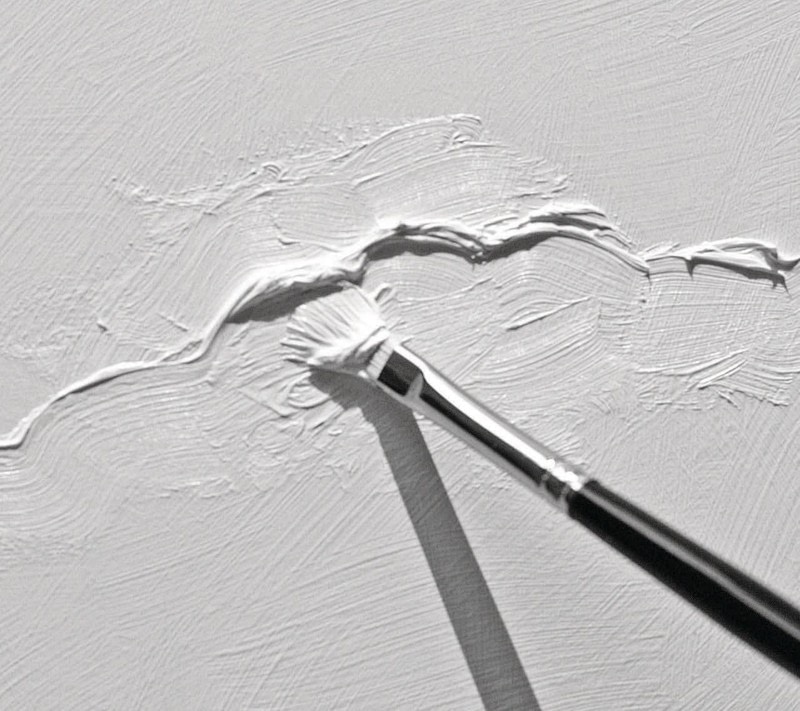
Using only white paint, have some fun seeing what textures you can create as you build up the lightest areas of the clouds. You may use brushes, the palette knife, your fingers or any tool you like. In the upper clouds, try some scumbling, dragging the paint lightly over the surface. I used the palette knife for the flat bottoms of the clouds closer to the horizon. You could use the lift-off technique to create the silver lining on the very tops of the clouds. These ridges of paint can be made even finer by painting up to them with a brush.
You can manipulate the paint for as long as you like, scraping off and reapplying until you have achieved a variety of textures. This stage must be left to dry before proceeding. About a week should be long enough in a warm environment.
-
 Step 4
Painting up to a ridge of paint makes it more pronounced.
-
 Step 5
Stage 2
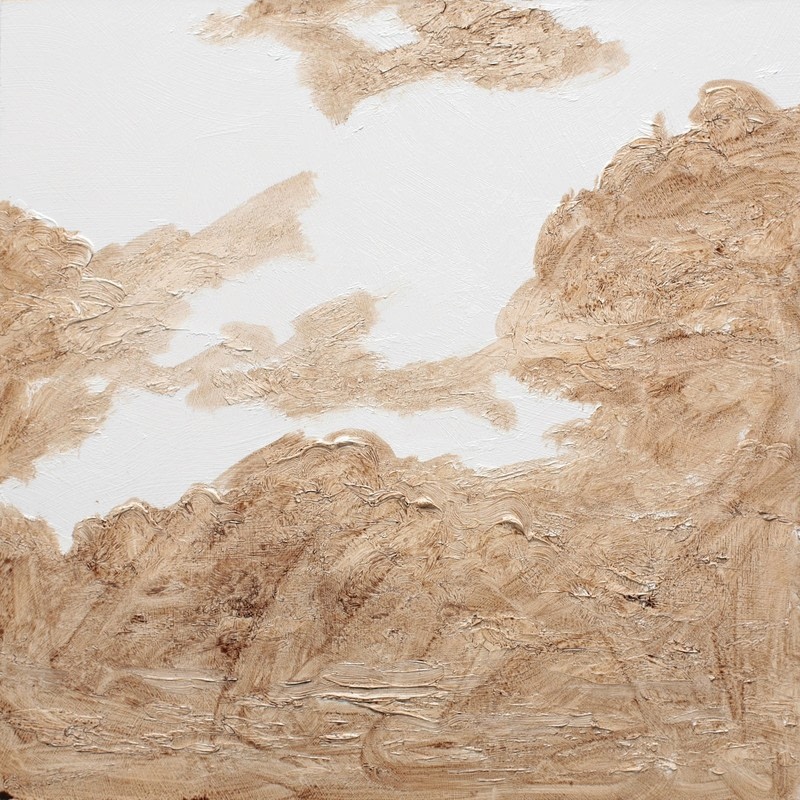
We will be using glazes to introduce colour over the white textured ground. Dip a large brush into your painting medium (solvent and linseed oil mixed) and make a pool of it on your clean palette. Mix in some burnt sienna, then add a touch of blue to dull the colour. If the glaze is too watery, add more paint.
Apply this glaze to all the cloud areas, going slightly over the edges into the blue sky region. The image shows a freshly applied glaze. Next, you will use a rag to gently wipe the glaze until it looks like the clouds in stage 3. Keep turning the rag to a clean side so that the raised surfaces of paint become clean, leaving paint in the crevices. If you are unhappy with your glaze, it can easily be completely removed using a rag dipped in solvent.
-
 Step 6
Stage 3
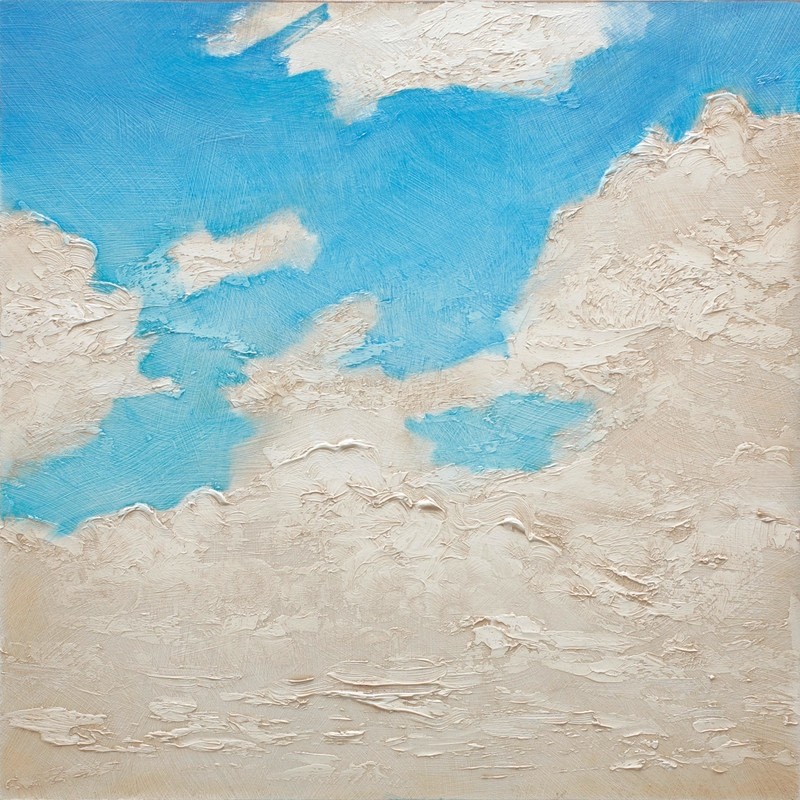
Blue sky transitions from a dark purple-blue high up to a lighter, more turquoise blue at the horizon. To convey this, start by mixing a pure blue glaze. Apply this into the middle section of the blue sky, then add a little crimson into the mix for the higher areas. Clean off your paintbrush, then add a little viridian to the blue for the lower section. Keep turning the rag as you wipe the glaze and press more firmly on the lower area of the sky so that it becomes lighter than the upper regions.
-
 Step 7
Stage 4
We can create variety in the cloud area by using milky glazes known as velaturas. The starting point for all four velaturas is light grey (1), made by adding white, blue, crimson and burnt sienna to a pool of painting medium.Apply your velaturas with a No. 4 brush, using the paintbrush in a messy fashion. Add more burnt sienna to your initial mix to create a warm velatura, suitable for closer to the horizon (2). Adding white gives a lighter mix for the higher clouds (3). A final, less diluted mix with more blue and crimson gives the darker colour of the foreground floaters (4).
For the delicate high clouds, return to undiluted paint. Use the knife to mix a blue slightly lighter and greyer than the sky. With some of this mix on the back of the knife, gently glide it over the upper sky area and see where the paint catches the raised surface. The effect is more varied and convincing than trying to paint each tiny cloud.
With this same mix, stamp the edge of the knife on the canvas to create the straight thin lines of vapour trails (upper left). Mine are a bit fuzzy at this stage but get sharpened up later. The final job for this stage is to refresh the sparkle in the highlights of the clouds using thick white paint and just a touch of yellow ochre.
-
 Step 8
Mixing four velaturas.
-
 Step 9
Stage 5
If you feel that your painting is too cluttered, use the sky colour to paint over some clouds. You will notice the textured surface at the top of my painting where I have removed a cloud. This remaining texture is known as ‘pentimento’, Italian for repentance or a change of mind.
Look for the main diagonals in your painting. If they are all tilting one way, you may need to introduce or strengthen some opposing diagonals to restore the sense of balance. At stage 4, my strongest diagonals are sloping upwards to the right (see the white lines). I begin to restore the balance by softening the edges of the upper left cloud. I then adjust the dark grey foreground clouds to slope down to the right (see the lower pink line). Finally, I strengthen the downward sloping vapour trail by stamping on more paint with the edge of the knife (see the upper pink line).
The landscape is painted with the No. 1 brush, combining touches of brown, green and ochre. Some bluer sections hint at water. Include a few verticals to break the horizon line. I placed my main vertical roughly two-thirds from the left. This lower section of the painting might be disturbed by a big signature, so consider one of the top corners. I opt for the top right and use a subtle colour very close to that of the sky.
-
 Step 10
Balancing the diagonals