


About
Pattern for Simple Cocoon Wrap
-
 Second Hand Susie added Simple Cocoon Wrap to Beatles Look
30 Apr 22:58
Second Hand Susie added Simple Cocoon Wrap to Beatles Look
30 Apr 22:58
-
Second Hand Susie favorited Simple Cocoon Wrap
30 Apr 22:58
-
 greenstyle added Simple Cocoon Wrap to Sewing
21 Oct 04:54
greenstyle added Simple Cocoon Wrap to Sewing
21 Oct 04:54
-
 Ami added Simple Cocoon Wrap to Stevie Nicks
14 Mar 17:37
Ami added Simple Cocoon Wrap to Stevie Nicks
14 Mar 17:37
-
 Laouen favorited Simple Cocoon Wrap
22 Dec 20:02
Laouen favorited Simple Cocoon Wrap
22 Dec 20:02
-
 Margarita L. favorited Simple Cocoon Wrap
09 Dec 01:44
Margarita L. favorited Simple Cocoon Wrap
09 Dec 01:44
-
 Taba__tina favorited Simple Cocoon Wrap
05 Oct 13:30
Taba__tina favorited Simple Cocoon Wrap
05 Oct 13:30
You Will Need
-
 Step 1
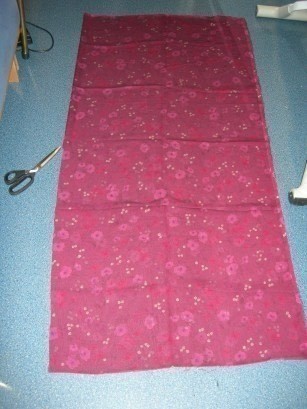
Fabric requirements : 1.5m 150cm wide fabric.
The wrong side will show so choose something that looks good on both sides. Drapy fabric is needed for the garment to look good. Chiffon or georgette is a good choice.
-
 Step 2
Fold the fabric in half along the length, and mark half way along this fold. Cut an opening from the front edge to this mark, by cutting about 1⁄4 to 1⁄2 inch from the fold, and curving to nothing at the top.
-
 Step 3
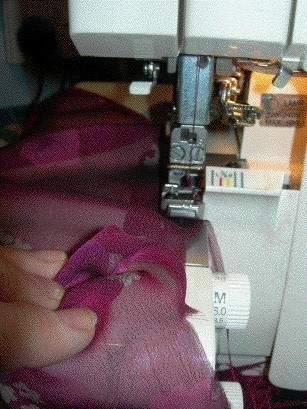
Finish all the edges of the garment, including the front opening. The best finish is an overlocker (serger) rolled hem. When sewing around the top of the front opening, hold the fabric gathered up so the stitching will continue around the curve at the top.
-
 Step 4
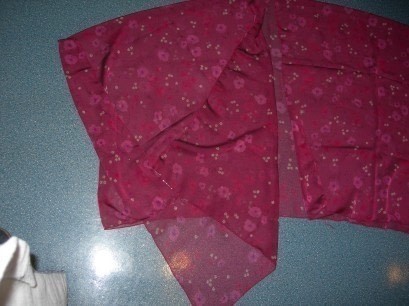
Lay the fabric out folded in half across the width, and with the front opening on top.
-
 Step 5
Bring the bottom point of one side pof the front opening across towards the other side, then fold it back the way it came, forming a sloping shoulder and a lapel.
-
 Step 6
Take the point at the back that has become visible and fold it forward to meet the front point, then down the bottom edge by about 4in. Pin the back edge to the edge at the bottom of the front overlapping by a scant 1/16 in.
Repeat this for the other side.
-
 Step 7
Close up of the overlap.
-
 Step 8
Sew the overlapped edges together.
-
 Step 9
Optional – sew beads to the remaining free points to help the garment drape correctly.
To wear, put your arms through the openings at the side, and ensure the free points are tucked behind the seams.


http://uk.youtube.com/watch?v=6pDAvOY3F3c