
About
Shaving Cream Technique
-
 Katie E. added Shaving Cream Technique to Macrame
28 May 21:20
Katie E. added Shaving Cream Technique to Macrame
28 May 21:20
-
 Linda K. published her project Shaving Cream Technique
18 Nov 09:00
Linda K. published her project Shaving Cream Technique
18 Nov 09:00
You Will Need
-
 Step 1
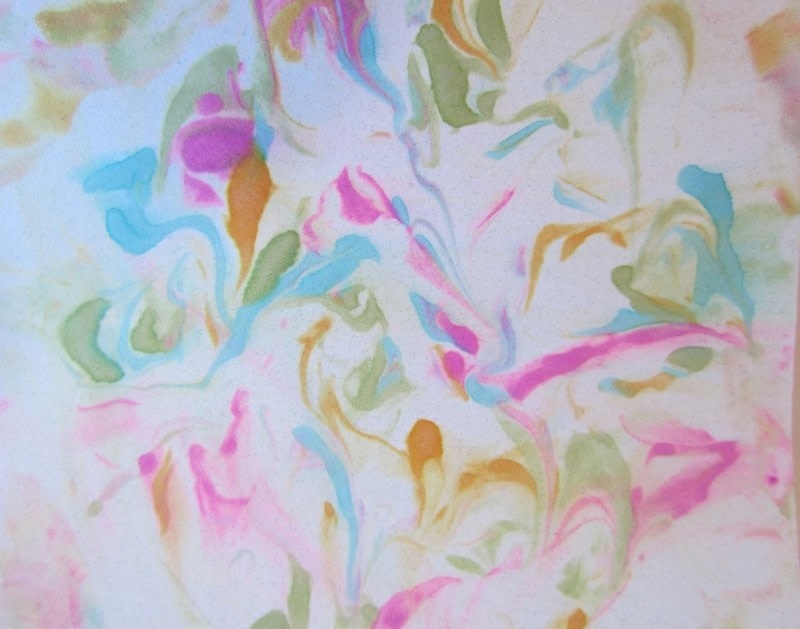
Shaving Cream Technique:
Squirt a pile of shaving cream in the center of a styrofoam plate (easy for clean-up). Drop a few drops of each of your 3-4 reinker colors randomly over the shaving cream. Don't use too much ink at this point.
With the popsicle stick, carefully drag it from dot to dot of reinker, marbling slightly as you go. When you are satisfied, after just a few strokes, lay your 4 1/4" x 5 1/4" piece of white cardstock flat down on top of the marbled shaving cream. With your fingertips, press lightly all over the back of the paper, making sure all points of the paper are in good contact with the shaving cream. Lift it straight up.
Have another blank sheet of cardstock ready, and place that directly on top of the shaving cream-covered piece you just lifted off. Rub these two pieces together. Peel them away from each other carefully.
Now, with just one application of the marbled shaving cream, you have TWO pieces. Granted, the second one will not be as vibrant as the first one. But, often that second image is even more appealing in its subtleness than the more contrasty first copy.
With paper towels, wipe the shaving cream residue from the paper and set them aside to dry completely before using them in a project. They dry fairly quickly.
You can make several copies from the same shaving cream before it becomes too muddy to be beautiful. You may need to add a drop or two of reinker to re-establish a color. And then re-marble.
Once you have more mud than marble, it is easy to simply rinse off the plate in warm water and start anew.
-
 Step 2
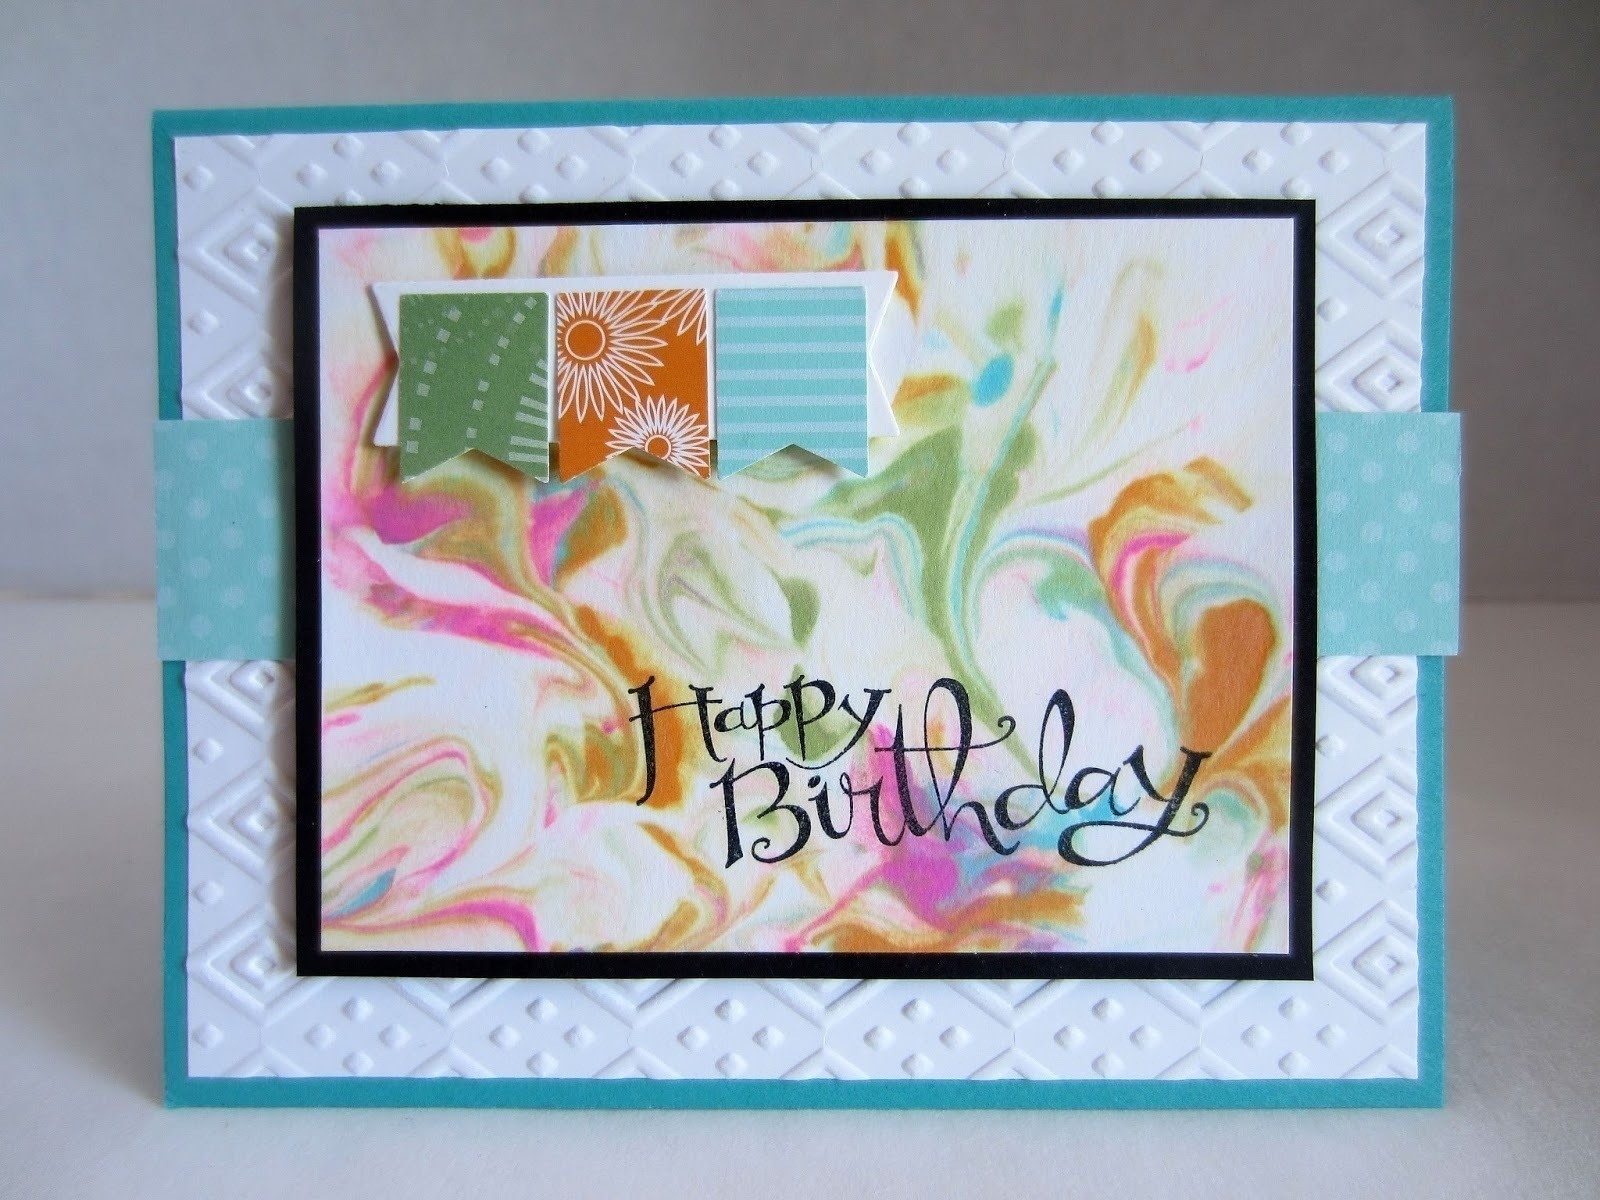
OK. Now to the card.
Fold a 5 1/2" x 8 1/2" sheet of Bermuda Bay cardstock in half, creasing well with a bone folder.
Run a 4" x 5 1/4" piece of Whisper White cardstock through the Big Shot inside the Boho Chic embossing folder. Adhere this piece to the card base.
Adhere a 1" x 5 1/4" strip of coordinating polka dot DSP over the embossed piece, raised up from the center point of the card.
Onto the lower right portion of a 3" x 4" piece of reserved shaving cream paper, stamp "Happy Birthday" in black. Adhere this piece to a 3 1/4" x 4 1/4" piece of Basic Black cardstock. Attach this piece to the card front with Stampin' Dimensionals.
From scraps of DSP, punch three banners with the Banner Punch to coordinate with the marbling colors. Mount them to a label created with the Circle Card Thinlets set from Whisper White cardstock. Add this string of banners to the upper left portion of the shaving cream piece with a couple Stampin' Dimensionals.