


About
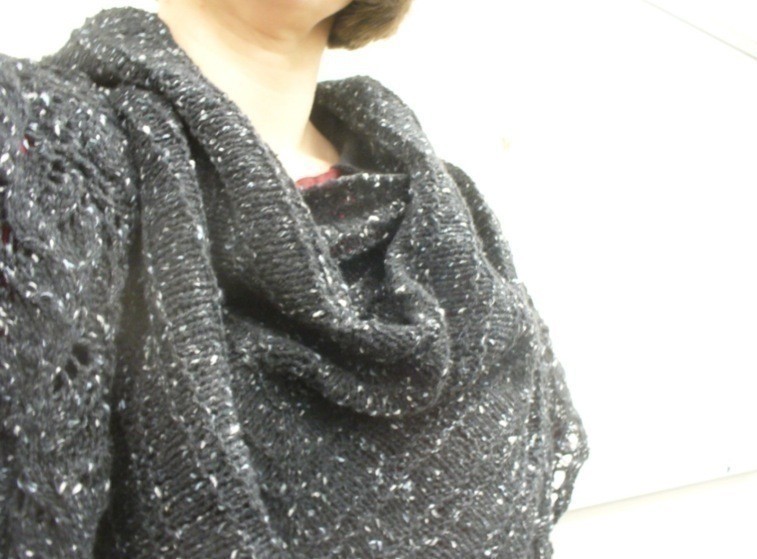
big and beautiful shawl with a lovely lace and nupp border
This large shawl has a main body pattern of simple stockinette with garter stitch ridges.
The bottom lace border is worked side to side to bind of the body of the shawl, thus leaving very few stitches to actually bind off when finished.
There are 2 versions of this shawl offered with the pattern : fingering and worsted. They both create a large and beautiful shawl to cuddle up in.
The lace portion is written out (not charted).
finished measurements :
fingering version : 69in x 28.5in
worsted version : 850 yds to 900yds : 87in x 42in
Materials
690 to 700 yds fingering weight yarn
or 850—900 yds worsted weight
US 7 (4.5mm) needles // US9/5.5mm for worsted weight)
Tapestry needle
Gauge (doesn’t need to be exact)
21sts x 32 r = 4inches in the main body pattern before block-
ing with fingering weight (17 st x 20 sts = 4in worsted)
Finished Measurements
69in x 28.5in (87 in x 42 in worsted)
Downloads
- new_sgiach.pdf 1.17 MB [ Download ]
-
 js-m crafts favorited Sgiach Shawl
26 Feb 13:45
js-m crafts favorited Sgiach Shawl
26 Feb 13:45
-
 Linda of Nice dress! Thanks, I made it!! added Sgiach Shawl to An Excellent Way to Start a Day!
22 Jul 03:00
Linda of Nice dress! Thanks, I made it!! added Sgiach Shawl to An Excellent Way to Start a Day!
22 Jul 03:00
-
Linda of Nice dress! Thanks, I made it!! favorited Sgiach Shawl
14 Jul 05:58
-
 Pimke added Sgiach Shawl to Strickmuster
10 Feb 13:21
Pimke added Sgiach Shawl to Strickmuster
10 Feb 13:21
-
 Karen D. favorited Sgiach Shawl
10 Jan 02:48
Karen D. favorited Sgiach Shawl
10 Jan 02:48
-
 PinkWeeds added Sgiach Shawl to Game of Thrones
09 Jun 16:38
PinkWeeds added Sgiach Shawl to Game of Thrones
09 Jun 16:38
-
 adriane.bragabusmeyer favorited Sgiach Shawl
10 Apr 20:26
adriane.bragabusmeyer favorited Sgiach Shawl
10 Apr 20:26
-
 Mrs. Wolfe favorited Sgiach Shawl
18 Feb 23:23
Mrs. Wolfe favorited Sgiach Shawl
18 Feb 23:23
-
 signe P. added Sgiach Shawl to strik
05 Dec 18:36
signe P. added Sgiach Shawl to strik
05 Dec 18:36
-
Jannette C. favorited Sgiach Shawl
05 Oct 17:06
You Will Need
-
Step 1
For both sizes : using size US7 needles,
CO 3sts.
k 6 rows.
At end of 6th row, do not turn work. Rotate piece 90 degrees clock- wise; pick up and k 3sts ( 1 st in each garter st ridge) along ad- jacenter edge of piece.
Rotate piece again, 90 degrees clockwise; pick up and k 3 sts (1 st in each CO st) along CO edge. (9 sts) -
Step 2
Set up pattern
Row 1 (WS) : k3, p3, k3
Row 2 (RS) : k3, m1, k1, m1, pm, k1, pm, m1, k1, m1, k3
Row 3 : k3, p sts slipping m when you come to them to last 3sts, k3 Row 4 : k3, kfb, k to m, m1, sl m, k1, sl m, m1, k to last 4 sts, kfb, k3
Row 5 : repeat row 3
Row 6 : k3, pbf, p to 1 st before m, pbf, sl m, p, sl m, pbf, p to last 4 sts, pbf, k3
Row 7 : repeat row 3
Row 8 : k3, kfb, k to 1 st before m, kfb, sl m, k1, sl m, kfb, k to last 4sts, kfb, k3
Row 9 : k all sts slipping m as you come to them -
Step 3
Pattern repeat
Row 10 (RS) : k3, kfb, k to 1 st before m, kfb, sl m, k1, sl m, kfb, k to last 4sts, kfb, k3
Row 11 (WS) : k3, p all sts slipping m as you come to them to last 3 sts, k3
Repeat these two rows 2 more times
Row16(RS): k3,pbf,pto1stbeforem,pbf,slm,p,slm, pbf, p to last 4 sts, pbf, k3
Row 17 (WS) : k3, p all sts slipping m as you come to them to last 3 sts, k3
Row 18 : k3, kfb, k to 1 st before m, kfb,
sl m, k1, sl m, kfb, k to last 4sts, kfb, k3
Row 19 (WS) : k all sts slipping m as
you come to them
Repeat these 10 rows a total of 11 (10 for worsted version) times. -
 Step 4
Lace border of the shawl
Beginning rows
For fingering weight version continue on size US7 needles and for worsted version switch to size US9 needles,
Before turning the shawl to the RS, CO 36 sts using your favorite method, turn.
RS: k35 sts, k2tog (you will be knitting 1 CO st with 1 st from the base of the shawl), turn
WS : sl 1, k to end, turn
Repeat these 2 rows 2x total. -
Step 5
NUPP and leaf lace pattern
Row 1 (RS) : (p2, yo, ssk, p2, yo, k2, ssk, k5)2x, p2, yo, ssk, p1, p2tog (you will be p 1 st from the lace add on to 1 st from the base of the shawl with the p2tog sts)
Row 2 (WS) : sl 1, k1, p2, k2, (p4, p2tog, p2, yo, p1, k2, p2, k2)2x
Row 3 : (p2, k2tog, yo, p2, k2, yo, ssk, k5)2x, p2, k2tog, yo, p1, p2tog
Row 4
Row 5
p2tog
Row 6
: sl 1, k1, p2, k2, (p2tog, p4, yo, p3, k2, p2, k2)2x
: (p2, yo, ssk, p2, yo, k7, k2tog)2x, p2, yo, ssk, p1,
: sl 1, k1, p2, k2, (p2tog, p6, yo, p1, k2, p2, k2)2x
Row 7 : (p2, k2tog, yo, p2, k2, yo, k5, k2tog)2x, p2, k2tog, yo, p1, p2tog
Row 8 : sl 1, k1, p2, k2, (p4, p2tog-b, yo, p3,k2, p2, k2)2x
Row 9 : (p2, yo, ssk, p2, yo, k4, ssk, k3)2x, p2, yo, ssk, p1, p2tog
Row 10 : sl 1, k1, p2, k2, (p2, p2tog-b, p4, yo, p1, k2, p2, k2) 2x
Row 11 : (p2, k2tog, yo, p2, k2, yo, k4, ssk, k1)2x, p2, k2tog, yo, p1, p2tog
Row 12 : sl 1, k1 p2, k2, (p2tog, p4, yo, p3, k2, p2, k2)2x
Row 13 : (p2, yo, ssk, p2, k4, NUPP, k3, yo)2x, p2, yo, ssk, p1, p2tog
Row 14 : sl 1, k1, p2, k2, (p1, yo, p2, purl 1 and all NUPP loops together (you will be purling 8sts together), p4, k2, p2, k2)2x Row 15 : (p2, k2tog, yo, p2, k4, k2tog, k1, yo, k2)2x, p2, k2tog, yo, p1, p2tog
Row 16 : sl 1, k1, p2, k2, (p3, yo, p2tog-b, p4, k2, p2, k2)2x
Row 17 : (p2, yo, ssk, p2, ssk, k7, yo)2x, p2, yo, ssk, p1, p2tog
Row 18 : sl 1, k1, p2, k2, (p1, yo, p6, p2tog-b, k2, p2,k2)2x
Row 19 : (p2, k2tog, yo,p2, NUPP, k5, yo, k2)2x, p2, k2tog, yo, p1, p2tog
Row 20 : sl 1, k1, p2, k2, (p3, yo, p4, purl 1 and all NUPP loops together (you will be purlin 8 sts together), k2, p2, k2)2x
Row 21 : (p2, yo, ssk, p2, k3, k2tog, k4, yo)2x, p2, yo, ssk, p1, p2tog
Row 22 : sl 1, k1, p2, k2, (p1, yo, p4, p2tog, p2, k2, p2, k2)2x Row 23 : (p2, k2tog, yo, p2, k5, k2tog, yo, k2)2x, p2, k2tog, yo, p1, p2tog
Row 24 : sl 1, k1, p2, k2, (p3, yo, p2tog, p4, k2, p2, k2)2x -
 Step 6
Repeat these 24 rows to first m.
Remove m .
Follow pattern (right and wrong side rows) with center st. Remove m.
Continue in pattern repeating rows 1 – 24 til 3 sts remain on
left needle. Do one more RS row. On WS : sl 1, k all sts, turn.
(RS) : k to last 3 sts, k2tog, turn. (WS) : sl 1, k all sts, turn.
(RS) : k to last 2sts, k2tog, turn.
BO loosely all remaining sts.
Weave in ends and block to
measurements.
For a smaller shawl: use you gauge swatch to decide how many re- peats of the main body you wish to make (the border is about 4in wide). Take the number of stitches you have after the main body and divide it by 24. You now know how many repeats of lace you will have. Take the number of repeats x 24. Subtract that number from the main body stitches, then divide that number by 2. This is the number of garter stitch rows you will need at the begin- ning and end for everything to work out evenly.


