
About
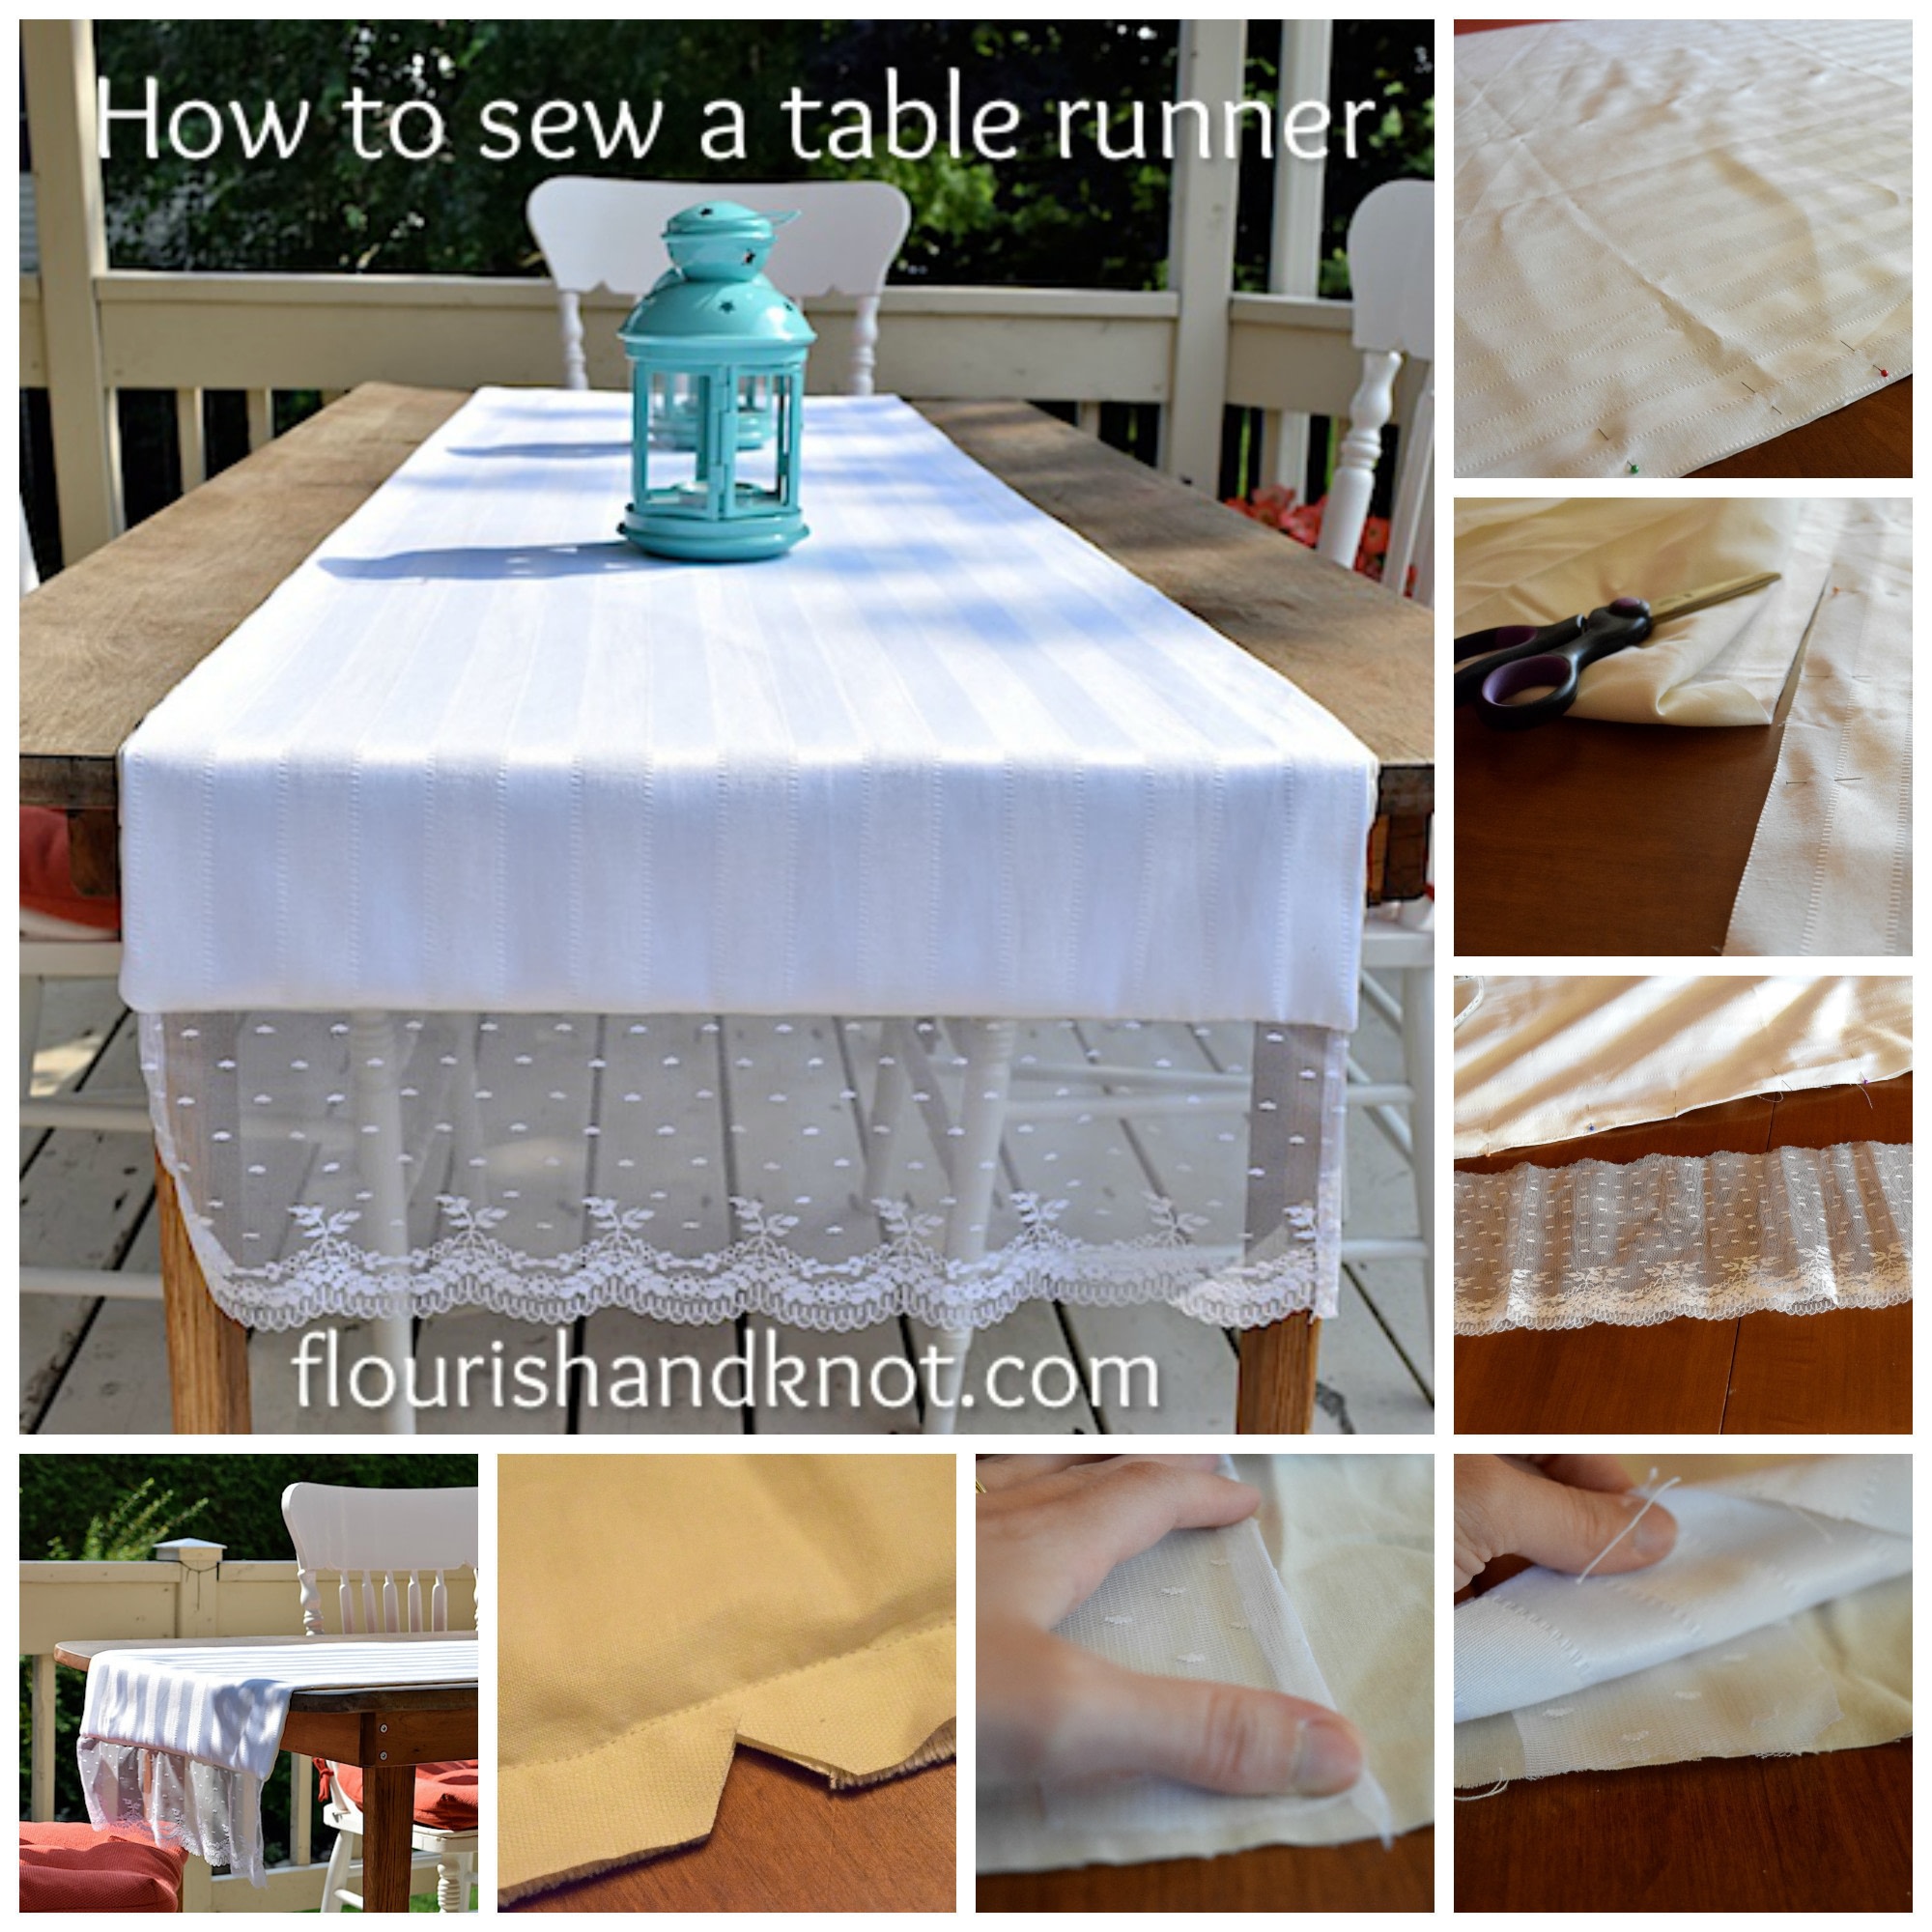
8 simple steps to sewing a (reversible!) table runner
Does your dining table need a little pick-me-up? Get an elegant look for your dining table for less than you'd pay in a store by sewing a beautiful table runner. Bonus: you can make it reversible and get twice as much bang for your buck!
-
 sallyc06 added Sew A Simple Table Runner! to Sally's Pad
22 Nov 09:36
sallyc06 added Sew A Simple Table Runner! to Sally's Pad
22 Nov 09:36
-
 Flourish & Knot published her project Sew A Simple Table Runner!
19 Oct 06:00
Flourish & Knot published her project Sew A Simple Table Runner!
19 Oct 06:00
-
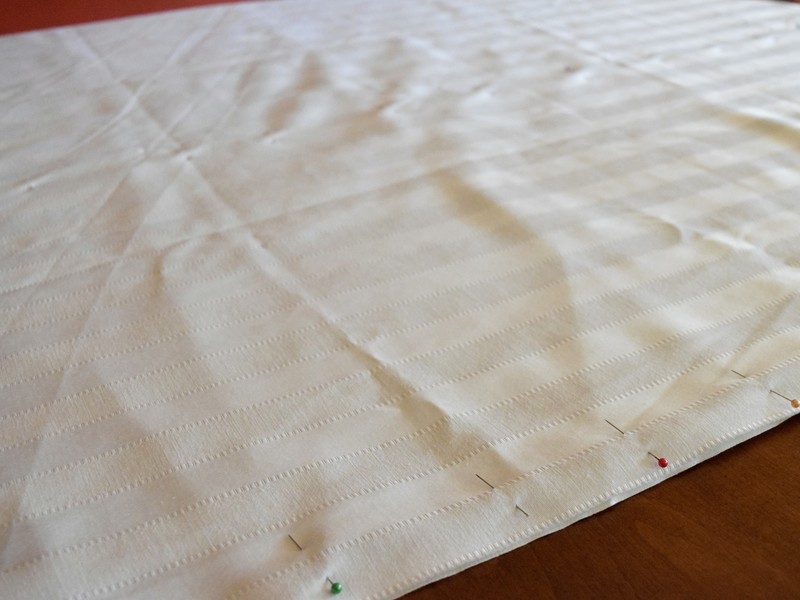
 Step 1
Measure the length and width of your table to decide how long to make it.
Finished length: 1.7 m
The runner should hang over the end of the table. I gave mine about three inches of overhang, plus I added the lace detail. Don’t forget your need a seam allowance. Leave at least an extra 2-4 cm for every seam.
-
 Step 2
Pin the fabrics, right sides together. Cut to the desired length/width.
-
Step 3
Sew straight seams down each long side.
-
Step 4
If you are adding ribbon or lace or a contrasting band of fabric at the bottom, you need to finish it. I was using lace, so I did a small rolled hem on each side.
-
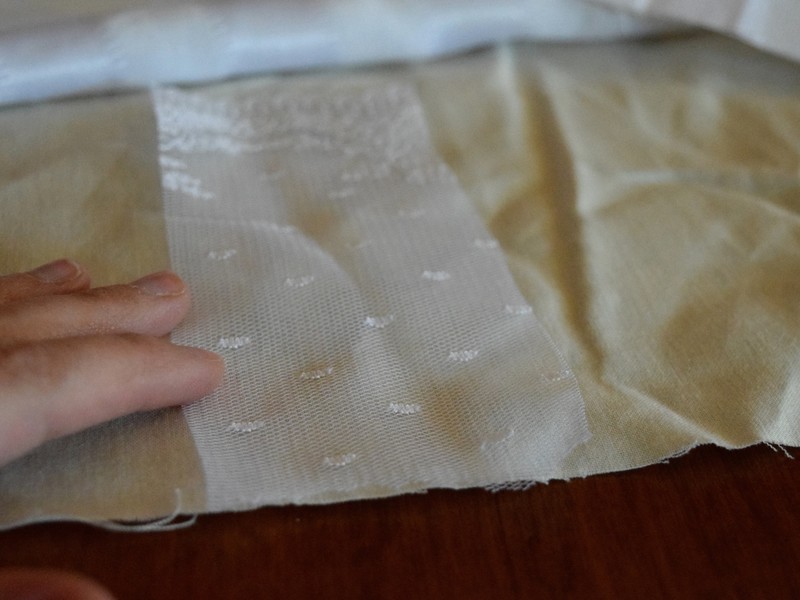
 Step 5
(If you’re not edging your runner, then don’t worry about this!)
Put the lace between the two pieces of fabric, with the bottom of the lace (in my case, the scalloped side) farthest away from the seam.
If there’s a hem on it (as in mine), the wrong side of the hem needs to be on top of the lining fabric.
Pin everything together.
-
Step 6
If you are edging your runner, sew the edging fabric into the runner, sewing a normal, straight seam.
Do the same to the other end of the runner, but leave at least a few inches of the seam open, so that you can flip the runner right side out.
-
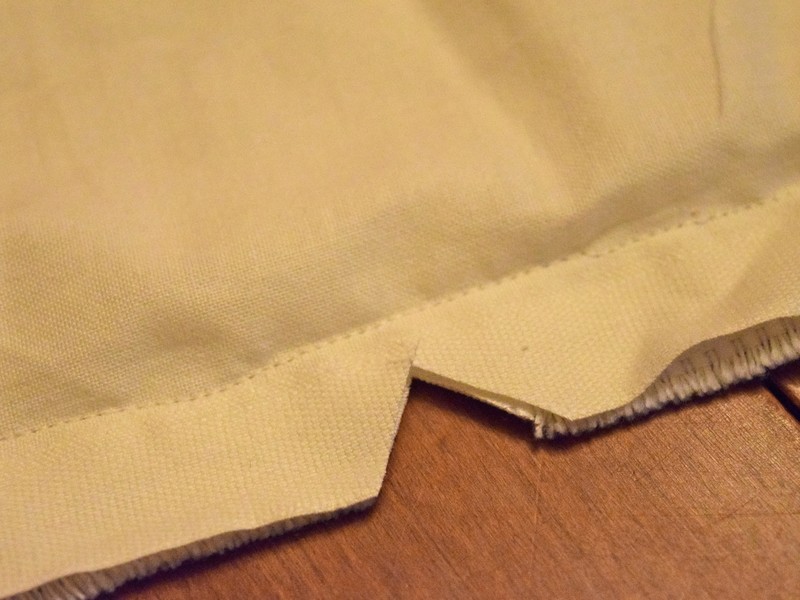
 Step 7
Cut notches in the fabric, so that it will lie flat. Press the seams flat.
-
Step 8
Turn the runner right-side-out and hand-stitch the open seam. Press your runner and enjoy!