Rustic Stool
Extract from Seasonal Scandi Crafts • By Christiane Bellstedt Myers • Published by CICO Books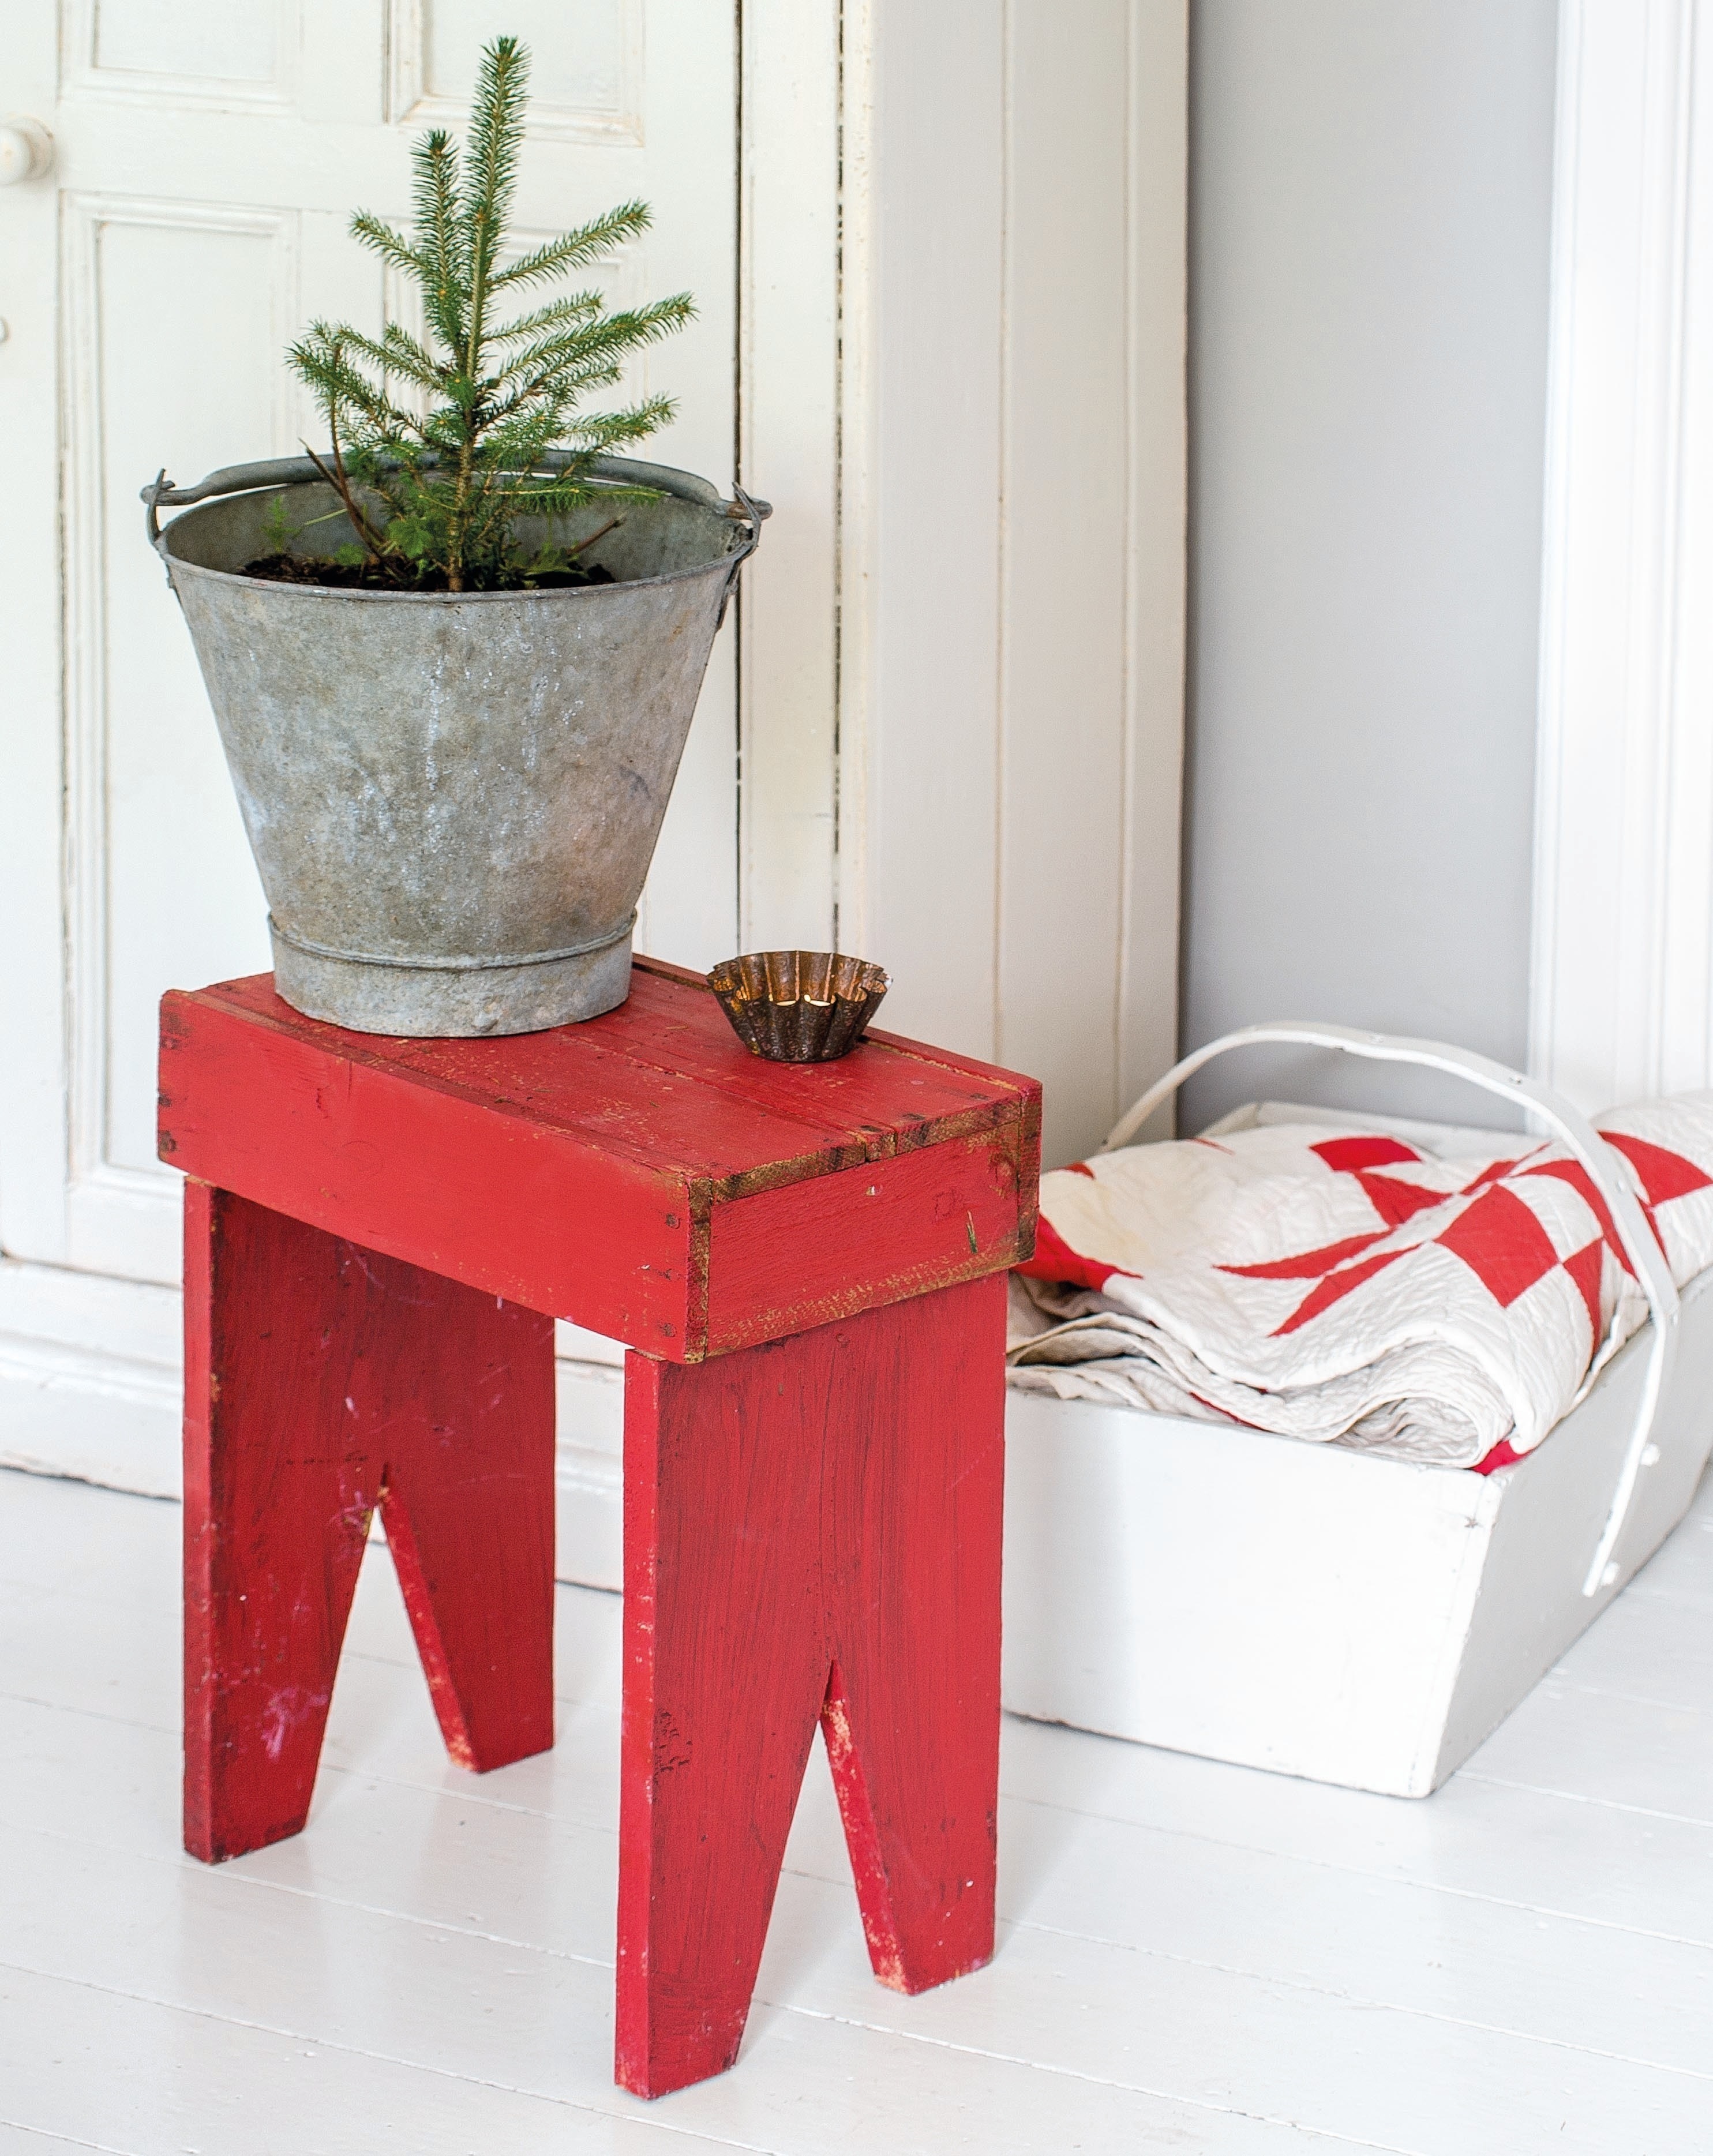

About
Seasonal Scandi Crafts
I AM ALWAYS ATTRACTED TO SMALL BENCHES AND STOOLS AS THEY ARE A GREAT WAY TO ADD A SPLASH OF COLOR TO A FORGOTTEN CORNER OF A ROOM. EASY TO MOVE AROUND WHEREVER NEEDED, YOU WILL BE TEMPTED TO MAKE QUITE A FEW OF THESE! I HAD THE IDEA FOR THIS STOOL WHEN I BOUGHT A COLLECTION OF OLD BOXES—BY ATTACHING A FEW PIECES OF WOOD, IT SEEMED JUST THE RIGHT THING TO MAKE. ADDING THE LOVELY COLOR OF BARN RED FINISHED IT OFF. I MUST ADMIT I DID GET CARRIED AWAY AND HAVE A FEW OF THESE STORED AS GIFTS.
-
 Libby W. favorited Rustic Stool
27 Apr 15:58
Libby W. favorited Rustic Stool
27 Apr 15:58
-
 C.J. M. added Rustic Stool to DIY The Room
23 Apr 17:54
C.J. M. added Rustic Stool to DIY The Room
23 Apr 17:54
-
 Ryland Peters & Small published his project Rustic Stool
27 Feb 09:00
Ryland Peters & Small published his project Rustic Stool
27 Feb 09:00
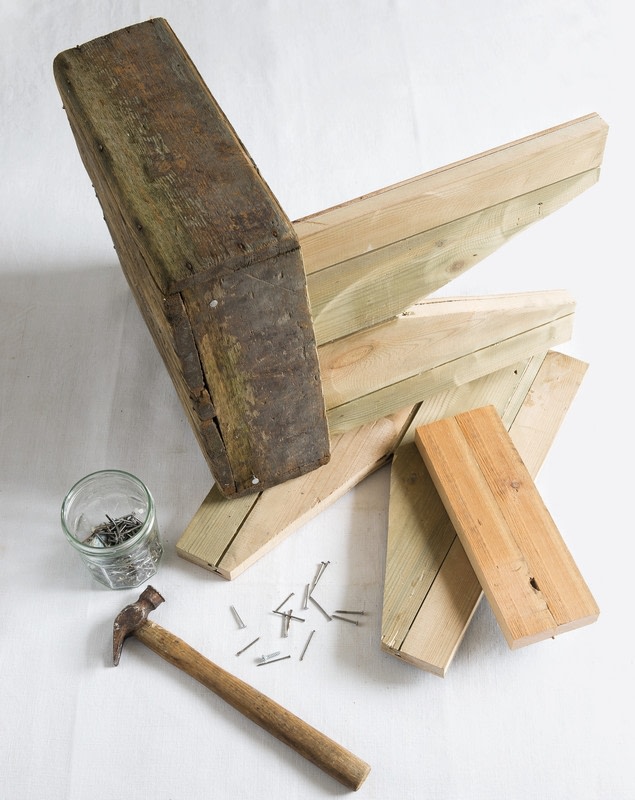
You Will Need
-
 Step 1
Using a tape measure, measure the depth of the inside of the box. Decide how high you want your stool to be and cut two pieces of sheet wood to these measurements.
-
 Step 2
Using a pencil and ruler, find the center of each leg piece and then draw a “V” shape of any size into each piece, making sure you leave at last 3 in. (7.5 cm) at each side of the “V”. This is purely decorative but gives the stool character. Use a fret saw to cut out the “V” shape.
-
 Step 3
Working on a hard surface, position one of the legs inside the box and hold firmly in place. Use a hammer and nails to secure the box to the legs, using two nails per leg per side. Stand the stool upright and add four nails to each corner to secure the top of the box to the legs. Measure the distance between the two legs and cut the support piece to this length. This extra piece of wood is necessary to support the legs. Slot the support position into position and nail through the legs on each side into the support piece.
-
 Step 4
Paint the stool, adding two or three coats as needed. Allow to dry fully between coats. Note that this is a decorative stool and is not designed to carry heavy weights.