

About
Two pendant in one
The timing includes the cooking part in oven (30')...
It's my firs How to and i admit it was so more easy to do then to explain! XD
(plus i'm italian so have mercy for my english or clumsy explanation)
I hope you can find it fun and useful
Tags
-
 Key West Witch added Round Necklace Fimo to Jewelry
30 Jun 03:51
Key West Witch added Round Necklace Fimo to Jewelry
30 Jun 03:51
-
 Lauren W. favorited Round Necklace Fimo
27 Oct 12:32
Lauren W. favorited Round Necklace Fimo
27 Oct 12:32
-
 Step 1
For this you will need 2 different (or more) color of polymer clay. I used Cernit but Fimo is more soft to work with.
The necklace is composed from 3 pieces.
2 parts of pendant
1 closure
I don't have the photos of the making but is really simple and you can DIY like your imagination guide you. -
Step 2
I liked the circle version so I stirred a little quantity of Brown & Black Fimo and when i liked the result i flattened it and gave the round form. I used a cutter for the hole where the thread will pass (make it big enough for pass without problem)
Then i made 2 cords with Black fimo and rolled them togheter then combined them at the ends. Be careful to do them some centimeters more wide then the Circle pendant.
I cutted another little cords of the black fimo and made an hole in the center of the thread dimension. This will be the closure of the necklace.
Then put it in the oven at 130° for 30'. -
 Step 3
In the waiting i prepared the thread.
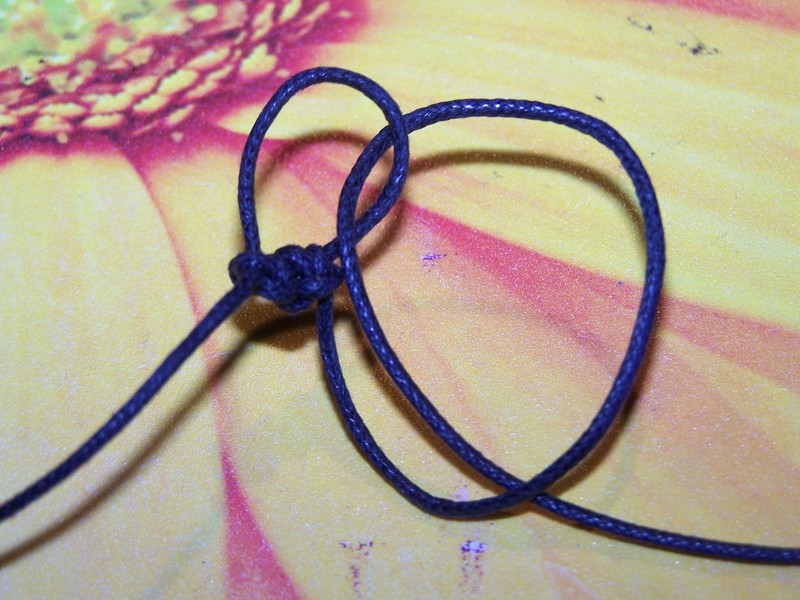
At one of the ends i made the eyelet (occhiello in italian,sorry i'm not sure of the translation <.<") like in the picture, be sure the to make it wide enough for the closure to pass. I did not do the loop at the end but more like 1/4 from the end becouse we will need the remain thread for making the eyelit more nice and resistant.
So i made a loop then whit the ending cord i made many nodes around it.
It's difficult to explain but really easy do to!
Make nodes around the loop until you can (for no more space or finished thread)
I added this pic in the top to be more easy to see. -
 Step 4
The result will be something like this.
In the maintime the oven should be done so take out the 3 pieces and let them cool.
You can also put on them some polish for make them shiny but i did not becouse i liked the "stone effect" more.
In case you do, be veeery careful to do one side at time and let they dry well before to touch them! -
 Step 5
We're almost done.
Take mesure for the lenght taking in mind that you will need some more thread for make some nodes for the circle pendants in the half.
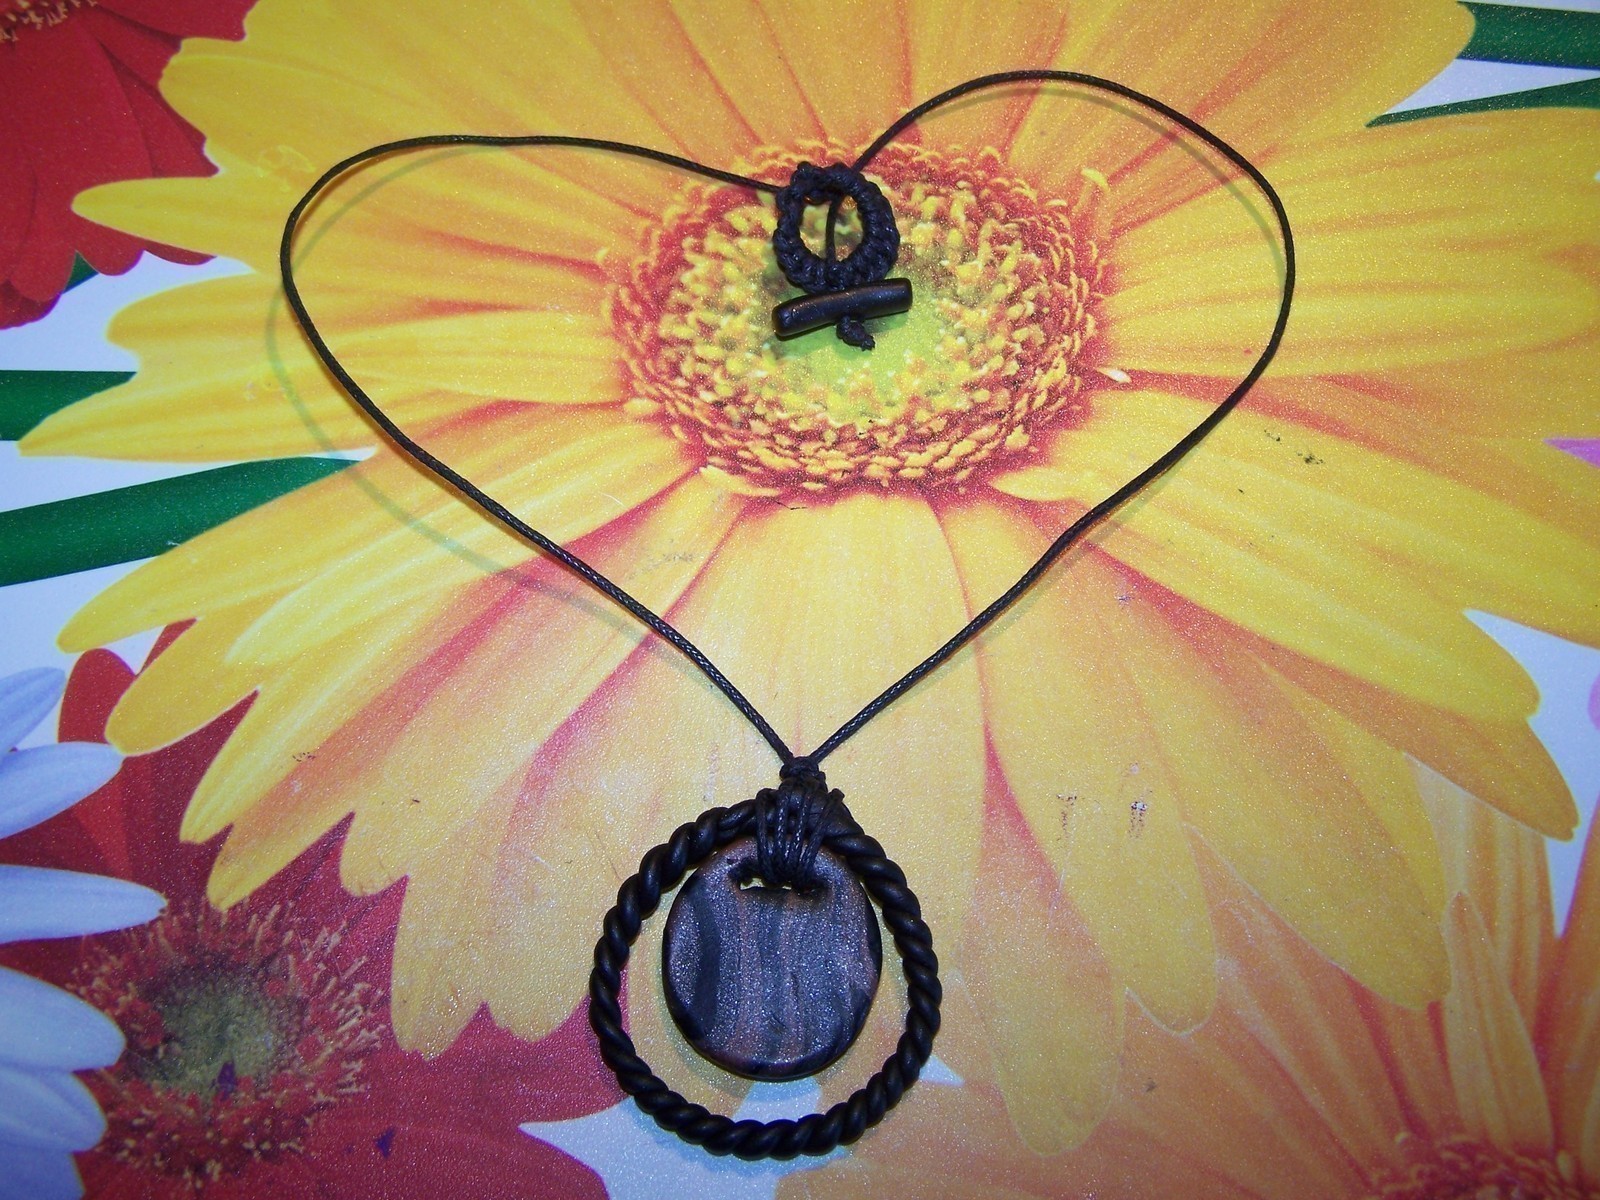
Now you have to pick the two pendandt and tie them togheter in the center of the thread.
I'm sorry, i don't have the pic for this passage. But the big one for the final will be good for reference.
I did two circle around them, passing in the hole and setting the circle whit the pendant (hiddening the part united). I made the node for fix them. -
 Step 6
Pick the other end and if needed, system the lenght.
Make a node at one or two centimeter to the end then thread the closure up to it.
Make another node directly attached on the little one for fix it, be sure it will not go enywhere. -
 Step 7
Congratulation you're done!
You can do it in every form you like, be sure to do the other rolled part of the pendand of the same form to make it nicer!
Hope you liked it!
Thanks