Rolling Bar Cart
Extract from I Modify IKEA • By Charlotte Rivers and Elyse Major • Published by Ulysses Press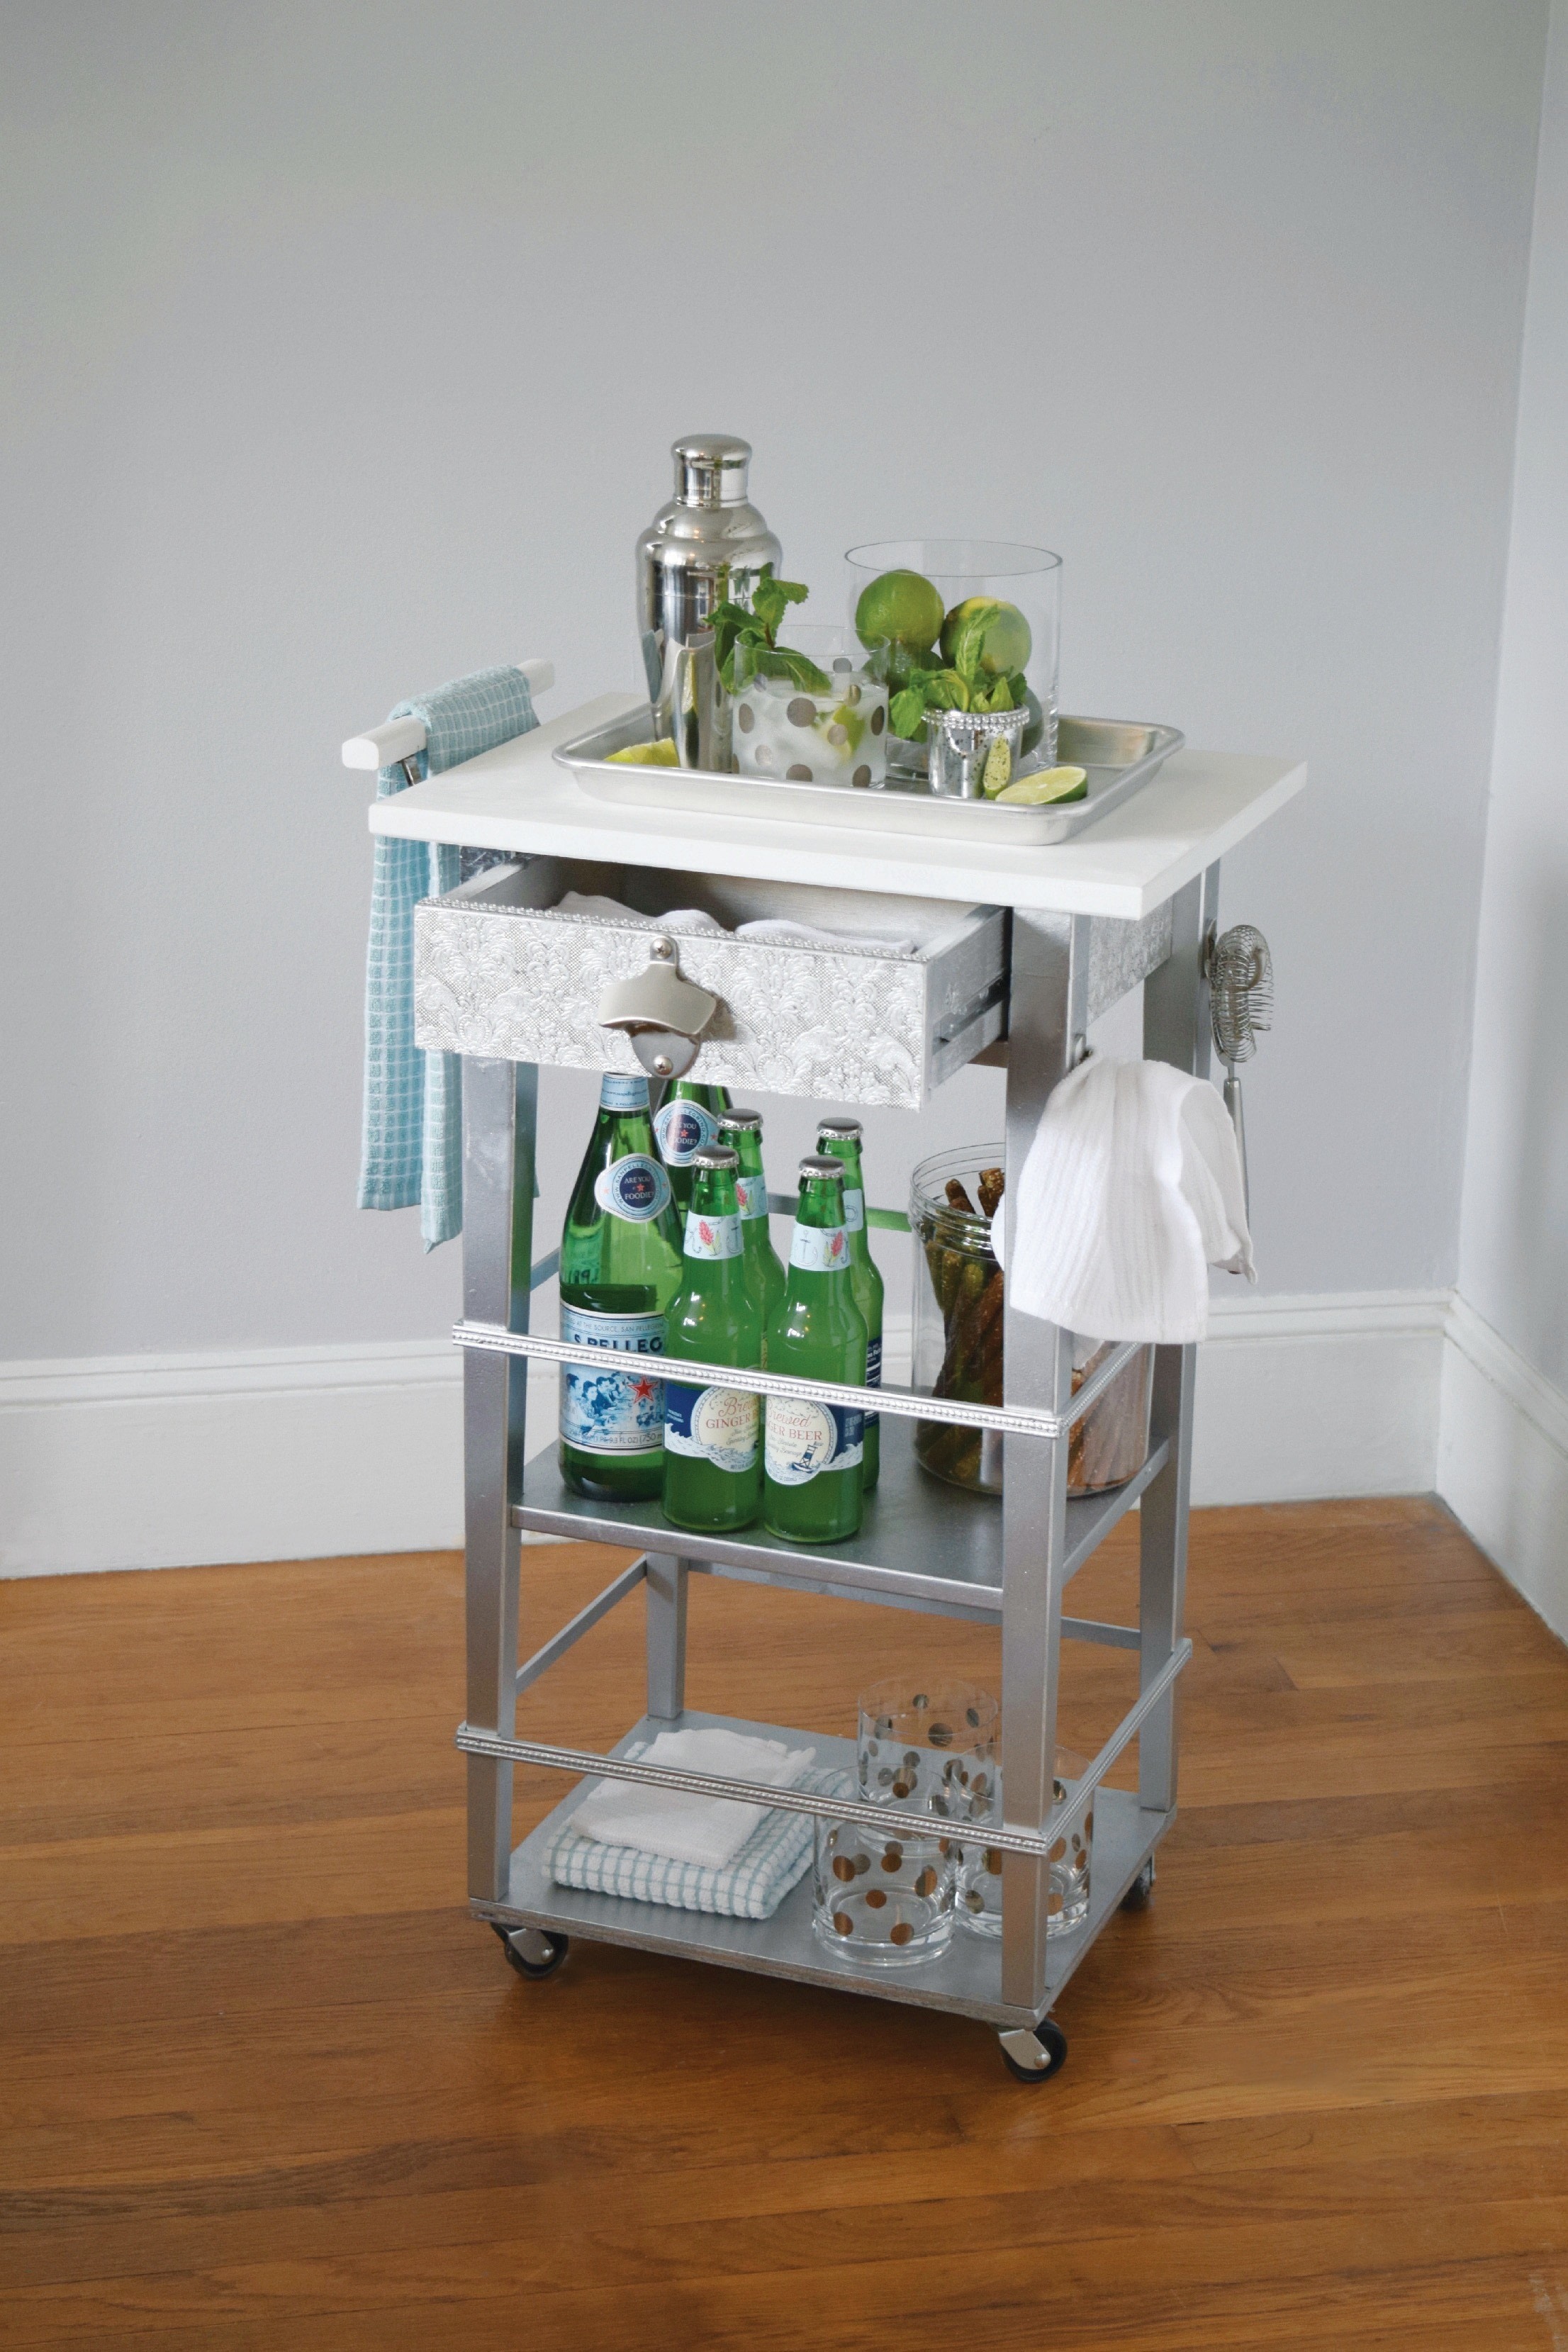

About
I Modify IKEA
Designed by: Elyse Major
Outfit this nightstand into a bar cart, ready to stock with your favorite drinks. You can roll the party from room to room!
TIME: 1 1⁄2 HRS+
DIFFICULTY: ADVANCED
-
 Libby W. added Rolling Bar Cart to Magnus bane’s apartment
27 Apr 16:01
Libby W. added Rolling Bar Cart to Magnus bane’s apartment
27 Apr 16:01
-
 Emma H. favorited Rolling Bar Cart
14 Nov 19:43
Emma H. favorited Rolling Bar Cart
14 Nov 19:43
-
 Ulysses Press published her project Rolling Bar Cart
07 Nov 09:00
Ulysses Press published her project Rolling Bar Cart
07 Nov 09:00
You Will Need
-
 Step 1
Assemble the nightstand following the assembly instructions. Then, using a tape measure, measure the bottom perimeter of the cart defined by the le
-
Step 2
Place the cart on top of the plywood base so that each le
-
Step 3
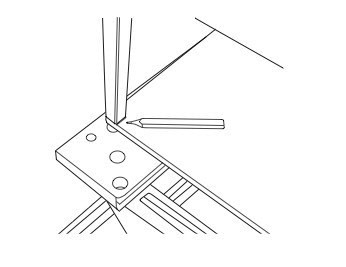
Use a pencil to trace each leg’s footprint onto the base. Use a ruler and pencil to find the center of the traced areas.
-
 Step 4
Drill pilot holes through the center points using a bit suitable for a #6 11⁄2-inch (4-cm) construction screw.
-
Step 5
Turn the table over onto the floor. Be sure to place it on a surface that won’t scratch its top. Place the plywood base on the legs of the table, aligning the top and front accordingly.
-
 Step 6
Drill through the holes you made in the plywood base so that the pilot holes are e
-
 Step 7
Do this for each corner of the plywood base. Drill pilot holes where indicated by your pencil marks. The holes should be drilled with a bit appropriate for the size of the mounting screws. (Be sure not to have the casters in place when drilling the pilot holes.)
-
 Step 8
Working one corner at a time, position each caster over its pilot hole and install to the bottom of the plywood base using a screwdriver and the included screws. Be sure all casters are installed to face the same direction.