


About
with how-to for the shrug!
When you go shopping these days you can´t deny there are jumpsuits everywhere you look. i wanted one too, but didn´t find the one i liked (as always...) In the Burda Style magazine (July issue) was a jumpsuit pattern and i decided to give it a try. Although i changed the pattern a bit (as always...:))
I used black jersey and red jersey with printed rockabilly images.
The jumpsuit consists of shorts, i added straps at the hem for a bloomers effect, a belt, a tubetop with yoke, pockets.
The shrug is basically made from the red jersey and has black jersey edging. i wanted something to match with the romper, because it is off-shoulder and i feel cold very fast. furthermore, i created some kind of extreme crop top, a thing i want to own for a while! the pattern i used was in an ancient burda magazine, it was a sweater and i just cut it to the length i wanted. you can probably use a sweater you own as pattern.
i recommend to use a serger for the seams because it´s made from jersey and i don´t trust zigzag and a normal stepstitch in this case, but you can try it!
the black jersey was a bargain and the red i got for free because i purchased four yards from the lady that sell these and she had this 4+1 for free thing. all in all, it costs me about 5€.
sorry, no pics with my head at the moment... and maybe, just maybe i should tidy up my craft room...
Tags
-
 Zacharie M. favorited Rockabilly Jumpsuit And Shrug
01 May 20:52
Zacharie M. favorited Rockabilly Jumpsuit And Shrug
01 May 20:52
-
 Roughwaters44 favorited Rockabilly Jumpsuit And Shrug
08 Jul 03:33
Roughwaters44 favorited Rockabilly Jumpsuit And Shrug
08 Jul 03:33
-
 Amara Ann favorited Rockabilly Jumpsuit And Shrug
01 Jul 18:17
Amara Ann favorited Rockabilly Jumpsuit And Shrug
01 Jul 18:17
-
 acid favorited Rockabilly Jumpsuit And Shrug
30 Mar 15:54
acid favorited Rockabilly Jumpsuit And Shrug
30 Mar 15:54
-
 Chrystal J. favorited Rockabilly Jumpsuit And Shrug
12 Feb 01:18
Chrystal J. favorited Rockabilly Jumpsuit And Shrug
12 Feb 01:18
-
 x_niccadee favorited Rockabilly Jumpsuit And Shrug
29 Nov 05:41
x_niccadee favorited Rockabilly Jumpsuit And Shrug
29 Nov 05:41
-
 Cortney R. favorited Rockabilly Jumpsuit And Shrug
17 Nov 21:19
Cortney R. favorited Rockabilly Jumpsuit And Shrug
17 Nov 21:19
-
 Taba__tina favorited Rockabilly Jumpsuit And Shrug
03 Oct 11:56
Taba__tina favorited Rockabilly Jumpsuit And Shrug
03 Oct 11:56
-
Shantelle t. added Rockabilly Jumpsuit And Shrug to something i'd like to try
02 Oct 03:19
-
kim s. favorited Rockabilly Jumpsuit And Shrug
24 Sep 02:52
-
Step 1
a quick look on the jumpsuit:
all you need for a jumpsuit in this style:
*shorts (makes 2 front and 2 back parts)
*a yoke (basically a strap as long as your upper edge of the shorts)mine has two side seams
*a tube top (a rectangle, one seam at the centre back)
*a strap for the upper edging as long as your upper edge of the tube top
*pocket pouches (2 for each pocket)they´re easy to make, just lay your hand on the shorts part at the side seam and trace around your hand
*strings for the shorts hems and the yoke
*elastic for the tube top edgingthere´s a vid on youtube where a girl explains how to make a jumpsuit out of a t-shirt, it was discussed here in the forum, although she made an opening at the front: http://www.youtube.com/watch?v=sF_BaBv_ppo
the pockets: just sew a pocket pouch right sides facing to the outer side seam of each shorts part. when you close the outer seam, just close above and underneath the pocket and sew the two pouches together.
the hems: leave a gap at the outer side seam when you close it. finish the edges, flip over the seam allowances of the hem and sew a tunnel. -
 Step 2
now the shrug:
use a pattern for a jersey sweater or the sweater itselfyou need
*front (on fold)
*back (on fold)
*sleeves
*shoulder attachment
*jersey bias tapejust lay your sweater on a piece of paper and trace around the outlines. i cut the sweater pattern 5cm from the armpit and drwe a striaght line to centre front/back. define the neckline
-
 Step 3
draw in the shape of your shoulder attachment, be sure to start the line at a moderately curcved part of the sleeves, if you use a pattern, don´t draw underneath the notch for the sleeve/body
-
 Step 4
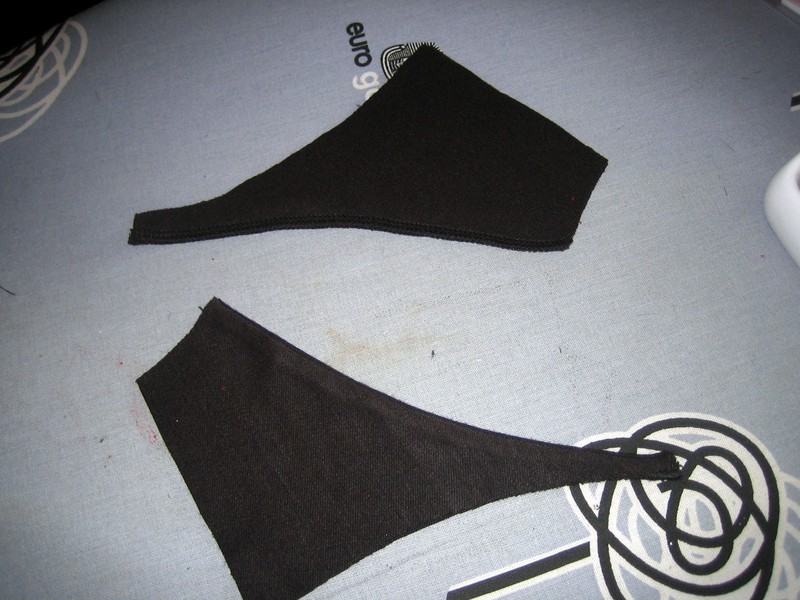
sew together the sleeve attachment parts right sides facing and flip over. press the attachment and slide one side a bit over the edge of the seam (so you make sure you can´t see the seam when you´re wearing the shrug)
baste the attachment with the slided side up to the shoulder, armhole and neckline. -
Step 5
sew side and shoulder seams and the seams of the sleeves.
-
 Step 6
sew the bias tape to the lower edges of the body, the sleeves and the neckline.
for making bias tape just cut strips of fabric in an right angle to the selvage.
to sew on bias tape lay the tape right side facing to the right side of the edge and sew along. make sure you close the bias tape first to a loop.
wrap the tape around the edge and fold in the seam allowance of the tape. topstitch from the right side (on the tape or in the crease between tape and shell fabric). As the topstitching doesn´t work with my machine (i want it stretchy) and i was too lazy to sew it by hand i got my serger and sewed from the right side with an overlock stitch (but be sure to remove the blade)


Comments

