

About
A tutorial on applying stencils to objects of your choice
Hey guys. Decided to make an actual tutorial and show my process of stenciling. I hope you love it and get inspired <3
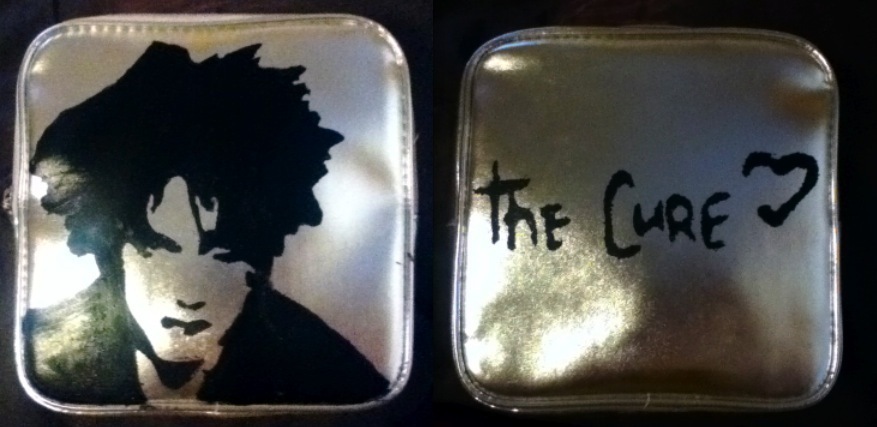
Now I LOVE stenciling, because it looks cool and you can stencil on almost anything. You can use my process of stenciling on pretty much anything you like such as clothes, bags, canvas, the possibilities are endless. I found the 90's looking silver makeup bag in a box of junk and it reminded me of 80's and 90's teen memorabilia with like girl's fav bands on everything from tees to posters and back to school gear. This method is pretty easy and I think you'll be able to use it in lots of diff ways :D
Tags
-
 Shawntay A. added Robert Smith Stenciled Silver Makeup Bag to To-make list
11 Jan 21:16
Shawntay A. added Robert Smith Stenciled Silver Makeup Bag to To-make list
11 Jan 21:16
-
 ElizabethJuddTaylor favorited Robert Smith Stenciled Silver Makeup Bag
04 Nov 17:04
ElizabethJuddTaylor favorited Robert Smith Stenciled Silver Makeup Bag
04 Nov 17:04
-
 Cheshire x. favorited Robert Smith Stenciled Silver Makeup Bag
14 Oct 01:32
Cheshire x. favorited Robert Smith Stenciled Silver Makeup Bag
14 Oct 01:32
-
 Mariah K. favorited Robert Smith Stenciled Silver Makeup Bag
10 May 05:15
Mariah K. favorited Robert Smith Stenciled Silver Makeup Bag
10 May 05:15
-
 Laura Gloomy.Panda favorited Robert Smith Stenciled Silver Makeup Bag
05 Sep 16:41
Laura Gloomy.Panda favorited Robert Smith Stenciled Silver Makeup Bag
05 Sep 16:41
-
 aradevon added Robert Smith Stenciled Silver Makeup Bag to DIY Ideas
01 Sep 12:47
aradevon added Robert Smith Stenciled Silver Makeup Bag to DIY Ideas
01 Sep 12:47
-
 Grimgirl101 favorited Robert Smith Stenciled Silver Makeup Bag
21 Jun 00:44
Grimgirl101 favorited Robert Smith Stenciled Silver Makeup Bag
21 Jun 00:44
-
 annabelle S. favorited Robert Smith Stenciled Silver Makeup Bag
12 Feb 01:32
annabelle S. favorited Robert Smith Stenciled Silver Makeup Bag
12 Feb 01:32
-
 nigrummonten favorited Robert Smith Stenciled Silver Makeup Bag
04 Feb 05:15
nigrummonten favorited Robert Smith Stenciled Silver Makeup Bag
04 Feb 05:15
-
 Sexi_PerMexi85 added Robert Smith Stenciled Silver Makeup Bag to must make!!
20 Dec 07:31
Sexi_PerMexi85 added Robert Smith Stenciled Silver Makeup Bag to must make!!
20 Dec 07:31
-
 Step 1
Find stencils online and put them into Word or Pages and scale them to size and print. if you'd like to use the stencils I'm using, here are the links
http://www.stencilry.org/stencils/bands/cure/cure1.gif
&
http://www.stencilry.org/stencils/bands/cure/cure2.gif
or of course you can create your own stencil. Here's a website for translating photos into stencils
http://strix.org.uk/stencil/
Then gather the rest of your materials:
card stock
cardboard
object to stencil on
stencils
scissors
marking tool(optional)
seam ripper(optional)
craft knife
paint, paintbrush and something to pour paint onto
tape
and a safe workspace, we don't want to get craft knife marks on our nice tables. I work on an art board so I can lay on my bed and work :D -
 Step 2
cut a piece of card stock large enough to fit your stencil onto and tape to your cardboard(the cardboard makes it easier to cut the stencil out)
-
 Step 3
now tape the stencil to the card stock, now everything's sturdy and not going to slide around while you work :)
-
 Step 4
This step is optional
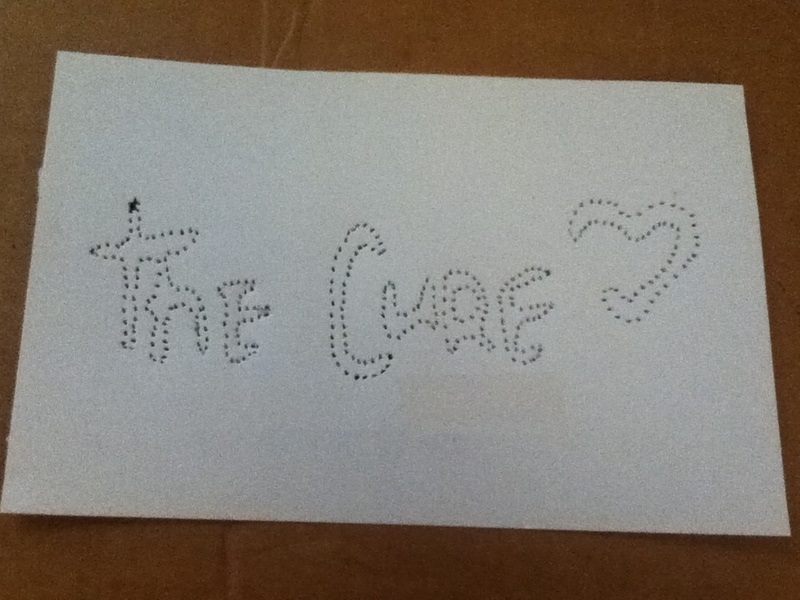
Take a seam ripper and poke tiny holes ALL the way around the stencil, I feel it makes it easier to cut through with a craft knife later, but if you think it's unnecessary and/or too much work, don't do it. It's not crucial.
-
 Step 5
if you decided to follow the last step, then this is what your stencil should look like when you finished creating the tiny holes. you can use a marking tool to redraw the lines of the stencil to guide you when cutting it out. if you didn't follow the last step, just leave the stencil on the card stock.
-
 Step 6
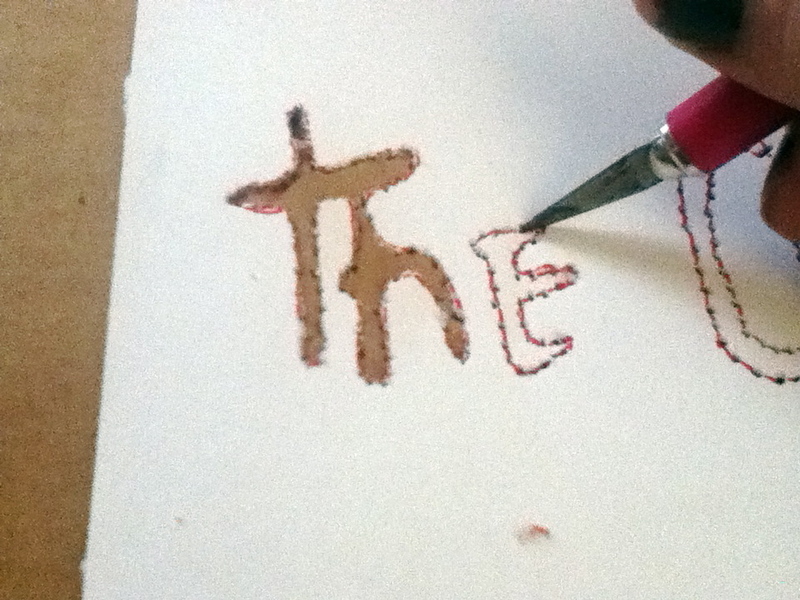
Now, begin to CAREFULLY cut out the stencil. I've nicked my self a couple of times and it does NOT feel great.
-
 Step 7
some stencils have these annoying little white parts in which they don't connect with the other white parts. So cut it out carefully and set aside for now.
-
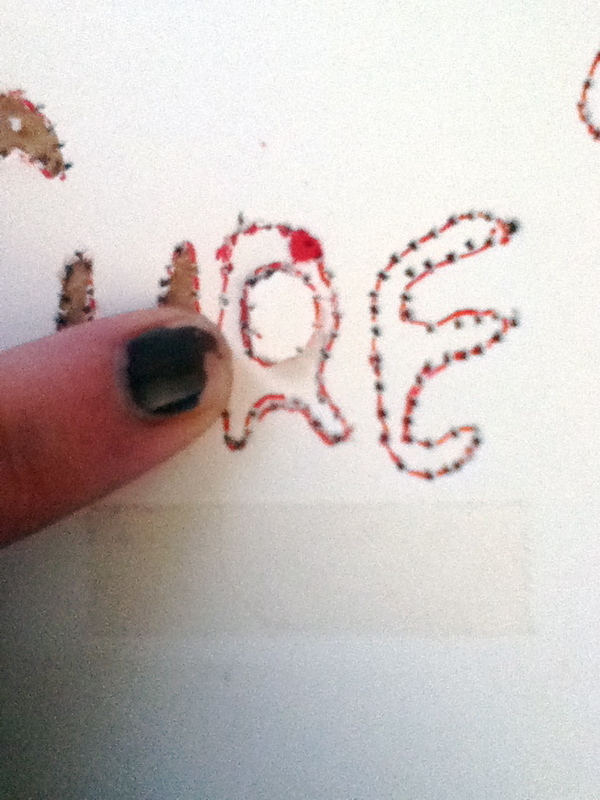
 Step 8
Yay, now the stencil is finished and ready! If you decided to leave the original stencil on the card stock and just cut out with a craft knife, now you can take it off :)
-
 Step 9
Securely tape the stencil to the object. This can be awkward, depending on the shape of the object. Just tape it as securely as you can for now.
-
 Step 10
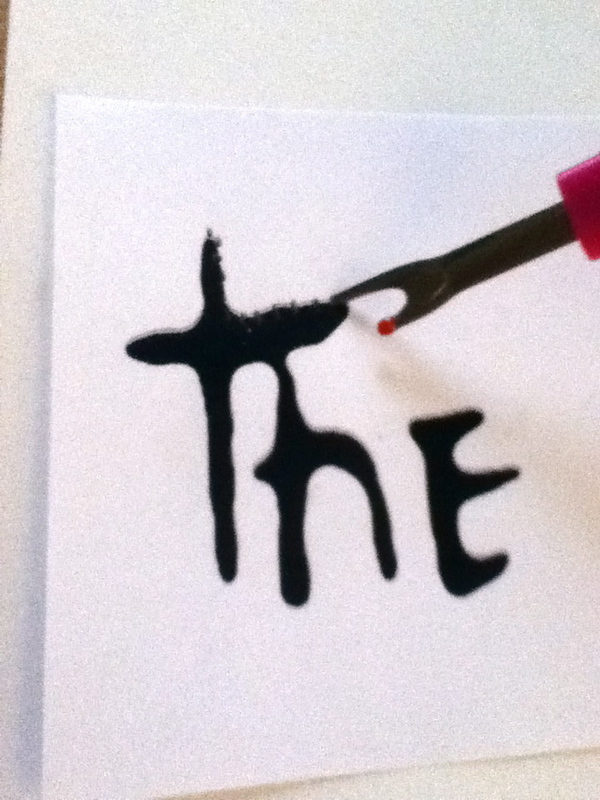
also, remember this little bugger...well I just simply put a tiny sliver or tape on it and stuck it to the bag where it would normally go :)
-
 Step 11
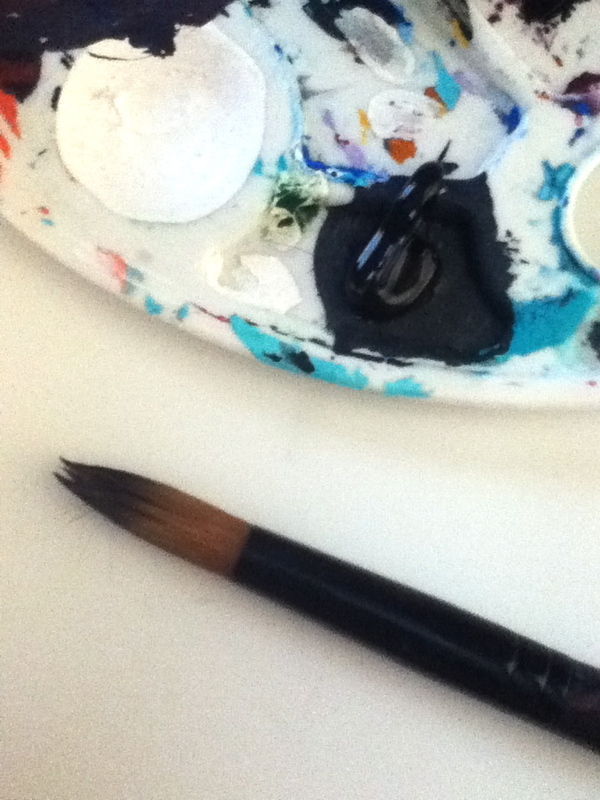
Squeeze some paint onto a paper plate or a palette of some sort.
-
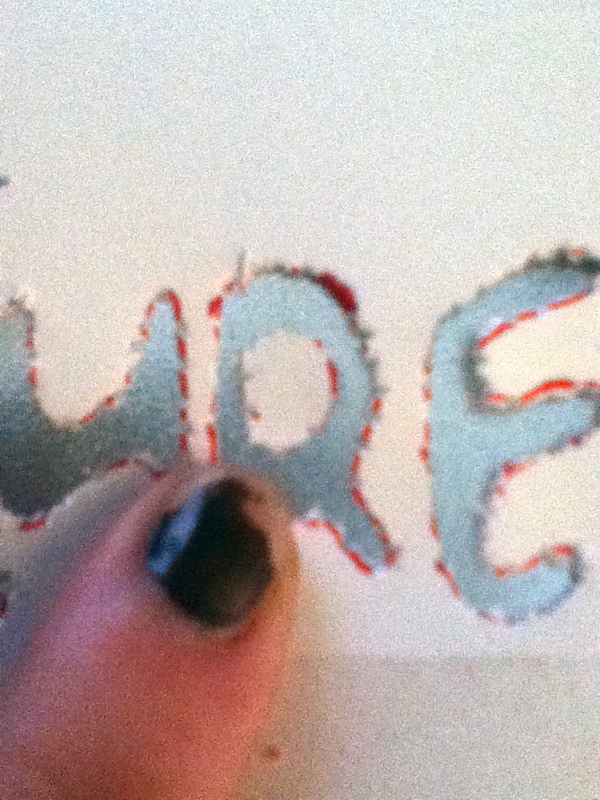
 Step 12
Now apply paint all over the stencil. Don't apply too much, for it can cause bleeding and clumpiness. Just a nice thin layer should do the job. Also, for those awkward areas I mentioned earlier; when applying paint, gently pressed down around the area, this will ensure that the paint is forming into the right shape.
-
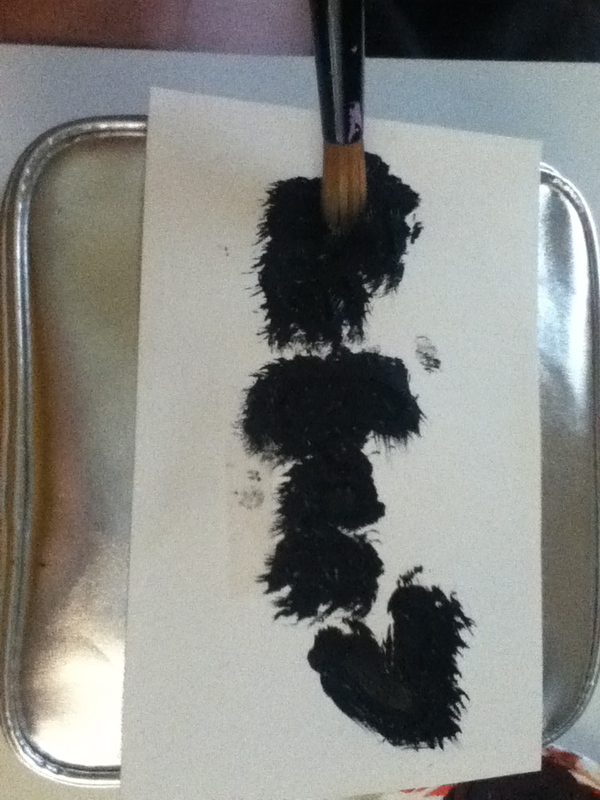
 Step 13
Gently peel off the stencil and any small white pieces and let dry. I don't recommend letting the paint dry before peeling the stencil off. it could make the stencil stick to the object and that's not fun. If you have some sort of varnish you'd like to spray over the stencil, be my guest. But I've never used a varnish and all the items I've stenciled are in perfect condition :)


Comments


