

About
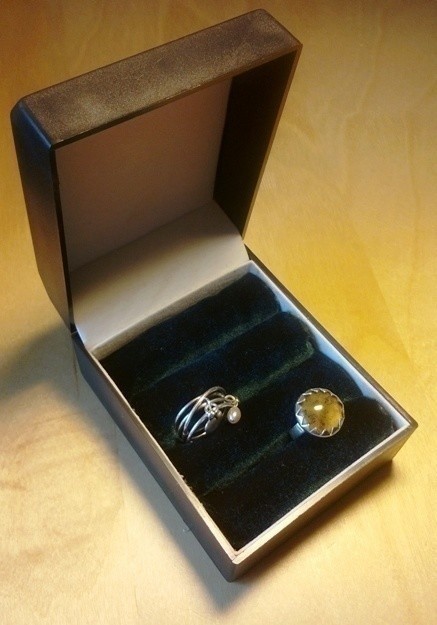
What once was an empty box... now a small box of treasures!
I was in a need of a jewellery box for my rings so I had this idea that I could make one for myself!
-
 Annie S. favorited Ring Jewellery Box
25 Feb 13:41
Annie S. favorited Ring Jewellery Box
25 Feb 13:41
-
 Moira A. favorited Ring Jewellery Box
02 Jan 18:27
Moira A. favorited Ring Jewellery Box
02 Jan 18:27
-
 Penny F. added Ring Jewellery Box to organization!
17 Jan 03:22
Penny F. added Ring Jewellery Box to organization!
17 Jan 03:22
-
 Sarah B. added Ring Jewellery Box to Housewares
14 Nov 05:32
Sarah B. added Ring Jewellery Box to Housewares
14 Nov 05:32
-
 Vanessa B. added Ring Jewellery Box to Jewelry
04 Nov 01:32
Vanessa B. added Ring Jewellery Box to Jewelry
04 Nov 01:32
-
 Taylor B. favorited Ring Jewellery Box
30 Oct 18:08
Taylor B. favorited Ring Jewellery Box
30 Oct 18:08
-
 Jennifer M. favorited Ring Jewellery Box
15 Oct 02:37
Jennifer M. favorited Ring Jewellery Box
15 Oct 02:37
-
 J. Pario commented on Ring Jewellery Box
12 Oct 22:17
J. Pario commented on Ring Jewellery Box
12 Oct 22:17
-
J. Pario favorited Ring Jewellery Box
12 Oct 22:16
-
Anett E. favorited Ring Jewellery Box
11 Oct 20:11
You Will Need
-
 Step 1
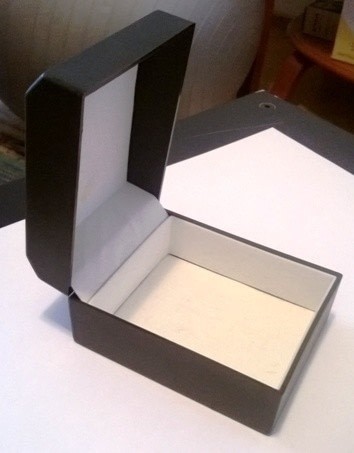
Take a box or whatever container you want to transform into a ring jewellery box.
The great thing is that you can make this box any size you want, you can have it done for just a few rings or then for 20+ rings, it just depends on your box's size!I decided to make mine from this box that used to contain a wrist watch.
-
 Step 2
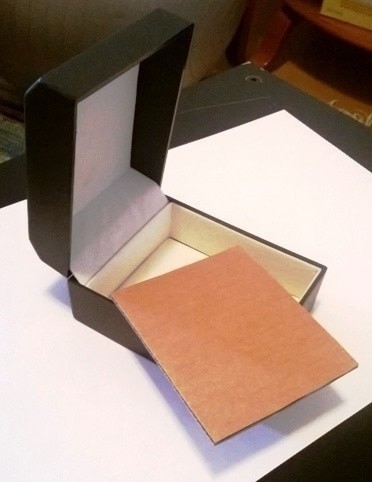
Now take a piece of cardboard and cut it to fit in to your box. This will be the base for the padding.
-
 Step 3
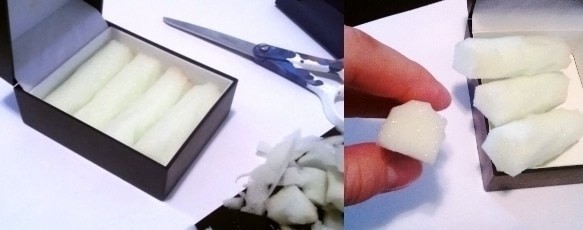
For the padding I used plastic foam, but I guess you can use some other material that holds its form.
First I cut the foam roughly about 2x2cm blocks, the lenght of the block depends on your boxe's size.
Then I used scissors to shape the blocks into a semicircle form, so the top part of the block is curved and the part that comes underneath is flat. -
 Step 4
Next step is to choose your fabric.
I had a piece of dark green velvet that I thought would look great on the padding. -
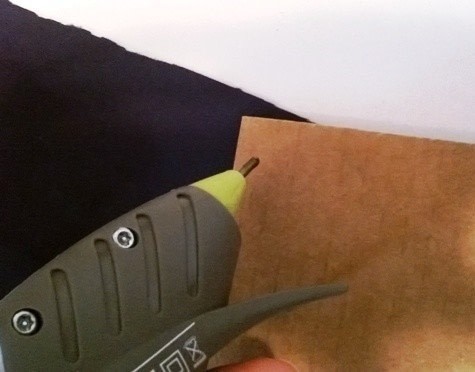
 Step 5
Now place your fabric upside down and take out your gluegun.
-
 Step 6
Glue the cardboard on the edge of the fabric.
-
 Step 7
Glue the first block of padding on the edge of the cardboard.
-
 Step 8
Firmly bend over the fabric and you have your first row of padding nearly done!
You just need to attach the fabric onto the cardboard. Maybe you could use the glue gun to do that but I decided to go with staples. -
 Step 9
Make sure you hold the piece off of the edge of the table so you don't also staple the table.
-
 Step 10
Now you have the staples sticking out from the backside of the cardboard, so you need to bend them. I used pliers to do that.
-
 Step 11
Now you can continue with the padding just by glueing another block into place and stapleing it again OR if you for some reason can't continue with the piece of fabric you have then just cut the fabric off (like I did because there was somekind of stain in it).
Maybe this way you could do the padding in multicolour!
-
 Step 12
So take another piece of fabric and glue it on the cardboard. Make sure you have the fabric right way!
Then glue on the padding block. Bend over the fabric and staple.
-
 Step 13
Once you're down to your last piece of padding, take out your glue gun and glue the fabric to the backside of the cardboard.
-
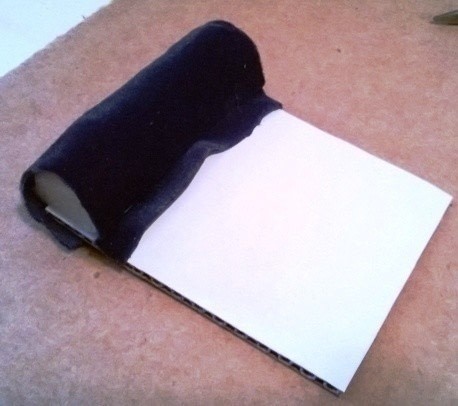
 Step 14
This is how mine looked when finished. Trim the edges if necessary.
-
 Step 15
Now slide the padding into place.
-
 Step 16
You can adjust the edges a bit with glue if the fabric isn't neatly tucked in.
As an afterthought: perhaps you could add some nice string to go with the curves, plus it might help hide any flaws if there is any.
-
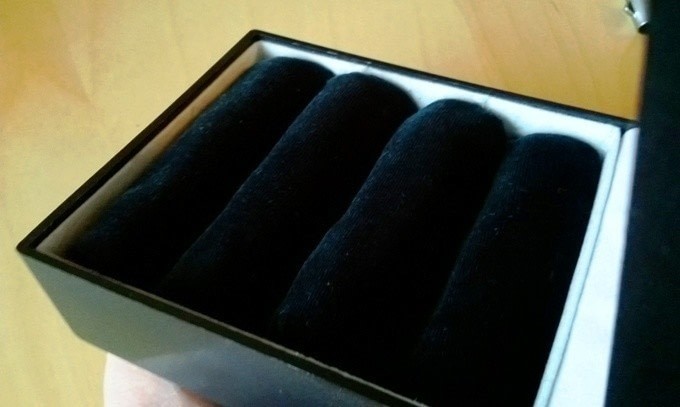
 Step 17
And now the ring jewellery box is done!
Mine holds about 9 rings.


Comments

