
About
An Easy Way to dress up an Outfit
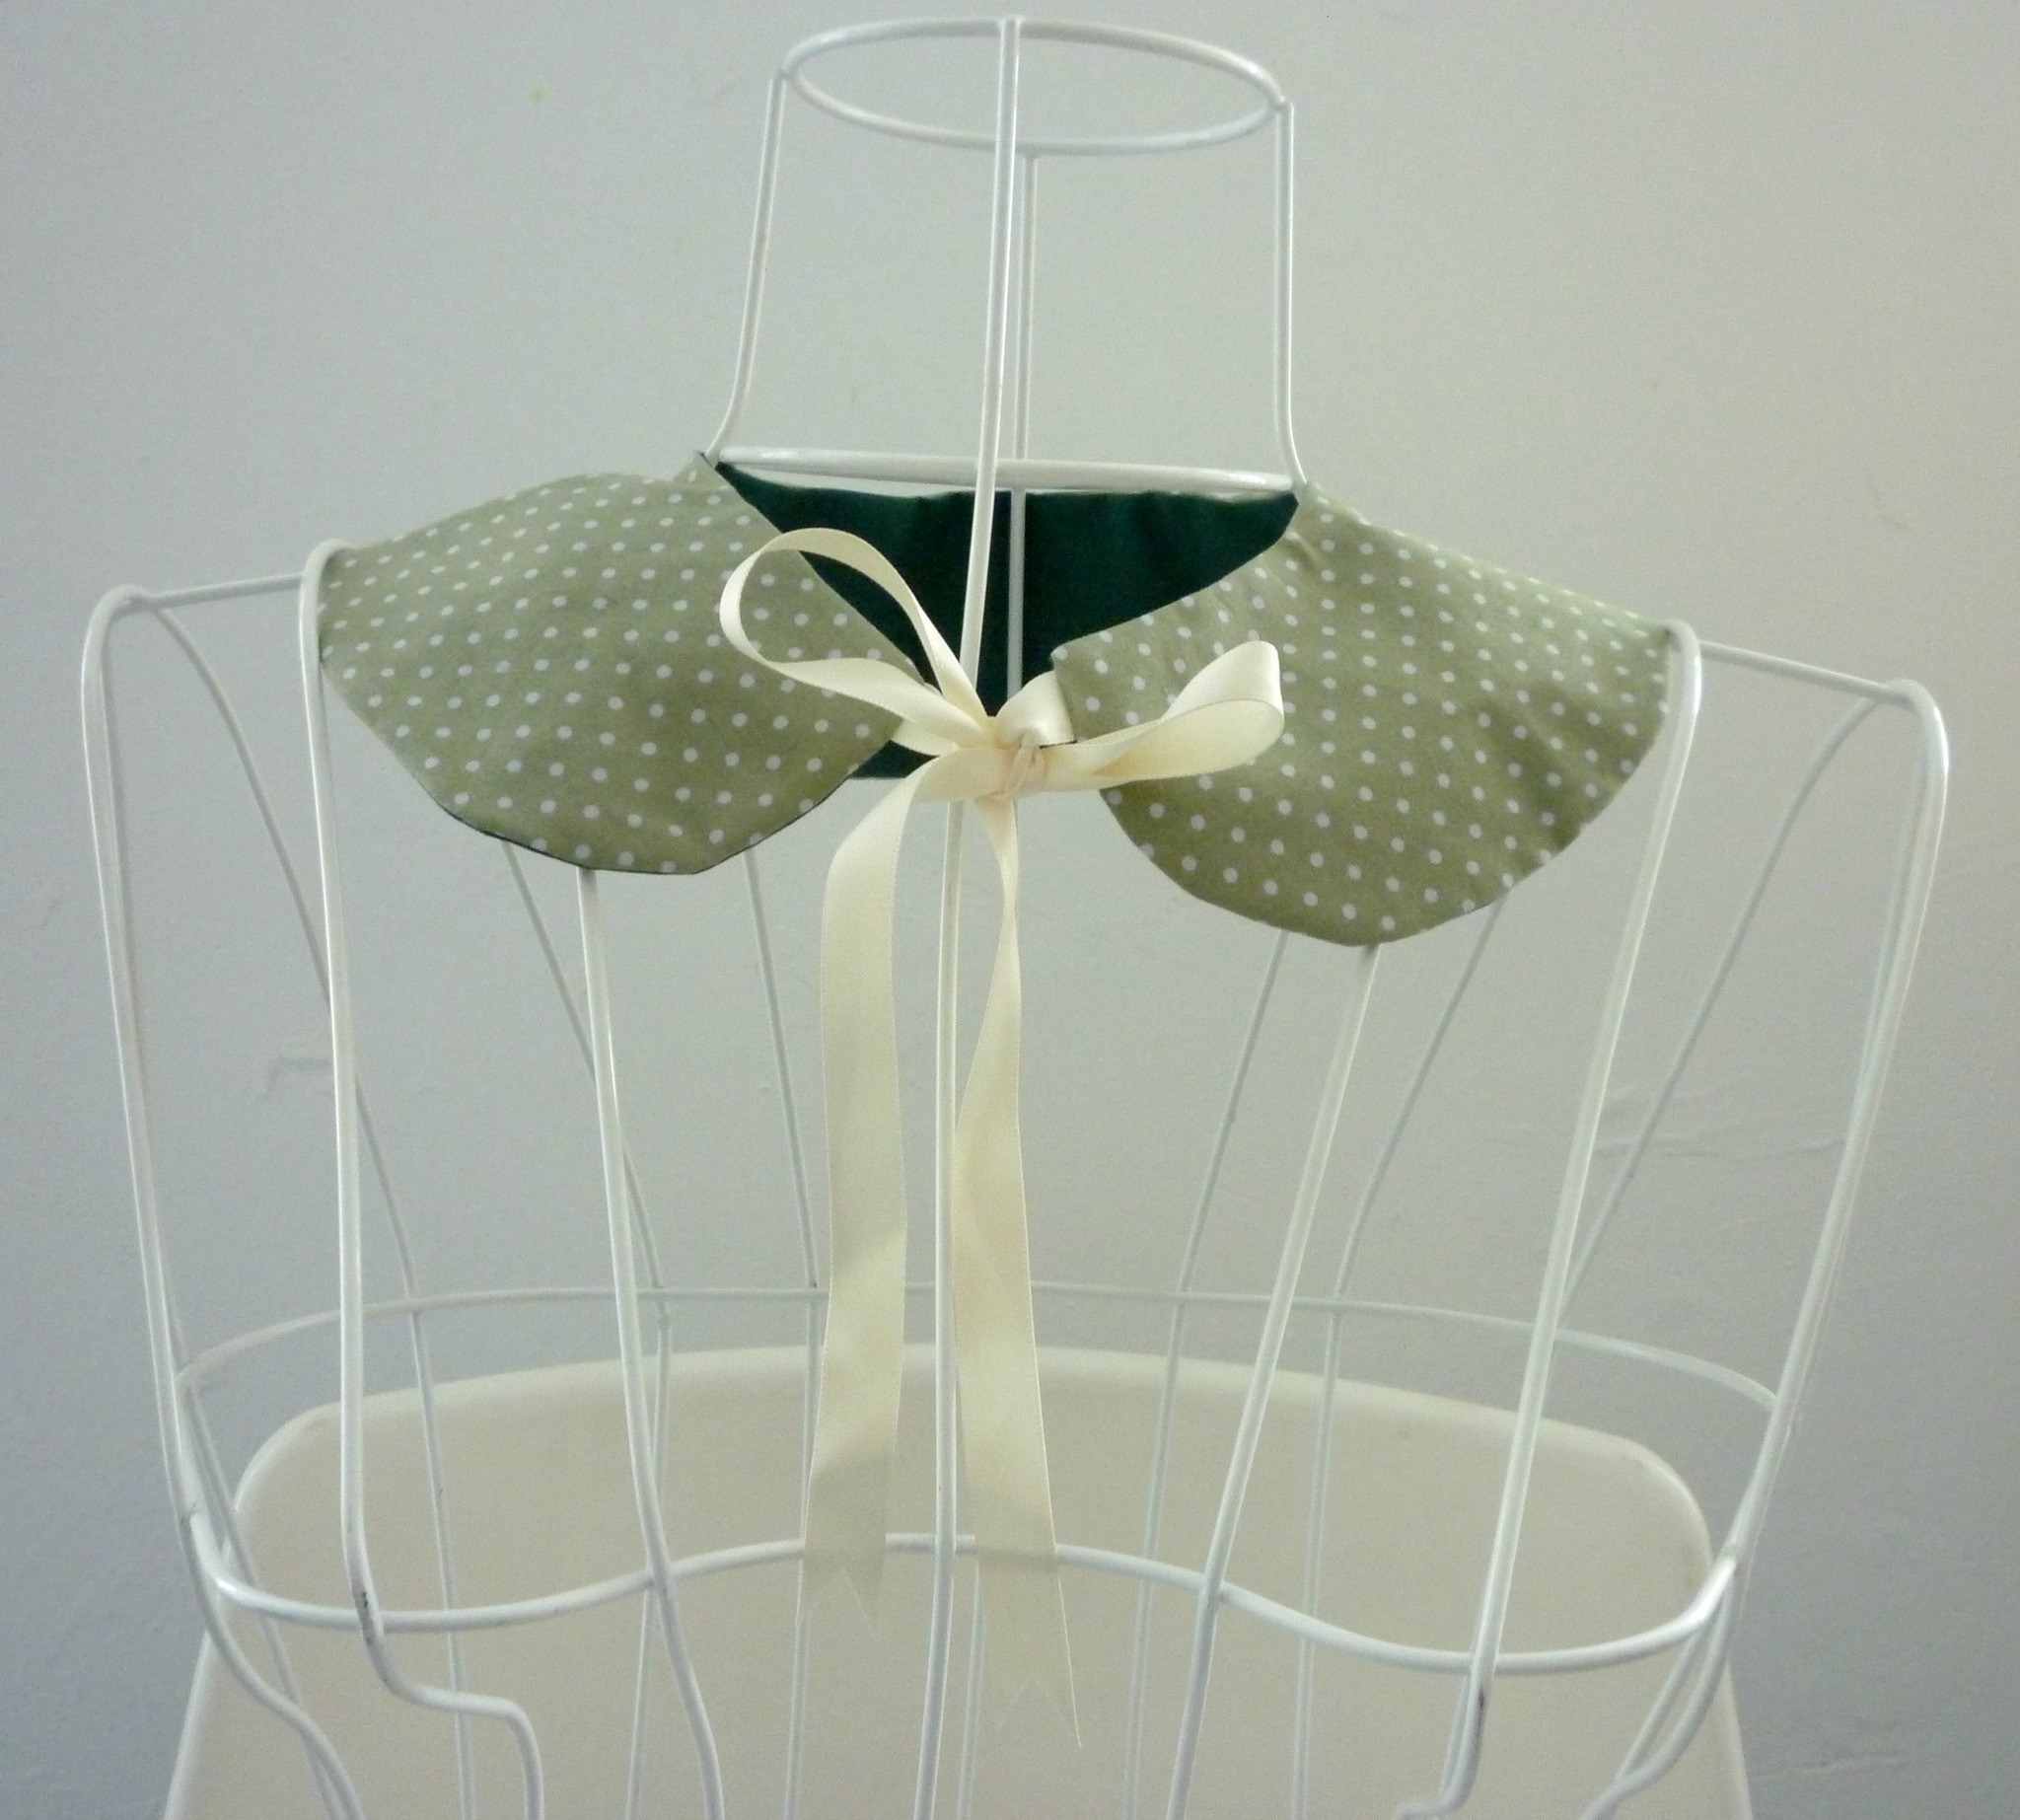
You can easily make your own collar using small amounts of fabric. This 'How To' is for a reversible, removable collar that ties with a ribbon. It uses a plain and a patterned cotton and is great to wear to add interest to plain tops.
When choosing your fabric, a light to medium weight cotton or polyester cotton mix is recommended. I was able to use fabric scraps for this version but if buying fabric specifically for the collar, buy in ¼ metre amounts. You might be able to get a piece of the right size in the remnant bin of your local fabric shop. If you're thinking about trying this, you could bring the pattern piece to the shop with you to check the sizing.
To create the pattern piece you can draw your own, or I used the one created by Colette Pattern and available here: http://media.colettepatterns.com/free/patterns/colette-patterns-0002-collar.pdf
-
 Kyara S. favorited Reversible Peter Pan Collar
03 Oct 23:07
Kyara S. favorited Reversible Peter Pan Collar
03 Oct 23:07
-
 Jessica S. favorited Reversible Peter Pan Collar
22 Feb 06:23
Jessica S. favorited Reversible Peter Pan Collar
22 Feb 06:23
-
 Loki_Doki favorited Reversible Peter Pan Collar
20 Feb 21:51
Loki_Doki favorited Reversible Peter Pan Collar
20 Feb 21:51
-
 Genesis G. favorited Reversible Peter Pan Collar
28 Jul 08:35
Genesis G. favorited Reversible Peter Pan Collar
28 Jul 08:35
-
 Kate H. favorited Reversible Peter Pan Collar
03 Mar 22:30
Kate H. favorited Reversible Peter Pan Collar
03 Mar 22:30
-
 Alex B. favorited Reversible Peter Pan Collar
13 Dec 19:03
Alex B. favorited Reversible Peter Pan Collar
13 Dec 19:03
-
 Laouen favorited Reversible Peter Pan Collar
05 Dec 17:01
Laouen favorited Reversible Peter Pan Collar
05 Dec 17:01
-
 Krystal B. added Reversible Peter Pan Collar to Favourites
23 Sep 04:26
Krystal B. added Reversible Peter Pan Collar to Favourites
23 Sep 04:26
-
 Katie C. favorited Reversible Peter Pan Collar
30 Aug 12:34
Katie C. favorited Reversible Peter Pan Collar
30 Aug 12:34
-
 Kerry P. published her project Reversible Peter Pan Collar
17 May 18:38
Kerry P. published her project Reversible Peter Pan Collar
17 May 18:38
-
 Step 1
Cut out your two pieces of fabric for the collar top and bottom using the pattern. Only the curved piece is needed, not the circular piece. To cut each piece, the fabric should be folded, with the flat collar edge (marked with double arrows) along the fold.
-
 Step 2
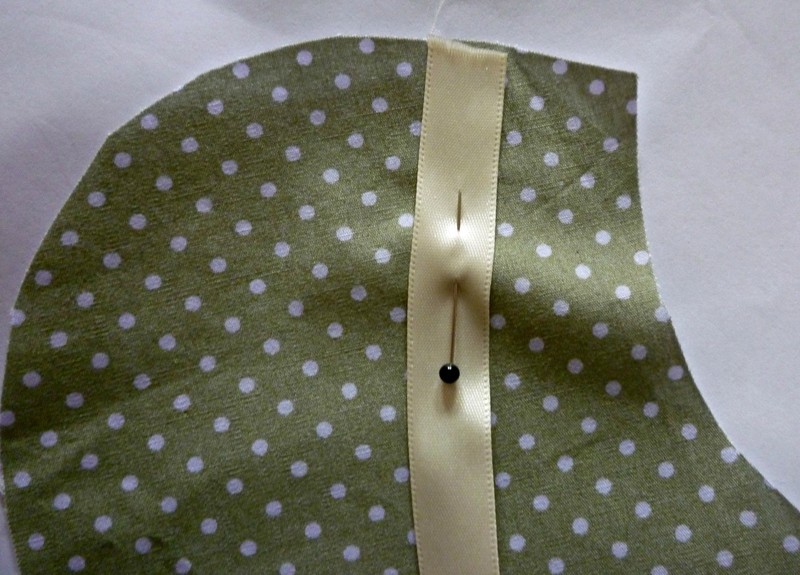
Place one piece of fabric down with the right side (the side you want to see) facing upwards. Cut the ribbon in half and place it 2.5 cm from inside edge of collar on each side. Pin to fabric or you can hand sew a couple of stitches instead of using a pin. Don't make these too small as you'll need to remove them later.
-
 Step 3
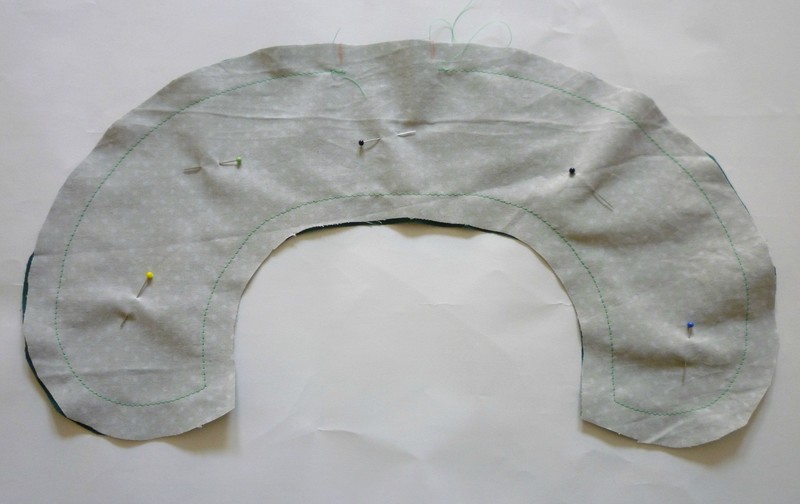
Place second piece of fabric on top, right side downwards. Pin together, making sure ribbon is tucked inside and won't get trapped in the seam line you will be sewing around the edge. The ribbon should be trapped inside the two pieces of fabric.
-
 Step 4
Mark a gap of 5 cm at the back edge of the collar – this enables you to turn the collar right way around. I recommend that you start on one side of this opening and then you can sew uninterrupted all the way around to the other side. Sew around the edges of the pieces, 2.5 cm from the edge of the fabric. Take your time with this, as it can be tricky sewing around a curve and it will look noticeable on the finished item if you do it badly.
-
 Step 5
Remove pins and trim your seam allowance (the fabric on the outside of the sewn line) in half. Clip across the collar front corners – this helps to get a sharp point when turned right way around. Notch the inner curve by cutting small triangles at intervals – this removes fabric bulk when turned out. Clip the outer curve by cutting snipping along at intervals - this allows the fabric to spread and sit properly. Small embroidery scissors can make this easier, but be careful not to snip over the stitched line.
-
 Step 6
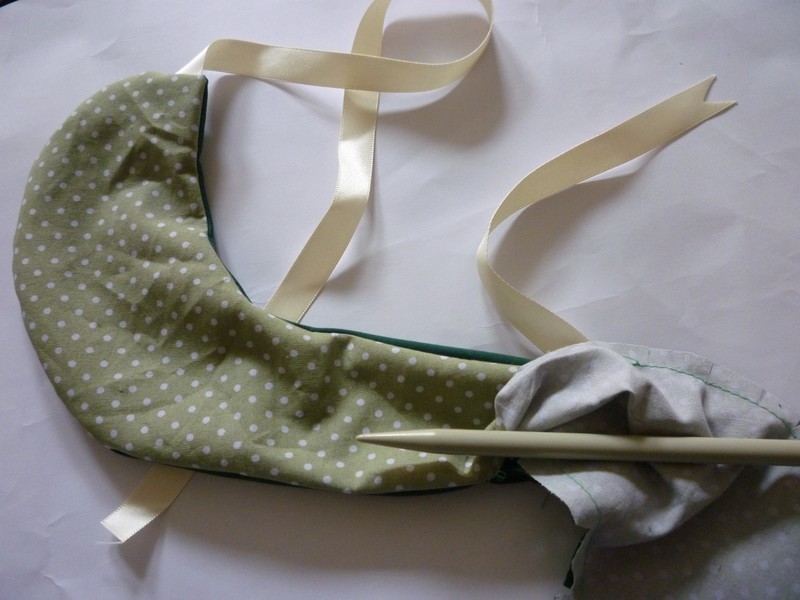
Turn the collar right way around using the gap left on the outside edge at the back of the collar. You can use a pointed implement such as a knitting needle to help. If you used pins to secure the ribbon, be careful of these when turning the fabric.
-
 Step 7
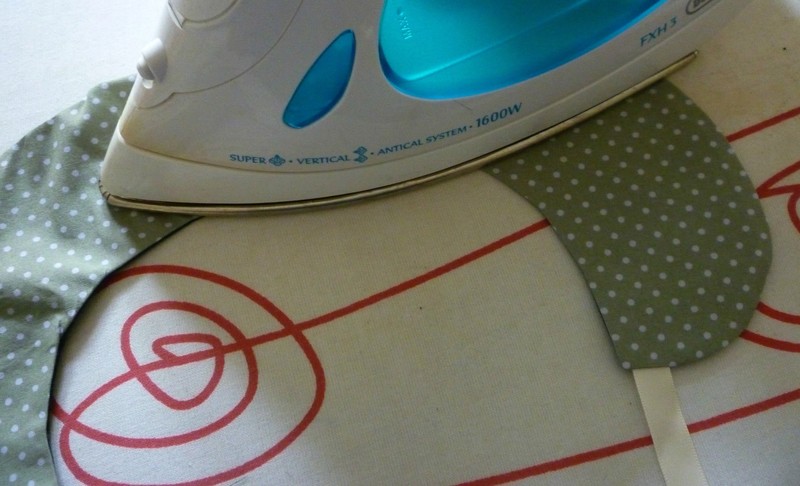
Press the collar on the right side with your iron. As there is still a length of unsewn seam at the back of the collar, turn and press the edges of this under. Sew this length of seam by hand using a few small stitches.
-
 Step 8
Try on the collar and cut ribbons to the desired length. Finish the ends of the ribbon by folding length wise and cutting at an angle, so that you are cutting a triangle shape out of the ribbon. This helps to stop the end of the ribbon fraying.