


About
:3
So I was at Target with a friend, browsing in the $1 section. I found a nifty little plastic craft tray for a dollar and thought, what the heck, its a dollar. I got it home and unwrapped it, only to realize it had a crack where the label was. Now I'm cheap, but not cheap enough to return it.
Later in the day, I was looking at the lid. It had a raised edge and I thought, "Hey, I could glue some cool image in there, and then I wouldn't see the crack." And then I took pictures along the way XD
Hope you like the tut :)
-
 Rose K. favorited Revamped Craft Tray
21 Aug 18:11
Rose K. favorited Revamped Craft Tray
21 Aug 18:11
-
 zoegirl221 added Revamped Craft Tray to craft
15 Sep 06:00
zoegirl221 added Revamped Craft Tray to craft
15 Sep 06:00
You Will Need
-
 Step 1
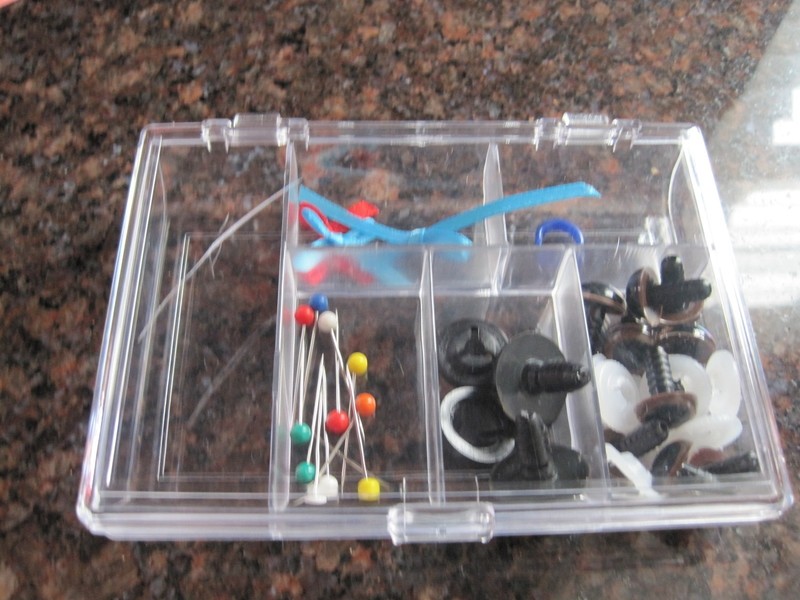
Tada! Cute little tray, perfect for safety eyes and other craft supplies. But sadness... there is a crack :(
-
 Step 2
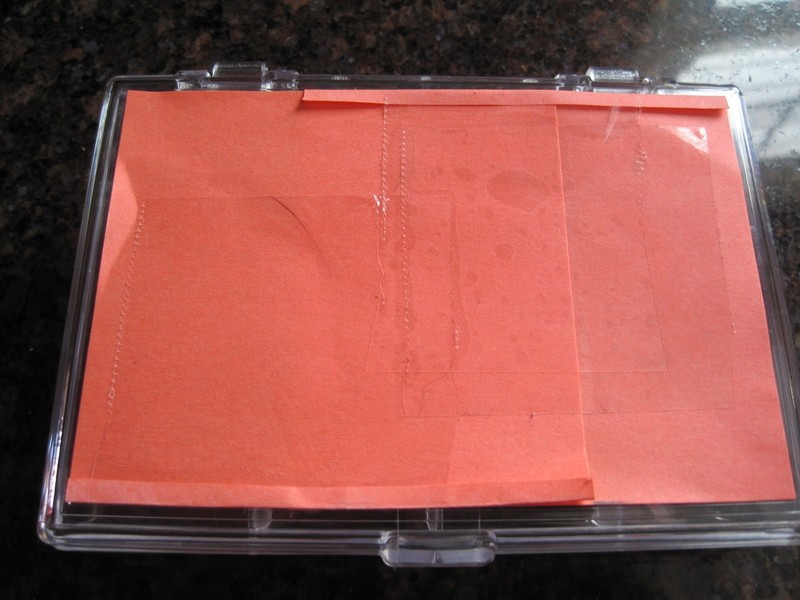
Grab some post-its and fit them into the lid. Mine had a raised edge, so I carefully pushed the sticky edges into the farthest corners. (The post-its were a little bit big, so I had to fold over the last little bits.)
I then taped them together in case I pulled them apart by accident.
-
 Step 3
Find an image you like.
I used magazine paper, since the image would be visible through the back side of the tray's lid.
Weird angle o_O
-
 Step 4
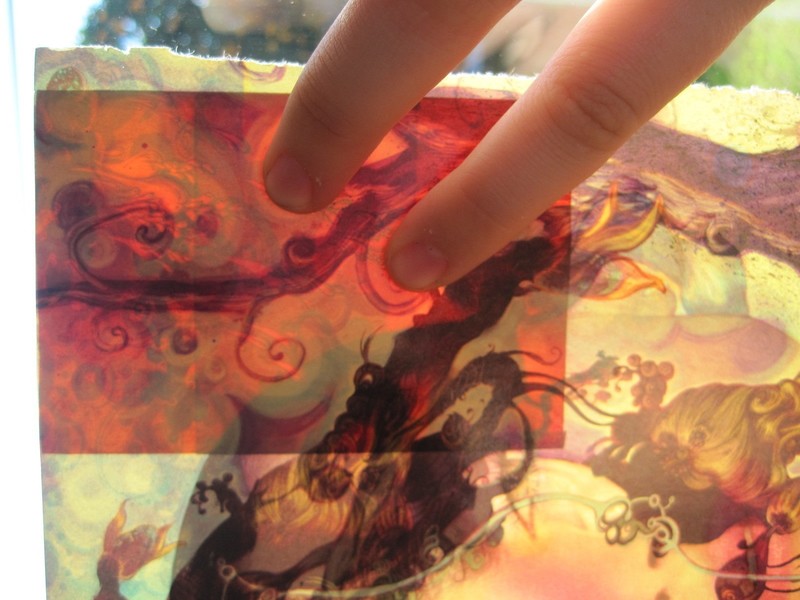
I slapped the post its, sticky side down, to the paper. I held it up o the light to see which part would come through :3
-
 Step 5
Cut out your image, and remove the post its.
-
 Step 6
Place the paper in the tray to make sure it fits.
I then used some Aleen's Craft glue to tack it down. I suppose that Mod Podge would have been a better idea, but I don't own any. I initially watered it down, but duh, its plastic so that didn't work XD.
So I just put dots of glue down, and painted over them with a paint brush. Try to use as little as possible, as you don't want the paper to get soggy!
-
 Step 7
Carefully place the image on top of the glue. Press it down and smooth out all of the air bubbles.
-
 Step 8
This is the underside, just after the paper was applied. The crack is still visible, but oh well :)
Happy crafting!


its still rocks. love it tooo much!;-D
it turn out really good, thanks for posting this