


About
From bleak to chic!
I have an obsession with charity shops, I always come out with something. Not only is the money going to a good place but also I get a great product to work with if not just a great product - usually a dress! So I started collecting bags from charity shops, in all shapes and sizes, and most have clearly been loved a bit too much. So they are usually only a few £'s and are a great easy afternoon craft if you have, like me, a lot of random fabric lying around. Unfortunately again I haven't taken photos while in the process of making so if you have any questions please just ask! Thanks x
Tags
-
 Callie added Revamped Bags! to Bags glorious bags
14 Oct 15:13
Callie added Revamped Bags! to Bags glorious bags
14 Oct 15:13
-
 Hester A. entered her project Revamped Bags! to Secret Santa
11 Dec 23:26
Hester A. entered her project Revamped Bags! to Secret Santa
11 Dec 23:26
-
Hester A. entered her project Revamped Bags! to ChattyFeet
28 Feb 11:55
-
 Pimke added Revamped Bags! to Upcycling
09 Feb 14:49
Pimke added Revamped Bags! to Upcycling
09 Feb 14:49
-
 Jasmine Cora favorited Revamped Bags!
06 May 02:21
Jasmine Cora favorited Revamped Bags!
06 May 02:21
-
Hester A. entered her project Revamped Bags! to SINGER Dress Form Contest
01 May 18:50
-
 katia k. favorited Revamped Bags!
14 Mar 22:06
katia k. favorited Revamped Bags!
14 Mar 22:06
-
 Diver favorited Revamped Bags!
24 Feb 14:09
Diver favorited Revamped Bags!
24 Feb 14:09
-
C T. added Revamped Bags! to Accessories! x
12 Feb 03:23
-
 Anna J. favorited Revamped Bags!
02 Sep 15:57
Anna J. favorited Revamped Bags!
02 Sep 15:57
You Will Need
-
 Step 1
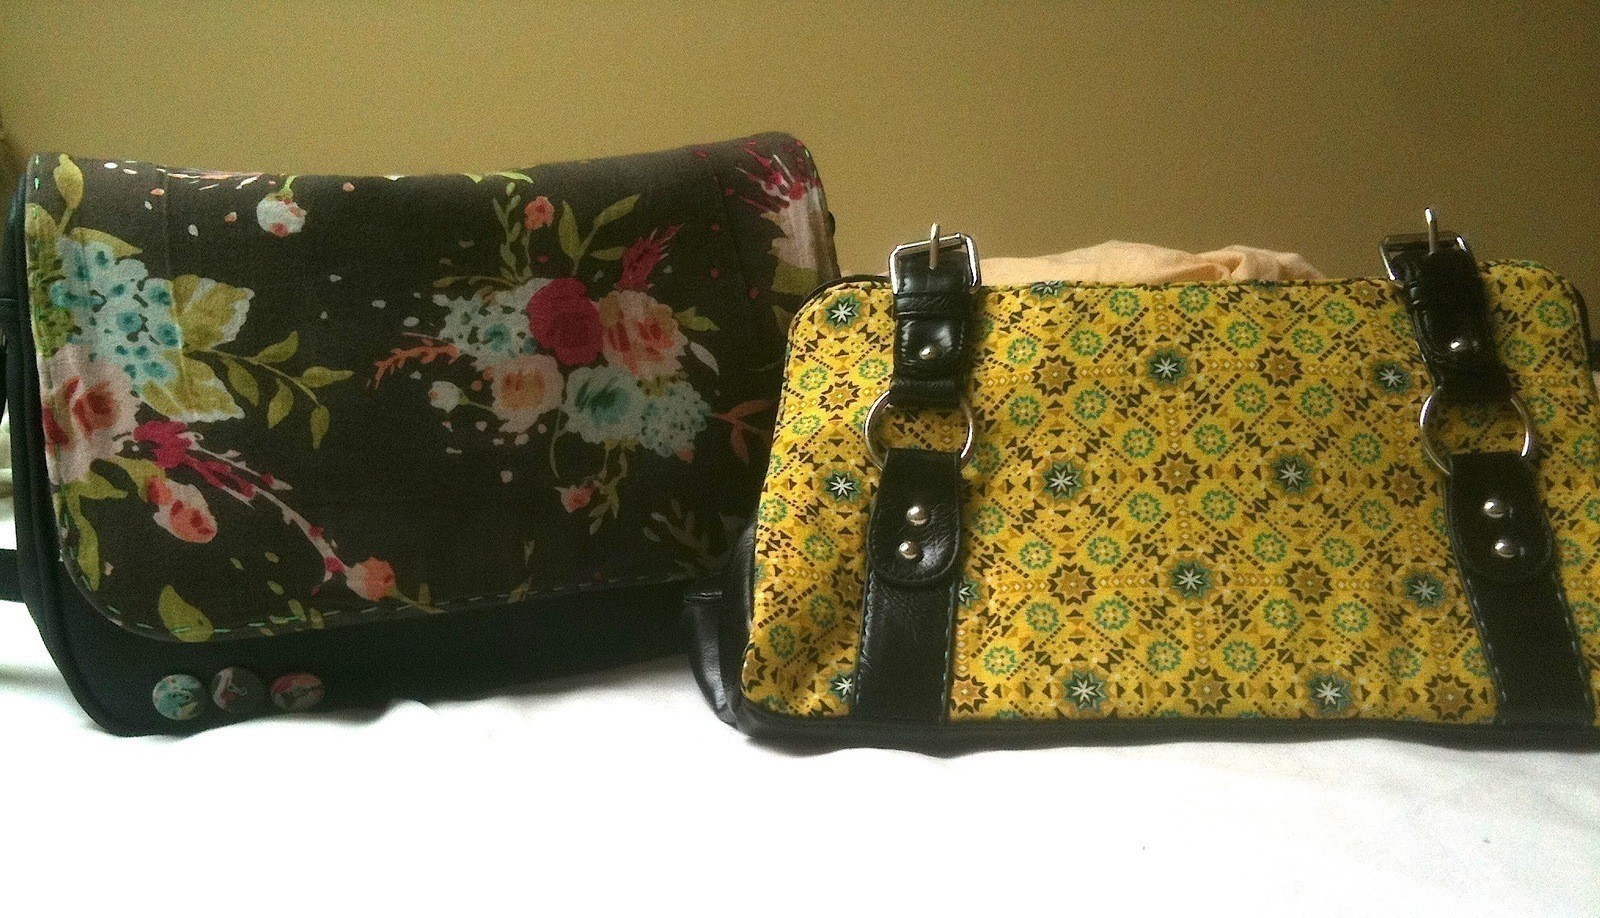
So there are two examples here, an over the shoulder navy, messenger bag and a black, court style bag.
My first step was to pick what fabric from my scraps bag I thought would go best and how much of each bag I wanted to cover with it. This is where your own artistic style comes in. I chose to cover only one part of each bag, being the front. One in a brown floral and the other in a 60's inspired lemon piece. -
Step 2
For the navy messenger bag I chose the front flap as the part I wanted to cover, mainly because it was scratched and a bit worn. I started by figuring out my plan of action, I realised the smartest way would be to completely detach the flap from the rest of the bag. Once done, I ripped the seam between the top and bottom layer of the flap, and then took the top part and took my ironed floral fabric and measured it out in.
-
 Step 3
I then cut the fabric to size and attached the two together. I then realigned the new revamped top flap with the bottom and sewed them together with a chunky, bright green handstitch to add a bit more flare! Then I reattached the new flap to the bag. And because I had a little more time I covered three buttons with the floral fabric and attached them along the bottom of the front of the bag and TA DA!
-
 Step 4
I followed pretty much the same thing with the black bag. Plan of action, measure out fabric, sew together, baddabing baddaboom.
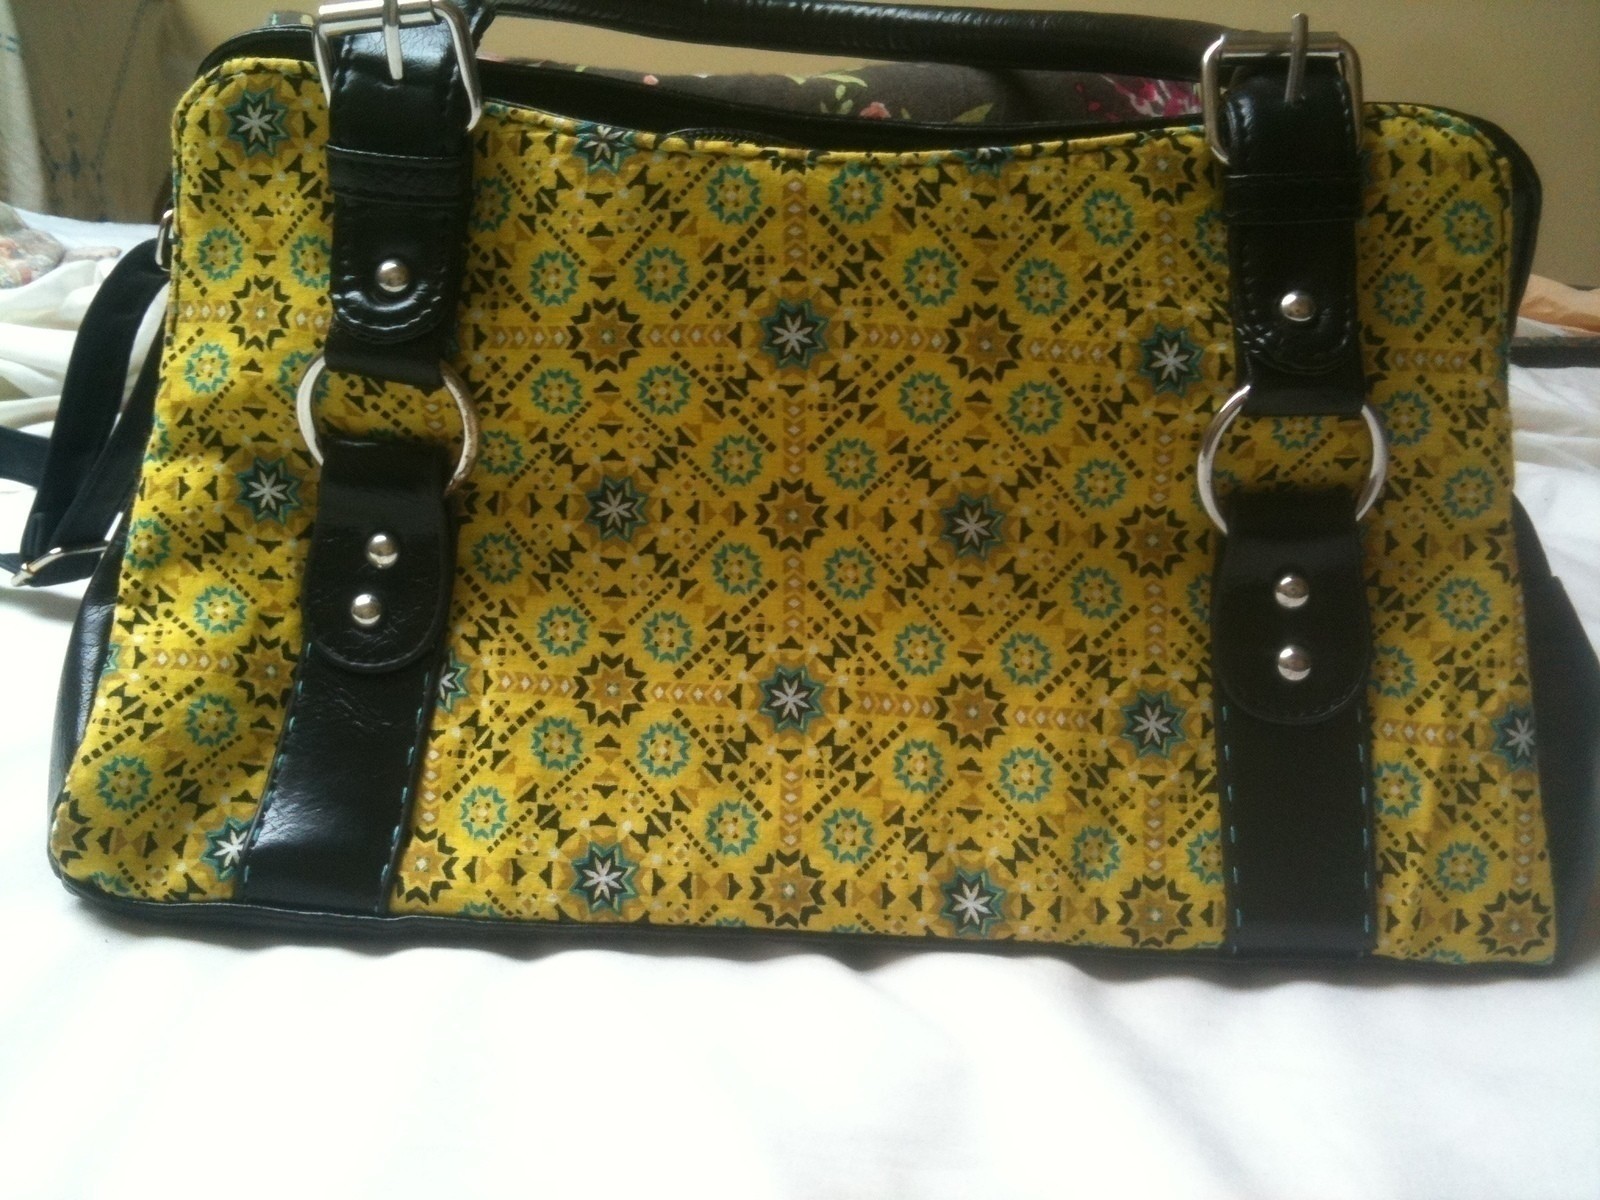
Little note, as you can the bag has these snazzy studs and buckle decorations. These were on the original bag and posed a slight issue when I was trying to cover the bag. As I didn't have the right tools to remove the studs properly I had to ruthlessly pull them through the black faux leather, which did slightly damage the fastener, but I used a bit of glue to keep them firm in their place when finishing up as I really liked the way they looked over the top of the yellow
Hope you like them (:


