About
Let your toiletries travel in style in a Retro Rocket inspired washbag!
Downloads
- 115852_2F2017-02-23-152525-washbagtemplate.pdf 226 KB [ Download ]
-
 Rebecca favorited Retro Rocket Washbag
15 May 10:16
Rebecca favorited Retro Rocket Washbag
15 May 10:16
-
 Whitney I. favorited Retro Rocket Washbag
12 Aug 07:45
Whitney I. favorited Retro Rocket Washbag
12 Aug 07:45
-
 Hannah favorited Retro Rocket Washbag
10 Apr 21:31
Hannah favorited Retro Rocket Washbag
10 Apr 21:31
-
 Cheryl favorited Retro Rocket Washbag
13 Mar 21:33
Cheryl favorited Retro Rocket Washbag
13 Mar 21:33
-
 greenstyle added Retro Rocket Washbag to Wishlist
11 Mar 00:59
greenstyle added Retro Rocket Washbag to Wishlist
11 Mar 00:59
-
 Alice P. favorited Retro Rocket Washbag
10 Mar 20:00
Alice P. favorited Retro Rocket Washbag
10 Mar 20:00
-
 PineconePrincess favorited Retro Rocket Washbag
10 Mar 00:58
PineconePrincess favorited Retro Rocket Washbag
10 Mar 00:58
-
 Crafterella featured Retro Rocket Washbag
06 Mar 23:00
Crafterella featured Retro Rocket Washbag
06 Mar 23:00
-
 WerewolfCas favorited Retro Rocket Washbag
05 Mar 07:11
WerewolfCas favorited Retro Rocket Washbag
05 Mar 07:11
-
 Melissa Beth favorited Retro Rocket Washbag
24 Feb 14:36
Melissa Beth favorited Retro Rocket Washbag
24 Feb 14:36
-
 Step 1
For this project, you'll need some silver or grey fabric. I was lucky enough to find some quilted leather which looked perfect.
Print out the template onto paper and cut out.
-
 Step 2
Fold the fabric in half and pin the template onto the fabric.
-
 Step 3
Cut around the template, leaving a 1/2" seam allowance.
-
 Step 4
Before removing the pins, carefully snip around the seam allowance cutting 1/2" snips all the way around.
-
 Step 5
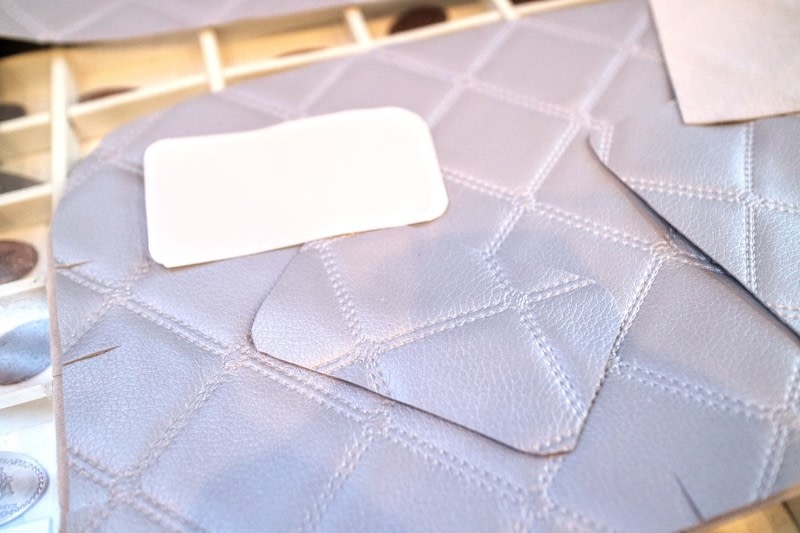
Unpin the template from the trailer fabric and then use the template to cut a rectangle for the door.
-
 Step 6
Do the same for the window, cutting a silver rectangle.
-
 Step 7
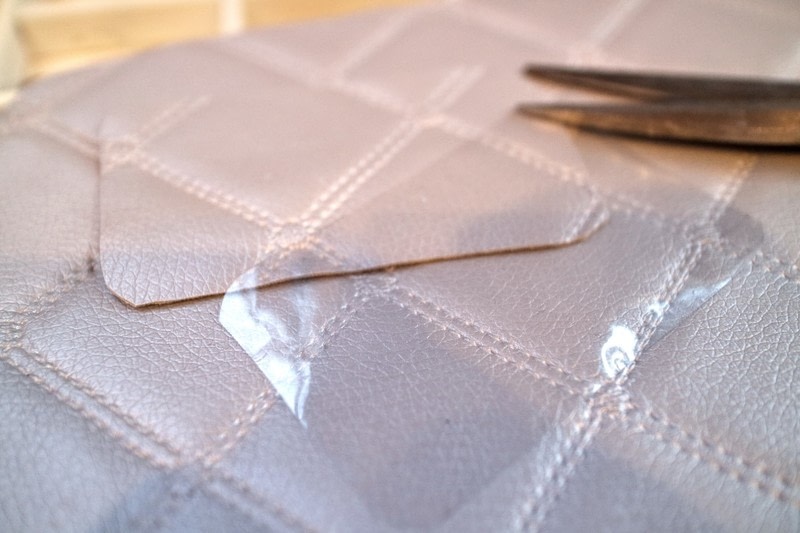
Then cut another window from clear vinyl.
-
 Step 8
Carefully cut a smaller window shape from the middle of the silver rectangle for the window so that you're left with a 1/4" window frame.
-
 Step 9
Cut four small leather circles to fit inside the large buttons.
-
 Step 10
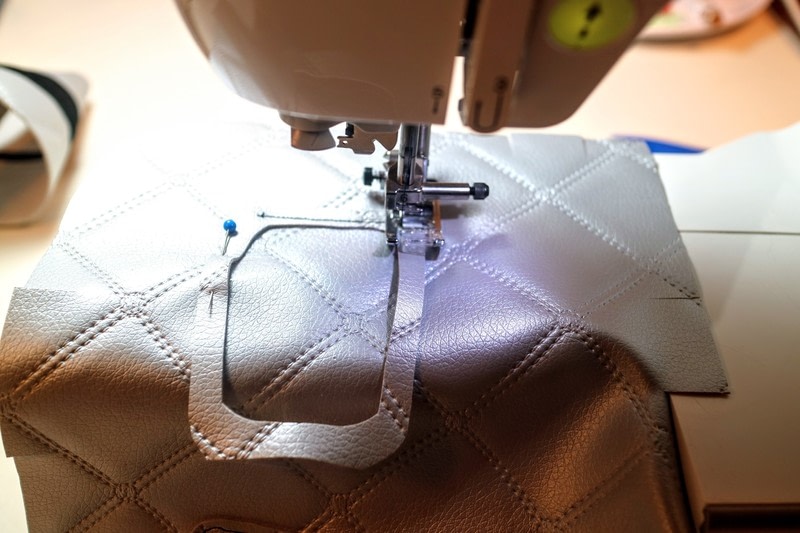
Pin the door in place on the front of one of the trailer pieces. Pin the window frame in place with the clear vinyl window behind it.
-
 Step 11
Sew the door in place.
-
 Step 12
Sew the window in place.
-
 Step 13
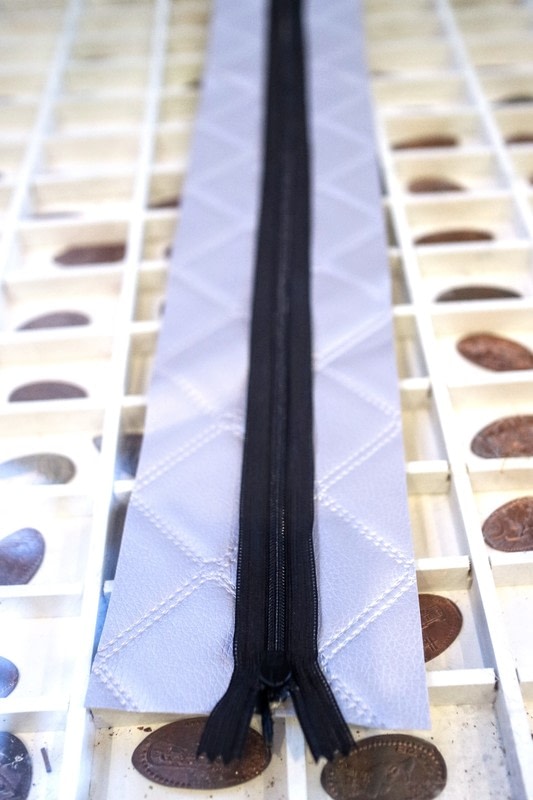
Get a zip that's long enough to fit around the top edge of your trailer.
-
 Step 14
Cut a rectangle of silver fabric to the length of your zip and 4" wide.
-
 Step 15
Cut this strip in half down the middle.
-
 Step 16
Pin the zip in the middle of the two strips.
-
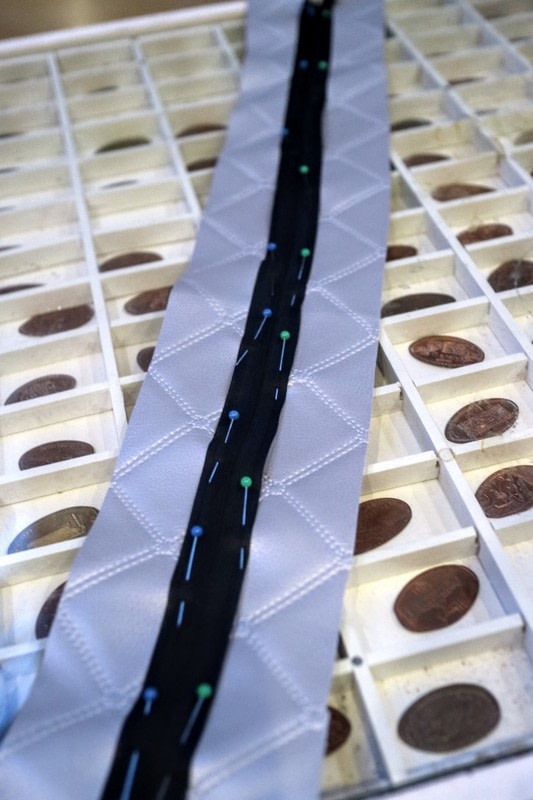
 Step 17
Sew the zip in place, removing the pins as you go.
-
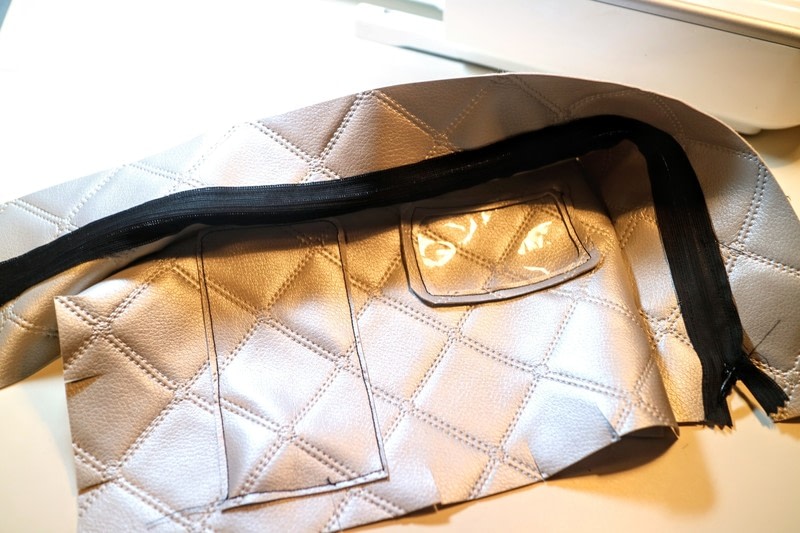
 Step 18
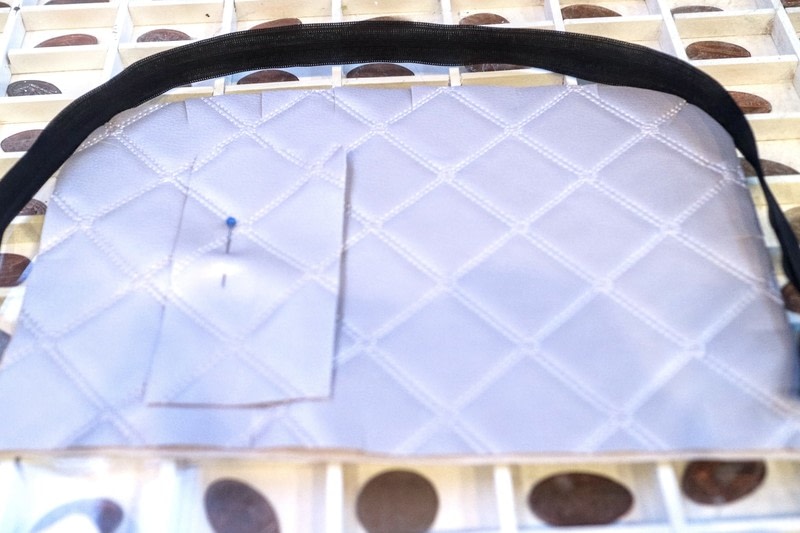
With the wrong sides facing out, pin strip with the zipper around the edge of the front trailer piece so that it's 1/2" in from the edge.
-
 Step 19
it should look like this.
-
 Step 20
Sew in place.
-
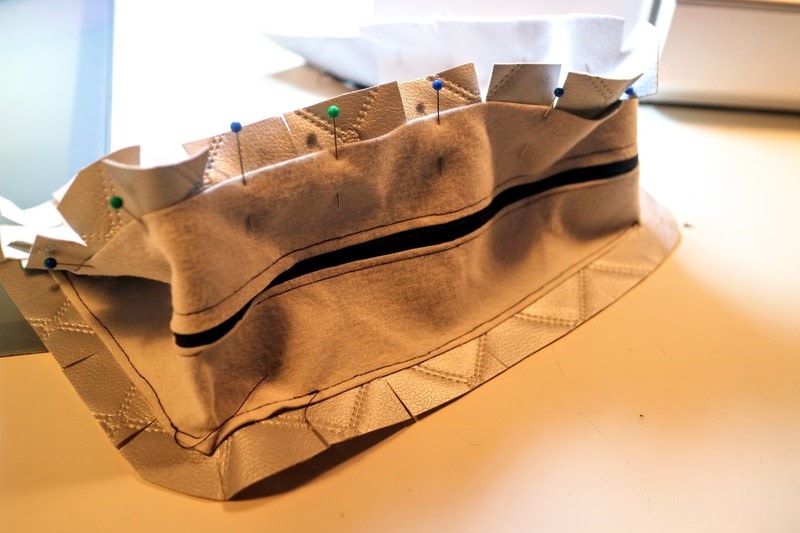
 Step 21
Pin the back trailer piece to the other side of the strip with the zipper like this.
-
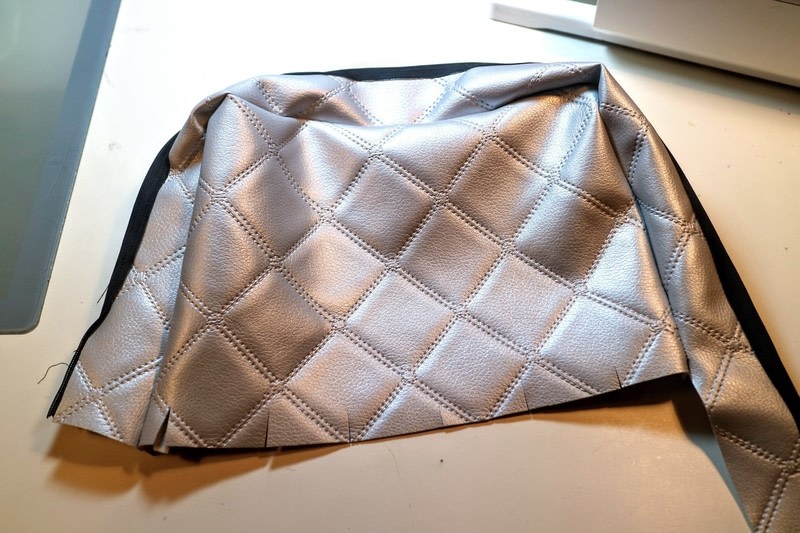
 Step 22
Sew in place.
-
 Step 23
Your zip should look like this.
-
 Step 24
Finally, cut a rectangle of fabric for the bottom of the washbag and pin to the bottom 1/2" in from the edge.
-
 Step 25
Unzip the top of the bag and sew the bottom in place.
-
 Step 26
Cut off any excess fabric from the seam allowance and turn the bag inside out.
-
 Step 27
Using a sewing needle, stitch the buttons for wheels on to each corner of the bag.
-
 Step 28
I glued a metal number on the door - we stayed in rocket number 3.
-
 Step 29
Finally, turn the bag inside out and cut away the inner fabric from the window.
-
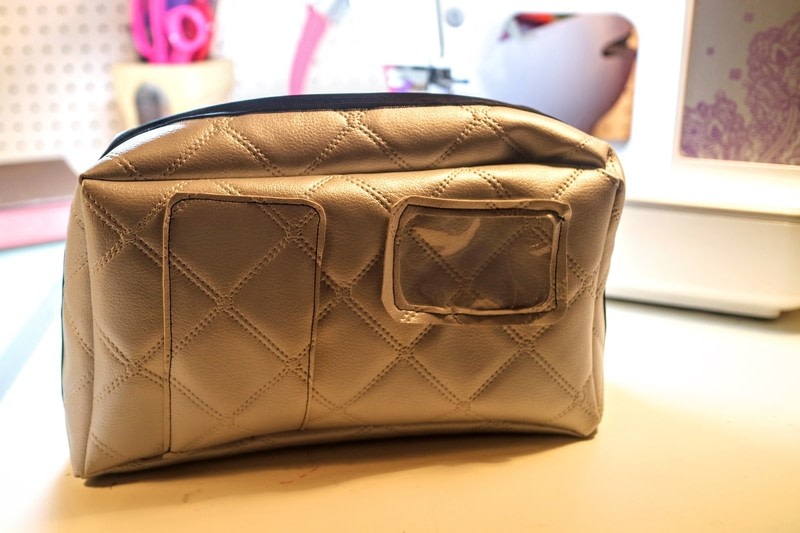
 Step 30
Your bag is ready to fill with toiletries and take on an adventure!