About
duct tape in one of its best forms
My friend's birthday just passed, and I decided to throw together this belated birthday present using duct tape.
Tags
-
 Trisha J. favorited Retro Nintendo Controller Wallet
27 Nov 02:34
Trisha J. favorited Retro Nintendo Controller Wallet
27 Nov 02:34
-
 RareJewel favorited Retro Nintendo Controller Wallet
02 Oct 07:07
RareJewel favorited Retro Nintendo Controller Wallet
02 Oct 07:07
-
 PixieFey added Retro Nintendo Controller Wallet to 1980's
19 May 19:11
PixieFey added Retro Nintendo Controller Wallet to 1980's
19 May 19:11
-
 Rose K. favorited Retro Nintendo Controller Wallet
18 Aug 14:21
Rose K. favorited Retro Nintendo Controller Wallet
18 Aug 14:21
-
 Diver favorited Retro Nintendo Controller Wallet
21 Feb 14:12
Diver favorited Retro Nintendo Controller Wallet
21 Feb 14:12
-
 rosa r. favorited Retro Nintendo Controller Wallet
28 Oct 23:24
rosa r. favorited Retro Nintendo Controller Wallet
28 Oct 23:24
-
 Alina M. favorited Retro Nintendo Controller Wallet
22 Jul 03:12
Alina M. favorited Retro Nintendo Controller Wallet
22 Jul 03:12
-
 christopher.hiland added Retro Nintendo Controller Wallet to Nintendo
15 Jun 09:53
christopher.hiland added Retro Nintendo Controller Wallet to Nintendo
15 Jun 09:53
-
 cynthia.rodriguez.3532507 favorited Retro Nintendo Controller Wallet
11 May 10:14
cynthia.rodriguez.3532507 favorited Retro Nintendo Controller Wallet
11 May 10:14
-
 Kyara S. favorited Retro Nintendo Controller Wallet
11 Apr 12:59
Kyara S. favorited Retro Nintendo Controller Wallet
11 Apr 12:59
-
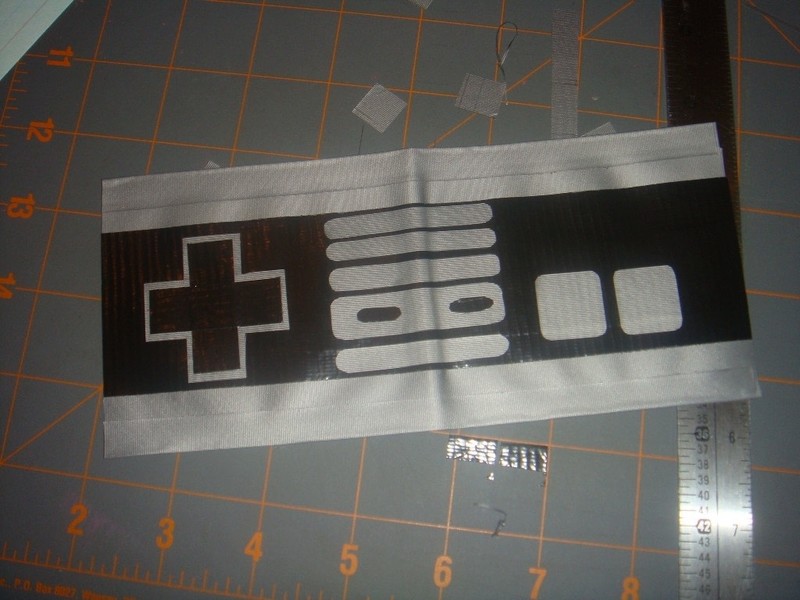
 Step 1
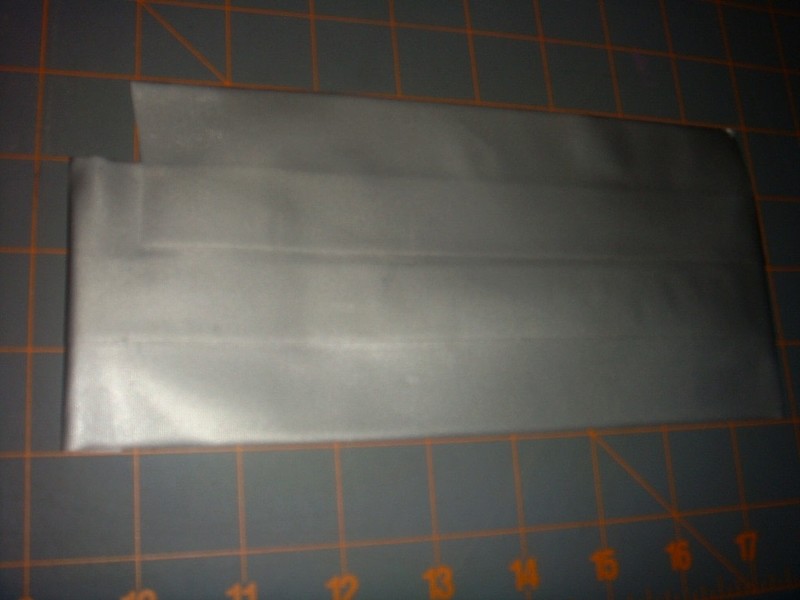
One by one, layer three 10" strips of silver vinyl duct tape onto your cutting board (pay no mind to how sloppy it looks in my picture). They should overlap 1" each, so that you end up with a big piece that is at least 10" x 4".
It's okay if it's bigger because you'll be cutting it down later.
-
 Step 2
Carefully peel the 10"x4" piece from your cutting mat, then flip it sticky side up. As you can see in the picture, I stuck the ends of the sheet back to the mat so it would stay in place. Layer 3 strips of duct tape onto this piece, following the process in step 1.
This should result in a non-sticky, sheet of duct tape that is at least 10" x 4".
-
 Step 3
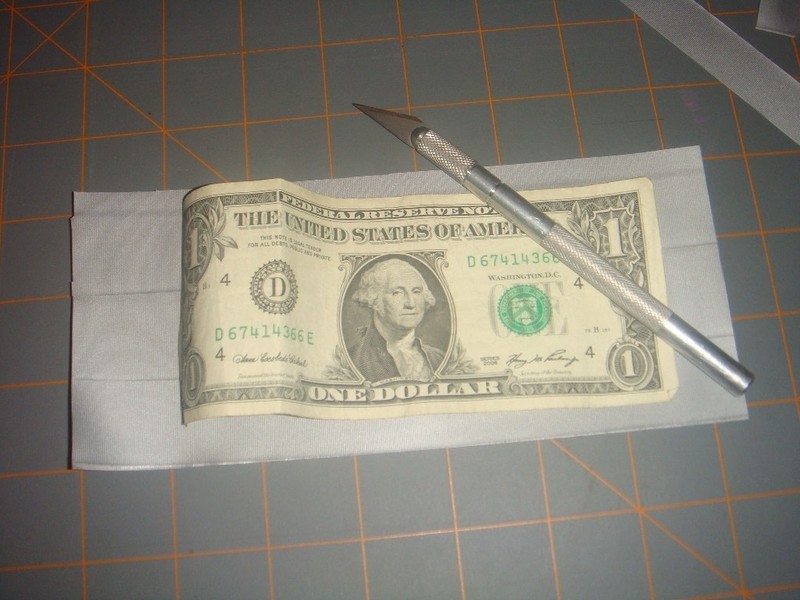
Using an xacto knife, cut your sheet down to an 8" x 3.25" rectangle.
Then repeat steps 1-3 to make another sheet that produces a 7.5" x 3.25" rectangle.
-
 Step 4
Using an xacto knife, cut a strip of silver vinyl duct tape so that it is 8.5" x 1". Line the long side of your 8" x 3.25" rectangle with this strip, then fold it over onto the other side so that it looks like the example shown here.
Repeat this on the remaining long side of this sheet, as well as the long sides of the 7.5" x 3.25" piece of duct tape.
This "lining" process keeps will keep the edges of the wallet looking clean.
Then fold each rectangle in half afterward.
-
 Step 5
Set the smaller rectangle aside.
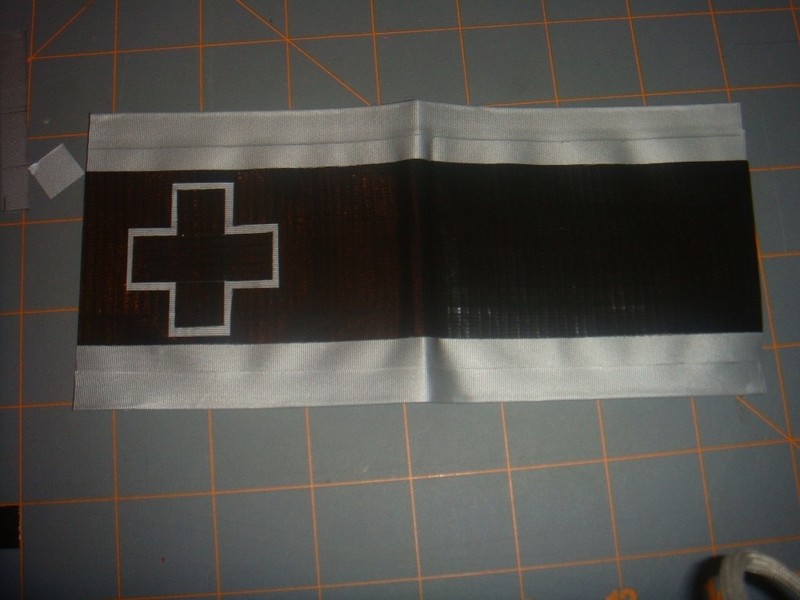
Take the 8" x 3.25" rectangle and place a strip of black duct tape over the center of it, as shown.
Using an xacto knife, cut the extra tape off.
-
 Step 6
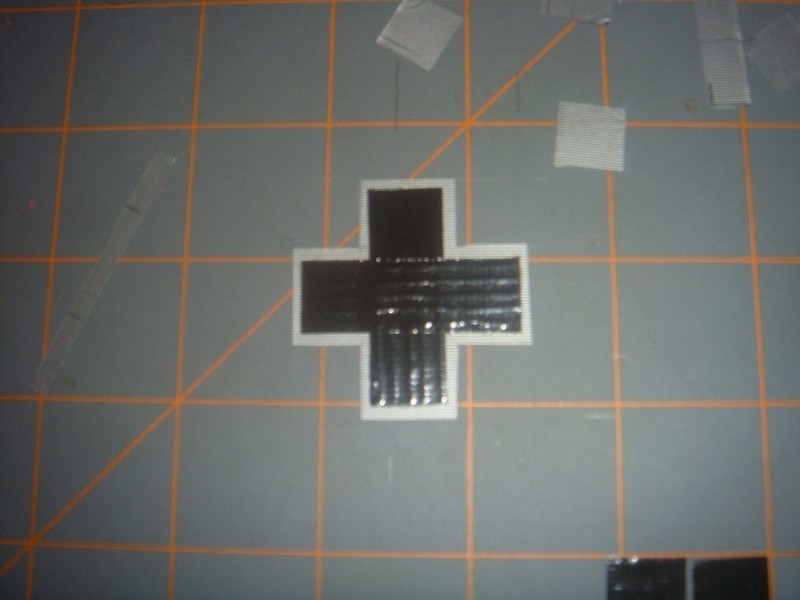
Stick a square of silver vinyl duct tape to your cutting board. Using a pencil, draw a 1.5" square onto the duct tape. Draw a small square at each of the corners to produce a thick plus sign on this piece. Using an xacto knife, cut the plus sign out, then erase any pencil marks.
-
 Step 7
Using your xacto knife, cut 2 strips of black duct tape that are thinner than the pieces of the plus sign created in the previous step. Tape these strips onto the plus sign so that they are evenly centered
-
 Step 8
Peel the plus sign from the cutting mat and stick it to the left side of the 8" x 3.25" rectangle, as shown.
-
 Step 9
Stick another strip of silver vinyl duct tape to your cutting board. Using a ruler and a pencil, measure out four 0.25" strips width-wise across the tape, as well as a 0.50" strip.
Using the xacto knife, cut these pieces out, rounding the edges.
(The picture is poor quality, but) i hope it clarifies this step a little bit.)
-
 Step 10
Take the strips produced in the previous step and tape them to the center of 8" x 3.25" rectangle as shown.
-
 Step 11
Using the xacto knife, cut 2 small ovals from the black duct tape and stick them onto the thickest silver rectangle, as shown.
Also using an xacto knife, cut 2 rounded 0.75" squares from the silver vinyl duct tape, then stick them to the rectangle as shown.
-
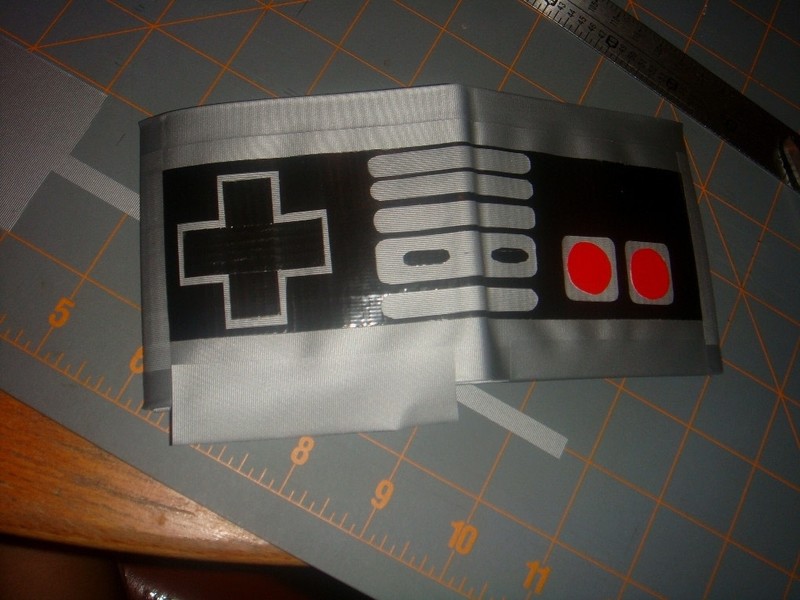
 Step 12
Using the xacto knife, cut 2 small circles from the red duct tape. Stick these onto the centers of rounded squares produced in the previous step.
Now that you've completed the Nintendo side of your wallet, set it aside.
-
 Step 13
For the inner pocket(s):
Take a credit card/gift card/ID and trace its outline onto an index card. Cut this out, trimming about half an inch from the top so that you end up with a piece of index card that is shorter than the card you originally traced.
Cover both sides of this piece of index card with silver vinyl duct. Trim the tape as needed.
-
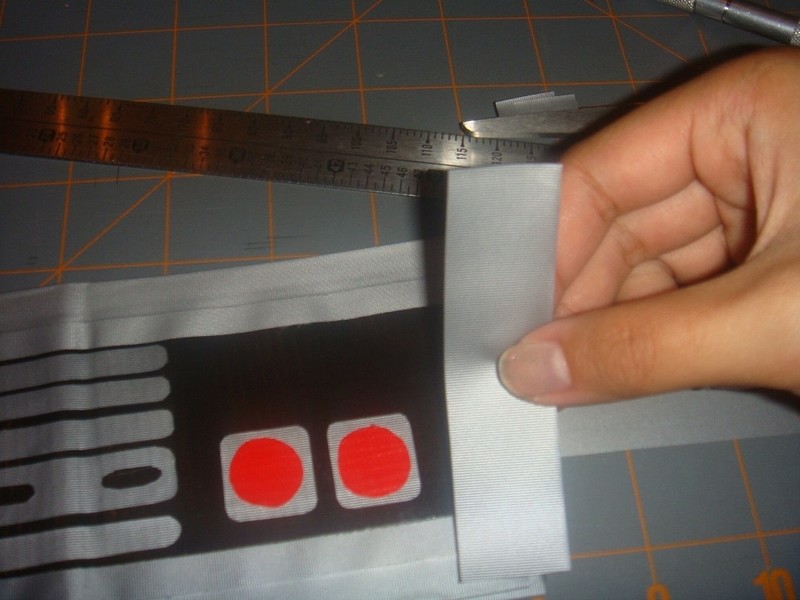
 Step 14
Take the smaller, 7.5" x 3.25" rectangle (aka the rectangle WITHOUT the Nintendo design on it) and fold this piece in half width-wise.
Then peel the top layer of lining from the bottom right edge of the sheet, as shown in the picture.
-
 Step 15
Take the rectangle that you made in step 13 and stick it onto the lining that you just peeled off, making sure that the edge of the pocket rectangle is aligned with the edge of the larger rectangle. Trim the lining as needed so that you can move the pocket as shown. (If you hold this piece up, the pocket should be able to hang down freely.)
-
 Step 16
Repeat steps 13-15 on the bottom left edge of the 7.5" 3.25" rectangle to create another pocket.
-
 Step 17
Using the xacto knife, cut a 1" x 3".25 strip of silver vinyl duct tape and stick this onto the right edge of the Nintendo rectangle you created earlier, leaving 0.50" still hanging off the side.
Flip this piece onto its other side, making sure that it is still right side up.
-
 Step 18
Take the smaller, pocketed rectangle and place it, pocket side up, on top of the Nintendo rectangle. Align the edges of the rectangles and tape down using the flap created in the previous step.
-
 Step 19
Repeat steps 17-18 on the left side of your wallet so that it looks like this from the top.
Remember to trim the lining so that your pockets can be filled. (If you don't know what I mean, place your ID in the pocket, and you'll be able to figure out which parts to cut.)
-
 Step 20
Using the xacto knife, cut two 1" x 3" strips of silver vinyl duct tape. Tape these strips along the bottom of the Nintendo side, making sure to leave about half an inch of space between them at the center so that you'll be able to fold the wallet.
Flip the wallet over and tape the inner, pocketed part of the wallet to the outer Nintendo piece.
-
 Step 21
Enjoy your spiffy new wallet!


Versions

Comments