


About
Resin Knitting Needles - TUTORIAL
Hmm, they are all hand cast resin needles I made, the smaller ones are size 10 and 1/2, and 7 and 1/2 inches long.
The jumbo needles are size 19s, and 11 inches long.
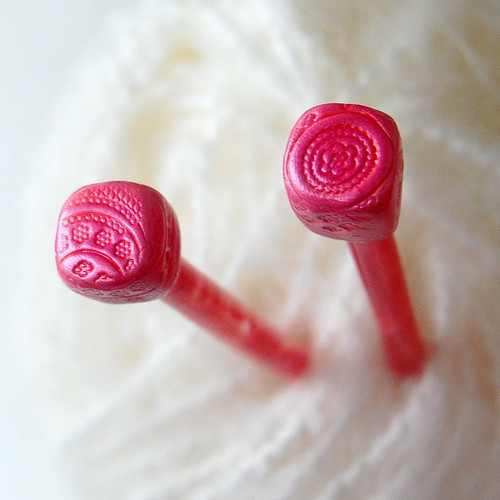
then ends are either polymer clay or buttons, and the needles are embedded with yarn, glitter, gold leaf, mica powder, and resin dye, but not all in the same pairs!
Okay, quick and dirty pics and instructions, since I have to try to finish while Amelia naps!
You will need-
resin, a mask, wax paper for your table, cups to stir your resin in, popsicle sticks to stir it with, alcohol or acetone are what's recommended by the manufacturers for cleanup while resin is still wet, gloves if you want them, honestly I don't usually, MC DONALDS STRAWS, and polymer clay to stop up the ends and support the bottom while they cure, the clay is what will turn your straw into a mold. These things will give you a resin tube, the one shown included gold leaf.
To make points you need a Dremel, or some way to make a point on the end of your resin tube, another form of grinder? Maybe you're a heck of a whittler? And then sandpaper, and cutting and polishing compound. Resin compound can be found at Sherri Haab's website.
The mask can be found in most paint departments, runs about thirty dollars, and is necessary when you have THIS outside preventing ventilation!
-
 Kelly W. added Resin Knitting Needles to Need to make one of these days
31 Aug 04:02
Kelly W. added Resin Knitting Needles to Need to make one of these days
31 Aug 04:02
-
 Karen P. favorited Resin Knitting Needles
09 Feb 05:31
Karen P. favorited Resin Knitting Needles
09 Feb 05:31
-
 craftymomjenlan favorited Resin Knitting Needles
10 Jan 11:42
craftymomjenlan favorited Resin Knitting Needles
10 Jan 11:42
-
 Allen P. commented on Resin Knitting Needles
24 Jun 09:50
Allen P. commented on Resin Knitting Needles
24 Jun 09:50
-
Allen P. favorited Resin Knitting Needles
24 Jun 09:50
-
 Dyson S. favorited Resin Knitting Needles
26 May 17:31
Dyson S. favorited Resin Knitting Needles
26 May 17:31
-
 darryl c. favorited Resin Knitting Needles
12 May 07:27
darryl c. favorited Resin Knitting Needles
12 May 07:27
-
 Ariane D. favorited Resin Knitting Needles
03 May 05:06
Ariane D. favorited Resin Knitting Needles
03 May 05:06
-
 cha favorited Resin Knitting Needles
14 Mar 06:22
cha favorited Resin Knitting Needles
14 Mar 06:22
-
 emily s. favorited Resin Knitting Needles
25 Feb 10:45
emily s. favorited Resin Knitting Needles
25 Feb 10:45
You Will Need
-
 Step 1
I can't make you use it, but resin=hazardous, wear a mask if you're going to sit around breathing it. It won't get you high, it will cause neurological damage. anyway...
Yes, I have some resin!
-
 Step 2
So, take your clay, and put your straws in it, in some way that the ends are plugged up with clay, but not too much so it doesn't take away from the length of the finished needle. Most of the clay is surrounding them so they don't fall over, don't stick them into an inch of clay! Don't poke the straw through your clay, or wiggle it too much, or resin will be everywhere. IF it's leaking from the top of where it's inserted into the clay plug it up with clay, have a bit extra in case. This has only happened to me once, but it's a mess!
-
 Step 3
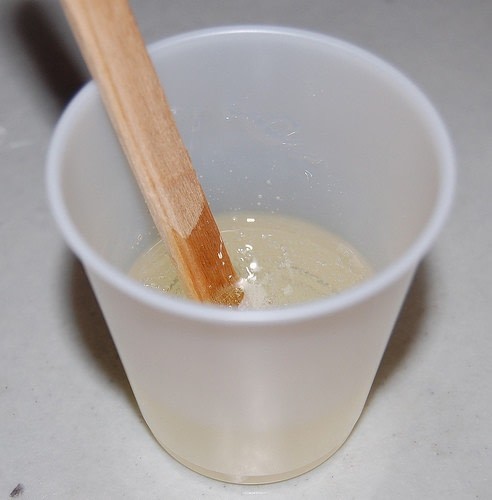
Mix your resin! And mix, and mix some more. If you're not used to mixing it you may want to follow the directions and pour it from one cup to another to help make sure there's not unmixed resin in the first cup.
-
 Step 4
Add some junk, in this case gold leaf.
-
 Step 5
Put the resin in the straw. I don't advise trying to photograph yourself doing it, or you'll take many pictures trying to focus... but look ma, that fancy angle of my hand means no tattoos!
-
 Step 6
Fill 'em up! If you pour too fast you may have to wait for bubbles to rise to the top and then continue to pour, mainly with the gold leaf. With dye or glitter that doesn't usually happen.
-
 Step 7
When they're cured, you'll have this at one end.
-
 Step 8
Push that sucker outta there! If you push from what was the top you will have better success with this, it should slide out easily IF it's cured. No mold release, no magical abilities. And if you don't push the polymer clay through it you can reuse the straw! In the beginning I cut the straw away, DON'T do that, it's awful. It's difficult. Especially when you realize all you had to do was poke it out of there!
-
 Step 9
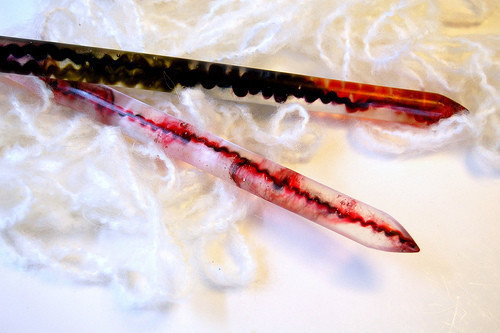
Then you'll have a tube, like this, but this one is short.
-
Step 10
Now you're on to phase 2, which for me means moving to the sink. Resin should be wet sanded, I sort of sand over water, wetting what I'm sanding, wetting the sink holding the Dremel over it so it sort of kicks debris at the wet sink wall and the water catches some of what is in the air, sometimes sanding properly immersed IN water... You do NOT want to breathe resin dust as you sand, I am not technically doing this properly. Wear a mask, put a sink in your basement, go outside, just don't create or leave the dust around say your kitchen for your pets or your family to breathe or eat.
-
 Step 11
Sand with this attachment or whatever grinder your using till you get this-
-
 Step 12
If you have real sandpaper for wet sanding resin use that, I use these. First the black one, then the 6 sided one. I don't know haw to explain sanding resin, except that you sand with the next lightest grade in the opposite direction you used the last one, and move to another lighter grade as soon as the lines from the previous grade have been erased. Clear as mud, no?
-
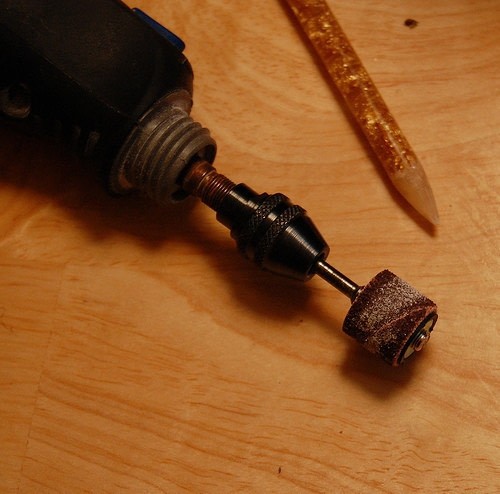
 Step 13
I've finished the points with different combinations of these things, I am currently using the small felt wheel at the top of the picture that's not screwed into the Dremel attachment, and the cutting/polishing compound, and sometimes I still use auto wax. Your not supposed to use a Dremel for finishing/polishing resin because the heat from friction mars the resin. With the right SLOOOOOOOW speed and enough compound or wax on the wheel I can get them to a shine, I have no idea how to explain this to anyone else, except trial and error.
I use a Dremel because I have arthritis and can't do any more hand finishing than necessary. You can do all the sanding and polishing by hand. But you'd still need the Dremel, or something, to make your point.
-
 Step 14
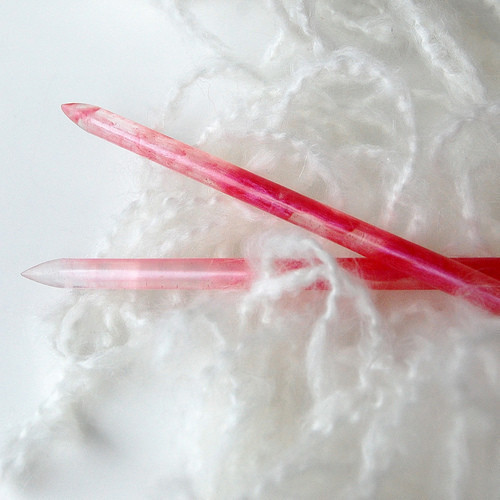
After about an hour, you have this-
For the other end, sand it flat, and glue something to it. You could make it all one piece if you cast a resin topper and stick the needle in it to cure if you're so inclined, sounds like too much work to me!
IMPORTANT! almost forgot, if you have any bubbles they will rise to the top, so make the point on the bottom end, where the clay was. Otherwise you may find bubbles on the inside as you make the point and they'll be unusable and you'll have to start over. Ugh.
For other sizes, hint, hint, find other tubes, don't ask me! I've given up all I can, I worked hard figuring this stuff out!


those needles are a must have... *dreamy eyes*
You should be able to set a button in the top, as long as the resin doesn't contract too much during curing, make sure it's really full!
The yarn is put in, then the resin poured in, once it's full it stays in place!