


About
Thick and velvety sponge, sweetly iced
This is my take on a red velvet cake, enjoy!
Tags
-
 mmotse03 favorited Red Velvet Three Layer Cake
30 Jan 10:11
mmotse03 favorited Red Velvet Three Layer Cake
30 Jan 10:11
-
 Kenny the kitty favorited Red Velvet Three Layer Cake
22 May 17:45
Kenny the kitty favorited Red Velvet Three Layer Cake
22 May 17:45
-
 jessica.boulanger.10 added Red Velvet Three Layer Cake to foods
26 Jan 01:47
jessica.boulanger.10 added Red Velvet Three Layer Cake to foods
26 Jan 01:47
-
 luisana v. favorited Red Velvet Three Layer Cake
23 Oct 20:16
luisana v. favorited Red Velvet Three Layer Cake
23 Oct 20:16
-
 Sam Goth Winchester favorited Red Velvet Three Layer Cake
28 Aug 20:43
Sam Goth Winchester favorited Red Velvet Three Layer Cake
28 Aug 20:43
-
 Carrie K. entered her project Red Velvet Three Layer Cake to The Deli Garage
20 Jun 12:29
Carrie K. entered her project Red Velvet Three Layer Cake to The Deli Garage
20 Jun 12:29
-
 Step 1
Preheat oven to 150 (gas mark 2).
You will need:
3 bags of chocolate sponge mix (400g each)
6 eggs
12 tbsp Buttermilk (I needed 2 cartons of St Ivel Buttermilk)
300ml milk
Red food colouring
Black food colouring
1-2 tbsp cocoa powder
1 tub vanilla flavoured buttercream icing
500g ready fondant icing
Icing sugar to dust -
 Step 2
Grease and line 3 cake tins.
First layer:
Mix 2 eggs in a jug with 4 tbsp buttermilk, 6 tbsp milk and 1 tsp red food colouring. Pour into a bowl with the chocolate sponge mix and beat with an electric mixer for 1 minute. -
 Step 3
The mixture should be this lovely colour halfway between pink and chocolate. If your mix feels too thick, you could add a little more milk.
Bake on the top shelf of your oven for 30 minutes at 150 (gas mark 2).
-
 Step 4
Second Layer:
For the next layer make up the same quantities of egg, buttermilk and milk, but this time use 3/4 tsp black food colouring instead of red.Add 1 or 2 tbsp cocoa powder to the cake mix before mixing for a darker chocolate sponge.
-
 Step 5
Third Layer:
Make up one last layer, either velvety red or dark chocolate.Be sure to skewer the cakes as they come out of the oven. 150 is a low heat for a sponge, but 30 minutes was perfect timing in our oven and the sponge was beautifully moist.
-
 Step 6
Leave the cake to cool for 10 minutes before popping it out of the tin. Be careful not to burn your hands!
Turn out onto a cooling rack and use a pallet knife to remove the base of the tin from the cake.
-
 Step 7
Place an upside down cooling rack onto the cake, press the two racks together and turn over so that you can slice the rounded top side off with a bread knife.
Having flat cakes makes sandwiching them together so much easier (especially when working with 3+ layers).
-
 Step 8
Preferably use a cake board or flat plate to piece your cake together. Here I'm using the base of a cake storer thingy, which isn't ideal for presentation or helpful while icing/decorating. Use what you have ^_^
Wait until all of your cake layers are completely cool and then spread on the butter icing. Work layer by layer.
-
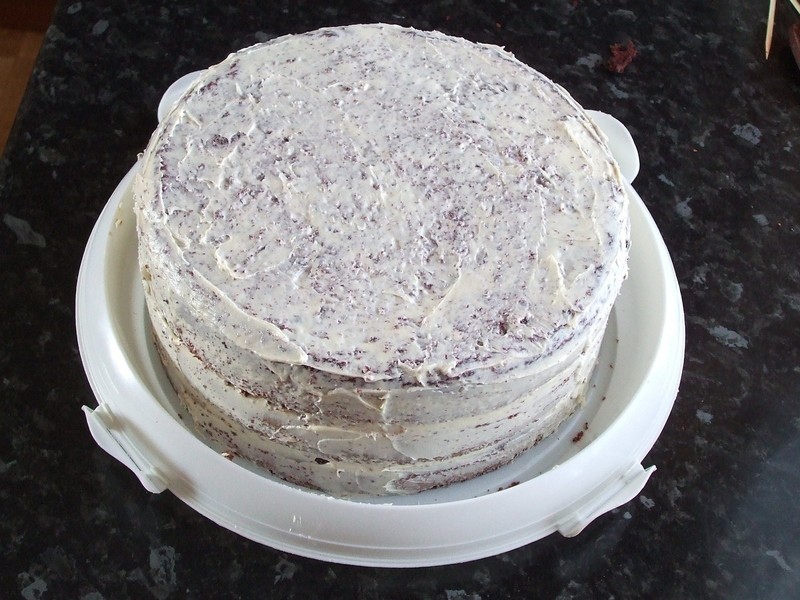
 Step 9
Once tub of Betty Crocker's icing was just enough to cover my cake. The icing looks a bit odd because there are crumbs all mixed in from slicing the cake flat, but this isn't at all noticeable after the next step...
-
 Step 10
... Which is to cover the cake in fondant icing.Rolling was a messy process, but be prepared and patient and you should get a good result.
My tips are:
1) Have plenty of icing sugar to dust the surface and rolling pin, this prevents the icing from sticking.
2) Roll outward, rotate often.
3) Be 100% sure you have rolled the icing big enough to cover your cake before you pick it up.
4) Use a pallet knife to free the icing from your surface before picking it up.
5) Transfer onto your cake with a rolling pin, be careful but work quickly. -
 Step 11
After covering the cake with fondant icing, trim the excess at the bottom with a knife. If you have any odd seems, creases or bumps, work them out with your hands or use a pallet knife dipped in a mug of hot water.
-
 Step 12
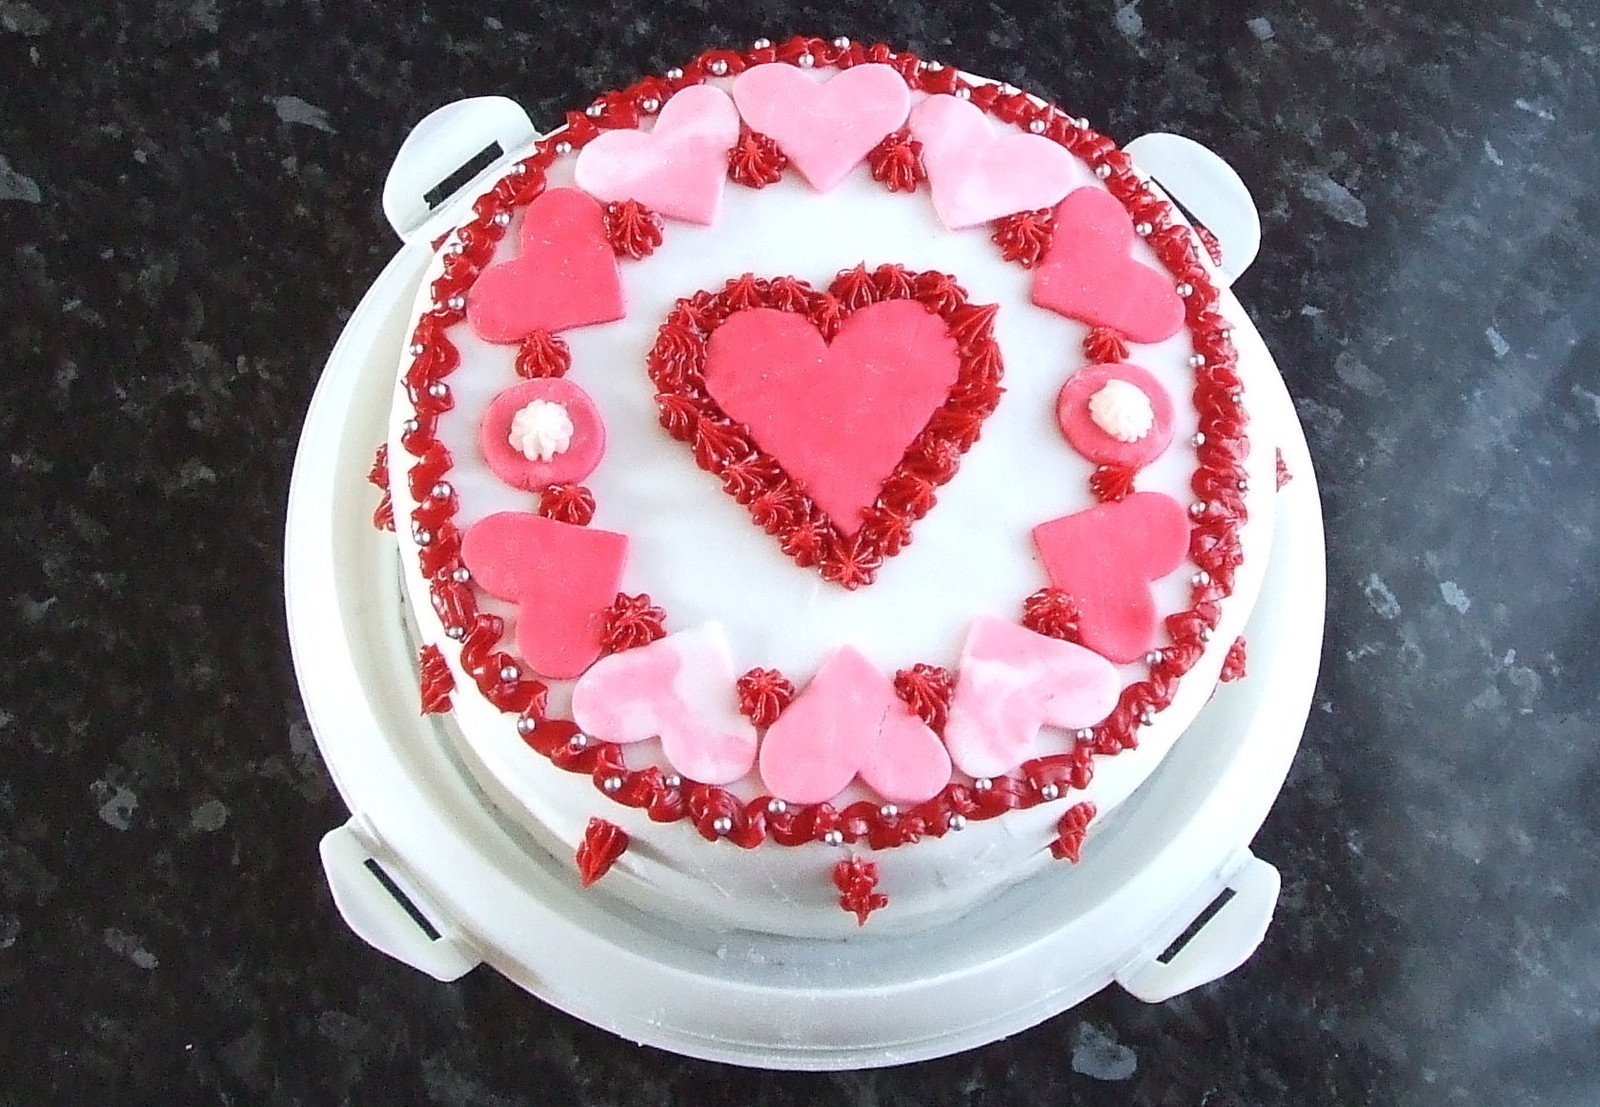
I wish I had taken more photos of decorating my cake for you, but it was a very sticky process.
I used a Silverspoon designer icing tube for the red edging and a heart shaped cookie cutter for the icing hearts. I coloured the icing for the hearts with food dye, just add a couple of drops at a time.
It's a really simple design but I think the symmetry works.
-
 Step 13
As you can see my decorating skills aren't perfect, but if you do your best that's what matters. It's still going to taste great!
-
 Step 14
Here is my cake all finished and cleaned up.
The most beautiful part is definitely the next step...
-
 Step 15
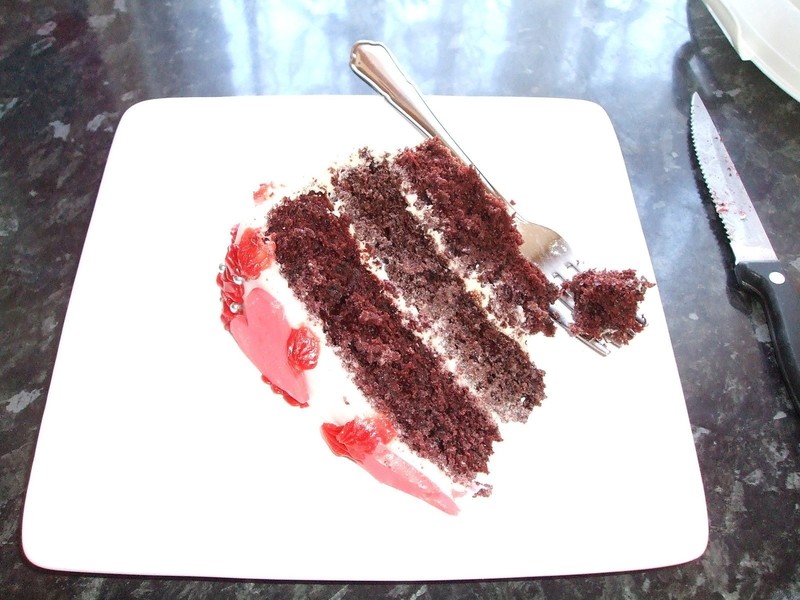
Share out...
-
 Step 16
And enjoy!
(You can see my buttercream ran, I sandwiched the layers before they were cool enough. Also these final pictures didn't do my red/dark layers justice, but trust me, it's worth it ^_^)