


About
Quirky little gift bag for super cool homemade presents!
These bags look so cute with homemade gifts in - especially as the bag itself is homemade. It looks great with cards or small gifts in - but even my Imelda May CD fitted in to! The only problem with using the small, clear plastic bags is that the handles can be quite small. The only reason why I used clear plastic bags was because they look better than coloured supermarket bags. Experiment with the size of the bag too. You could also replace the braided plastic handles with cute ribbon. I first thought up this idea when I was thinking that there must be more to a simple little plastic bag. Then the idea suddenly came to me - the recycled gift bag!
Happy Crafting!
P.S The small plastic bags can be found at supermarkets or grocery stores :).
Tags
-
 Willow Bon-Bon entered her project Recycled Gift Bag to Rethink Rubbish
19 Jan 16:31
Willow Bon-Bon entered her project Recycled Gift Bag to Rethink Rubbish
19 Jan 16:31
-
Step 1
Lay out all the equipment needed in a clean - and quiet - space!
-
Step 2
First we are going to make the bag. Take two sheets of A4 paper - this works best with magazines but wrapping paper works as well - glue them together. This makes it stronger and helps it to last longer.
-
Step 3
Once the paper has dried, fold it in half. Then make two creases either side of the center line you've just made. When you fold them all together it should make a sort of indented 3D triangle. It should stand up.
Don't forget that the side you want to be on the front has to be facing down! Unfold it, so that it just has a crease in the center of the A4 paper and the two either side. Then fold two 'bars' down either side of the A4 paper - try to make them as similar as possible! The two 'bars' and the center line should now look like a 'H'.
-
Step 4
Cut two slits where the 'bar' and the center line meet. It should be about 0.5cm - 1cm deep/long. This is to help you to fold it in the trickier bit later! Now fold the 'bars' back in to where they were earlier.
-
Step 5
When you folded the bars earlier you might of noticed that the center line sepaprated the 'bars' on either side.
So now we are going to put a line of glue on the BACK of the 'bar' (the bit thats facing the floor) and another line of glue on front of the 'bar' (the one facing upwards/facing you). Do this on both sides.
-
Step 6
Fold the side nearest you in first then the other. Try to do this as quickly as possible so that the glue doesn't dry. You should now have a sort of slim bag shape. Hole-Punch on both sides of the bag. You need to get them as level as you can.
Leave your bag to dry.
-
 Step 7
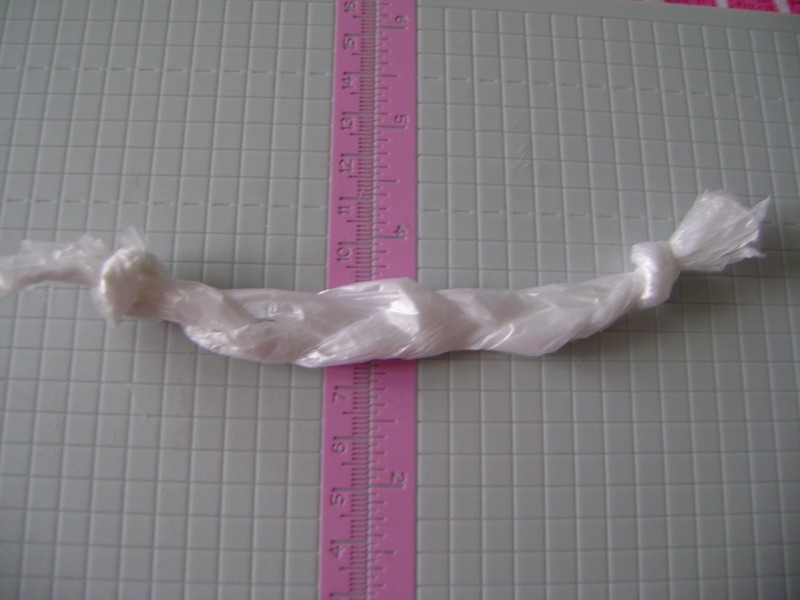
Now, we are going to make the braided handles for the bag. One of these small bags makes ONE braided handle!
-
 Step 8
Cut the bag into three strips, cutting the handles of the two outside strips off. Gather the ends that aren't sealed together and tie them in a knot. Braid the three strips. Leave enough space at the end so you can tie another knot.
Repeat this with the other bag so that you have two handles.
-
 Step 9
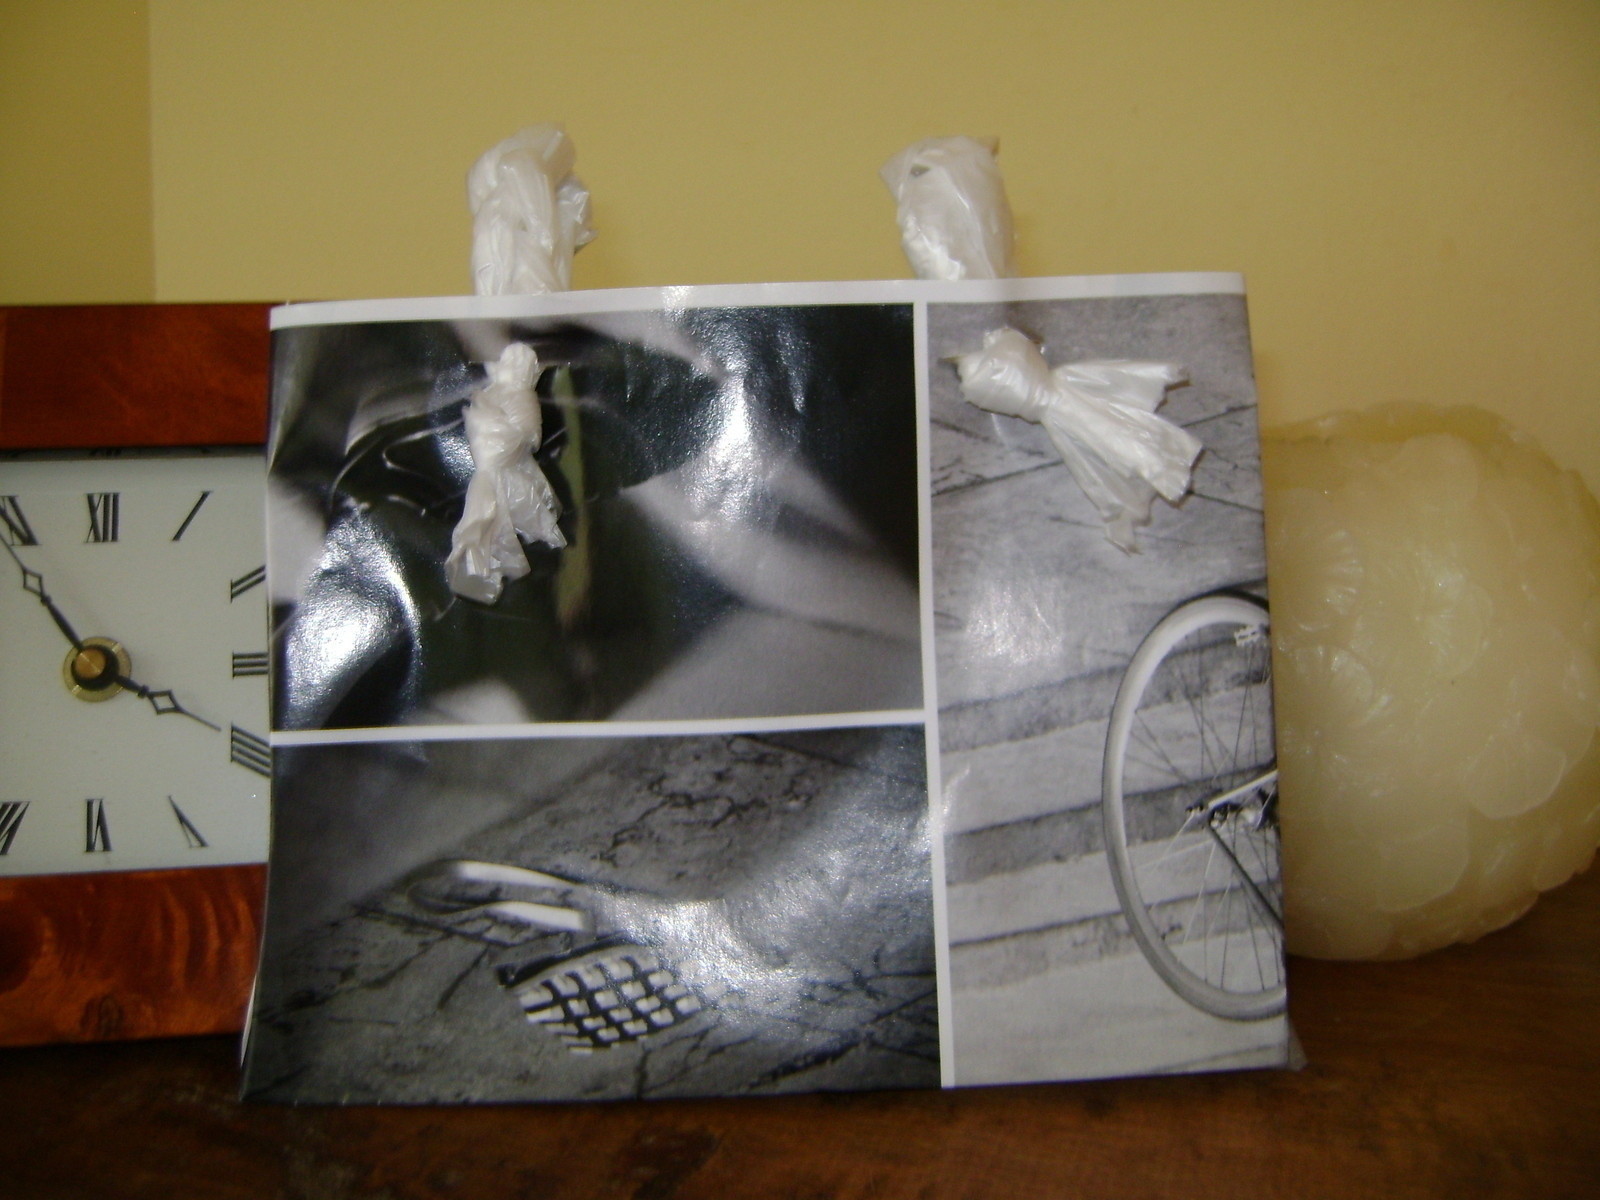
Cut slits coming off the hole-punched holes on the bag to give the handles room to fit in. Push the handles through.
Ta Da! A delightful little bag - ready to be filled with beautiful presents!


but that there problemLOL
Now i have thanks to you a new wrap idea;-D