


About
Using a useless old greeting card and duct tape, you can make the sturdiest and trendiest wallet!
This project was inspired by a card-made wallet project I saw the other day, but I put my own twists on it. I used one of those singing greeting cards as my main piece of my wallet. I covered it in colored duct tape. Then, I proceeded to create pockets and a clear cover/id picture holder using electric tape and clear packaging tape. Then, I found random clippings/pictures from magazines to decorate the inside and outside of wallet. This is probably my favorite project I have done lately. hope you enjoy. :]
-
 Miss_Fit favorited Recycled Card Wallet
07 Jul 03:06
Miss_Fit favorited Recycled Card Wallet
07 Jul 03:06
-
 Kay T. favorited Recycled Card Wallet
12 Nov 08:26
Kay T. favorited Recycled Card Wallet
12 Nov 08:26
-
 Anya I. added Recycled Card Wallet to paper work
11 Nov 12:02
Anya I. added Recycled Card Wallet to paper work
11 Nov 12:02
-
 Terapitha favorited Recycled Card Wallet
13 Aug 12:17
Terapitha favorited Recycled Card Wallet
13 Aug 12:17
You Will Need
-
 Step 1
First, you need to find the old, useless greeting card that you were going to probably throw away anyways. I used one of those singing greeting cards from my graduation (sings "I want money" i found it apropriate for a wallet). You need to cut the card into the size you want your wallet to be. Make sure you don't get near the singing piece. I kinda cut it so it was somewhat towards the top of my wallet.
-
 Step 2
After you cut the card into the size you want, you need to cover the card with your duct tape. I used black electrical tape and some blue scotch tape (lack of resources atm). I did a striped design, but you can do anything. Just pretty much get an even layer around your card, so that it's completely covered. You can make it funky as you want after you cover the whole thing. and only do that to the outside of the card. For the inside, you need to do a few special things...
-
 Step 3
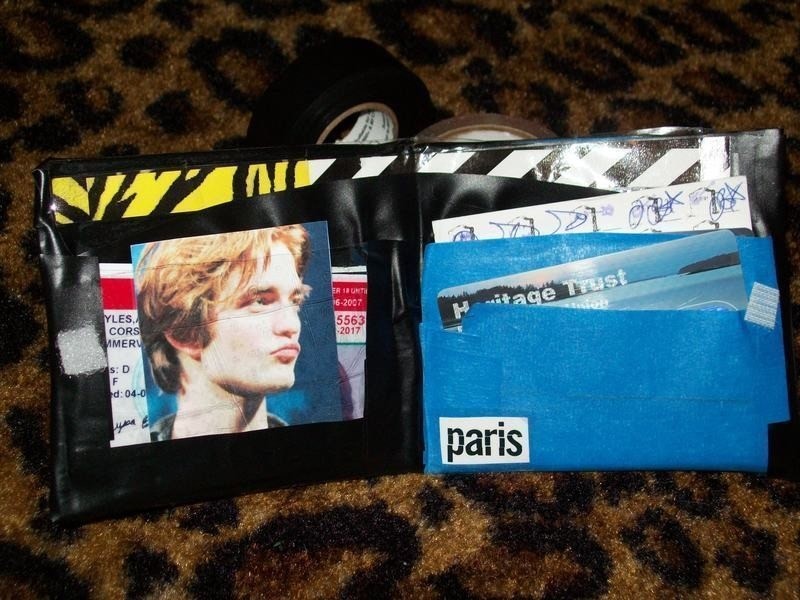
This picture is the only best way I can explain how to work the inside pockets for the wallet. I used the black electrical tape to make a 'flap' for the entire width of the card (for the money bills). just lay the tape over one another, so it adds in length. Then you cut to the shape of the card, and tape it to the bottom of the card. The tape should match the color of the outside, so it won't look too blotched. For the card pockets (as shown on the right) you do the same thing as before, just a smaller version. I made two card pocket holder, but you could probably do only one or more if you like. For the clear id cover, i used clear packaging tape to create a clear cover. Then I used the black tape around the edges to keep it to the wallet, except for the top part, of course, so you can simply slid the cards in. You can mix it up anyway you like, but that's how I did it. :]
-
 Step 4
Next, I put the velcro pieces on the inside of the wallet. You can look at the previous picture to see exactly where I put them. I was going to make a string and button on the outside of the wallet, but i didn't have a glue gun at the time, and i found some stick-on velcro pieces. I'm glad i found them, cause they work out well. You can pretty much put the velcro pieces wherever you think best; i put it in the middle edges, but i might have to move them cause my wallet is thick (from the cards, not the money haha).
-
 Step 5
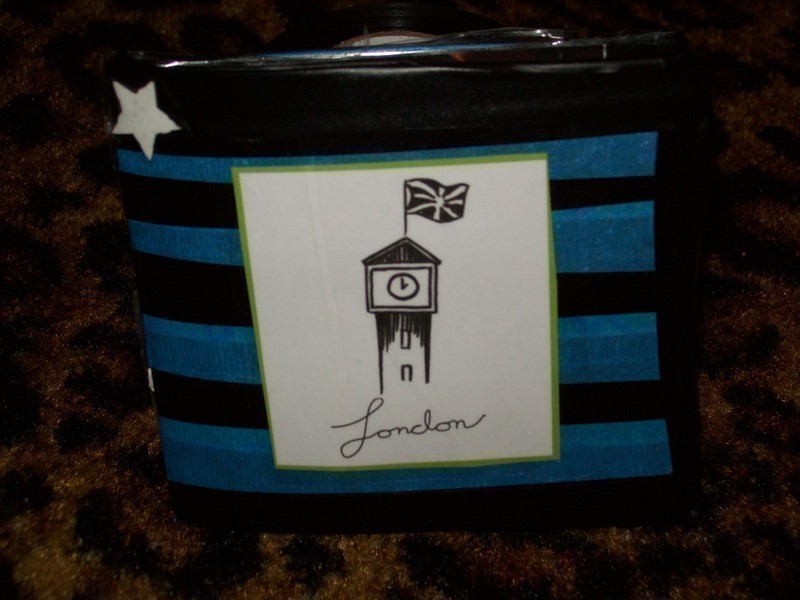
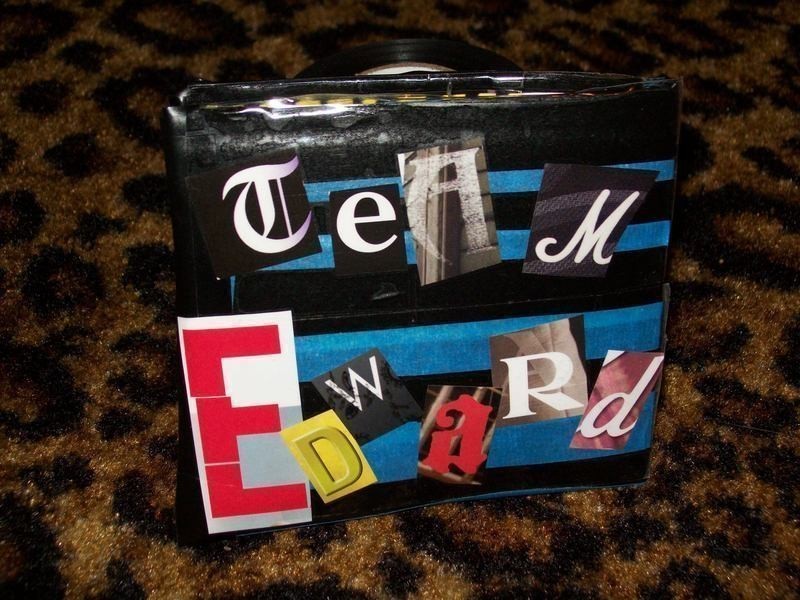
After you have all the major mechanics worked out, it's time to get creative with your wallet! I used magazine clippings from old magazines I've had laying around my room. I cut out little pics I liked, and stuck them to a piece of the clear packaging tape that I used earlier, and made the tape overlap alittle bit enough to stick the picture to the wallet. It also gives it a finished, more professional look, and protects the picture from getting damaged later. As you can see from the pictures, i put pictures outside and inside the wallet. And if you're wondering what the zebra/striped design outlining the money slot of the wallet, it's a border from a magazine page that i taped. You can do anything in this area; customize your wallet! I'm a big fan of London, Paris, and Twilight, so i showed some love to those. :]
-
 Step 6
So after that, you're done! You can put your credit cards, business cards, whatever in your wallet and start using it! i can't wait to use mine; and everytime you open it up it plays music; you can't go wrong with that! Just make sure that you don't get something stuck and interfere with the singing piece. Mine was sticking, and i had to cut some tape that I had placed there. :] hope you like it, and are able to make one for yourself.


i'd like to see your reasoning behind your choice... ;)