
About
Create a lovely shimmery quilled maple leaf, the perfect reminder of the beauty that Autumn holds.
Fall is such a lovely time of the year with the crisp air, cozy sweaters and the beauty of leaves turning to the shades of Autumn. You can capture that beauty with Rinea Foiled Papers and a bit of quilling fun. This creation takes a bit of time but the finished product is worth it...it will be a keepsake to treasure for a lifetime.
-
 Ink Stained Roni published her project Quilled Multi Color Foiled Maple Leaf
19 Mar 09:00
Ink Stained Roni published her project Quilled Multi Color Foiled Maple Leaf
19 Mar 09:00
-
 Step 1
Select a pattern which you wish to re-create with quilling. I did a search for free maple leaf coloring page.
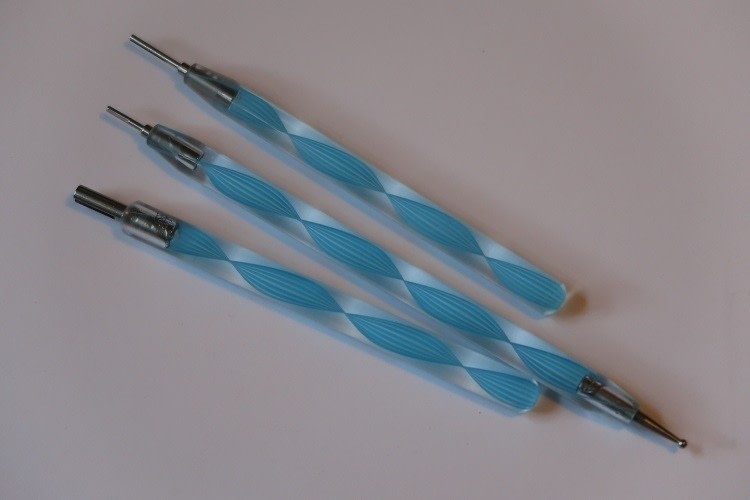
The regular size quilling tool will work fine for this project.
Trim foiled papers to 1/8" strips in desired colors. I used red, orange and mocha for this design.
-
 Step 2
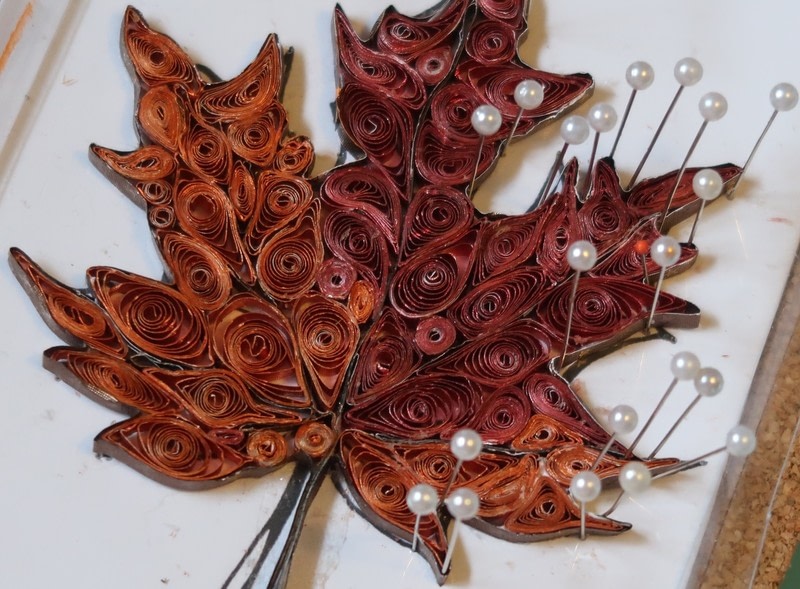
Place pattern on corkboard; cover with a piece of acetate and secure with straight pins.
Pin leaf veins to the acetate following the pattern.
Roll several circles with the foiled papers and begin placing and gluing to the veins. I started off with orange (Marigold) foiled paper.
-
 Step 3
Continue to roll various size circles, pinching them to fit the pattern and secure with glue working from one side of the leaf to the other.
Use the straight pins to hold the newly placed pieces in position as well as the brown veins while the glue dries.
-
 Step 4
If desired, about mid-way through the leaf switch colors, I went from Marigold to Ruby. Continue rolling, positioning and gluing the circles and veins as you work around the pattern.
-
 Step 5
Once you have finished, there may be white edges showing, touch up the color by applying StazOn ink to the edges using a Fantastix.
Let the quilled leaf dry completely before removing the pins.
-
 Step 6
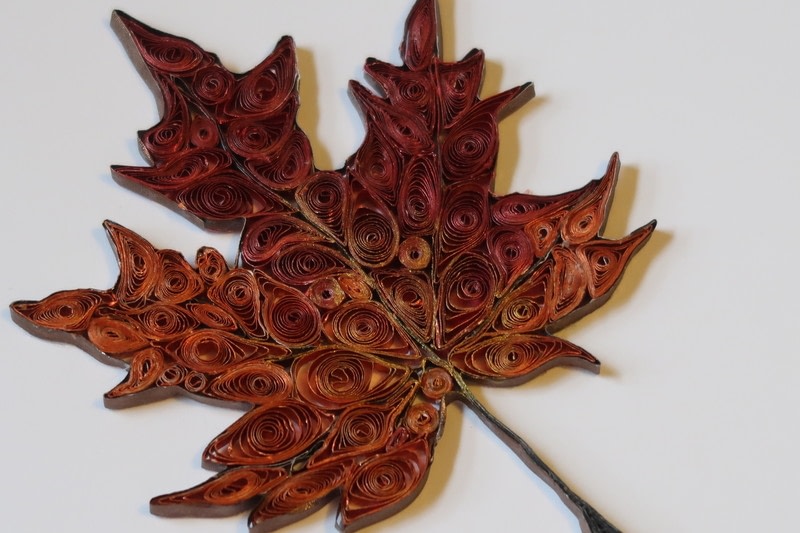
Once dry, pull out all of the pins and gently peel it away from the acetate.
You now have a beautiful foiled leaf ready for use.
-
 Step 7
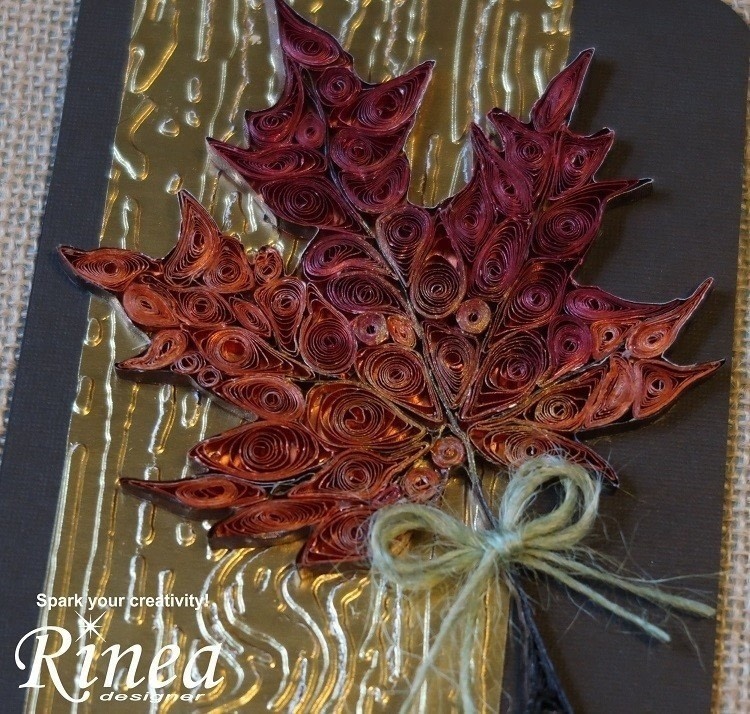
The maple leaf was added to a brown card base with a wood embossed gold foiled paper panel. I tied a bit of twine to the stem of the leaf for an extra little touch.