


About
Two versions.
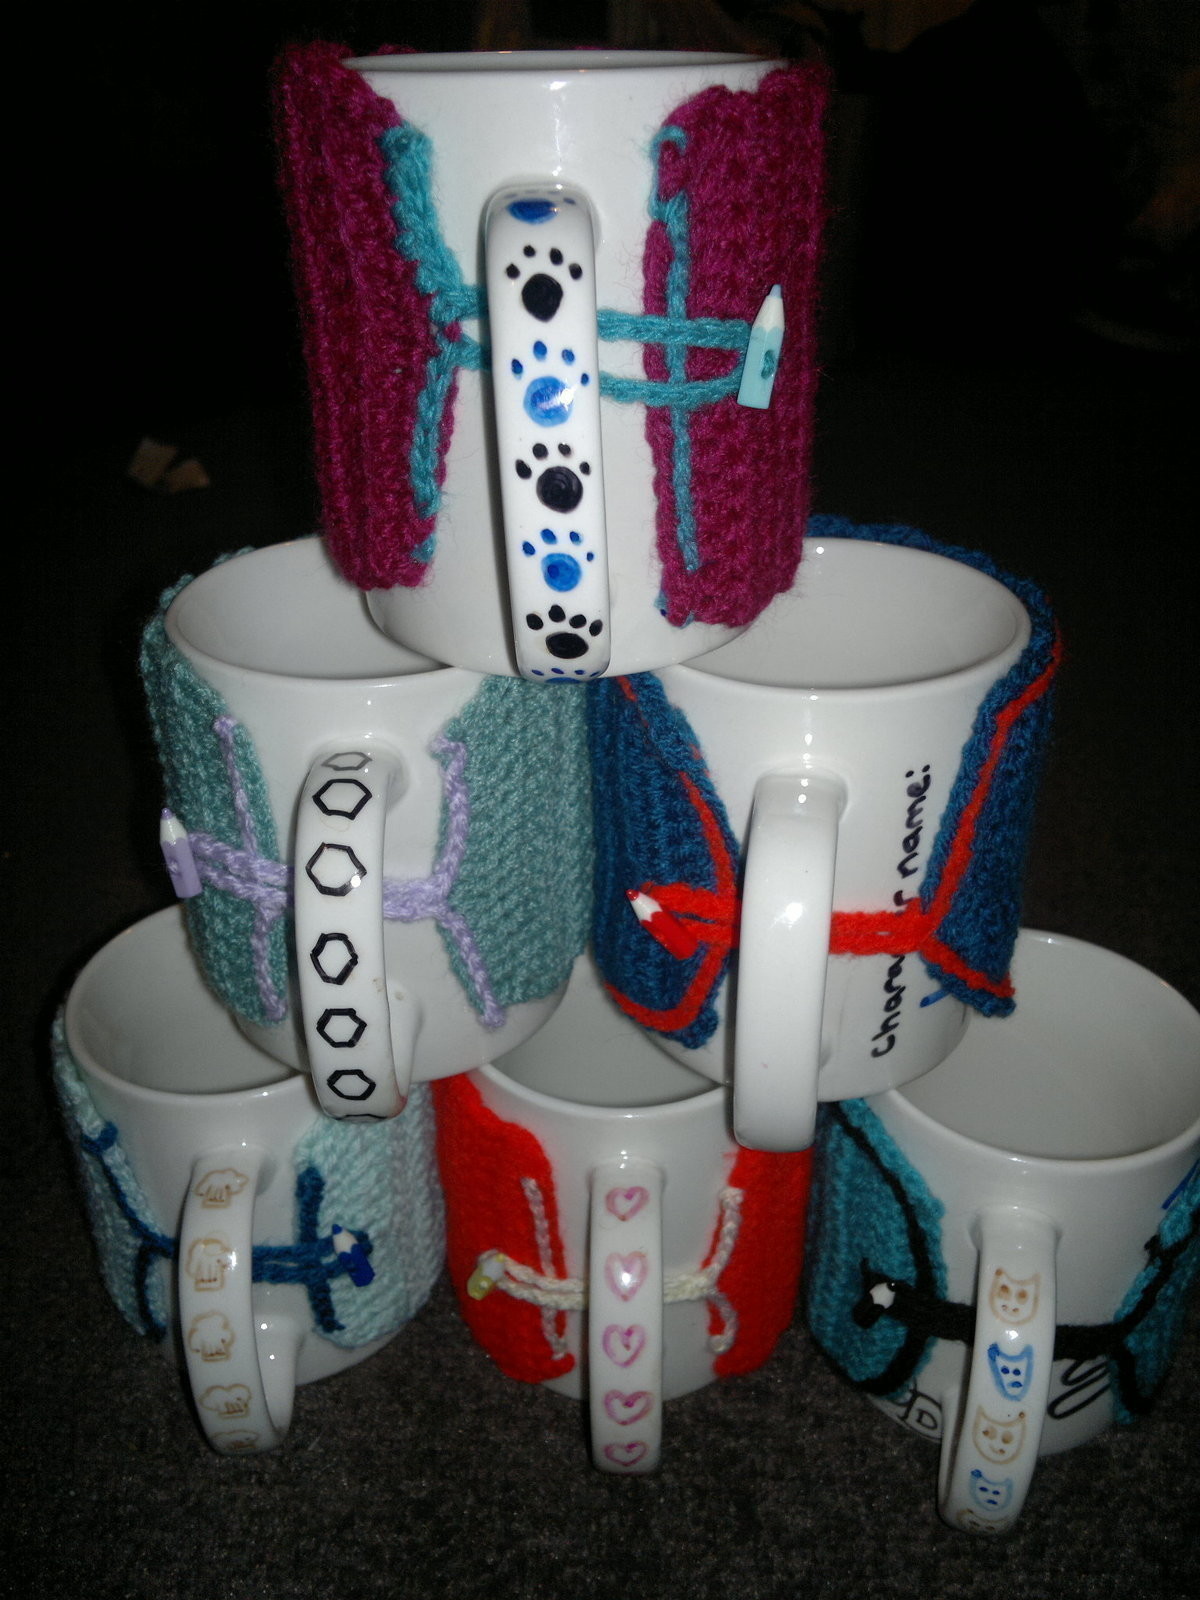
With a week until Christmas the pile of presents to make wasn’t going to get any smaller by me avoiding thinking up what the heck to make people! If you’re ever in a similar ‘what the heck do I get for x person?’ kinda state of mind to me, then this pattern is probably for you – the ever popular, totally simple and quick but looks like you’ve put some effort in mug cosy!
Originally posted on my blog Amiuruthi.
Tags
-
 Kimya J. favorited Quick And Simple Mug Cosy
29 Oct 22:34
Kimya J. favorited Quick And Simple Mug Cosy
29 Oct 22:34
-
 San added Quick And Simple Mug Cosy to Tea Party
01 May 17:35
San added Quick And Simple Mug Cosy to Tea Party
01 May 17:35
-
 lauren w. favorited Quick And Simple Mug Cosy
31 Dec 06:02
lauren w. favorited Quick And Simple Mug Cosy
31 Dec 06:02
-
Louisa R. favorited Quick And Simple Mug Cosy
17 Nov 01:16
-
 ManooRa A. favorited Quick And Simple Mug Cosy
21 Jul 01:49
ManooRa A. favorited Quick And Simple Mug Cosy
21 Jul 01:49
-
Meena R. favorited Quick And Simple Mug Cosy
07 Apr 09:31
-
 irieone311 favorited Quick And Simple Mug Cosy
11 Feb 21:42
irieone311 favorited Quick And Simple Mug Cosy
11 Feb 21:42
-
 Chudames favorited Quick And Simple Mug Cosy
05 Feb 16:21
Chudames favorited Quick And Simple Mug Cosy
05 Feb 16:21
-
Chudames added Quick And Simple Mug Cosy to Crochet
05 Feb 16:20
-
 Desirey G. favorited Quick And Simple Mug Cosy
26 Jan 06:45
Desirey G. favorited Quick And Simple Mug Cosy
26 Jan 06:45
You Will Need
-
Step 1
You will need:
3.5mm (E) crochet hook.
Yarn in two complimentary colours – one for the background and one for the edging and letter.
Yarn Needle
ButtonStitches:
Double Crochet (DC)
Chain Stitch (CH)
Slip Stitch (SL ST)
Chain embroidery stitch (excellent video tutorial here and I’ll try describe it below too).To start – measure your mug and chain as many as you need to go from rim to base, minus 1cm at the top, and also measure around it fully minus about a 1″/ 2.5cm gap to work out how many DC’s you’ll need (it’s about 1DC = 1cm). For my mug that was 15 chain stitches and 23 rows, so I’ll write like that, but edit as necessary.
-
 Step 2
Ch17 in your base colour.
Row 1: 15DC starting in third chain from the hook. [15] Ch2 and turn.
Row 2 – 22: 15DC [15] Ch2 and turn.
Row 23: 15DC [15] Finish off and weave in the ends. -
Step 3
Ok, grab your edging colour and keep the 3.5mm crochet hook. There are two ways you can add the loop – what I call the half assed way (only two lines of edging) or the what-I-should-have-done-on-everyones-if-I-weren’t-being-lazy way.
-
 Step 4
For the half assed way:
Pull up a loop through the corner of your work as if you’re working along a short edge (the bottom left corner in the picture above).
1: 6 SL ST (or however many it takes to get the centre of the edge).
2: CH 25, then loop it around and SL ST into the 6th SL ST of the above.
3: 6 SL ST (or however many it takes to get the the end of the edge) and finish off.That gives you as per the photo.
-
 Step 5
On the opposite short side:
Pull up a loop through the corner of your work.
1: 12 SL ST (or however many it takes to get the end).It does look ok, I just prefer the method I’m going to show you now that I used on my brother’s and Dad’s mugs.
-
 Step 6
To do the what-I-should-have-done-on-everyones-if-I-weren’t-being-lazy way:
Ch25 leaving a long tail. Secure the tail edge in the centre of the short edge (sew it in place).
-
 Step 7
Loop the chain round and SL ST where you sewed the tail.
SL ST around all four edges of your mug cosy, finish off when you get back to the loop. MUCH more professional looking. -
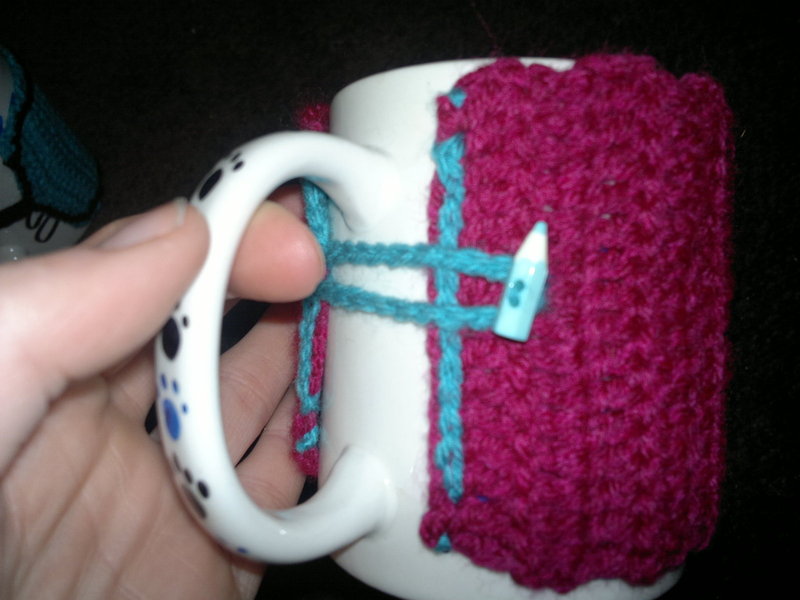
 Step 8
Add a button in the centre of the short end without the loop. Mine are placed on the second row of DC from the end, about 2cm in, but test it on your mug to see where you need your button. I got cool pencil shaped buttons coloured to match the yarn, but you can use anything really.
-
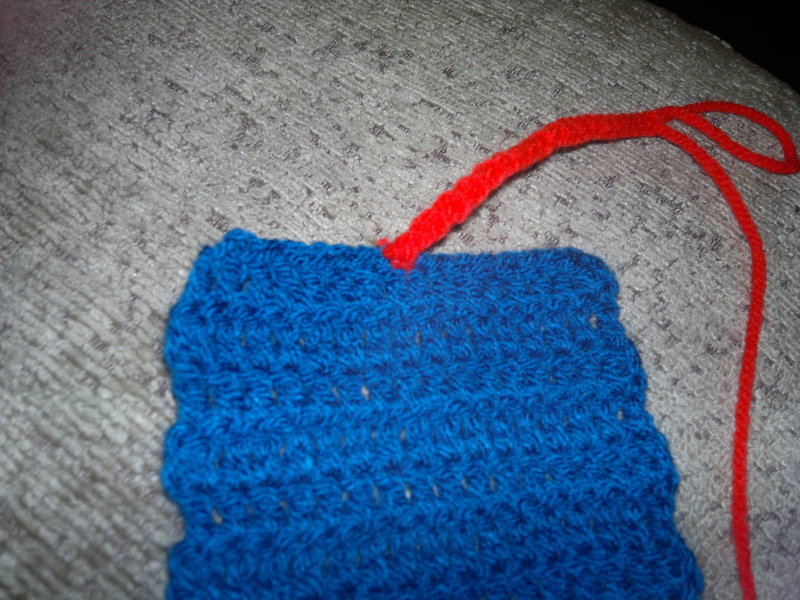
 Step 9
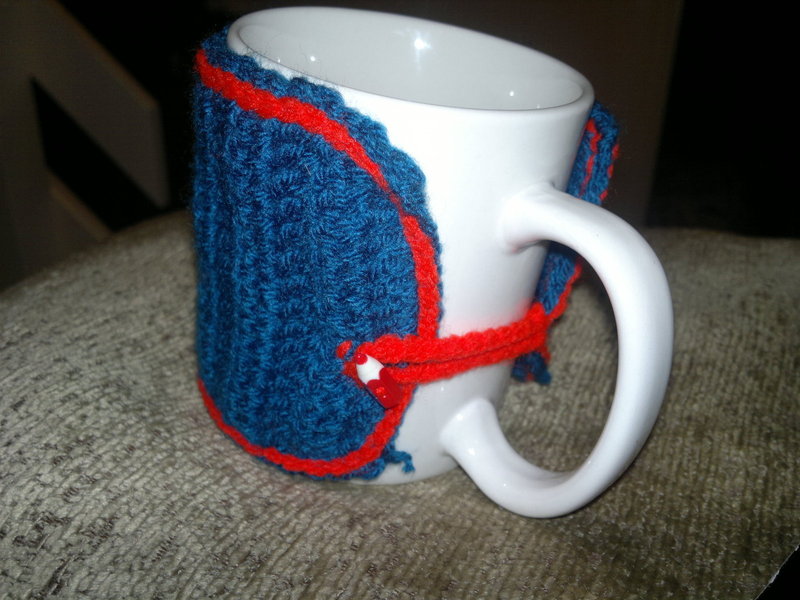
You can choose to decorate the centre however you wish – make an amigurumi to stitch on, embroidery a nice image, make a motif/embellishment/ applique/ whatever you call it. I chose to add the receivers initial using chain stitch.
Chain stitch is nice and easy but looks way more effort than it actually is.
Five steps to follow:
1) Using a yarn needle, pull your yarn up through the work, tie a knot or secure it at the back somehow.
2) Pull your yarn back down through the same hole, but make sure you leave a small loop (don’t pull it all the way back down).
3) Bring your needle back up inside the loop, about half a cm away from the first hole.
4) Repeat step two. This forms a new loop which holds the original loop in place.
5) Repeat until your row or curve is as long as it need to be or your letter is complete. Then simply secure the last chain with a small stitch round the loop.Full view the picture for a visual representation of the above.
-
 Step 10
Once you’ve done a row you can loop through it anywhere to create your letter, so say I wanted to make a ‘T’ for example, I’d embroidery a line of say seven chains, then start a new line going down from the fourth chain, looped through the side of the stitch. For the ‘K’ to the left, I started with a vertical line, then did the two diagonal lines from the centre stitches.
-
 Step 11
once you're done, slip your wool around the mug and close it by pushing the loop through the handle and closed round the button.