

About
Digital Image Enhancing Portrait Airbrushing Tutorial
-
 Nia Romadhoni favorited Portrait Airbrushing
01 Dec 09:55
Nia Romadhoni favorited Portrait Airbrushing
01 Dec 09:55
-
 Blythe W. favorited Portrait Airbrushing
18 Nov 06:17
Blythe W. favorited Portrait Airbrushing
18 Nov 06:17
You Will Need
-
 Step 1
<b>Adjusting Colour, Contrast and Lightness</b>
01 - Open your image in Photoshop.
-
 Step 2
Duplicate the background image by right-clicking the background image in the layers panel, and selecting Duplicate Layer. Repeat this once more, and rename this duplicate to “Screen”. If you do not have the layers panel visible, select Window then Layers from the menu, or press F7 to toggle.
-
 Step 3
02 – Using the Layer Effects drop down menu in the layers panel, select the “Screen” effect. This should lighten your image. If the image is too bright, don’t worry – we will play around with settings in a moment!
-
 Step 4
03 – You should now duplicate the Screen layer, this time renaming it “Overlay”. Now select the “Overlay” effect from the layer effects drop-down menu this time. This should add a whole load of contrast and colour punch to your image.
-
 Step 5
04 – If you think the image is too bright or contrasty, you can use the Opacity slider on each layer to reduce the effect. If your image is too contrasty, reduce the opacity of the Overlay layer. If it is too bright, reduce the Screen layer opacity. There are no right or wrong values, it’s all about your taste and your starting image.
-
 Step 6
05 – Once you are happy with the layer effects, hold down the Shift key and click on the Overlay, Screen and Background Copy layers. With all 3 selected, right click over either one, and select Merge Layers. You could also go to the menu and select Layers, followed by Merge Layers. You should now have a layer named Overlay with our modifications, and another layer underneath called Background, which is our original layer.
-
 Step 7
<b>Removing Blemishes</b>
As you can see, these simple steps have already improved the general image. Next we are going to look at removing some of the blemishes in the skin.
-
 Step 8
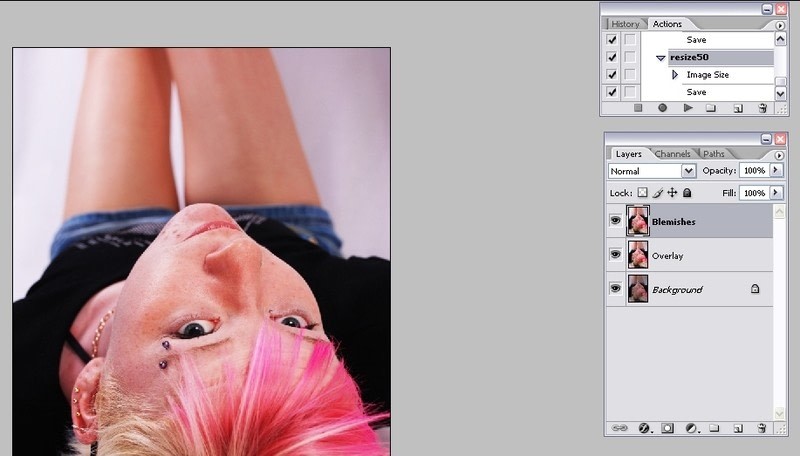
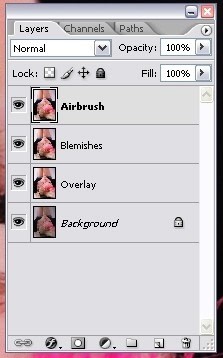
06 – Duplicate your Overlay layer, and rename the duplicate to “Blemishes”. I tend to make duplicate layers after each major step, as if something goes wrong we don’t have to start from scratch. Make sure you have the tools palette open by selecting Window then Tools from the menu.
-
 Step 9
Zoom in nice and close to your models skin using the zoom tool, then select the Spot Healing Brush tool, which is the one that looks like a plaster, 4th from the top on the left of the tools palette.
-
 Step 10
07 – We are now going to remove some of the minor blemishes from the skin using the Spot Healing Brush. This tool is great for getting rid of spots and blemishes quickly, but doesn’t work too great around the edges of the face, or around features like eyes and lips. Don’t worry about it for the moment if you can’t get rid of every tiny niggle – we will work on that soon. For now, just concentrate on getting the majority of the blemishes to disappear! Here are a few things to remember when using this tool:
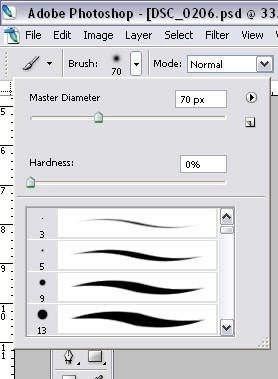
Keep your brush size just a little bigger than the blemish you intend to cover up. You can increase or decrease the brush size quickly by using the wobbly parenthesis keys – To decrease use { and to increase use }.
Make sure your brush is nice and soft at the edges. You can do this by reducing the hardness of the brush in the brush options panel.
If an area doesn’t turn out like you want it to, undo your latest actions by holding down the Ctrl and Alt keys on the keyboard, and tap Z until you are happy. You can try again, or just leave that particular area for the moment.
Simply move your brush cursor over the area you wish to cover up, and click on it. Make sure it blends nicely with the surrounding skin area – you will figure it out via experimenting with this tool!
-
 Step 11
Once you have finished with the Spot Healing brush, you can compare the modifications you have made to the previous layer by clicking the eye icon in the Layers panel. Clicking this icon toggles the visibility of that particular layer, allowing you to see what is underneath. As you can see, we have already made a considerable difference to the skin, but there are some fiddly areas that we need to work on with a different tool.
-
 Step 12
08 – The next tool we are going to use is called the Clone Stamp tool. This tool is easy enough to use, but difficult to explain. To cover up a blemish, we need to sample a blemish-free area of skin to cover it up with. We do this by holding down the Alt key, and clicking over the desired area. We now release the alt key, and start painting over our blemish – effectively copying and pasting the skin. It’s easier if you just select this tool and have a play around with it, or look up some additional tutorials on the Clone tool. It’s a good idea to use a soft and fairly small brush, and select from an area close to the blemish, in order to keep the skin tones etc similar. You can also reduce the opacity of this brush, which I like to do as it helps blend the skin tones.
-
 Step 13
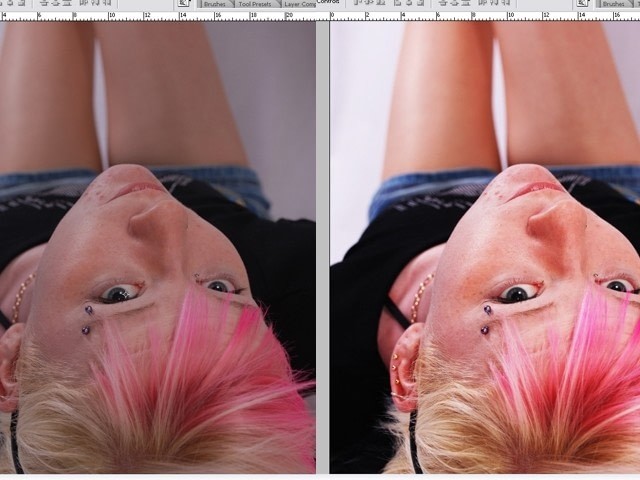
As you can see, we have already come a long way since our original image! Depending on your photo, you may just want to leave it at that. I’m going to go into a few additional techniques, just in case you want to take it further.
-
Step 14
<b>Airbrushing</b>
I just want to make it clear that I’m not an advocate for the perfect super-model image, but as a photographer I am expected to know how to use a few techniques that help create a similar image. I try to keep the image believeable, and I do not want a ton of hatemail from people claiming I’m putting pressure on young girls etc.
09 – We are now going to use a few photoshop filters to get a more polished effect on the skin. We will start by duplicating our Blemishes layer, and re-naming it to Airbrush. With the layer selected, we now want to follow these menus: Filter > Noise > Dust and Scratches… This will open up a little dialogue box with some options in. You can play around with these, but for now we want to achieve a blurred effect on the skin, but we don’t want to go overboard. I’m going to set the Radius to 4 and the Threshold to 0, then click Ok.
-
 Step 15
10 - We now want to follow this menu: Filter > Blur > Gaussian Blur… We want to eliminate any banding that occurred after the previous filter, especially in areas like eyes and lips, but again we don’t want to overdo it, so
-
 Step 16
I’m going to set my Radius to 3.0 pixels, and click Ok.
-
 Step 17
11 – The next filter we are going to use is here: Filter > Noise > Add Noise… and we use it to add a little bit of texture back into the skin. We need a very small amount of noise, so I’m going to go with 1.3% with the Uniform and Monochromatic options selected. Click Ok.
Right about now you might be thinking “My beautiful image, what have you done?!” but trust me a little here, it’s going to look good!
-
 Step 18
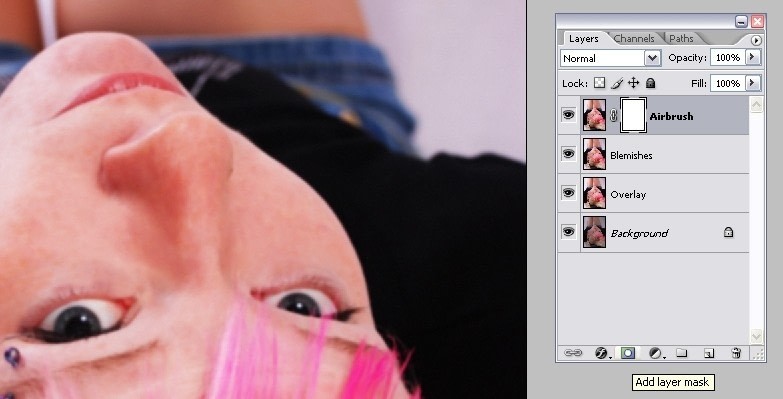
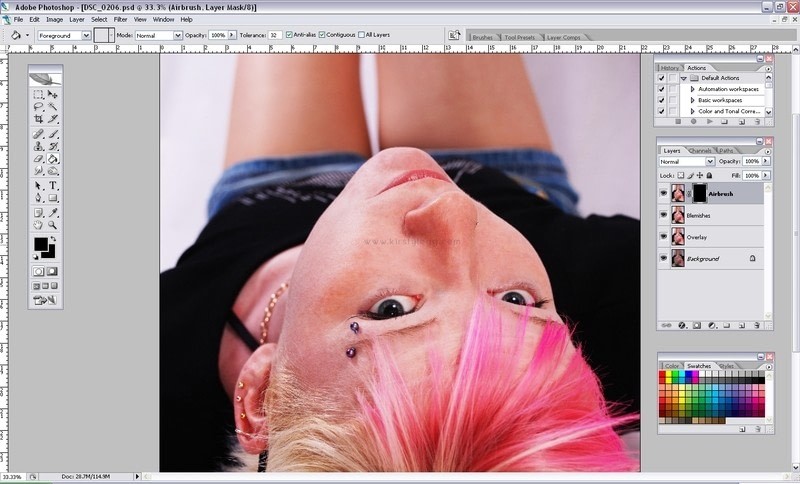
12 – Next up, we are going to use a Layer mask to the Airbrush layer, and we do this by clicking the icon that is a square with a circle inside it, on the layers panel. A little white box should appear on the layer. The next few steps might not make much sense, but once you see them in action, you’ll stop worrying!
-
 Step 19
First of all, select the paintbucket tool from the tools panel. Then select the colour black from the Colour Swatches panel. If you don’t have swatches open, go to Window > Swatches to bring the panel up. Ensuring that you are still working on the Airbrush layer, click anywhere on the image. Now you might be thinking “what was the point in all those filters?!” but you are about to see the wonder of the Mask technique. The little white box that appeared should now be black.
-
 Step 20
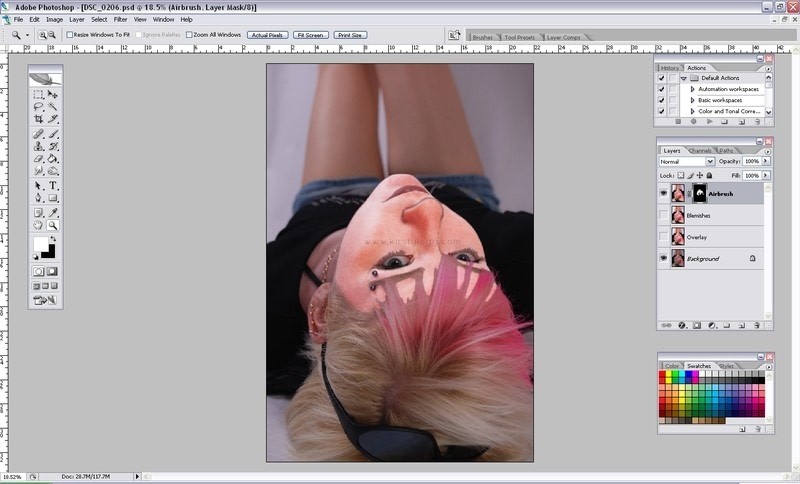
13 – Next we are going to take our Paint Brush tool, and select white as our colour. We want the brush to be nice and soft, and the opacity set to 100%. We are now going to use the paintbrush to paint in those filter effects over the skin. If you start painting on quite a large plain area of skin, you will notice that the blurring effects will start to appear. Take care to avoid blurring around the features such as eyes, nose, lips and edges of the face. If you make a mistake, just switch your brush colour to black and paint over the mistake area. I tend to de-select all other layers except from the Airbrush layer I’m working on, and the very original layer, as it is easier to see the areas of skin we are covering up, and helps ensure I don’t miss bits.
Keep going with the painting, reducing your brush size for the fiddly bits. It might look a bit creepy for now, but go with it!
-
 Step 21
14 – Once you have all the desired areas covered, right-click the little black and white box to the right of your layer, and select Apply Layer Mask. This should leave you with just the areas you have painted on its own layer. You can toggle this with the eye icon to view the effect.
-
 Step 22
15 – Depending on your image, this will probably look very fake. I usually reduce the Airbrush layer opacity to around 50-60%, which helps blend it in with the Blemishes layer underneath. If the skin doesn’t have enough texture, you can always add more noise. Once finished, I prefer to duplicate the Blemishes layer, then merge the Airbrush and duplicate blemishes layer together.
-
 Step 23
<b>Enhancing Eyes</b>
We are now going to look at enhancing the eyes.
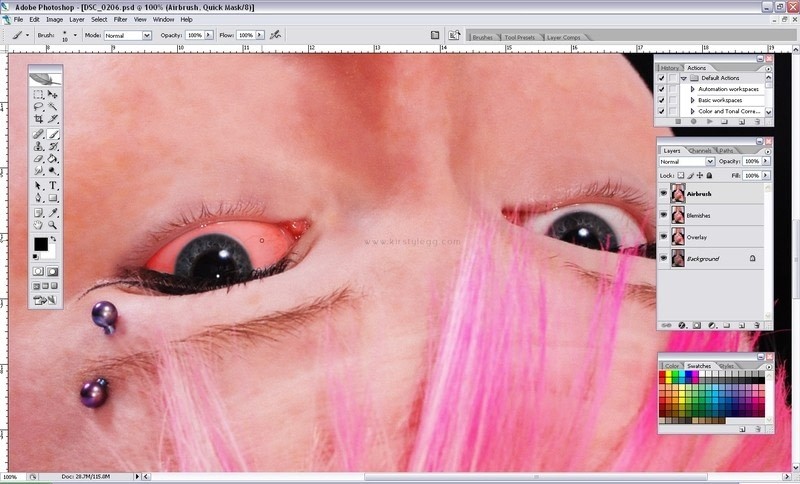
16 – Duplicate the Airbrush layer again, and re-name it Eye Enhance. Zoom into the eyes nice and close, then press Q on the keyboard to enter quick mask mode. With our paintbrush set to black colour, we now want to paint over the whites of the eyes. I know it paints in red, don’t worry about that. If you make a mistake, change your brush colour to white, and paint over the mistake until you are satisfied. Press the Q key again to enter standard mode, and there should be a selection area where you painted over.
-
 Step 24
17 – Now we want to select the opposite of this area, so go to the Select menu then chose Inverse. Return to the Select menu, and this time chose Feather – this will soften the edges of the effect and make it less obvious. Visit the menu again, and select Image > Adjustments > Hue/Saturation… to bring up the hue and saturation panel. Select Reds from the drop down menu, and decrease the saturation slider to reduce the redness of the eyes. Then chose Master from the drop down menu, and pull the Lightness slider up to around about 20 or so to increase the whiteness.
-
 Step 25
Experimenting will help customise the effect to your image, but remember that gleaming white eyes look unnatural. Click Ok, then go to Select > Deselect from the menu to get rid of the selection area. You should now have a nice natural-looking white eye.
You should repeat the previous step for the 2nd eye before continuing.
-
 Step 26
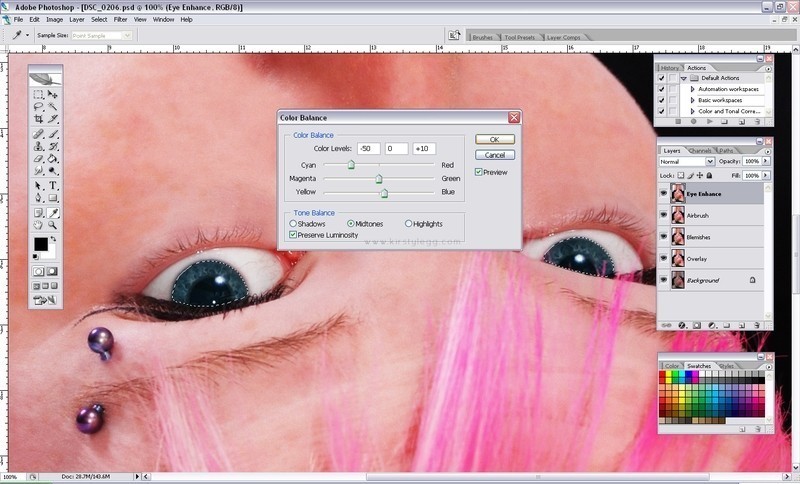
18 – Now we will look at changing the colour of the iris. Repeat the quick mask technique, but this time we want to paint over the iris and pupil. You can do both at the same time if you wish. Once you have done this, again go to Select > Inverse, then Select > Feather and chose 2 pixels. Click Ok, then go to Image > Adjustments > Colour Balance… You can mess around with the sliders to get the desired colour.
-
 Step 27
I’m just going to add a touch more blue to the eye colour, but you can have purple, orange, anything you want. Once you are done playing, click Ok, then go to Select > Deselect in the menu.
If you find that the eye effects are a little too overpowering, you can reduce the opacity of the Eye Enhance layer. I’m going to reduce mine to 85% just to take the edge of that super-white glow.


Comments


