


About
The Cake is a Lie
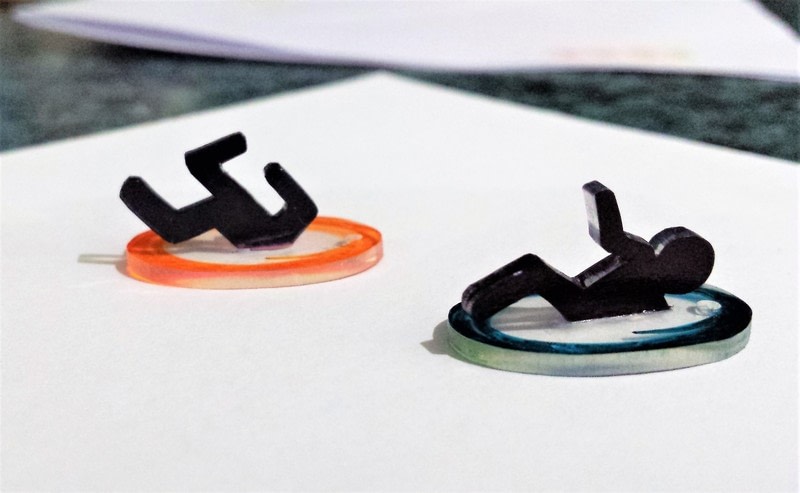
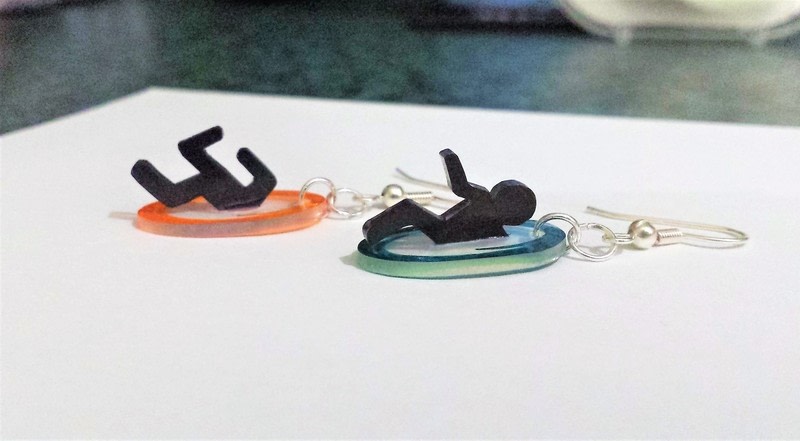
I made these portal earrings for a friend's birthday.
Tags
-
 redwolf54 added Portal Earrings to craftyness
10 Oct 04:03
redwolf54 added Portal Earrings to craftyness
10 Oct 04:03
-
redwolf54 favorited Portal Earrings
10 Oct 04:03
-
 Ms K. favorited Portal Earrings
11 Jan 19:59
Ms K. favorited Portal Earrings
11 Jan 19:59
-
 Dori B. favorited Portal Earrings
20 Mar 18:30
Dori B. favorited Portal Earrings
20 Mar 18:30
-
 erin g. favorited Portal Earrings
09 Mar 21:32
erin g. favorited Portal Earrings
09 Mar 21:32
-
erin g. commented on Portal Earrings
09 Mar 21:25
-
 Kathy C. favorited Portal Earrings
24 Feb 20:08
Kathy C. favorited Portal Earrings
24 Feb 20:08
-
 Carol S. added Portal Earrings to to download
15 Feb 06:42
Carol S. added Portal Earrings to to download
15 Feb 06:42
-
Carol S. favorited Portal Earrings
15 Feb 06:37
-
 Jackkie replied to a comment on her project Portal Earrings
05 Jan 11:24
Jackkie replied to a comment on her project Portal Earrings
05 Jan 11:24
You Will Need
-
 Step 1
Print out an image of the portals (choose their size by using a shrunken ruler* to estimate their final size). Sticky-tape a sheet of shrink plastic on top and copy the design onto it with coloured sharpies.
*If you don't have a shrunken ruler, all you need to do is draw a ruler on a piece of shrink plastic (you can include some colour swatches and hole punches of different sizes to see how they turn out as well) then cook them to the requirements on your packet of shrink plastic.
-
 Step 2
Cut out your portals and punch a hole in the top of each.
-
 Step 3
Carefully cut out the partial men.
-
 Step 4
Cook your plastic pieces to the specifications on your shrink plastic packaging.
Be careful: Your oven also effects what temperature/time you need to cook your plastic at.
-
 Step 5
Superglue the bodies to the portals and leave them to dry for an hour.
-
 Step 6
Link an earring hook and two jump rings in succession with the plastic portal.
Repeat for the second earring.
-
 Step 7
Leave to dry for another few hours (my superglue packet recommended 24 hours).
-
 Step 8
Print out an image of the man (choose its size by using a shrunken ruler to estimate their final size). Sticky-tape a sheet of shrink plastic on top and copy each half of the design onto it with coloured sharpies.
Make sure to move the plastic in between drawing the halves on so you can extend the drawing a bit on either side. I chose to put two legs on one side because I thought that half a leg would be a bit difficult for me to glue.


Comments


