


About
How-to draw and paint poppies with Chameleon Colour Changing Pens
-
 Amanda P. added Poppy Ink Drawing to Drawing Tutorials
17 Jun 22:01
Amanda P. added Poppy Ink Drawing to Drawing Tutorials
17 Jun 22:01
-
 Minna O. favorited Poppy Ink Drawing
10 May 05:12
Minna O. favorited Poppy Ink Drawing
10 May 05:12
-
Lisa B. favorited Poppy Ink Drawing
23 May 02:23
-
 paola m. added Poppy Ink Drawing to disegnare
20 Feb 13:15
paola m. added Poppy Ink Drawing to disegnare
20 Feb 13:15
-
paola m. favorited Poppy Ink Drawing
20 Feb 13:15
-
 tyler t. favorited Poppy Ink Drawing
10 Nov 08:31
tyler t. favorited Poppy Ink Drawing
10 Nov 08:31
-
 Crafterella featured Poppy Ink Drawing
01 Sep 22:00
Crafterella featured Poppy Ink Drawing
01 Sep 22:00
-
Lina M. favorited Poppy Ink Drawing
27 Aug 07:16
-
 Renee P. favorited Poppy Ink Drawing
11 Aug 06:33
Renee P. favorited Poppy Ink Drawing
11 Aug 06:33
-
 prpltrtl946 favorited Poppy Ink Drawing
09 Aug 15:48
prpltrtl946 favorited Poppy Ink Drawing
09 Aug 15:48
-
 Step 1
Choose a photograph of some flowers that you'd really love to draw, or sit in your garden and draw some in real life. Get all your equipment together - a sheet of drawing paper, a pencil, eraser and Chameleon Color Changing Pens.
-
 Step 2
Make a light pencil sketch of your flowers. I chose not to do a black outline with the detail pen as I wanted a more delicate watercolour effect.
-
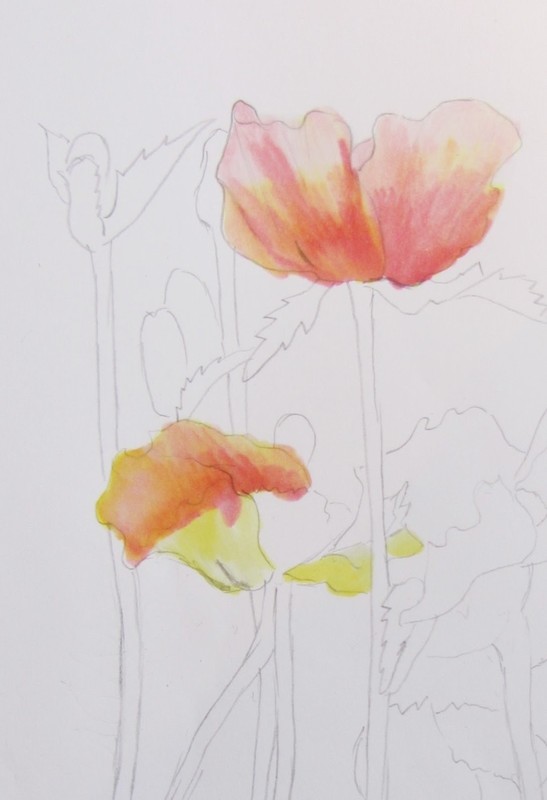
 Step 3
I first applied a gradated tone of yellow to all the petals using YL2 Summer Sun. This warms up the crimson tone which will be applied next and also where the yellow shows through it gives the impression of sunlight shining onto and through the petals. I infused the painting nib with the toning medium for about 20 seconds and mostly worked from the top of each petal blending to a darker tone towards the inside edge of each petal.
-
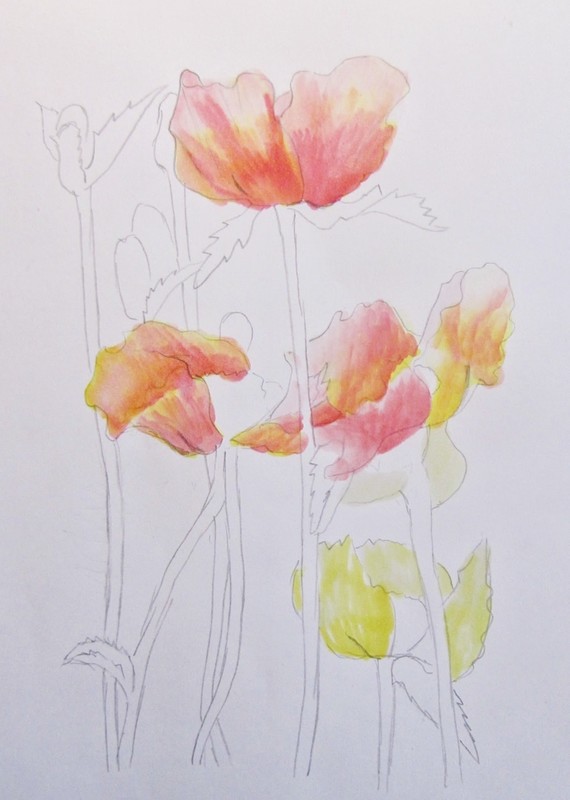
 Step 4
I next applied a layer of crimson RD4 Crimson Red over top of the yellow, again blending from light at the outer edge to a darker tone approaching the middle of each petal on the poppies where there is more shadow. This time I infused the painting nib for about 10 to 15 seconds. It didn't seem to take as long to lighten as the yellow. Don't worry too much about precise shadows and lighter areas. Just vary tones throughout the petals and you get an impression of them being translucent. Just look out for the obvious shadows.
-
 Step 5
Keep working around the petals with the crimson. I infused the nib a number of times to lighten the ink and went over some of the areas again where more colour was need, so as to build up the tones. Starting with the ink light each time meant I didn't suddenly get a hard edge of dark tone where it needed to be more subtly blended.
-
 Step 6
A closer up view of where I where I am building up the tones of crimson.
-
 Step 7
I now strengthened the shadows on the insides and undersides of the petals with the crimson ink at full strength where I felt they would be darkest. This step also shows me starting to add the first colour to the leaves. For those I started with YG3 Spring Meadow blending light and dark tones of this one colour through them for the highlights and shadows. Again infuse the painting nib for about 10 to 15 seconds to lighten the ink.
-
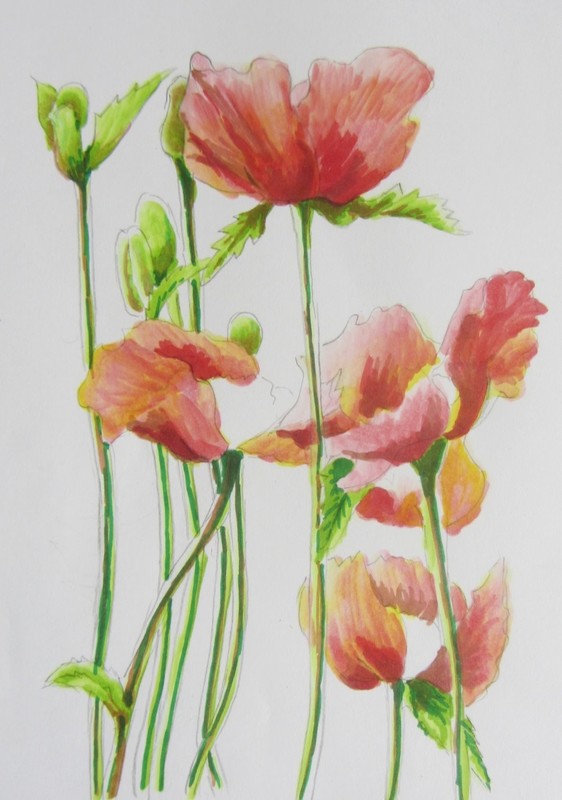
 Step 8
In this step I have completed all the leaves and buds leaving the lightest tone of the ink for the highlights and as the ink darkens indicating the shadows. For the stalks I painted a single line of the green in the lightest tone. I then painted down the right half of the line with the ink at it's darkest tone to give a shadow on the right of the stalks.
-
 Step 9
I then went over the parts of the shadows in the leaves and on the top of the stalks underneath the flowers with a darker green GR3 Grass Green. This colour I used at full strength. I also used this colour with the finer nib to draw a finer line down the centre of the shadow on the stalks. Also with the fine nib draw some veins onto the leaves.
-
 Step 10
This step shows all the stalks and leaves completed with the darker green. I also felt the light areas of the petals didn't have enough colour so I again lightened the crimson with the toning medium and put another light wash over the outer edges of the petals.
-
 Step 11
I then added some warmer colour into the darker green shadow using BR2 Hot Cocoa. I also used this in the deeper areas of the shadows in the crimson on the petals. This added some colour into the shadows and greyed them a little.
-
 Step 12
This is a close up of the painting showing the details of the shadows on the stalks and leaves and also the buds. You can see the touches of the cocoa in the darker areas and also along the shadow on the stem.
-
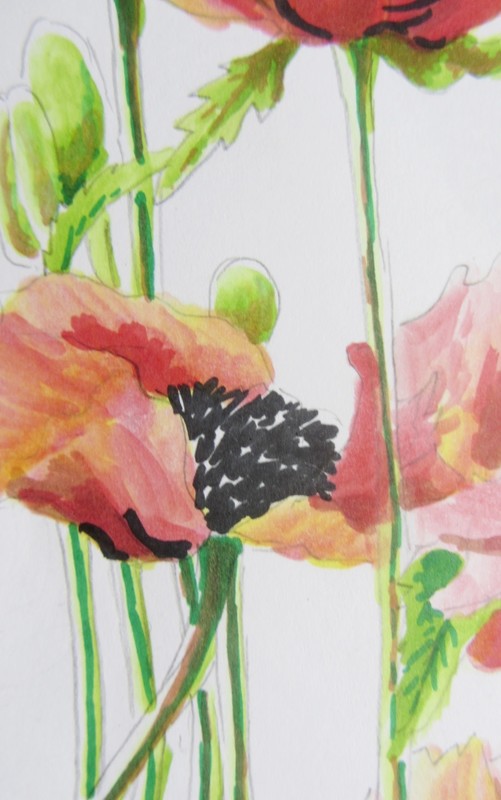
 Step 13
Finally I added the black details using the black detail pen. I used short flecky strokes for the stamens in the middle of the poppies. Leave some white showing between the strokes. There are also some small black details on some of the petals. Once these are painted in that is the painting completed.
-
 Step 14
Another close up showing the black details painted in.
-
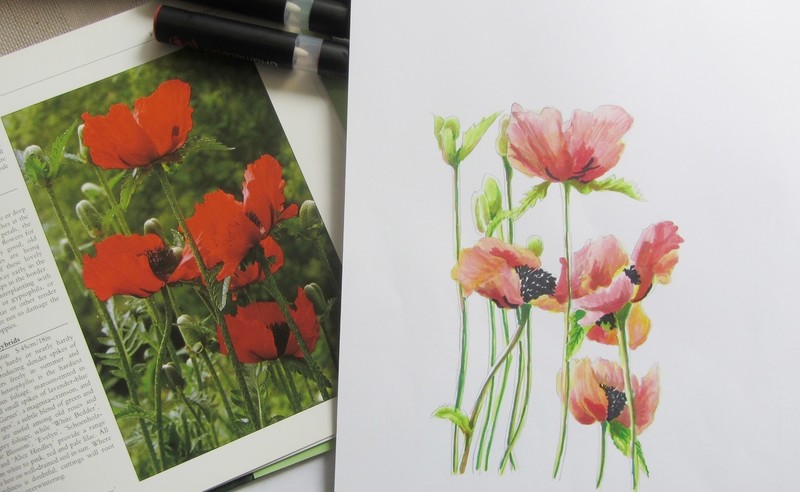
 Step 15
The painting alongside its inspiration.
-
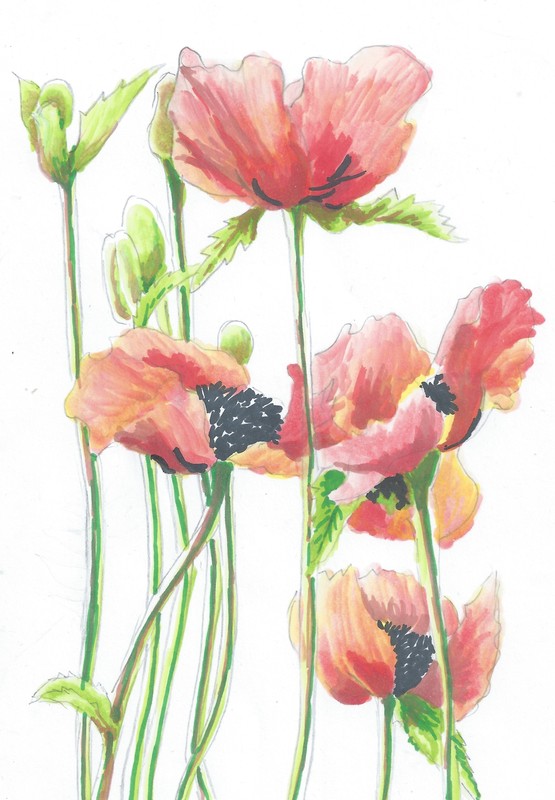
 Step 16
The finished work.


Comments


