


About
Tutorial: Pocket Belt
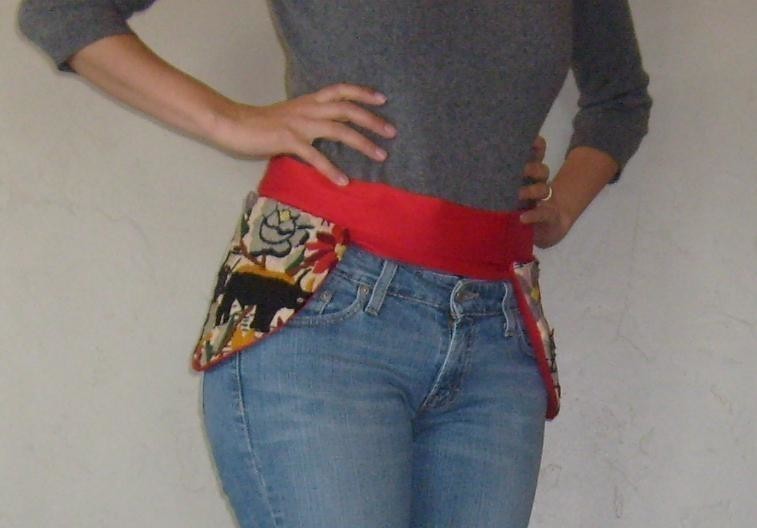
I made this pocket belt from scrap silk and two embroidered panels (which I've been hoarding for ages) from a 1940's handbag that was beyond repair.
-
 Alma added Pocket Belt to Bags, Wallets...
31 Jul 12:01
Alma added Pocket Belt to Bags, Wallets...
31 Jul 12:01
-
 Dee D. added Pocket Belt to bags
07 Jun 20:37
Dee D. added Pocket Belt to bags
07 Jun 20:37
-
Sarah J. favorited Pocket Belt
09 Jun 17:36
-
 carlyanne favorited Pocket Belt
02 Mar 10:51
carlyanne favorited Pocket Belt
02 Mar 10:51
-
 choco s. favorited Pocket Belt
23 Jan 17:52
choco s. favorited Pocket Belt
23 Jan 17:52
-
 Devious_Insightful_Pixie favorited Pocket Belt
03 Sep 23:13
Devious_Insightful_Pixie favorited Pocket Belt
03 Sep 23:13
-
 Catalina C. favorited Pocket Belt
17 Aug 04:25
Catalina C. favorited Pocket Belt
17 Aug 04:25
You Will Need
-
 Step 1
Make a paper pattern for your pocket. These can be any size/shape.
-
 Step 2
For each pocket: cut 2 for the lining and 2 for the outside of the pocket.
(total of 4 pieces for each pocket).For each pocket:
Sew the two lining pieces right sides together, leaving top open. Trim away excess seam allowance.
Sew the two outer pocket pieces together.
-
 Step 3
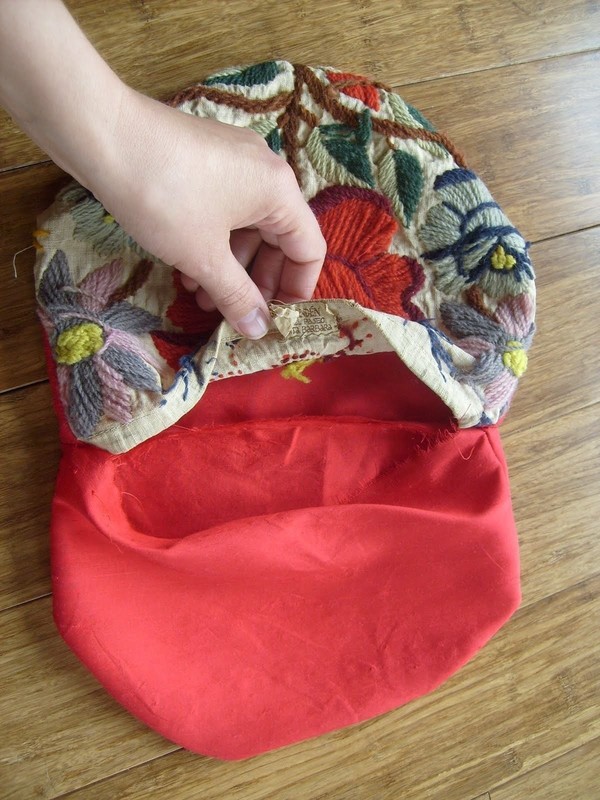
Machine sew the lining (one top edge only) to the outer pocket as illustrated in the next three pictures. This is the tricky part (I ended up ripping several times).
-
 Step 4
After turning the lining into the pocket and pressing, you will still have one entire open seam.
-
 Step 5
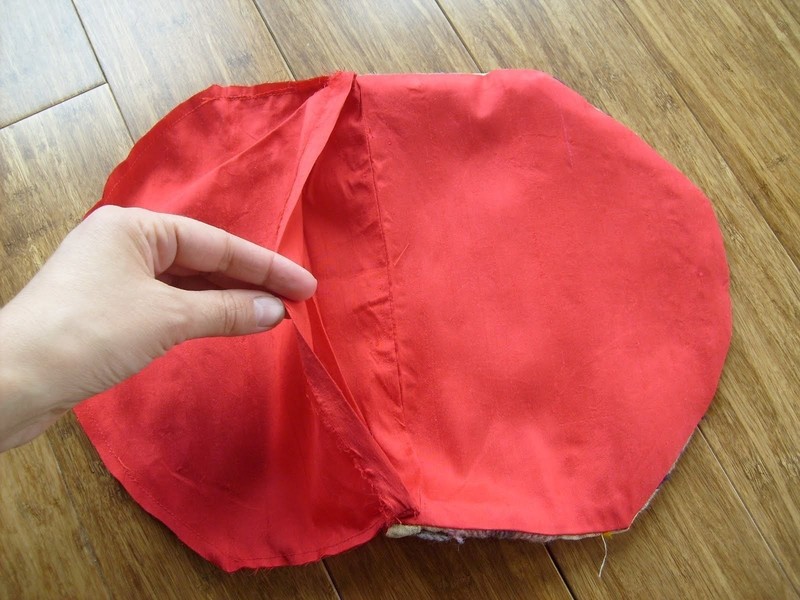
Press under raw edge and slip stitch lining to pocket front on the inside of the pocket. (To see what this should look like see the next to the last picture)
-
 Step 6
The belt itself is cut as a basic rectangle twice your desired width and the length of your waist plus sufficient for overlap at the button area (alternately, one could use fabric ties similar to apron ties).
-
Step 7
Fold the rectangle in half, length wise, stitch down length and stitch one end closed. Turn and press. Completed pockets are then hand sewn to belt.
-
 Step 8
I used braided yarn loops inserted into the final end seam of the belt and buttons as closure.
-
Step 9
Things I would do differently:
1.I made the basic belt too wide. I would aim for something much narrower next time. When I'm wearing it, I have to fold it over to get it to fit without gaping at the top.
2. I would place the pockets more to the front rather that on the sides (this is not a slimming garment, to say the least, and pockets in the front would help considerably).


Yes Dessah, it is a sort of riff on the fanny pack. My sister pointed that out too, when she saw it.
Note to Hank: That's Tiger and he always tries to make the most of any photo op.
Nice kitty, too :3
CO + K User