

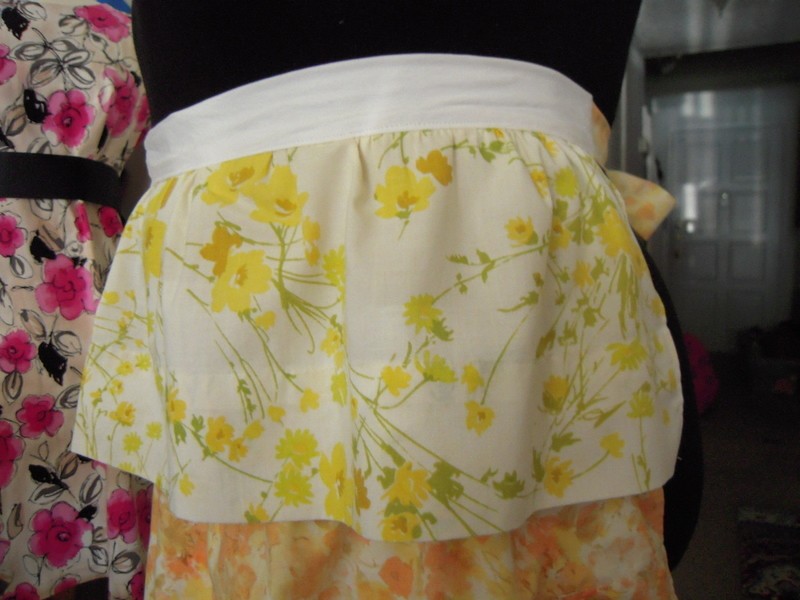
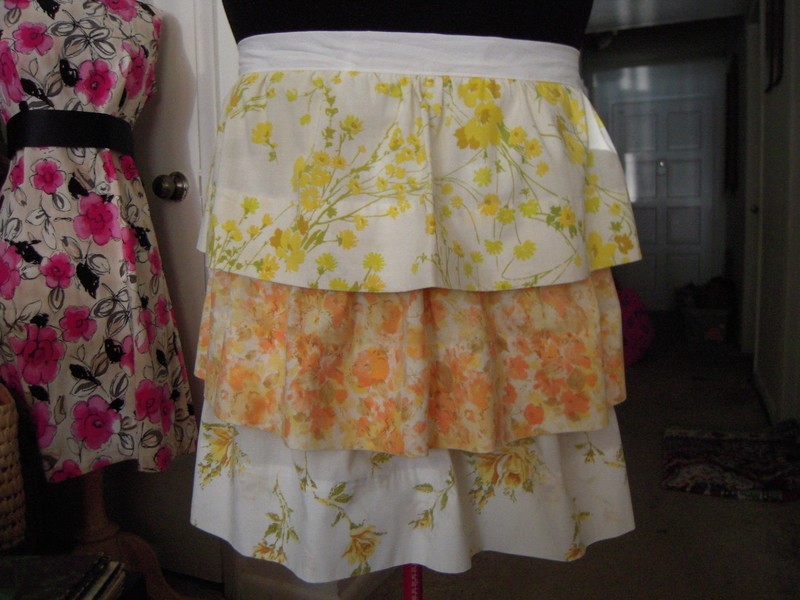
Pillowcase Apron
Extract from Craft Challenge: Dozens of Ways to Repurpose a Pillowcase • By Suzanne J.E. Tourtillott • Published by Lark Crafts

About
Cute Vintage Apron
Tags
© 2024 Suzanne J.E. Tourtillott / Lark Crafts · Reproduced with permission.
-
 Miss_Fit favorited Pillowcase Apron
09 Dec 19:25
Miss_Fit favorited Pillowcase Apron
09 Dec 19:25
-
 Cat Morley added Pillowcase Apron to Nigella Lawson's Kitchen
18 Mar 06:24
Cat Morley added Pillowcase Apron to Nigella Lawson's Kitchen
18 Mar 06:24
-
 MickeyDi added Pillowcase Apron to To try
15 Jul 17:27
MickeyDi added Pillowcase Apron to To try
15 Jul 17:27
-
Miss_Fit added Pillowcase Apron to Aprons
29 Mar 16:11
-
 elarablair favorited Pillowcase Apron
23 Feb 18:27
elarablair favorited Pillowcase Apron
23 Feb 18:27
-
 kim B. favorited Pillowcase Apron
04 Aug 23:45
kim B. favorited Pillowcase Apron
04 Aug 23:45
You Will Need
-
 Step 1
BACKING:
Cut off all seams around pillowcase to have one large piece. Cut off hemmed portion and set aside.
Finish the sides and bottom; use pinking shears, fold over 1/4 inch, press and stitch.
-
 Step 2
RUFFLES:
The remaining three pillowcases; measure up 8 inches from the open (hemmed) edge and cut off. Cut off seam to have one long rectangular piece.
-
Step 3
CUT THE WAISTBAND:
Using the cut-off hemmed portion from the backing piece; cut the seam(s) to open a long rectangular piece. Cut the waistband to the same width of the backing plus 1/2 inch.
-
Step 4
TIES:
Cut two 42 x 4 1/2 inch lengths from any of the pillowcases.
With wrong sides together, fold tie in half lengthwise and stitch long edge leaving open ends. Turn tie right side out. On one short end, fold in 1/4 inch and press; stitch close. Repeat for second tie.
-
Step 5
(OPTIONAL)
Sew trim or rickrack to the lower edges of the ruffles as desired. -
Step 6
PLAN RUFFLE PLACEMENT:
Draw a straight line across the width of backing of the ruffle placement for all three ruffles.
-
Step 7
ATTACH RUFFLES:
Make two baste stitches on upper edge of each ruffle and gather.
Right sides up; pin the lowest ruffle on the backing where marked; topstitch 1/4 inch from gathered edge. Press. Sew a ruffle to each of the other lines on the backing.
-
 Step 8
ATTACHING WAISTBAND:
Right sides together, sew raw edge to upper edge of top ruffle (which is attached to backing).
-
 Step 9
FINISH WAISTBAND:
Fold and pin the upper half of the waistband to the wrong side so that the long, folded edge extends just past the seam line you stitched.
Slide the unhemmed, pleated end of each apron tie inside an end of the waistband. Make sure right side of both ties are facing out. Sew across the ends of the waistband and sew the long edge to the waist.


Comments


