
About
Sew an adorable picnic basket with everything you need for the perfect picnic!
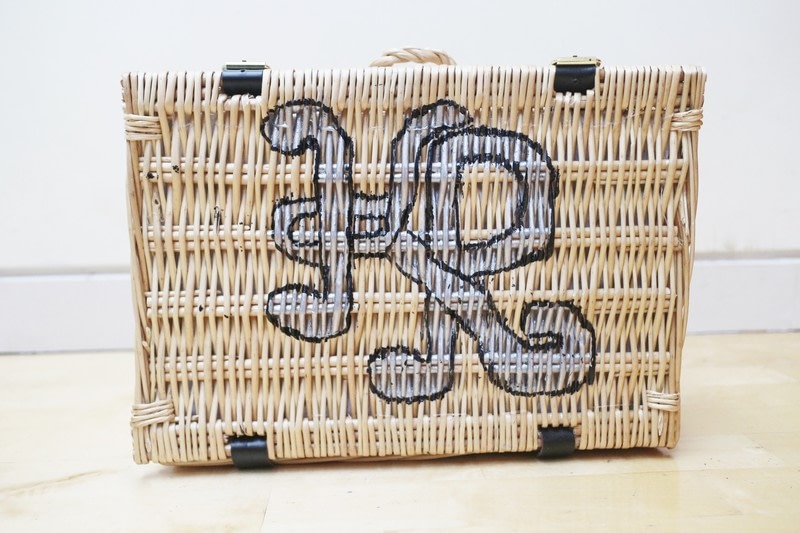
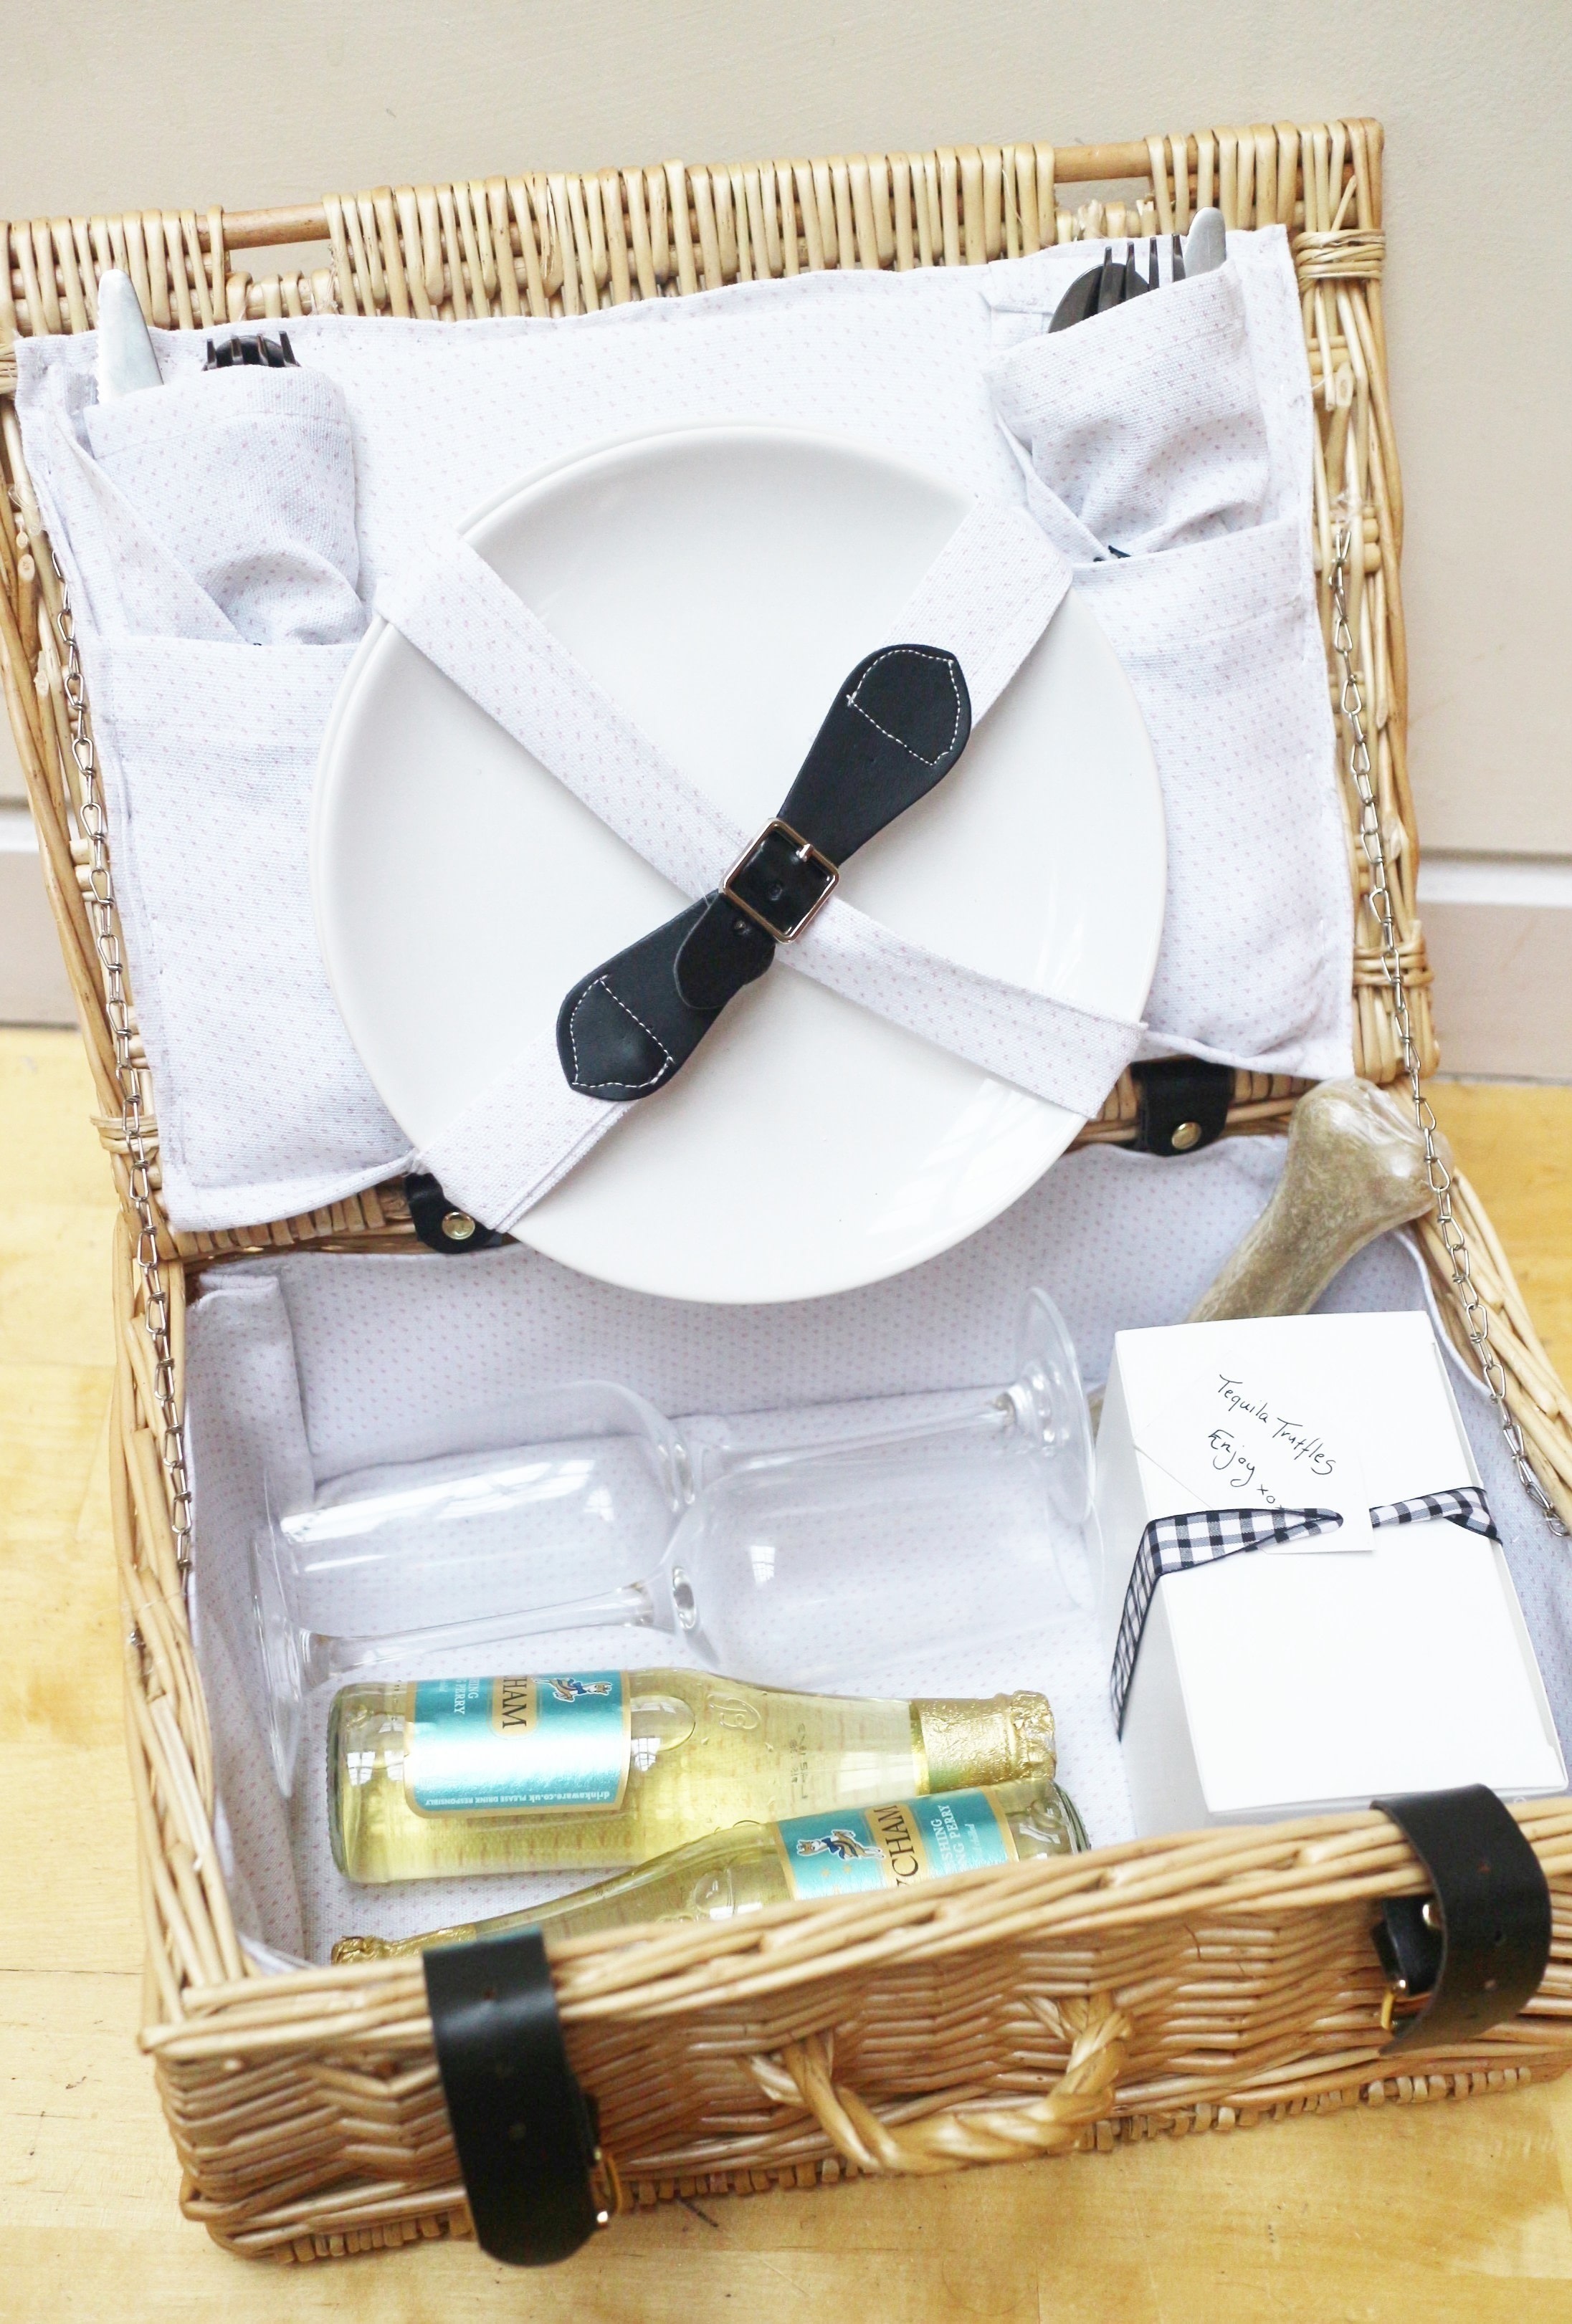
It was our friends Keava & Rosa's wedding at the weekend, so I decided to make them their own custom picnic basket as a gift, inspired by a lovely picnic we had for them in the summer. It is lined with custom Zazzle fabric, has straps for buckling in plates, napkins with pockets for cutlery and their initials painted on the front. I hope they like it!
Tags
-
 amyistheparty added Picnic Basket to Backyard Picnic Summer Soiree
18 Apr 21:08
amyistheparty added Picnic Basket to Backyard Picnic Summer Soiree
18 Apr 21:08
-
 llJulie added Picnic Basket to Vintage Picnic
22 Feb 15:04
llJulie added Picnic Basket to Vintage Picnic
22 Feb 15:04
-
 Alissa B. favorited Picnic Basket
18 Jan 02:29
Alissa B. favorited Picnic Basket
18 Jan 02:29
-
 CraftyCat added Picnic Basket to Crafts
18 Nov 18:34
CraftyCat added Picnic Basket to Crafts
18 Nov 18:34
-
CraftyCat favorited Picnic Basket
18 Nov 18:34
-
Suzi T. favorited Picnic Basket
22 Sep 14:29
-
 Cat Morley published her project Picnic Basket
21 Sep 22:22
Cat Morley published her project Picnic Basket
21 Sep 22:22
-
 Step 1
For this project, you'll need a basket and a thin piece of wood cut to the same size as the inside of the basket.
-
 Step 2
Cut a rectangle of fabric three times the width of your basket and a few inches taller.
-
 Step 3
Fold the right edge of the fabric in (with the wrong side facing up) by 1/2" and then in by another 1/2" and pin.
-
 Step 4
Repeat with the top and bottom edges too, pining in place.
-
 Step 5
Sew these edges in place.
-
 Step 6
Place in your basket and fold under the final edge until the fabric fits perfectly. Pin and sew the final edge.
-
 Step 7
Make two smaller rectangles to the size of the back and front of the inside of the basket, fold and pin.
-
 Step 8
Sew the two side rectangles to the lining, creating a box shape.
-
 Step 9
Place neatly inside the basket.
-
 Step 10
Using fishing line and a needle, stitch along the top of the lining fabric, stitching it along the weave of the basket.
-
 Step 11
Make sure the lining is all secure.
-
 Step 12
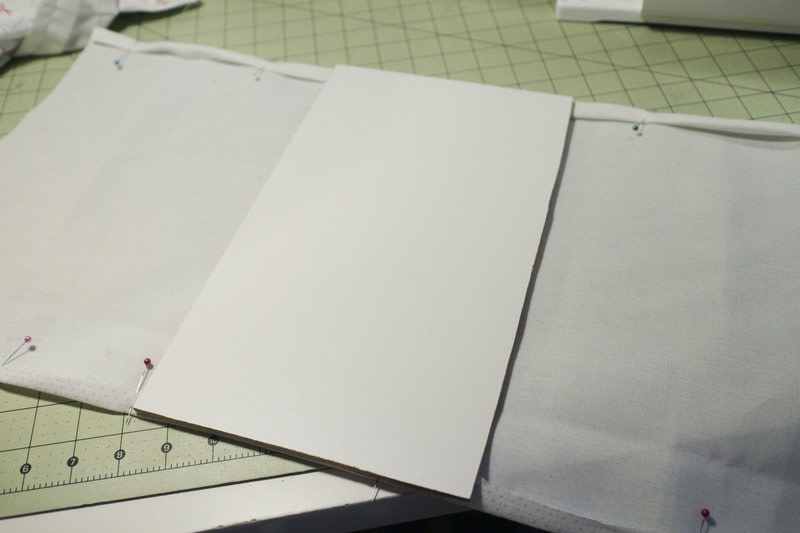
We're not going to make the top of the basket, so get your piece of wood ready.
-
 Step 13
Cut a rectangle of fabric three times the width of your wood and an inch taller at either side.
-
 Step 14
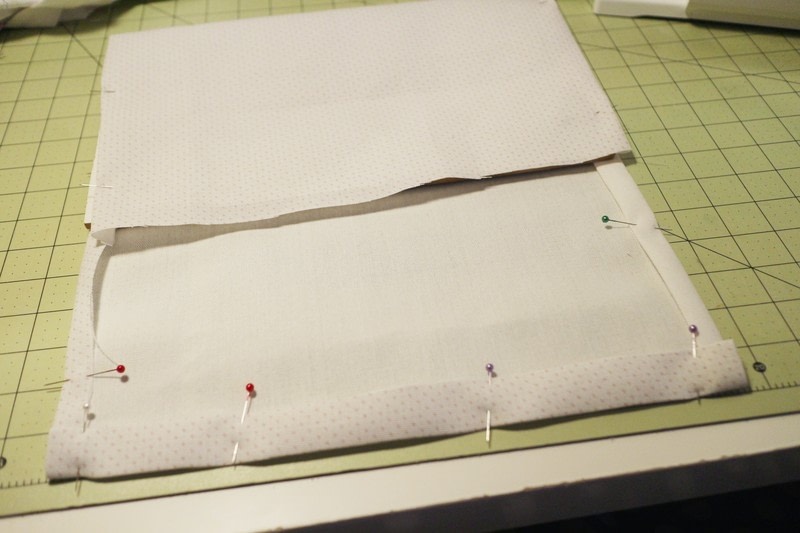
Fold the top and bottom edges over by 1/2" and then by another 1/2" and pin.
-
 Step 15
Pin the top edge too.
-
 Step 16
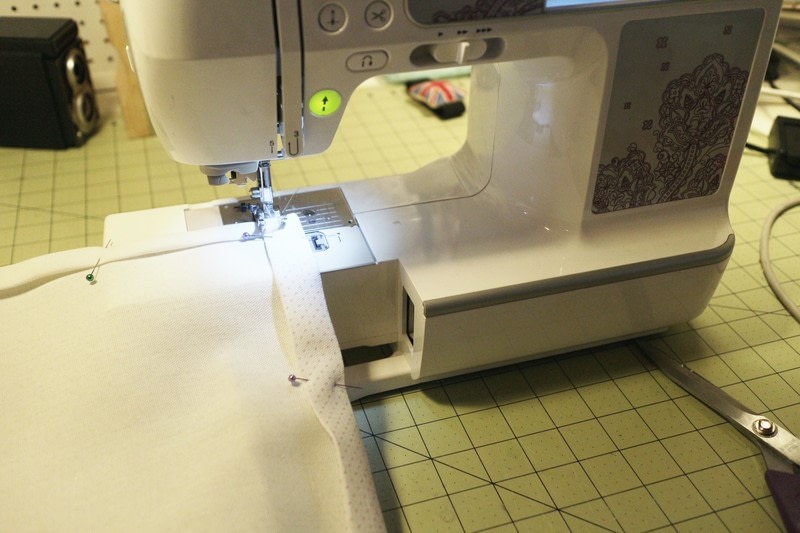
Sew along these edges.
-
 Step 17
Now fold the bottom edge up, creating a pocket 3/4" the height of the wood, pin the top edge and sew the edge. Pin the side of your fabric and sew.
-
 Step 18
Slip the wood inside the fabric, pin the second edge and sew.
-
 Step 19
Cut two rectangles of fabric double the width of the wood and 4" tall to make straps for the plates.
-
 Step 20
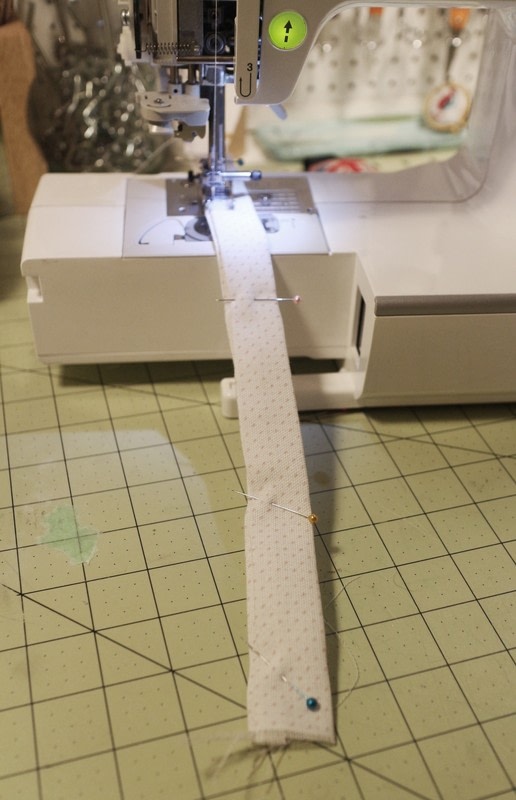
Fold the top and bottom edge over by 1/4", fold the strap in half and pin.
-
 Step 21
Sew along the edges of the straps.
-
 Step 22
Cut one of the straps in half and pin a buckle in between the two edges.
-
 Step 23
Sew the buckle in place.
-
 Step 24
Place the straps in a cross over the plates.
-
 Step 25
Pin the bottom edges of the straps to the bottom of the baking rectangle.
-
 Step 26
Cross the straps over the two plates and pin inside the pocket.
-
 Step 27
Lay the baking on the lid of your basket and try closing it, to make sure the plates are hanging in the right place.
-
 Step 28
Place the plates to one side for a moment.
-
 Step 29
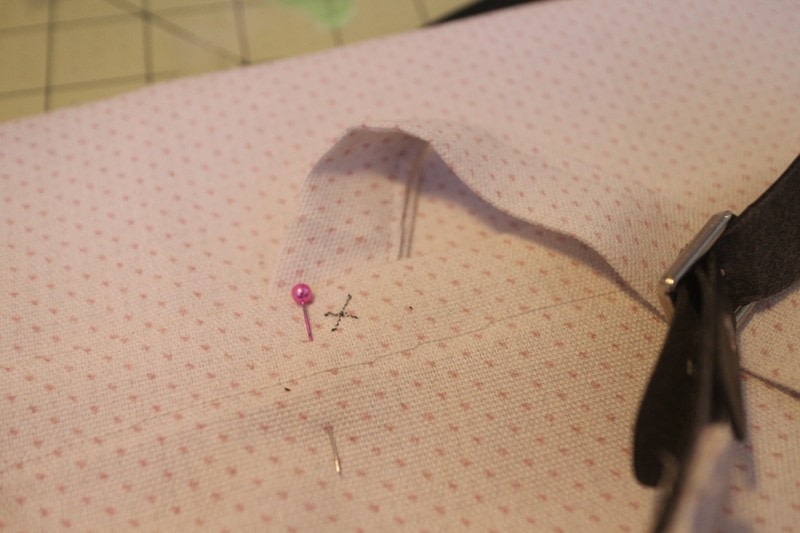
Mark the center of the strap, where it goes under the pocket with an x and drill a hole through the fabric and wood.
-
 Step 30
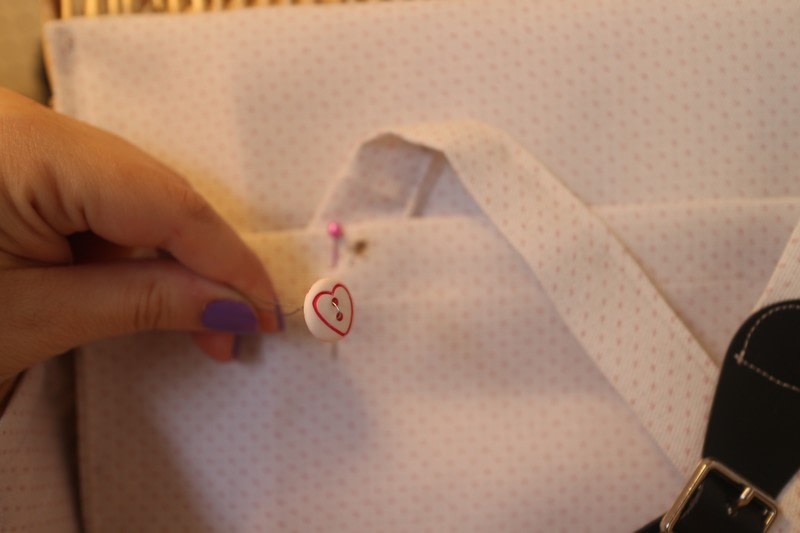
Tie a length of wire through a cute button and slip it through the hole.
-
 Step 31
Slip a small button on the other side of the board and tie the wire. Repeat for both straps.
-
 Step 32
Stitch the backing to the lid of your basket with fishing line.
-
 Step 33
Make sure it's nice and secure.
-
 Step 34
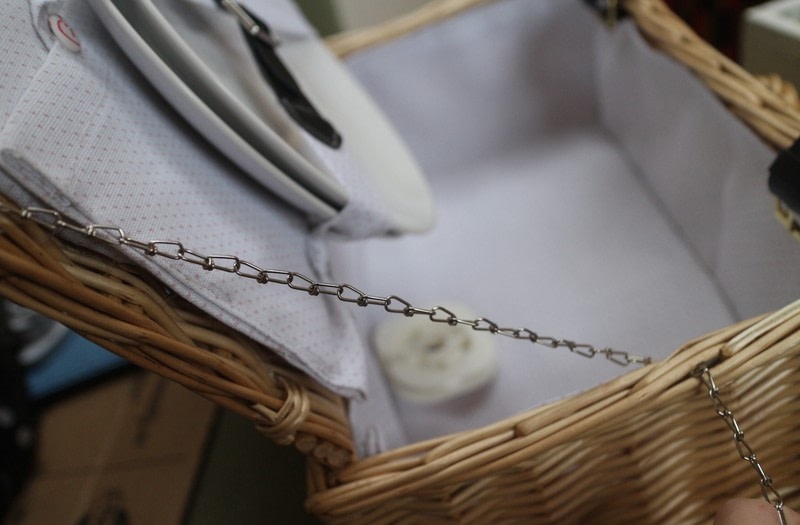
Cut a length of chain and stitch it between the lid and bottom of the basket to stop the lid from folding back. Repeat at the other side.
-
 Step 35
Cut two rectangles of fabric for napkins measuring roughly 14" x 14", fold over each edge by 1/2" and then by another 1/2" and pin in place. Cut two more rectangles measuring 7" x 11" and fold the top edge over by 1/2" and then another 1/2" and pin in place. Cut two lengths of ribbon measuring 18".
-
 Step 36
Pin the ribbon on the middle of the back of the napkin.
-
 Step 37
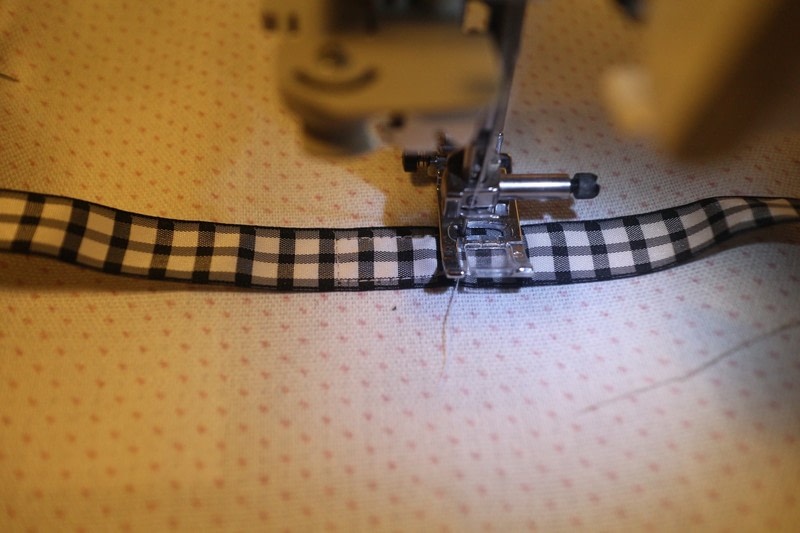
Stitch the ribbon in place at the center.
-
 Step 38
Sew the top edge of the half rectangles in place.
-
 Step 39
Slip the half rectangle inside the napkin, placing it under the bottom edge and sides. Re-pin.
-
 Step 40
Sew around the edges of the napkin.
-
 Step 41
Place your cutlery in the napkins pocket.
-
 Step 42
Roll up the napkin and tie the ribbon in a bow.
-
 Step 43
Buckle your plates in place and slip the napkins into the pocket at either side.
-
 Step 44
Fill the basket with treats.
-
 Step 45
Finally, paint the front of the basket with initials if you're hoping to give it as a wedding gift.