
About
Screen Printing Tutorial Part 1: From Photograph to Monochrome Image
This is the first in a series of three screen printing tutorials, in which I will describe the process I use to create the hand printed items for sale in my Etsy shop, The Dog House. Over the course of the tutorials I will show you how to use a photograph to create a screen printed product, using the example below:
This specific tutorial will show you how to convert a photograph into a monochrome image using image manipulation software (in this case GIMP – the GNU Image Manipulation Program*), which is the first step towards creating your print.
* GIMP is a free piece of software that runs on most computers – you can download it here.
-
 Nia Romadhoni favorited Photograph To Monochrome Image
01 Dec 09:57
Nia Romadhoni favorited Photograph To Monochrome Image
01 Dec 09:57
-
 Leanne Louise favorited Photograph To Monochrome Image
08 Nov 14:03
Leanne Louise favorited Photograph To Monochrome Image
08 Nov 14:03
-
 Cecily F. favorited Photograph To Monochrome Image
18 Oct 01:19
Cecily F. favorited Photograph To Monochrome Image
18 Oct 01:19
-
 PunkR0ckKitty favorited Photograph To Monochrome Image
29 Aug 18:01
PunkR0ckKitty favorited Photograph To Monochrome Image
29 Aug 18:01
You Will Need
-
 Step 1
Choosing a photograph
First, pick the photograph that you would like to use as the basis of your print. You can choose any picture you like, but I find that highly contrasted images with relatively plain backgrounds tend to work best with the technique I use. It also helps if the subject of your photograph has clearly defined edges. I think this photo that my partner took of our foster dog, Torres, fits these criteria nicely:Remember you can choose to include as much or as little detail from the photograph as you like in the resulting print, so you can choose to focus on just one part of an image, editing out the rest. For example, with the above photo I only intend to make a print of the greyhound’s head, so it doesn’t matter that some of his body is missing from the picture. I also do not intend to print the background.
-
 Step 2
Selecting which part(s) of the photograph you want to print.
Next, open your image using GIMP Image Editor (or image manipulation software of your choice). Using the drop down menu View at the top, zoom in so that the part of your image on which you would like to focus fills the screen:
-
 Step 3
From the Toolbox window, select the Scissors Select Tool & tick the Interactive boundary box. This tool allows you to ‘cut’ around the part of the image which you wish to print. In this case, I want to cut around the dog’s head, excluding his collar & the background.
Click on any part of the outline to the area which you wish to ‘cut’ around. Keeping the mouse button pressed, trace a line with the curser along the edge of your image. The interactive boundary tool means that this line should naturally follow the outline for you. As soon as it begins to deviate, go back & release the ‘click’ at a point which is on your outline. (If you are confused, see this link.)
In this fashion, you should be able to trace a line all the way around the edge of your image, ending up back where you started. Once you have placed a point on top of your starting point, simply press return or enter to select the image you have just drawn around:
-
 Step 4
Using the drop down menu Edit at the top, Copy this image then select Paste as new image. A new file should open, containing only the parts of the image which you have selected:
-
 Step 5
Converting your selected image to monochrome
Using the drop down menu Colours at the top, select Threshold. You can now move the arrow within the Apply Threshold box to change the resulting monochrome image. Select OK when you are happy with the image. Remember you can always add in details which are lost, but which you wish to retain, by hand later on in the process of creating a screen.
-
 Step 6
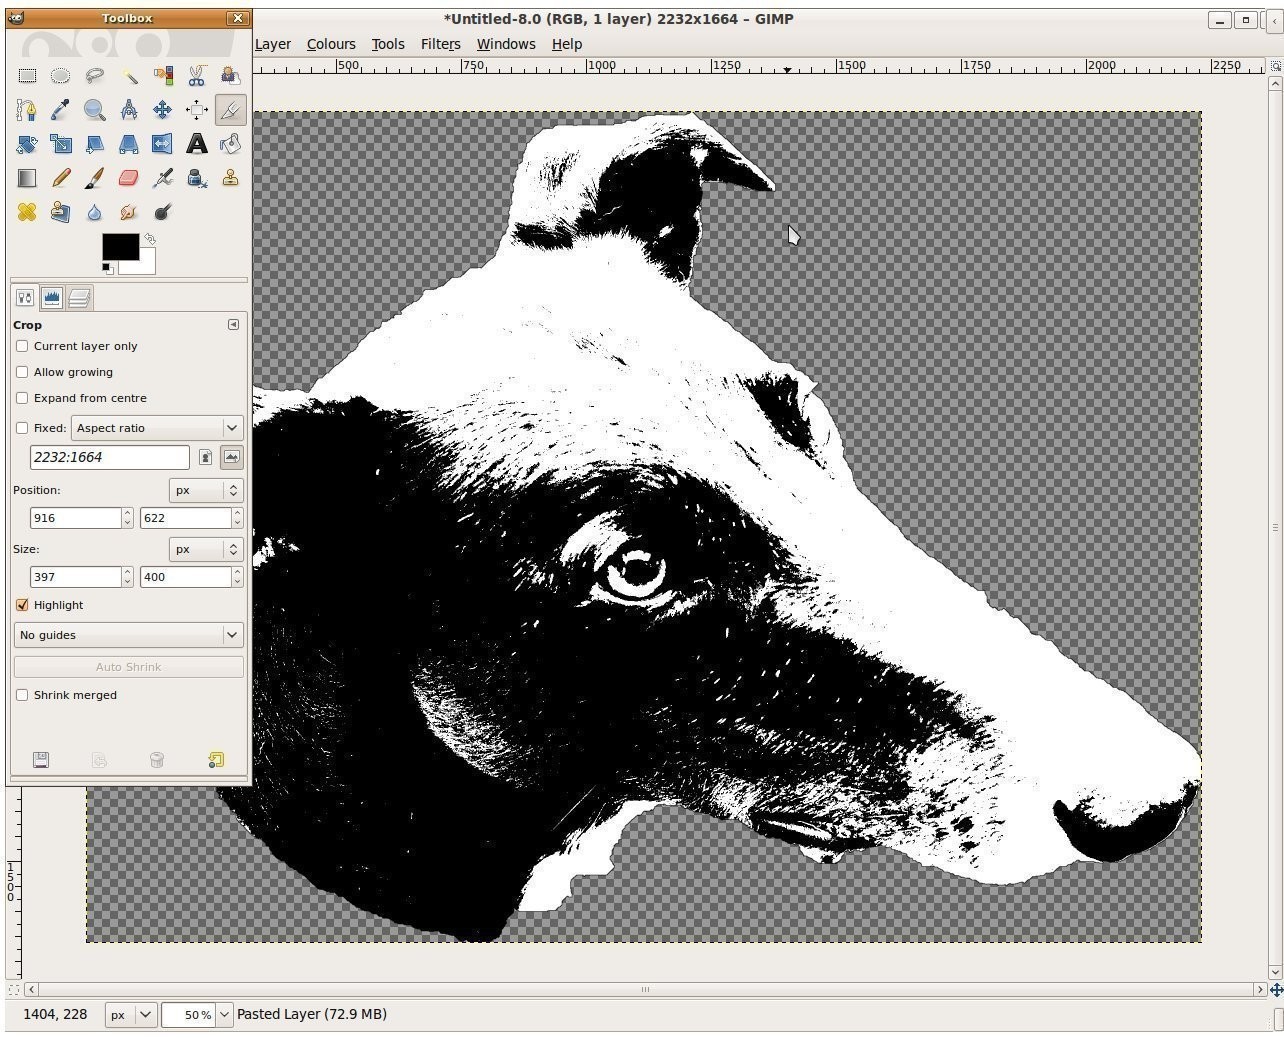
I think the monochrome image I opted for of Torres has a nice balance of light & shadow with clean, sharp lines between the two, whilst highlighting his beautiful eyes. I plan to add in some details which have been lost, such as his whiskers, by hand later on:
-
 Step 7
Now, you need to draw a border around your image that will be visible when you print it off the computer to make your screen.
-
 Step 8
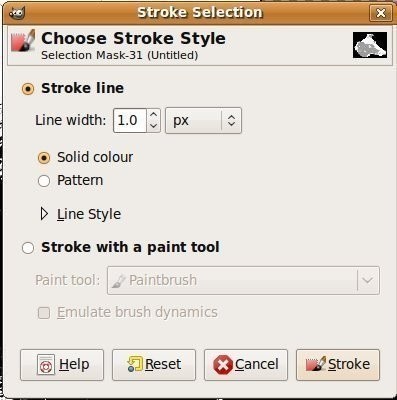
From the Toolbox menu, select the Select by Colour Tool. Next, click anywhere within the grey background to your image. Then, using the drop down menu Edit at the top, select Stroke Selection. Within the Choose Stroke Style box, choose the width which you want the border to be (I usually pick 1.0 pixels) & click Stroke. Then, using the drop down menu Select at the top, select None.
-
 Step 9
There should now be a black outline all the way around your image:
This is the image which you will use to create your printing screen. You can now save this image as a .jpg file & print it off your computer, ready to use as described in the next part of this tutorial series. Use any program to print your image, making sure you adjust the dimensions according to how large or small you wish your eventual screen printed image to be.