


About
Yarn Hooking
Size: Approx. 45.75 x 35.5cm (18 x 14in)
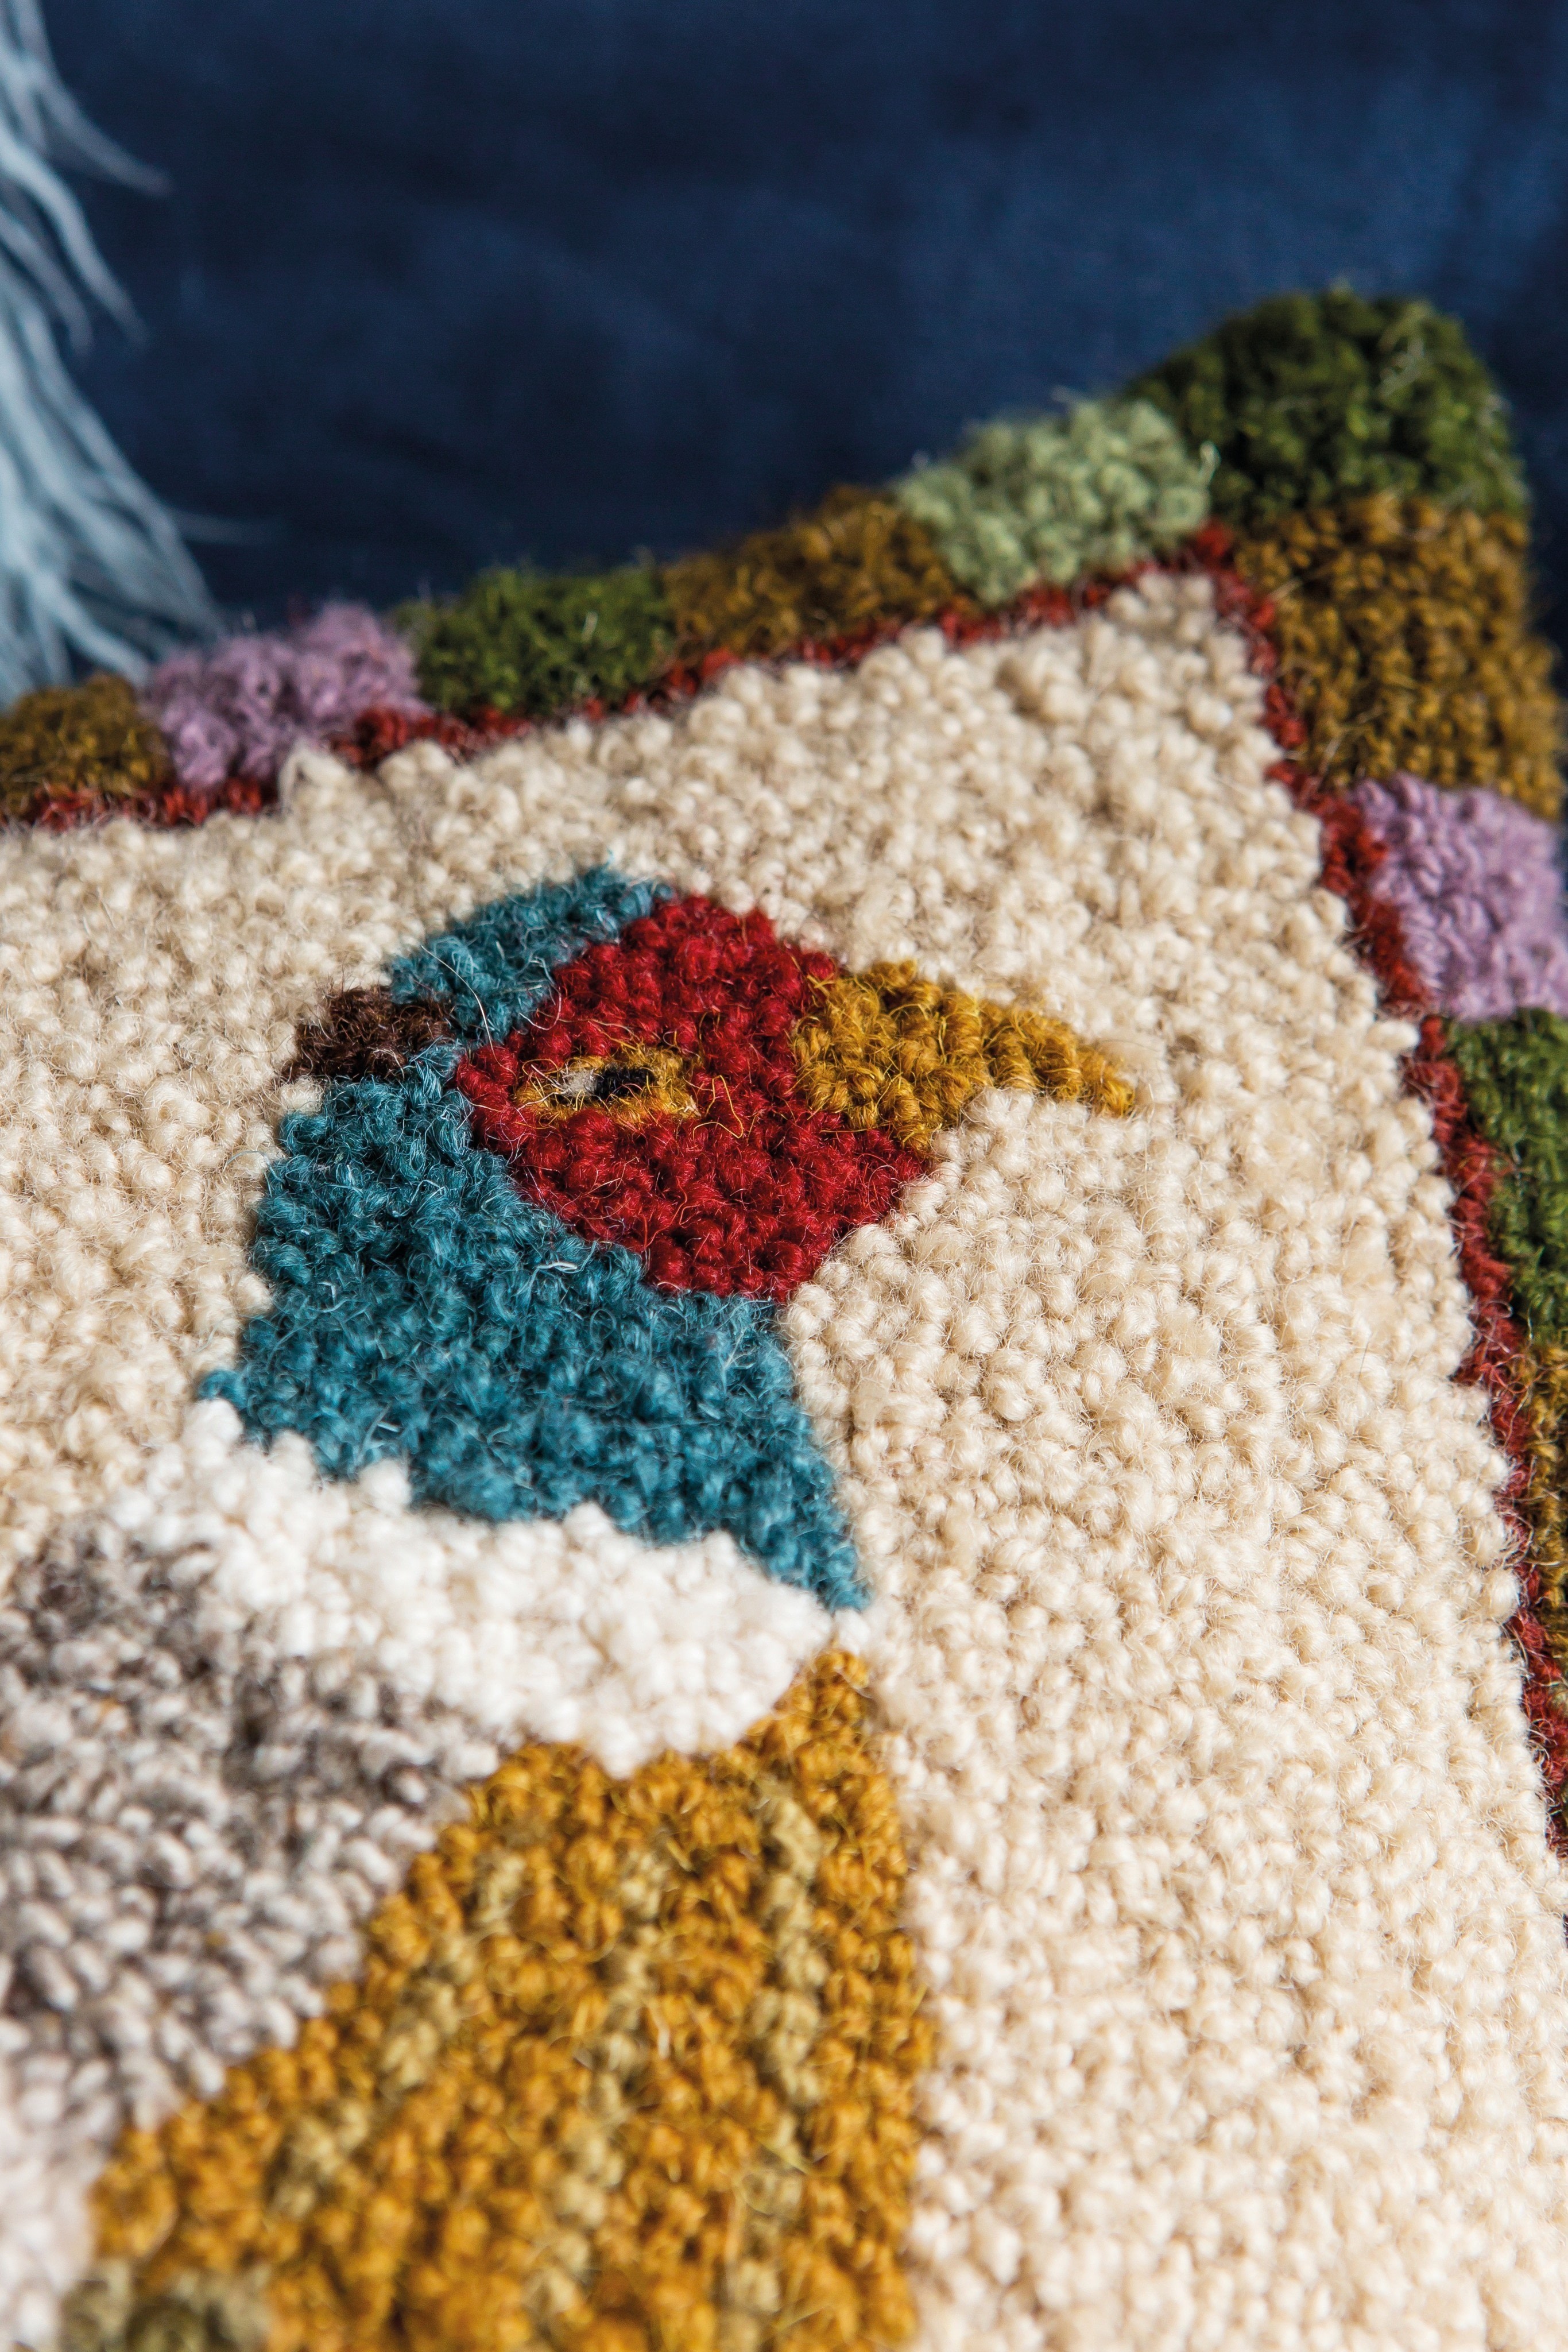
This pillow is inspired by the beautiful pheasants we have at home in Littondale, North Yorkshire, England. They are such wonderfully colourful birds, and I was very excited to try to capture their brilliance with my coloured yarns.
Note: As this project is bigger than the hooking frame, you will need to remove the hessian from the frame halfway through the hooking and reattach it, in order to hook the remainder of your picture. Please see page 19 for advice on this.
Tags
Downloads
- 2019-03-13-131601-p86.pdf 3.3 MB [ Download ]
-
 Amara D. added Pheasant Pillow to hooking
02 Apr 06:21
Amara D. added Pheasant Pillow to hooking
02 Apr 06:21
-
 Crafterella featured Pheasant Pillow
22 Mar 23:00
Crafterella featured Pheasant Pillow
22 Mar 23:00
-
 Victorian Dreamer favorited Pheasant Pillow
18 Mar 14:52
Victorian Dreamer favorited Pheasant Pillow
18 Mar 14:52
-
 Search Press published her project Pheasant Pillow
15 Mar 09:00
Search Press published her project Pheasant Pillow
15 Mar 09:00
You Will Need
-
Step 1
Create the pheasant template from Template Sheet A.
-
Step 2
Using the permanent marker pen and a ruler, draw a 45.75 x 35.5cm (18 x 14in) rectangle in the middle of your hessian. With your ruler and pen once more, draw another rectangle inside your larger rectangle, 2.5cm (1in) from the outside line.
-
Step 3
To create the patterned border, use the ruler to mark off 2.5cm (1in) squares along the bottom, top and both sides of the rectangle.
-
Step 4
Take your pheasant template and place it centrally in your rectangle. Draw around it with your marker pen. Then, using the template and the finished image as a guide, draw in the details of the pheasant – beak, eye and ear and all the other sections of the body and head.
-
Step 5
Attach the hessian to the hooking frame. This will be slightly bigger than your frame, so place as much of the main design (the pheasant) within the frame as possible. You will then need to remove the hessian from the frame and reattach it a few more times to hook the remainder of your picture. If you are attaching the work to the frame through a hooked area, use push pins (tacks) as they have a longer shaft.
-
Step 6
Hook the border and as much of the pheasant that is on the frame first, then hook the background colour.
-
Step 7
On completion of your picture, remove it from the hooking frame and press lightly on the wrong side with your iron set to wool.
-
Step 8
Now to make your work into a simple envelope cushion. Cut your backing fabric in half for the back of the cushion. I have chosen a lovely tweed fabric in colours that tone well with the yarn colours in the cushion. Double hem both short edges on each backing piece, as these will be seen on the finished cushion. Turn both short edges of the backing pieces under by 1cm (½in) and press, and then turn them under again by 1cm (½in) and press. Sew a seam along the right sides of both pieces.
-
Step 9
Lay one of the backing pieces on to the hooked design, right sides together. Lay the other backing piece on top of the first piece, wrong side facing up, so that both backing pieces overlap to create the envelope opening.
-
Step 10
Pin the hooked design and backing pieces together all around and then tack (baste) them together, ensuring that there is a 1.5cm (⅝in) seam allowance all around.
-
Step 11
Sew all around the cushion by machine or hand, sewing as close as you can to the edge of the hooking.
-
Step 12
Remove tacking (basting) stitches. Trim the corners and raw sides of the seam allowance to reduce bulk, and then turn right side out.
-
Step 13
Insert your cushion pad to finish.


