
About
Inspired by 500 days of Summer. Only $5 to make two of these!
I got a new apartment, and I am slowly getting into decorating. 500 Days of Summer is one of my favorite movies, and I loved the little tree Summer had in her apartment. So I thought I'd make my own.
This is just inspired from the movie, it's not an exact replica. You can use pretty paper, instead of computer paper, like I did. Or what ever you like from the dollar store. Like the little marbles, instead of using little white rocks, like I did. You also don't have to put cranes on it. I just liked it.
Everything is from the Dollar Tree, except for the tree branches, and paper. There is a PDF to a tutorial on how to make cranes as well. (I found it on google.) Enjoy!
Tags
Downloads
- Missing file
-
 Kinhime Dragon favorited Peace Tree
17 Oct 13:04
Kinhime Dragon favorited Peace Tree
17 Oct 13:04
-
 Step 1
Gather your items. The newpaper ads were wrapped around the little glass dishes from the Dollar tree. *used it as scrap*
-
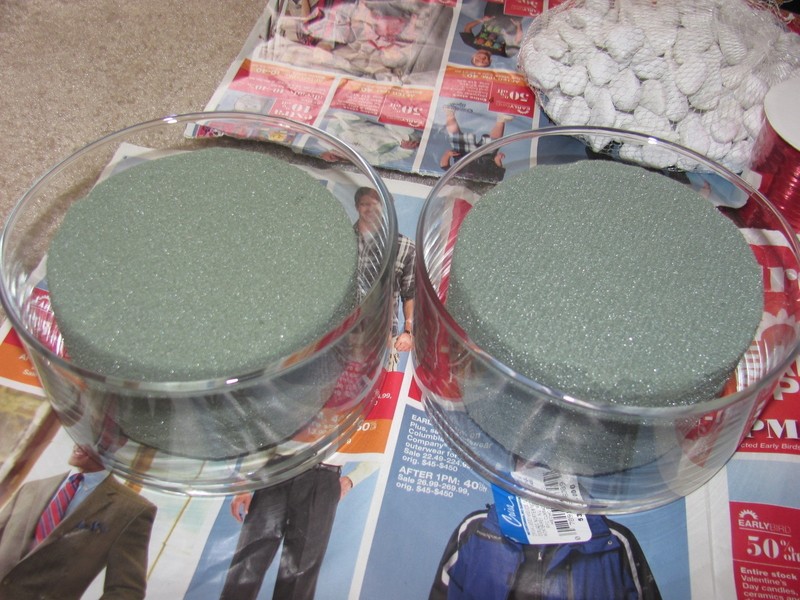
 Step 2
place the foam disks into the glass bowl and make note that you will be cutting it down smaller.
-
 Step 3
I took off about an inch around the side, and about a half an in of the top. *here's a good tip: do this part inside the dollar store plastic bag, it will get messy.
-
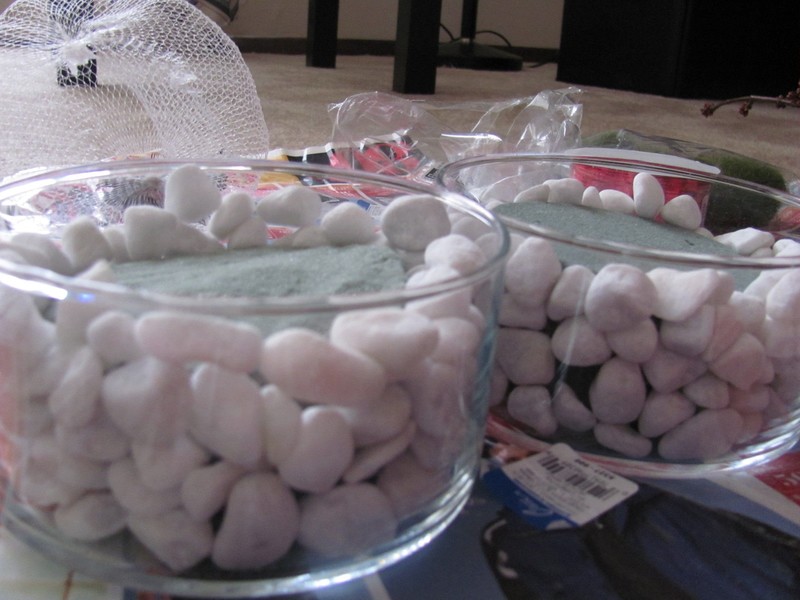
 Step 4
place the foam into the bowl and cover the sides with the rocks. Keep the top of it empty, you will be adding more rocks at the end. *Make sure to give the bowl a little shimmy, so the little stones cover the outer edge.
one pack of the rocks filled up both glass bowls for me.
-
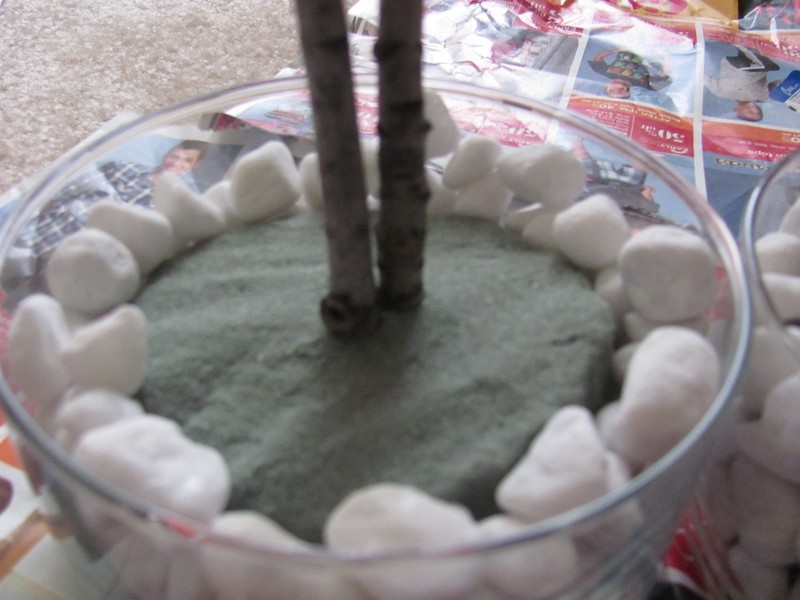
 Step 5
place the tree branches in the middle of the foam, make sure to press it all the way through to the bottom. *I broke some branches off if they were too long, and placed them at the bottom.
-
 Step 6
Arrange it to your own taste. *don't try to place all of your branches on one side, it may tip over.
-
 Step 7
arrange the little fern rock/bushes and rocks and see how, you may want it to look. *there are 5 little rock/bushes in 1 pack.
-
 Step 8
I didn't want the fern bushes to go anywhere. I had to cut slits into the fern (they were a bit stiff, so I needed the help from the knife). *don't go through the whole fern, only partially through the edge. Just enough for the q-tips to be placed.
-
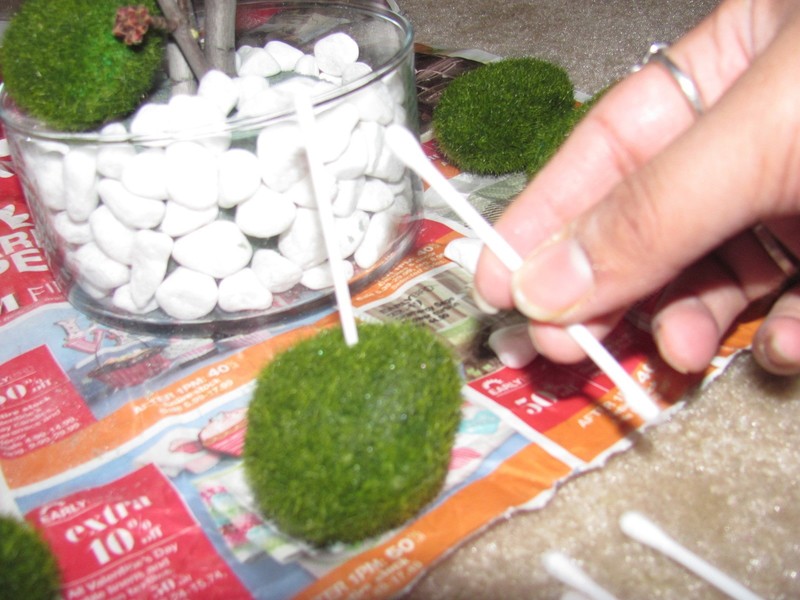
 Step 9
I didn't have any tooth picks or wire. So I used little q-tip sticks. *take off the cotton ends first.
And slide them into the slits.
-
 Step 10
Then place the fern rock/bushes into the foam around the branches. *q-tip ends- facing down.
-
 Step 11
place the rest of the rocks around the moss, and branches to cover the foam. *you may need to arrange the rocks on the top to get full coverage.
-
 Step 12
If you like it just the way it is you can keep them like this, and it works great as a center piece.
-
 Step 13
next part is making the cranes from the PDF tutorial I found on google. *I just used computer paper.
-
 Step 14
Make all different sizes. *you can use different printed paper to add a little pazazz.
-
 Step 15
string some ribbon through the bottom of the cranes belly. *Make sure to double not at the bottom.
-
 Step 16
And hang them from the tree branches. *here's a design tip: odd numbered objects are interesting.
-
 Step 17
I made some of the strands extra long and tied it to the branches, in the middle of the ribbon, so I could curl some strands.
You can give it as a house warming present, birthday gift, etc. Or keep it for your self.