


About
Finally, a project that didn't take me all day!
I've been hardbinding books, but I thought an easy paperback would be fun. Lucky for me, I found this excellent site that shows a really, really easy method. No sewing or anything. <3 I am so happy with this!
Five minutes to do, not counting drying time. Did I mention easy?
-
 Aimee H. added Paperback Book to Bookmaking
14 Mar 15:11
Aimee H. added Paperback Book to Bookmaking
14 Mar 15:11
-
 bigrthanlasagna favorited Paperback Book
15 Jan 05:55
bigrthanlasagna favorited Paperback Book
15 Jan 05:55
-
 rosa r. favorited Paperback Book
07 Sep 17:33
rosa r. favorited Paperback Book
07 Sep 17:33
-
 Zeppydoo added Paperback Book to crafts
11 Jun 23:32
Zeppydoo added Paperback Book to crafts
11 Jun 23:32
-
 Heather H. favorited Paperback Book
26 May 01:10
Heather H. favorited Paperback Book
26 May 01:10
-
 mmrydawn favorited Paperback Book
24 Apr 18:27
mmrydawn favorited Paperback Book
24 Apr 18:27
-
 Rachael H. added Paperback Book to Books/Journals
16 Dec 17:28
Rachael H. added Paperback Book to Books/Journals
16 Dec 17:28
-
 DocDoolittle added Paperback Book to Bookies
18 Sep 11:42
DocDoolittle added Paperback Book to Bookies
18 Sep 11:42
-
 Bayou Jenn added Paperback Book to Crafts
15 Jun 23:31
Bayou Jenn added Paperback Book to Crafts
15 Jun 23:31
-
 StraightJacketAnthem added Paperback Book to To-make list
01 Feb 22:46
StraightJacketAnthem added Paperback Book to To-make list
01 Feb 22:46
-
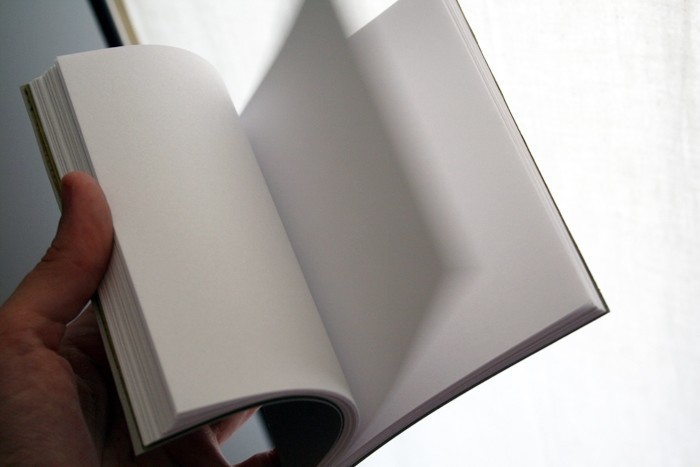
 Step 1
Pick a desired size for the book. I like 5.5 by 4.25, or a quarter of a standard 8.5 x 11 piece.
I cut regular copy paper in half, and then folded each piece until I had a stack about the size I wanted.
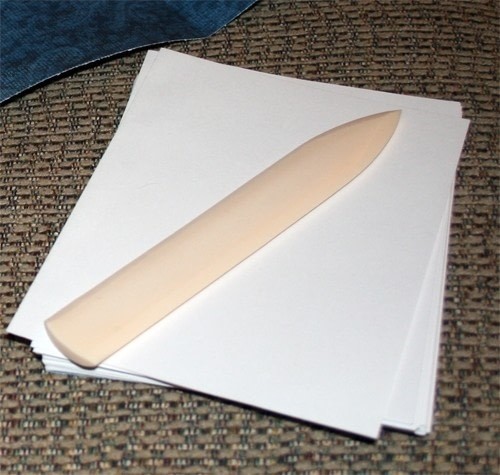
I just got a bone folder. Excellent if you plan on doing a lot of paper craft. And fairly cheap too!
-
 Step 2
I chose a blue color for the first and last pages to give a bit of contrast to the orange/yellow cover I'm going to put on this one. Cut it the exact size of the rest of the paper.
This isn't a step you need to follow, but I think it adds something to the finished piece!
-
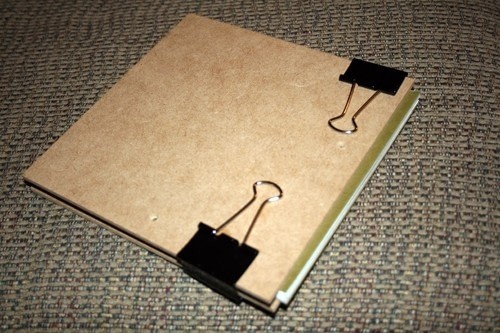
 Step 3
For the next step I use two pieces of thin and smooth particle board, binders clips, and E-6000 glue. You can use paint sticks to help hold the book together instead of the small pieces of board. 5 minute epoxy also works great instead of E-6000, but I'm trying to use up the last of it and it works fine. Any flexible bond glue will work great.
-
 Step 4
Here is everything set up. It takes a little bit to get just the right amount of paper to stick out of the edge.
Once you get here, put the glue on. I like a little bit of water on the edge first, and then the glue. This is actually my brother's book. Instead of blue, he chose a green!
And the hardest part of the whole thing:
-
 Step 5
Wait. Wait a long time... :(
While waiting, decide what you will use for the cover. Cardstock works great, and comes in pretty colors. Yesh. Cut the cardstock to the height of the book, leaving it long enough to wrap around the front and back and spine. I just usually leave it all on there and only cut the cover after it's glued on.
-
 Step 6
Using the book as the measuring guide, score the cardstock and fold.
-
 Step 7
Use the book to figure out the width of the spine. Score the cardstock and fold.
Glue! And then wait again.
-
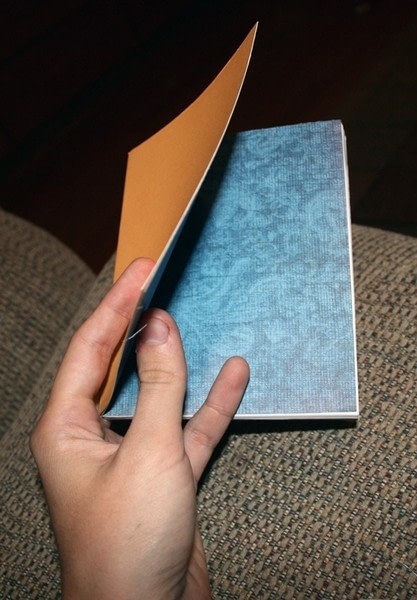
 Step 8
Take an exacto knife and cut down the cover piece after the piece is dry. You can also even up the edges with a really sharp blade or guillotine cutter. Be careful!!
Your book is pretty much done! Give it a bit of time to dry. It's usable, but the spine is just not at full strength.
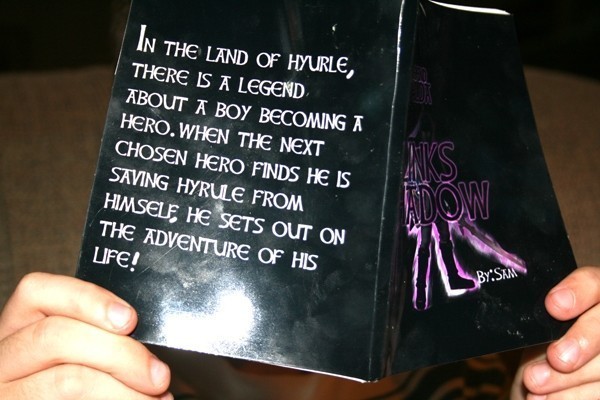
Make many, many books. Especially if your brother writes Zelda fan fiction. Help him out and make him feel proud of his writing! (Without actually having to read all 15 chapters... *Shifty eyes*... if he gets an account, I'll have to erase that bit)


thank you!
and this looks amazing :3
by the way, did you make that zelda book?
CO + K User
Love the tutorial, clear and it's a really cool idea.. I've been looking for a way to make paperback books.. But just 1 question.. How long does it take to dry? You only mention it takes very... very.. long..
I get that it may vary, but maybe an estimate?
thanks!
Anke