
About
Version of Nora C's original!
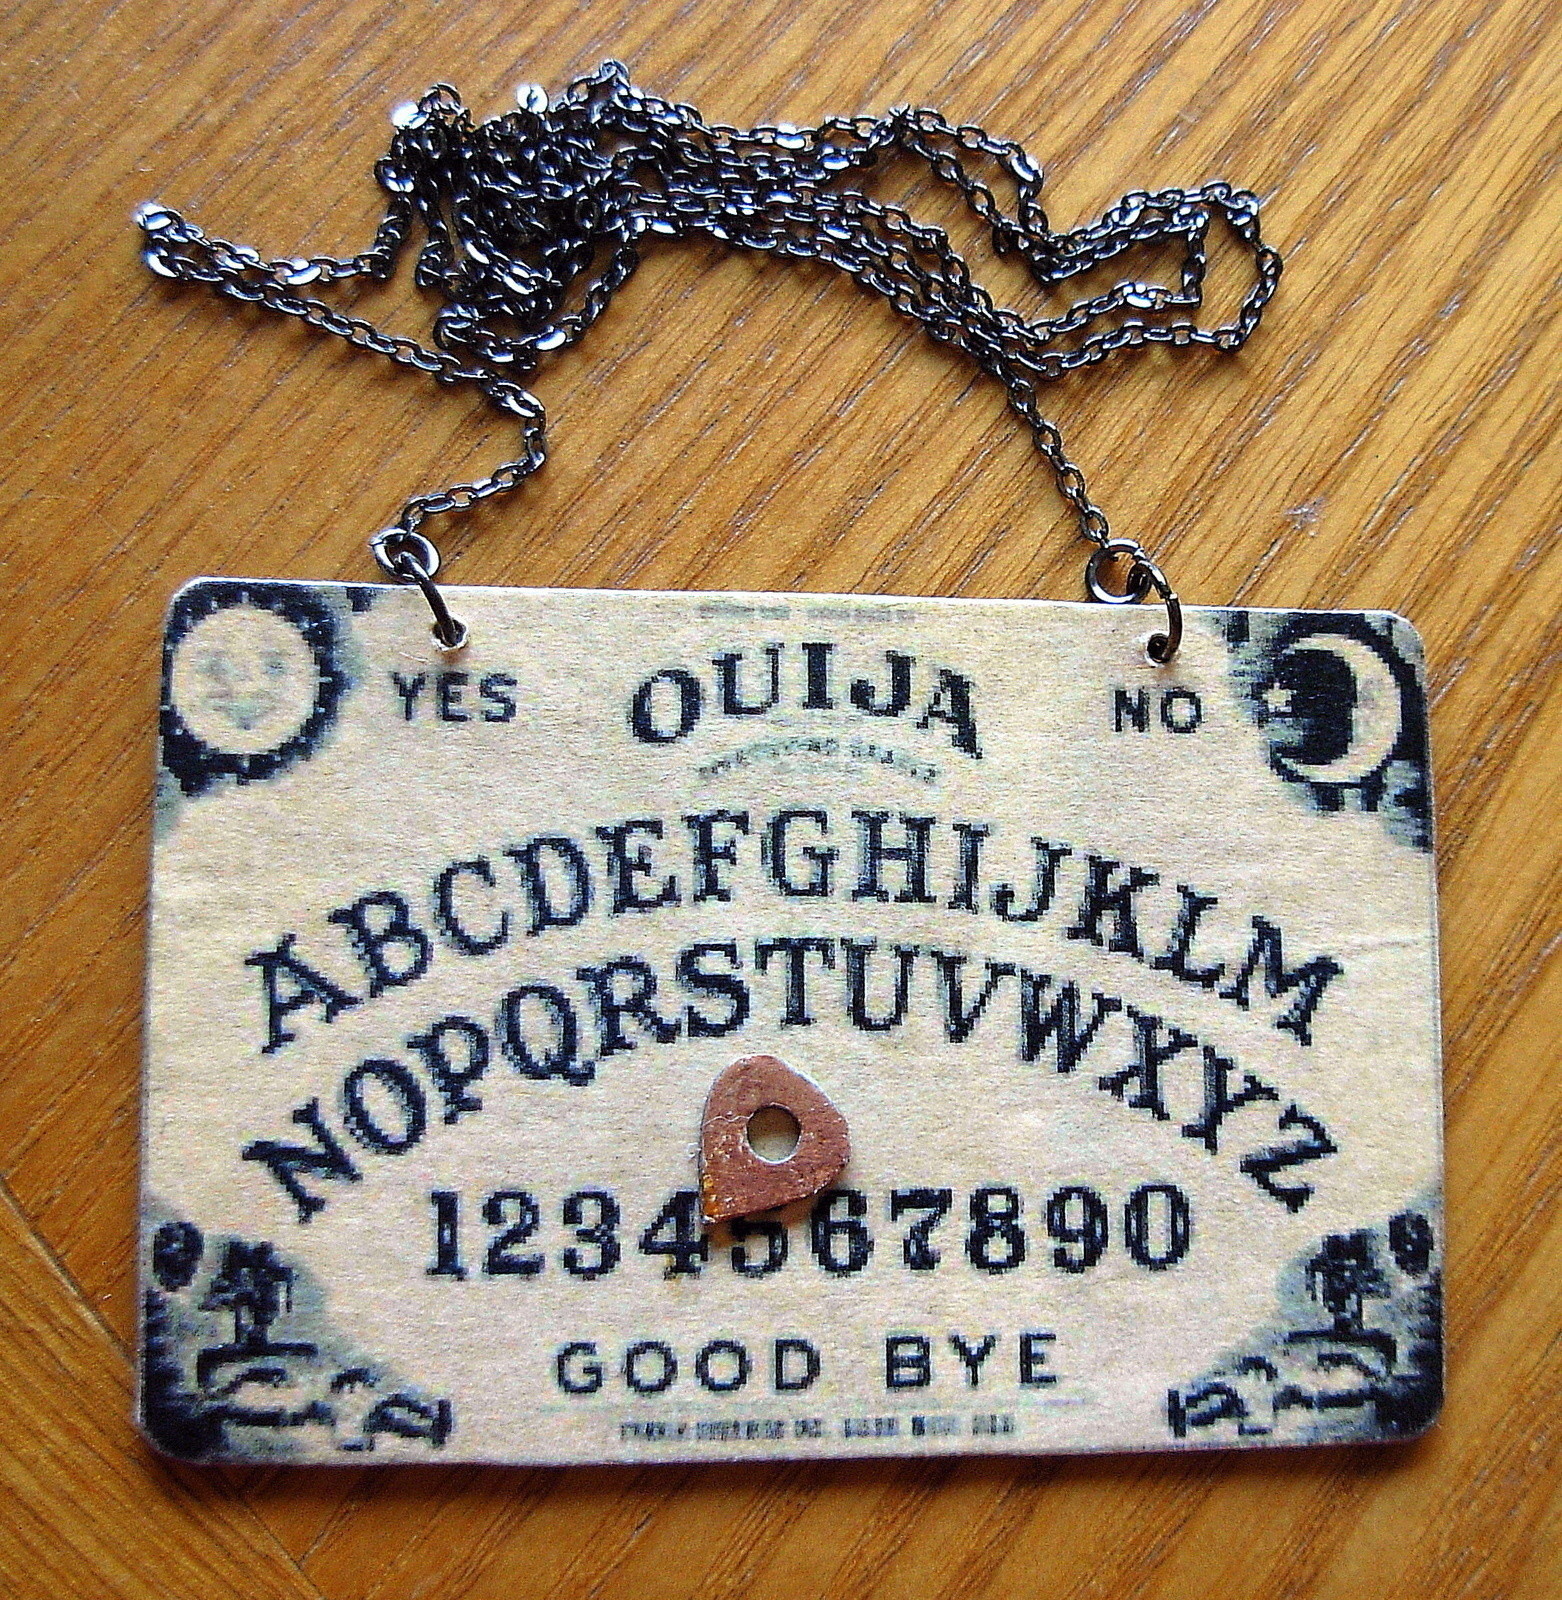
Here is my homage to Nora C's brilliant Ouija Board tutorial. For some reason, this wouldn't "versionfy", so this is the way it was published. I decided to omit the clay part since I am terribly messy with it. But I am fascinated with spirit boards, so when I saw her necklace appear on CO+K, I knew I needed to make one soon. My board image measures 3" x 2", but make it as large or small as you wish.
First, a list of things you need: image of a Ouija board, thin card board, Aleen's Paper Glaze or Mod Podge, hair spray or spray sealer, Dremel, scissors, brown acrylic paint, glue, jewelery pliers, jump rings, a length of chain, and a clasp (optional).
I found the image via Google, re-sized it in Irfanview (a free, no-frills image editor) and printed it out on regular ink jet printer paper. After I cut it out, I sprayed it with Aqua Net to prevent the colors from bleeding. You can use any spray sealer for this part, though. I just happened to have two gigantic cans of Aqua Net left over from my 80s party.
I turned the image over and sprayed it with Elmer's Spray Adhesive. Optionally, you can use Mod Podge, which I would have used if I had any. The spray adhesive stinks to high heaven and contains nasty chemicals, so be warned. Open some windows and follow the instructions on the can if you do it this way.
After this, I quickly affixed the image onto the card board and allowed it to dry. I carefully rounded the corners of the image with my favorite pair of very sharp, small fabric shears.
Using the Paper Glaze, I gave it a couple of thin coats, allowing the image to dry in between. Be sure to coat the sides, too, during this step. Optionally, you could use Mod Podge for this part as well.
Once the image was dry, I used the Dremel to drill two small holes in the image, right above the Yes and the No, and then applied a tiny bit of Paper Glaze to tidy it up. The jump rings were attached to the chain and threaded through the holes.
I used an extra piece of the card board to make the tiny planchette. I painted a small section with the brown acrylic and punched a hole with a very small paper punch. I gave it one coat of Paper Glaze, waited for it to dry, and affixed it to the board with a drop of glue.
-
 Key West Witch added Ouija Board Necklace to Ouija
21 Mar 01:12
Key West Witch added Ouija Board Necklace to Ouija
21 Mar 01:12
-
 Sarah Snowflake favorited Ouija Board Necklace
12 Feb 09:22
Sarah Snowflake favorited Ouija Board Necklace
12 Feb 09:22
-
 Jennifer M. favorited Ouija Board Necklace
13 Jul 02:59
Jennifer M. favorited Ouija Board Necklace
13 Jul 02:59
-
 TheSewingMaven favorited Ouija Board Necklace
01 Sep 03:42
TheSewingMaven favorited Ouija Board Necklace
01 Sep 03:42
-
 chelsea g. favorited Ouija Board Necklace
25 Aug 00:49
chelsea g. favorited Ouija Board Necklace
25 Aug 00:49
-
 Sandra D. commented on Ouija Board Necklace
29 Mar 19:21
Sandra D. commented on Ouija Board Necklace
29 Mar 19:21
-
Sandra D. added Ouija Board Necklace to Ouija Board Necklace
29 Mar 19:18
-
Sandra D. favorited Ouija Board Necklace
29 Mar 19:17
-
 Megzy H. favorited Ouija Board Necklace
28 Feb 02:06
Megzy H. favorited Ouija Board Necklace
28 Feb 02:06
-
 Sammy M. favorited Ouija Board Necklace
22 Jan 02:14
Sammy M. favorited Ouija Board Necklace
22 Jan 02:14
Impybat posted this project as a creation without steps
Here are some similar tutorials to help you make this one!

Comments